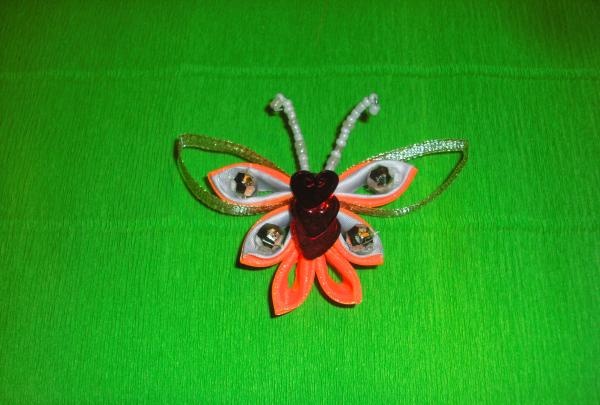
To create such a decoration you should prepare:
Material:
- orange clematis fabric.
- white satin ribbon with a width of 5 cm.
- medium-sized silver beads.
- white beads.
- wire.
- thin ribbon 0.5 cm wide, golden hue
- hairpin.
- large red sequins in the shape of hearts.
Tools:
- glue gun.
- lighter.
- ruler.
- scissors.
- tweezers.
Making a hairpin.
1 Making wings.
First, you need to cut out 6 identical even squares from the prepared orange fabric, each with sides of 5 cm. And also make 4 pieces of the same size from white tape. Since the width of the tape is already 5 cm, all you have to do is cut the required length.
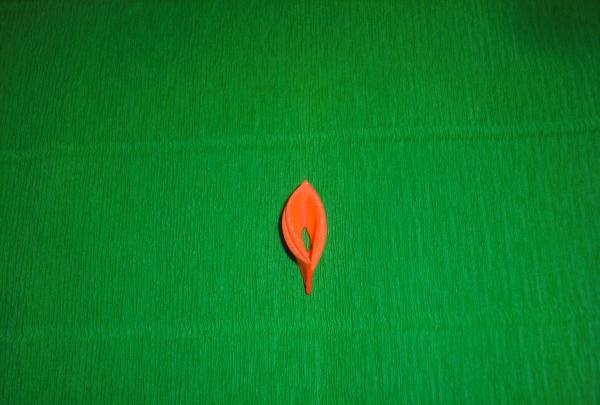
Now from these blanks you should make wings for the butterfly. To do this, take two squares, one orange and the other white. You should fold them crosswise to give them a triangular shape.
Then you need to put the resulting triangles on top of each other, matching one of their sides. In this case, orange should be located at the bottom.

Then you need to carefully bend the free corner of the orange triangle to the bottom.
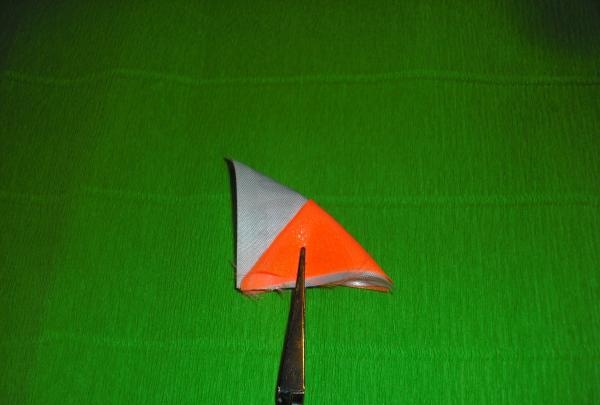
After this, the same technique should be repeated with the free corner of the white triangle.
As a result, you will get a triangle whose corners are intertwined, but the white side is on top.
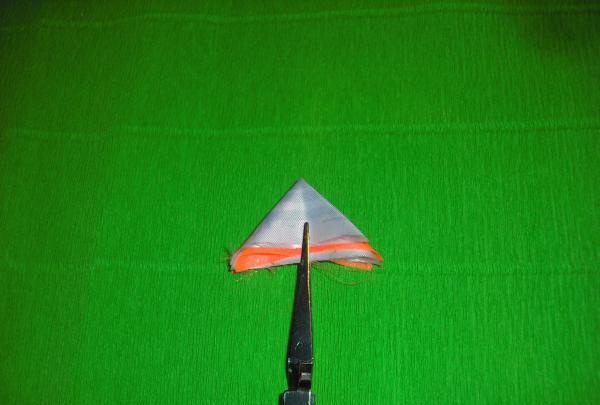
Now you should carefully fold the resulting part in half.

You need to cut off the pointed and uneven edges and immediately scorch them with fire, keeping the fabric from fraying and soldering each layer made.
Now you need to measure 0.7 cm from the fold lines of this part and trim off all excess with scissors. And carefully scorch the new sections obtained in this way using a lighter.

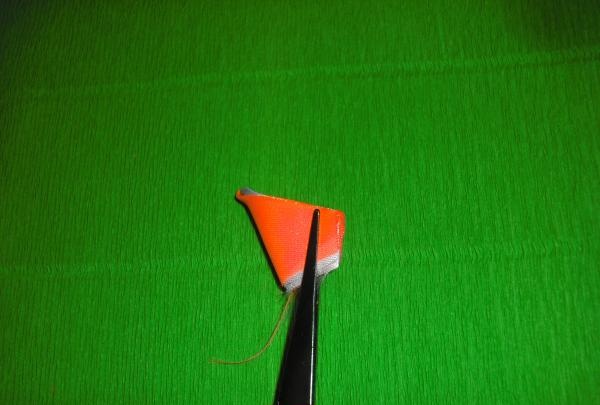
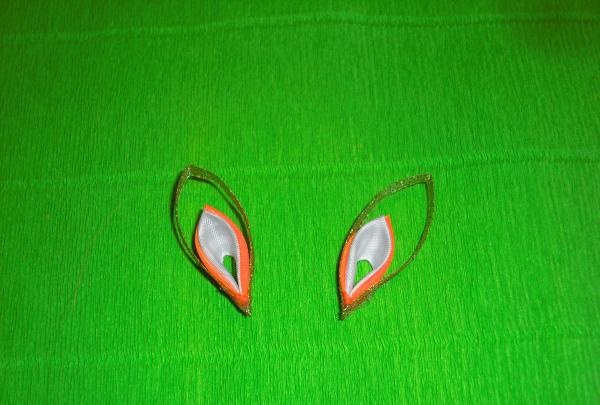
Next, you need to straighten the resulting workpiece and make three more pieces of the same kind.
Next, from the remaining two orange squares, you need to make two more of the same elements, but without adding white parts.
To do this, you should fold the square in half three times.

Trim thin, uneven corners and scorch with a lighter flame. And then arrange the same width as the rest of the parts, equal to 0.7 cm.
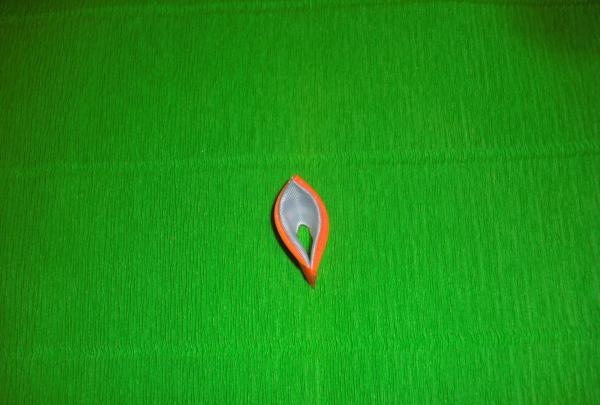
After this, you need to make two pieces of 8 cm each from the golden ribbon. And attach these segments with glue, one at a time, around the prepared combined elements.
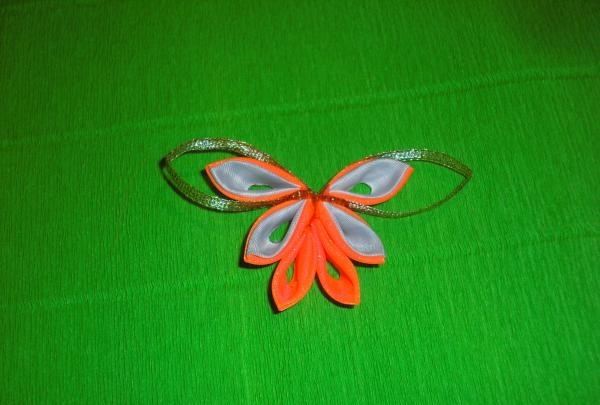
2 Butterfly connection.
Now you need to carefully glue the combined piece and the orange single piece together. In this case, the second one should be lowered by 0.3 mm from the main workpiece. From the remaining elements you should make the same wing blank.

Now you need to glue the two resulting parts to each other, aligning them only at the tops.

You need to attach the upper wings to the resulting lower wings.
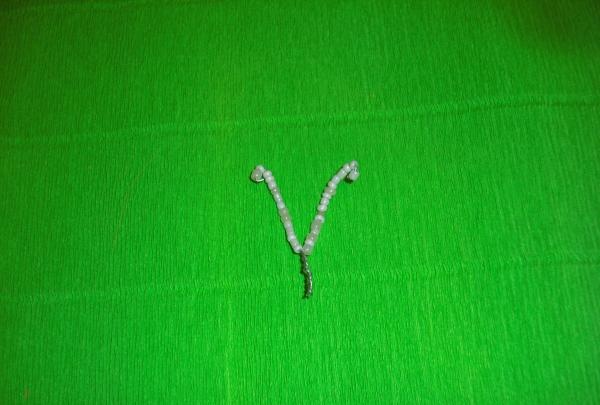
You have made the base of the butterfly, all that remains is to add small details. You will need two pieces of wire 5 cm long. You need to thread white beads onto each of them so that it fills more than half the length of the wire. Then carefully wrap one edge of each piece so that the beads cannot come off, and twist the opposite sides together, creating a spiral up to the beads. In this way you will get antennae for the butterfly.
You should glue the resulting antennae strictly along the line of connection of the butterfly wings. But in order to hide the resulting connections, you need to attach three large sequins in this place.

Now you need to take the prepared silver beads and glue them along the edges of the main parts of the butterfly wings.
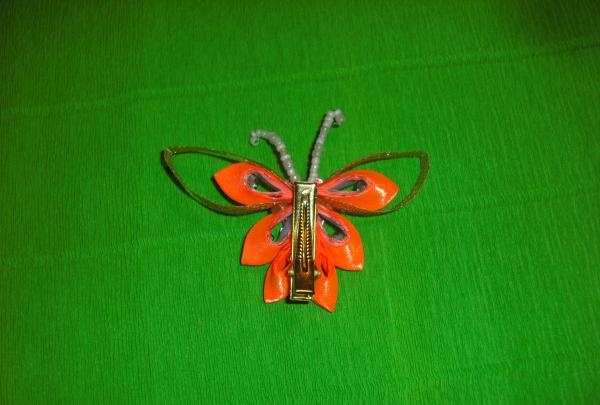
After this, all you have to do is attach the hairpin to the wrong side of the resulting decoration.
The “Orange Butterfly” hairpin is completely ready!