Required materials and tools
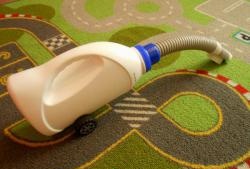
The basis for the project is an old household vacuum cleaner, from which the following components are used:
- Motor part;
- Power regulator;
- Power cord;
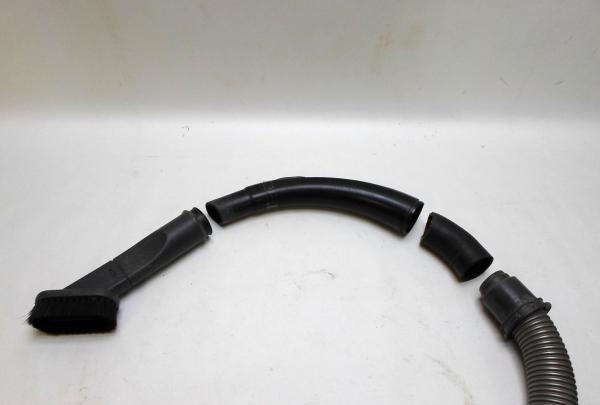
- Suction hose;
- Nozzles
For the homemade body, select a polyethylene barrel with a capacity of 50–80 liters, always with a fixed lid. You will also need:
- A piece of plastic sewer pipe with a diameter of 50 mm;
- Plywood 5–10 mm thick;
- M6 bolts and nuts – 14 pieces each;
- Strip of galvanized sheet metal;
- Air filter from a minibus;
- 220 Volt switch;
- Threaded rod with washers and nuts;
- Construction sealant;
- Sandpaper;
- Glue rods;
- Corrugated drain hose for washing machine;
- Electrical installation corrugation HDPE 32.
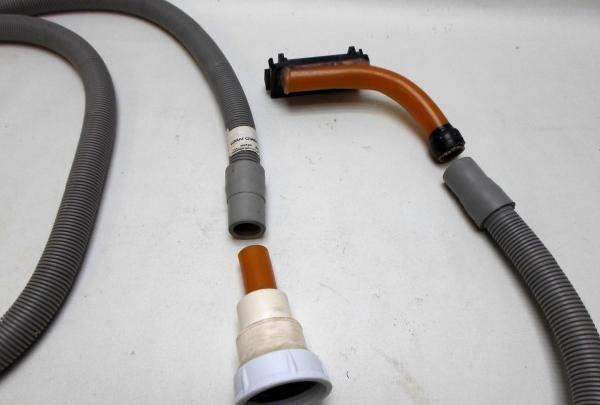
Docking units are made of plastic tubes and fittings, selected depending on the size of the pipes on the tools and the diameters of the vacuum cleaner intake hoses. List of tools used:
- Glue gun;
- Drill;
- Locksmith keys;
- Screwdrivers;
- Wire cutters;
- Electric jigsaw;
- Sharp knife;
- Files;
- Caulk gun.
The process of making a vacuum cleaner for a workshop
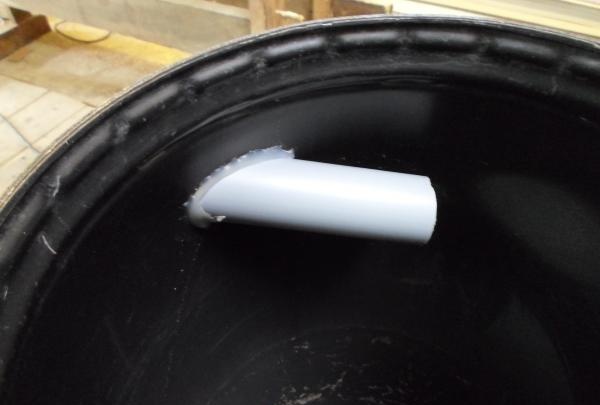
Stepping back approximately 100 mm from the top, mark a hole on the wall of the barrel for the inlet pipe and drill it using a drill. Then use a knife to give the hole an oval shape so that the inner end of the pipe is placed close to the wall and points down at a slight angle. Degrease the surfaces to be joined and, using a glue gun, fix the pipe in place.
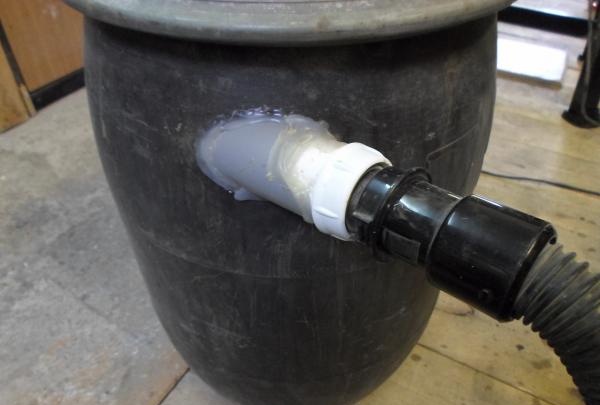
Using the same “hot” method, an adapter for the suction hose is attached to the outside of the pipe.
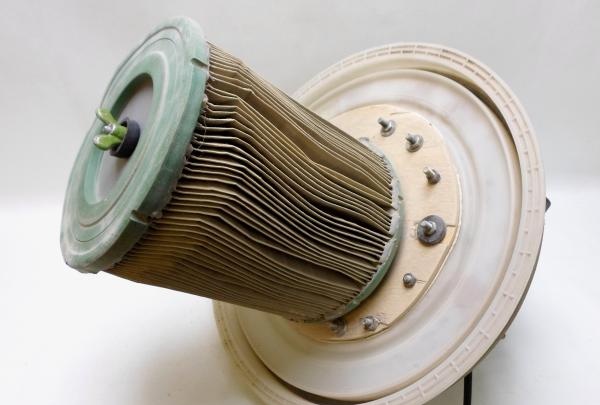
Using a jigsaw, cut out two circles from plywood with a diameter slightly smaller than that of the barrel lid. First, two holes are made in the blanks for bolts and the parts are secured on both sides of the cover. Next, drill the remaining holes, remove the circles and remove the burrs with sandpaper. Apply sealant around the perimeter of the workpieces, place the parts on the lid and fully install the fasteners. A hole is made for the pin in the center of the plywood circles, and a little to the side for the air intake of the motor block.
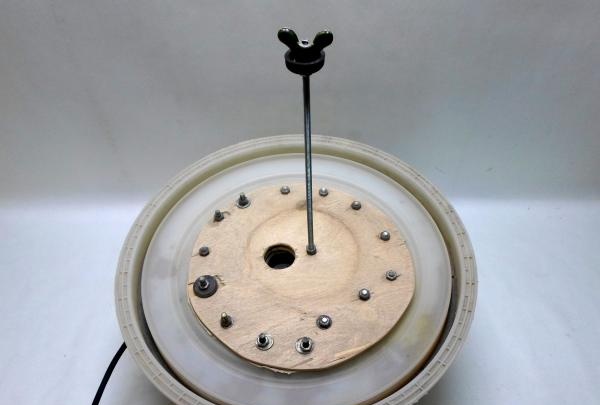
Remove the metal mesh from the air filter with pliers, otherwise it will become clogged with sawdust and interfere with cleaning the vacuum cleaner. One end of the cylinder is covered with a plywood plug.
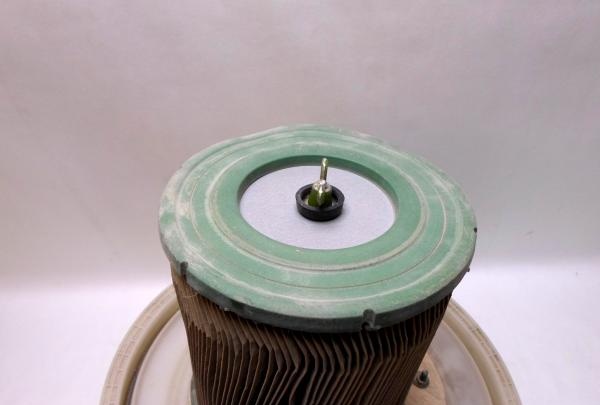
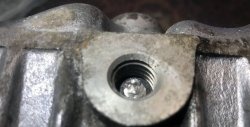
The prepared filter element is secured to the stud with a wing nut.
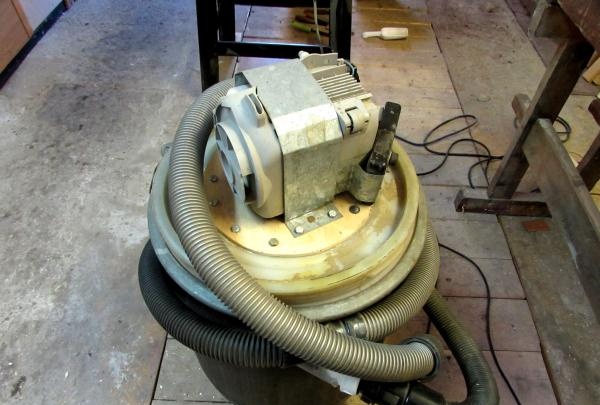
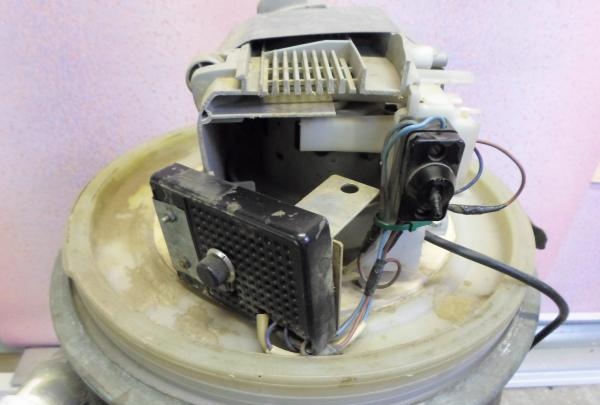
The motor part, as a rule, has a round shape. Therefore, for ease of installation, the plastic parts in which the motor was located are cut out from the body of the old vacuum cleaner. Thanks to them, to secure the unit to the barrel lid, you only need one clamp, made from a strip of tin.
A switch and power regulator are placed next to the engine, placing the latter in a suitable box. All that remains is to connect the elements together with wires and connect the cable with the plug. After making sure that the connections are correct and that there are no exposed contacts, apply power and check the operation of the device.
The standard suction hose of a household vacuum cleaner is too short; it is extended with a corrugated tube for laying wiring or another similar product.

Manufacturing of nozzles and adapters
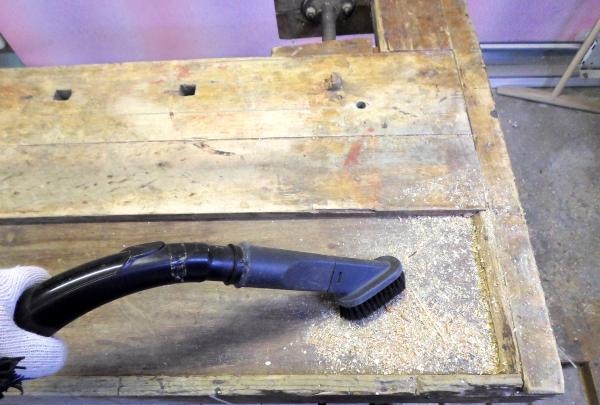
Cleanliness in the workshop begins with the workbench. To clean the workplace, use a standard brush that comes with the household appliance.
The nozzle is connected using a rubber adapter cut from a tube of appropriate caliber, for example, from a pipe of a car’s cooling system.
One of the most littered power tools is the power planer. The outlet fitting of the tool is large enough; most likely, the vacuum cleaner hose will connect without problems.

For a manual surface grinder, you will need to make an adapter that is soldered to the dust bag clamp.
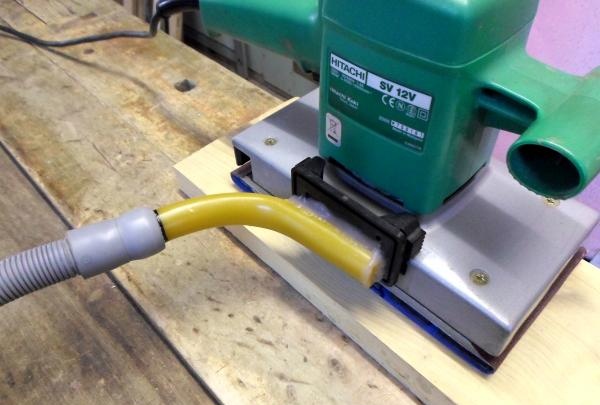
In this case, a thinner hose from the washing machine drain and the ability to electronically reduce the suction power of the vacuum cleaner so that the body does not shrink will come in handy.
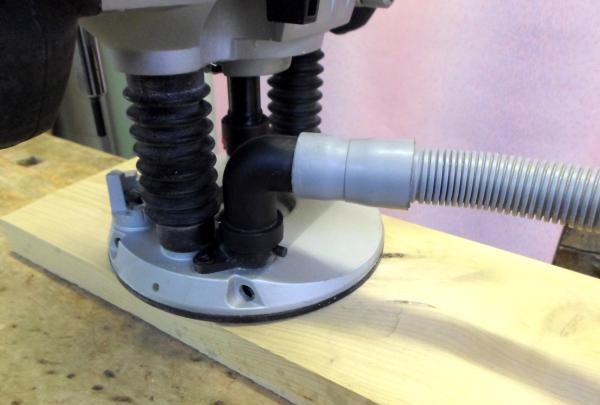
The same corrugation is suitable for suctioning chips from the working area of a manual router.
Using the selection method, the corresponding parts are also found for the pallet of the circular saw.

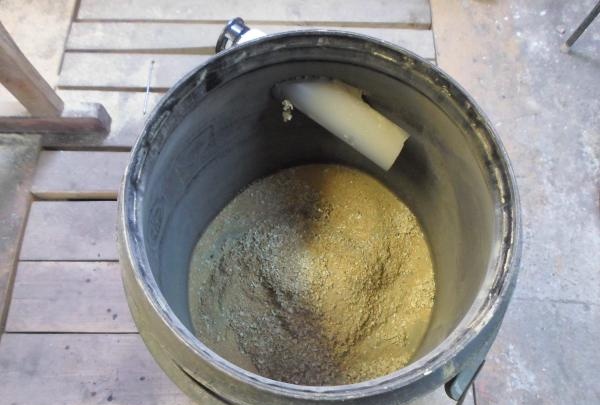
The design does not provide a filling sensor - at first you should look inside more often to prevent the vacuum cleaner from overfilling.
Cleanliness and order in a home workshop is the result of work done with your own hands, achieved with a minimum of financial investment.