A special feature of the assembled structure is the adjustability of the rotation speed of the chuck with the drill. When working with materials of different hardness, changing the drill rotation speed is simply necessary.
A special case is precision drilling. This is where the correct choice of rotation speed is most important.
Watch the video of the process
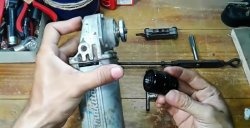
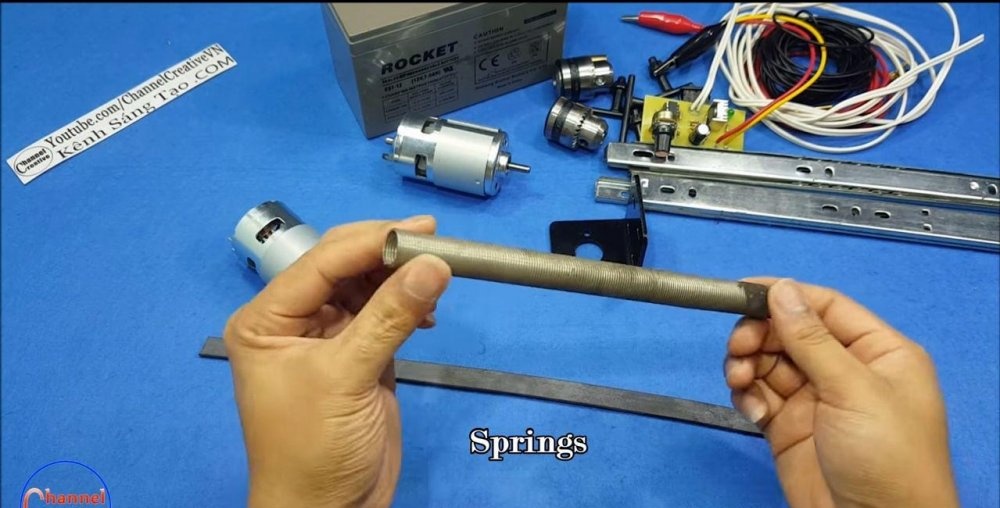
A 775 motor is used as the power element of the device. There are two electric motor options:
We recommend using the first option, which allows you to power it from a regular car battery. The engine base is made of wood.
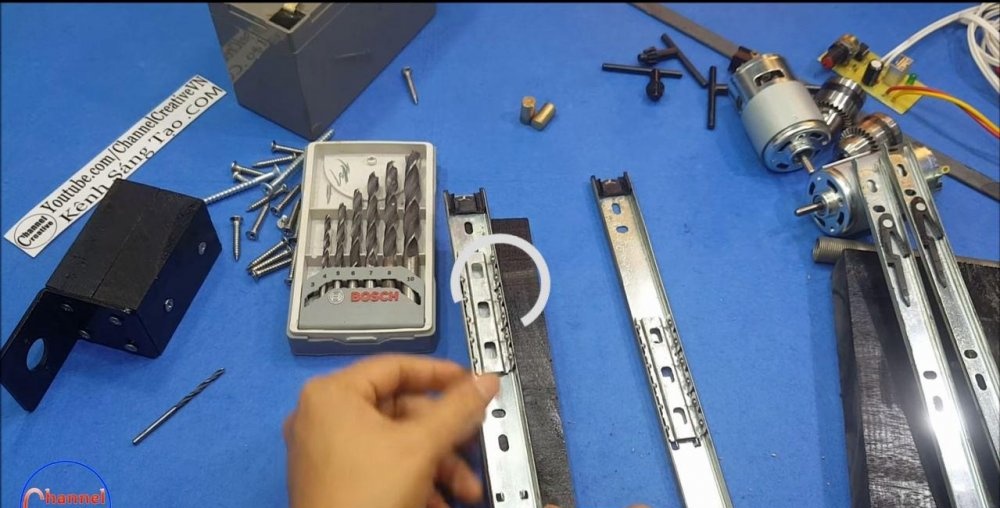
Tools and materials used in the production and installation of the machine
The materials used in the manufacture of a miniature drilling machine are:
- - electric motor 775;
- - a pair of sliders (for furniture);
- - mini chuck used for drill;
- - car battery (if necessary);
- - required footage of electrical wires;
- - a controller unit designed for precise control of rotation speed;
- - spring;
- - metal plate (used as a lever);
- - heat shrinkage;
- - corners for connecting perpendicular planes;
- - the required number of screws;
- - a special bracket for securing the electric motor;
- - quick-drying paint;
- - lubricant;
- - marker or pencil, ruler for measurements;
- - mug (preferably metal).
The tools required for the production and installation of a miniature drilling machine include the following set:
- - electric drill;
- - a screwdriver with variable attachments (it can be easily and inexpensively purchased in Russia);
- - a regular soldering iron with solder and tin;
- - screwdriver;
- - grinder (preferably bought in Russia);
- - pliers.


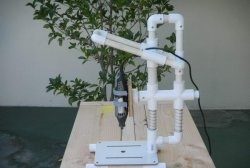
Production Procedure of Miniature Drilling Machine
The device manufacturing process can be divided into several stages.
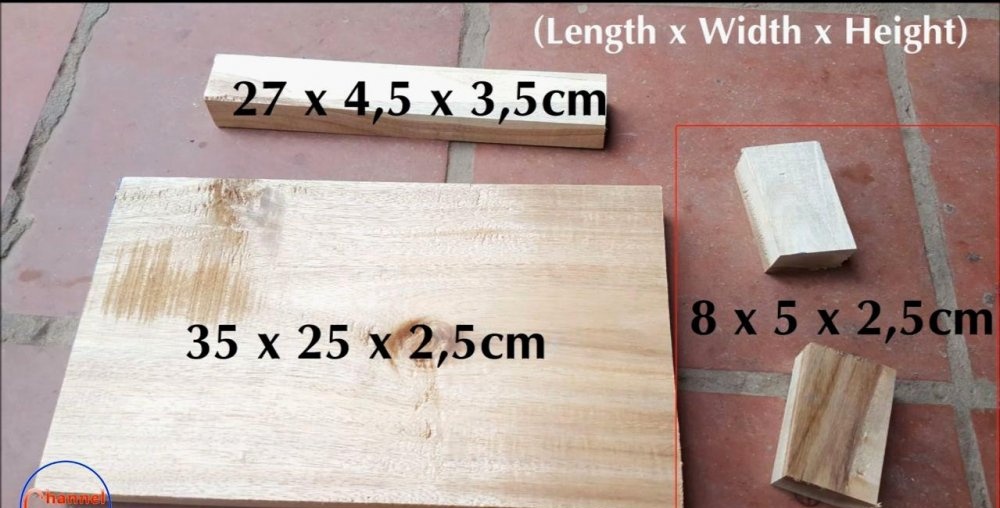
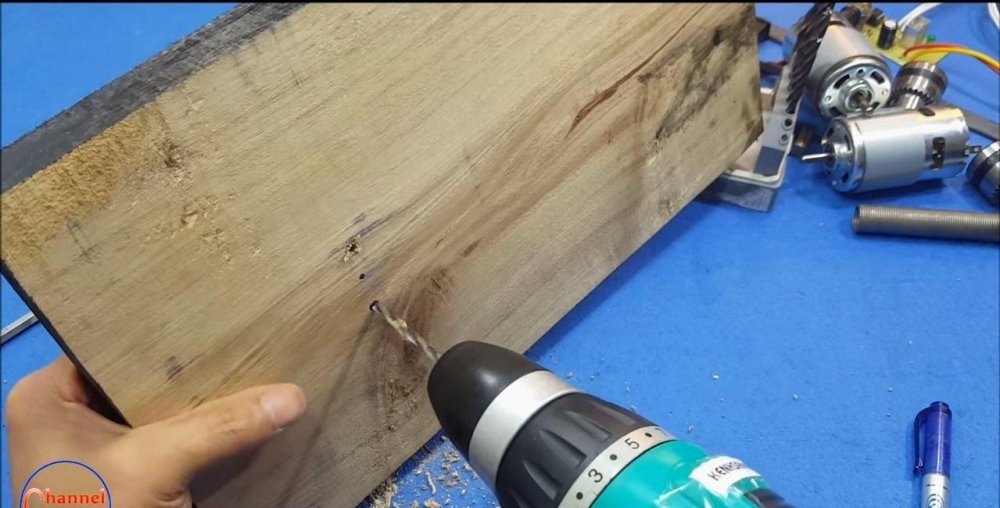
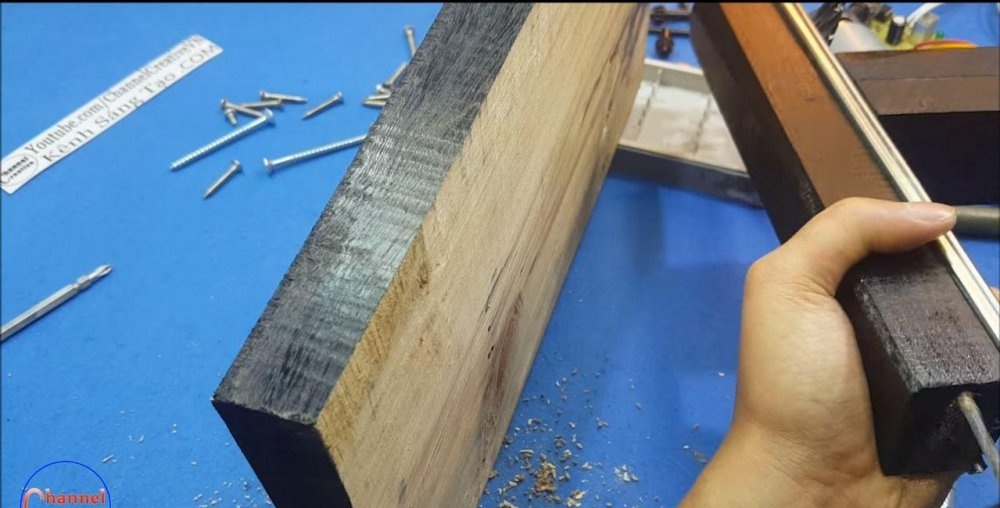
We are preparing materials for making the base.
To make the base (or frame structure), you can use ordinary boards and bars. Verbose plywood can be used as an alternative material.
In the presented photograph you can estimate the dimensions of the necessary blanks for the production of the structure. To ensure its aesthetics and comfort of work, it is advisable to subject the wood to careful sanding and painting with non-marking paints. You can use a regular aerosol can. Black color will be the most effective and economical.


We install the fastening part that secures the engine.
When producing a mounting device for an engine, it is advisable to secure two wooden blocks using wood screws. If there is a need to achieve maximum structural reliability, then you should additionally use glue for wooden products.


We install a bracket to secure the engine onto the finished part. This can be done using 4 self-tapping screws. The rigidity of the plastic bracket will be quite sufficient.
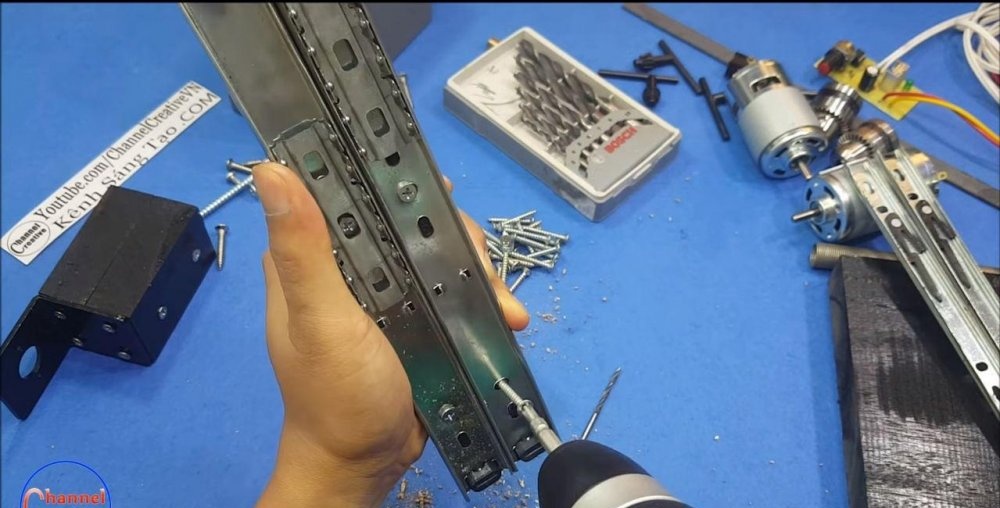
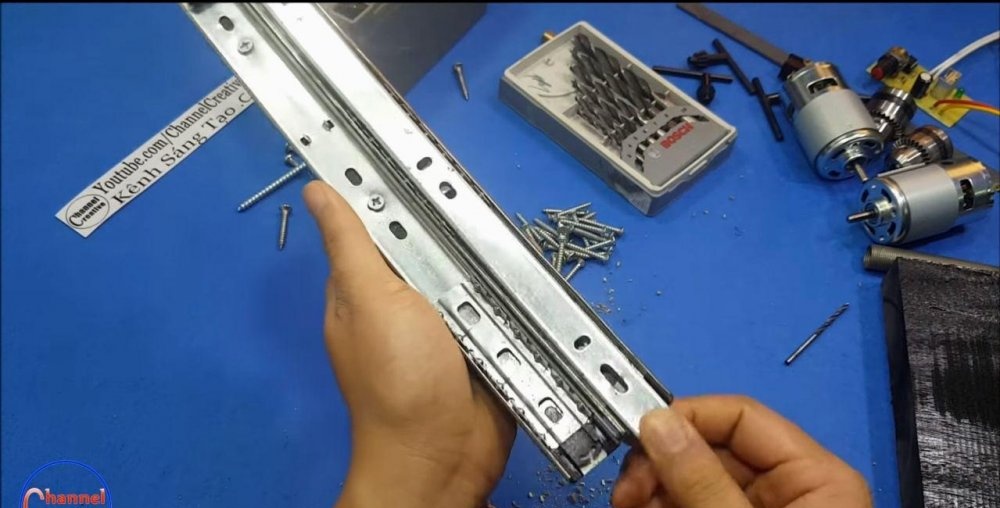
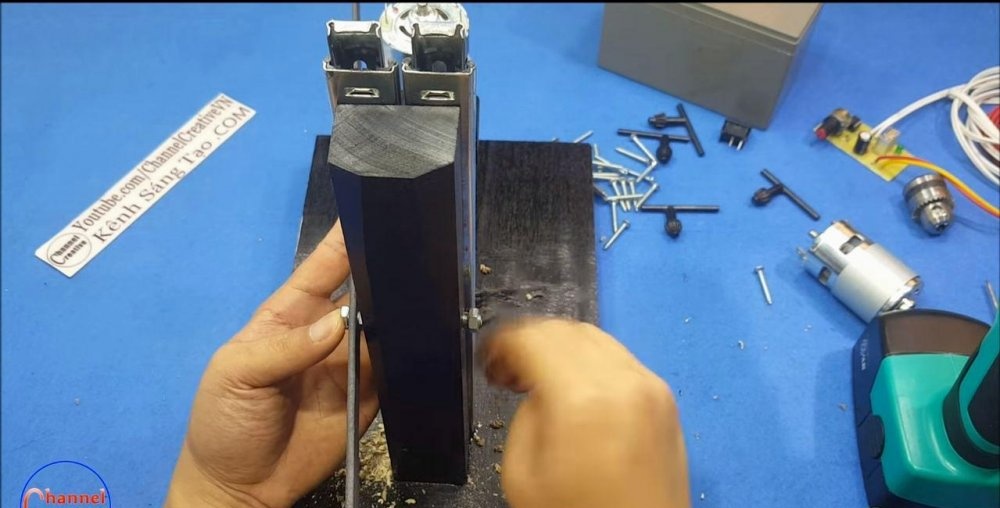
Installation of sliders.
For maximum reliability and strength, it is advisable to use two sliders. After disassembling them, the first one is fastened to the vertical stand. Fastening is carried out using self-tapping screws. The second slider is mounted to a device that holds the electric motor.
Once assembled, the sliders provide a strong platform to harness the engine's torque. The assembled platform will be able to move in a vertical plane.
When completing the work of the third stage, it is necessary to lubricate the sliders to reduce friction, soften the working stroke, and also extend their service life and operation.


Installation of the stand on the base.
To construct a solid base, it is advisable to use a wood board: this will allow the structure to gain stability and safety during operation. As a slab, it is best to use a solid board in which holes are drilled. The stand is screwed on using self-tapping screws.


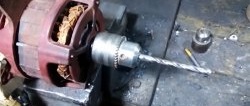
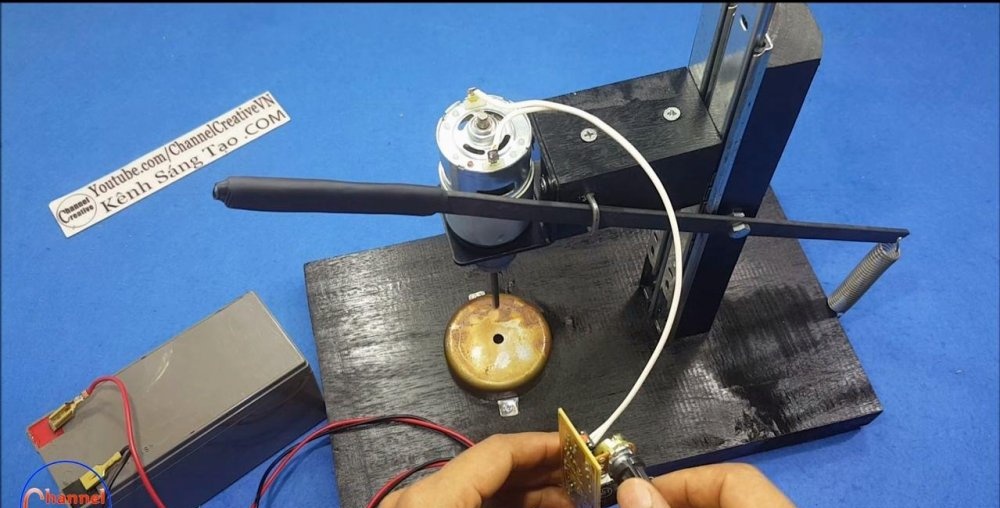
Installing the engine and cartridge.
Installing the electric motor will not take much time: you need to stock up on two screws and secure the unit. After this, the drill chuck is installed.


Mounting the lever.
To produce and install the lever, you should use a narrow metal plate of the required length. A mounting hole is drilled at its end. The lever is screwed to the stand using three nuts and one bolt. It is necessary to adjust the stroke of the lever so that it moves freely along the vertical axis (up and down).
A bracket is formed from a thick wire or a thin metal rod, designed to transmit movement relative to the platform with the engine. The bracket is made in a “U” shape and holes are drilled for it. The bracket is installed on the structure.
The return spring will be called upon to move the platform to its original (idle) state. To do this, measure and cut the required size of a moderately stiff spring, which is attached to the lever (one end) and, using a self-tapping screw, to the base (the other end).
Heat-shrinkable tubing in several layers can be used as a comfortable handle.


Making a working platform.
For ease of drilling, a working platform is formed into which the drill will fit. You can do without it, but its presence will create comfort when working and will ensure partial collection of sawdust when drilling.
For manufacturing, it is advisable to use the lower part of a metal mug, which is attached using self-tapping screws.


Completion of assembly, commissioning.
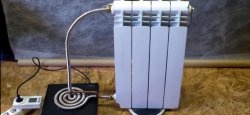
After the drilling machine is ready, power is supplied to the electric motor. Installing a controller (adjustment unit) will allow you to select the rotation speed of the chuck when drilling various materials (wood, metal, etc.).
After installing the board and connecting the power supply, the miniature drilling machine can be tested.Using the device, timber (4 cm) can be drilled easily and through. Thick metal can also be drilled successfully.


The machine is ready! You can use it at home and save a lot of money.
Good luck!