And the more interesting is the homemade product that we want to present to you today. It was made by the author 10 years ago, and as he himself admits, it can be modernized using modern components. However, the original model works properly and pleases its owner with a rather powerful and long-lasting glow. What's so special about it? Let's take a look together.

Device Specification
- 513 LEDs 5 mm (series of three);
- Lead-acid battery 12V/7Ah;
The LED panel is assembled on a regular breadboard, with all elements sequentially soldered. You can adjust it to the shape yourself using a hacksaw, paint knife or grinder. Disc diameter – 13 cm.


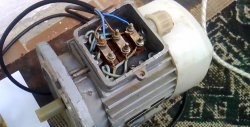
Mechanical DC relays 892-1Cc-C 12V 5A DC, resistances and transistors are used for the device controller.Sewer pipes and fittings can be used as a body.


Device characteristics (at full power)
- The amount of luminous flux is 3500 - 4000 lumens;
- Recharge the battery within 10 minutes;
- Power consumption 53 W (including 3 W resistor power consumption).
Control Features
- Various brightness settings achieved by powering different amounts LEDs;
- Voltage safety switch to prevent lead-acid battery from discharging;
- Possibility to recharge the battery without removing it from the case.
Assembly Specifications
On/off and protection system
The first switch activates the “system/charger” mode. Here we can choose to use the battery to recharge it or to operate the flashlight. When the device is charging, the light is completely turned off via a six-pin switch. In charging mode, you can activate the flashlight using the “on/off” switch. The rear panel contains several LEDs. First green Light-emitting diode Lights up when there is power to the flashlight system. Thus, the “system/charger” switch is switched to “system” mode, and the “on/off” switch is set to “on”.
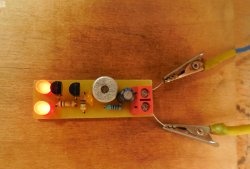
But the LED panel has not yet been brought into working condition. A safety module is provided to protect the lead-acid battery from over-discharge. The automatic voltage switching circuit is responsible for this, and the second green signal Light-emitting diode under the inscription "safety ok". When it lights up, it means that everything is in order and the voltage is normal, i.e. above the minimum. There are three buttons for the protection system:
- No. 1 Green “safety on/off” button - activates the protection system;
- No. 2 Black button (below the green one) – disables the protection system;
- No. 3 Black “override” switch – power override.
When the protection is activated, the front LEDs will go out and the voltage will drop to a certain value. If it reaches a minimum, the protection system will stop. You can restart it by holding the green button. The red “low voltage” LED will indicate a low charge.
When the third switch is activated, power is supplied bypassing the protection system, and the flashlight can be used even at low voltage. But battery discharge will now have to be controlled manually. When the switch is active, both the "safety ok" and "low voltage" indicators are still active. Overriding can be useful if your battery is not fully charged but has plenty of charge left in it. If you use all LEDs (“phase 3”), due to leakage to the battery, the voltage drops by about 1 volt. Thus, the protection may be active in standby mode, but will be disabled when in use. And when the switch is active, you can see the protection turn on and off without loss to the LEDs. When you use the flashlight at full power, check the protection activity after turning off the LEDs for a couple of seconds. If the protection does not activate even after all LEDs are turned off, the battery charge is too low to be used safely. When using the flashlight for a long time in "phase 1" (3 LEDs) or "phase 2" (100 LEDs) modes, it is recommended not to use override as you may easily forget to turn off the flashlight in time.
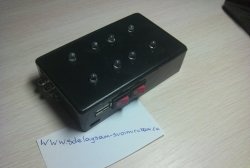
When power is supplied to the LED switches, the third LED on the "led system on" panel will light up. In the photo we can see that the “override” switch is active (the fourth yellow “override” LED is lit). In this case, the voltage is below the minimum value, because the “safety ok” LED is turned off, and the “low voltage” LED lights up red. Please note that the black safety off button will not work if the override switch is active. This way, the voltage monitoring circuit will always indicate the battery charge status.

Various brightness settings
The flashlight has three different LED brightness settings. They are designated by switches "phase 1", "phase 2" and "phase 3".
“Phase 1” mode means that only three LEDs are lit. At the same time, the work of the flashlight becomes very long; on one charge it can last more than one day, but it shines like a regular inexpensive LED flashlight on AA batteries.
"phase 2" mode includes 100 LEDs, and "phase 3" mode includes the entire platform. Modes are switched using the corresponding buttons on the panel, and they can be used either individually or in various combinations. When the “phase 3” mode is turned on, the remaining modes remain activated. These adjustments are possible due to the presence of a relay in the circuit. Opposite each of the fixed mode switches there are buttons for short-term activation, duplicating these modes. By alternating the positions of switches and buttons, you can use individual combinations of LED activity. For example, transmit signals in Morse code, or check communication with a group on a hike by pressing the “phase 3” button when the “phase 1” or “phase 2” modes are turned on.And if you just need to see something better in the dark, the buttons for momentarily turning on the mode are what you need!


Optional external device
The control panel is completed by elements intended for an external device. To make the flashlight more versatile, the author added a fourth “phase” switch and a button, next to which there is a socket for the “ext output” charger power plug. With this button you can turn on and off the 12V output on this jack for connecting an external device. The charger/system switch must be in charger mode to ensure that the battery is disconnected from its system. The device can be connected from any 12V DC source. According to the author, even a small 9V battery can light this flashlight, but not at full power. You can also use a car cigarette lighter to charge or operate it, since the flashlight battery produces only 7Ah of current, while a car battery can produce up to 100Ah.


Conclusion
For those who find this LED flashlight model too complicated, modern analogues of similar assemblies based on LED matrices are suitable. Their power reaches 100 W, the glow temperature is 6-10 thousand k, and the light wavelength is up to 9000 lm. The brightness from such lamps, even without a reflector and concentrator, is very high, and the dimensions are small. Nevertheless, the benefit is obvious, because soldering 500 LED elements is not an easy task. Instead of lead-acid batteries, lithium or polymer-lithium batteries of smaller size and higher power can also be used. Otherwise, this flashlight is quite powerful and bright, and its characteristics are quite worthy of the attention of DIY enthusiasts.


Watch the video
For more detailed assembly and testing of the flashlight, see the video clip.