Many gear mechanisms consist of plastic gears, the teeth of which can wear out under load. This especially happens when internal lubrication runs out after a long period. An example of this would be a car windshield wiper motor, an electric meat grinder, a blender, a spinning reel, etc. If you have a worn gear, there is no need to look for a replacement, since its teeth can be restored with two-component epoxy glue.
Will need
Materials and tools:
- two-component repair epoxy adhesive;
- degreaser;
- screwdriver;
- knife;
- rags.
As an epoxy adhesive, you should choose a repair composition that can be used to build up and restore fragments of parts. Information about this is indicated on the packaging. Also, the epoxy should have low shrinkage and be resistant to aggressive environments, including high temperatures.
Restoring a plastic gear
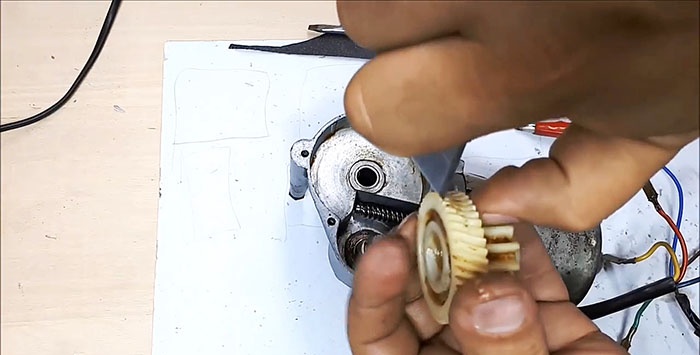
The gear motor itself initially slips under load and even when operating without load it produces unpleasant noise and grinding noise.

The first thing you need to do is disassemble it and remove the broken gear from the worm gear, since it is to blame for everything. All existing parts of the mechanism must be cleaned of grease using alcohol, solvent or gasoline. The fact is that it contains worn-out plastic wear particles, so it does not work well.

Using a sharp knife, you need to remove plastic deposits from the worn gear. After this, its surface must be degreased for normal adhesion of the epoxy adhesive. The remaining parts of the gearbox are not degreased.
The required amount of two-component epoxy glue is mixed according to the instructions. The composition is applied to problem areas of the gear with a small amount of exposure to normal teeth. You need to wait until the glue becomes plastic, resembling plasticine. This will take 10-20 minutes, depending on the manufacturer and the ambient temperature.


The worn gear with still plastic glue is installed in its seat. Next, you need to start the electric motor for the mechanism to work. As a result, the entire gear or worm gear will grind its teeth onto the broken part, squeezing out excess glue. Since the remaining parts of the gearbox are not degreased from grease, the resin will not stick to them.

After a minute, the engine can be turned off and the restored gear can be removed. The glue undergoes complete polymerization in 12-24 hours. After this, the part can be put in place, cutting off the excess sagging.


Lubricate all gears with grease or lithol and assemble the gearbox in the reverse order.


If the surface was completely degreased and good glue was used, then the quality of the restored gear corresponds to a new part.
Now there is no slipping, even with a strong hold. The operation is quiet, without any rattles or creaks.