A story about the battery density indicator. It’s about that “green eye” that is mounted in one of the cans. Let's figure out what it really shows and whether we should believe it.
The biggest myth about this indicator is that it monitors battery charge. However, there is some truth in this, because the charge is directly related to the density of the electrolyte. But if we focus only on it when it comes to the need to maintain the battery, then we will lose the battery. Most often, when this indicator changes color, it is too late to turn on the charger. And vice versa, the battery does not always require a charge when the green eye disappears. Let's start to figure it out.

- green color – everything is fine, the battery is working;
- black color – low electrolyte density, requires recharging;
- white color – low level, add water.
Colors may vary among different manufacturers - instead of black there may be red, and instead of white there may be black. More details can be found in the battery instructions.And the most reliable information from this sensor is obtained in the third case, when it is necessary to add water. Everything else should be questioned. Why?
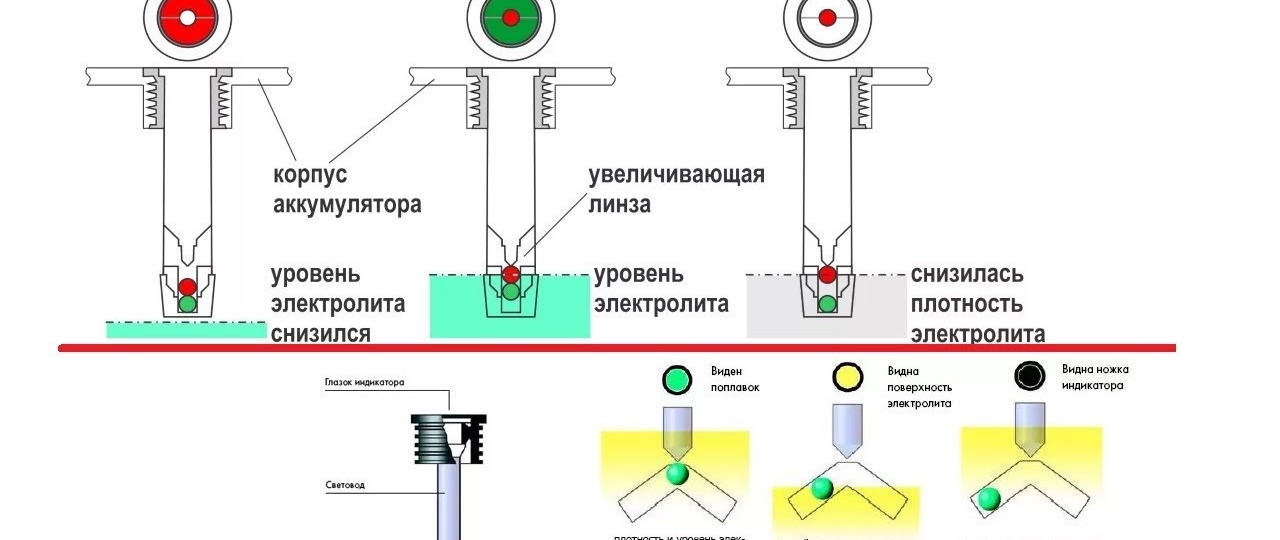
Green eye of the battery. What's wrong with him
What is the charge indicator? This is the simplest built-in hydrometer that responds to changes in electrolyte density. Thanks to its special design, three different colors can be seen in its window, corresponding to the three states of the battery. And I must say that all this works flawlessly, there is nothing to break. What don't we like?
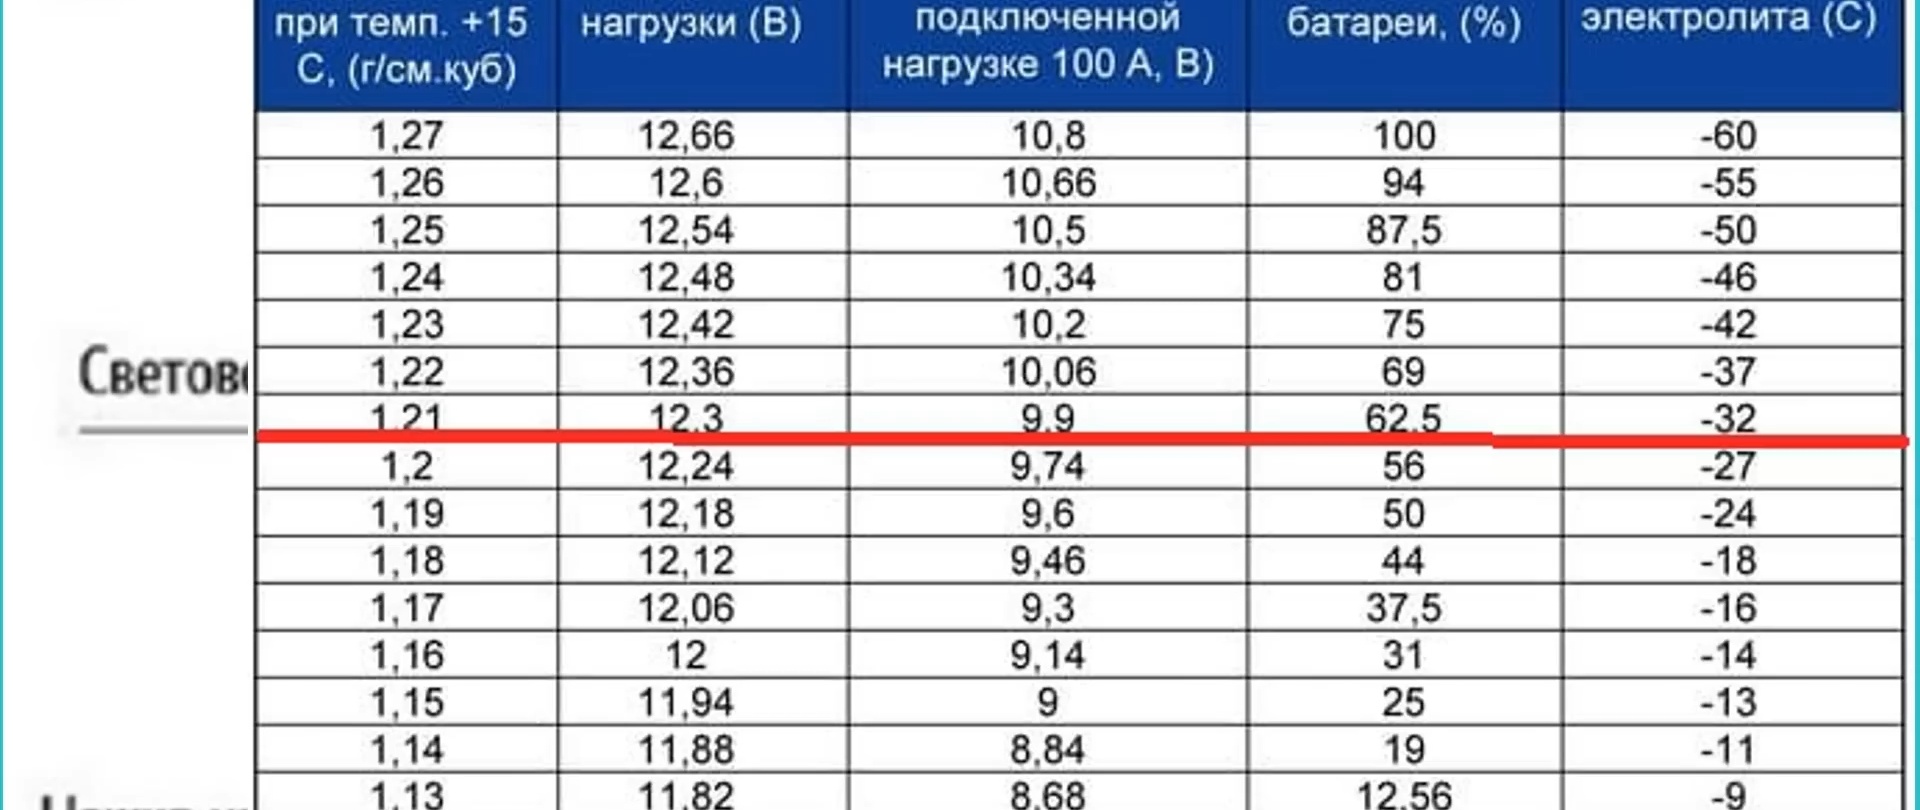
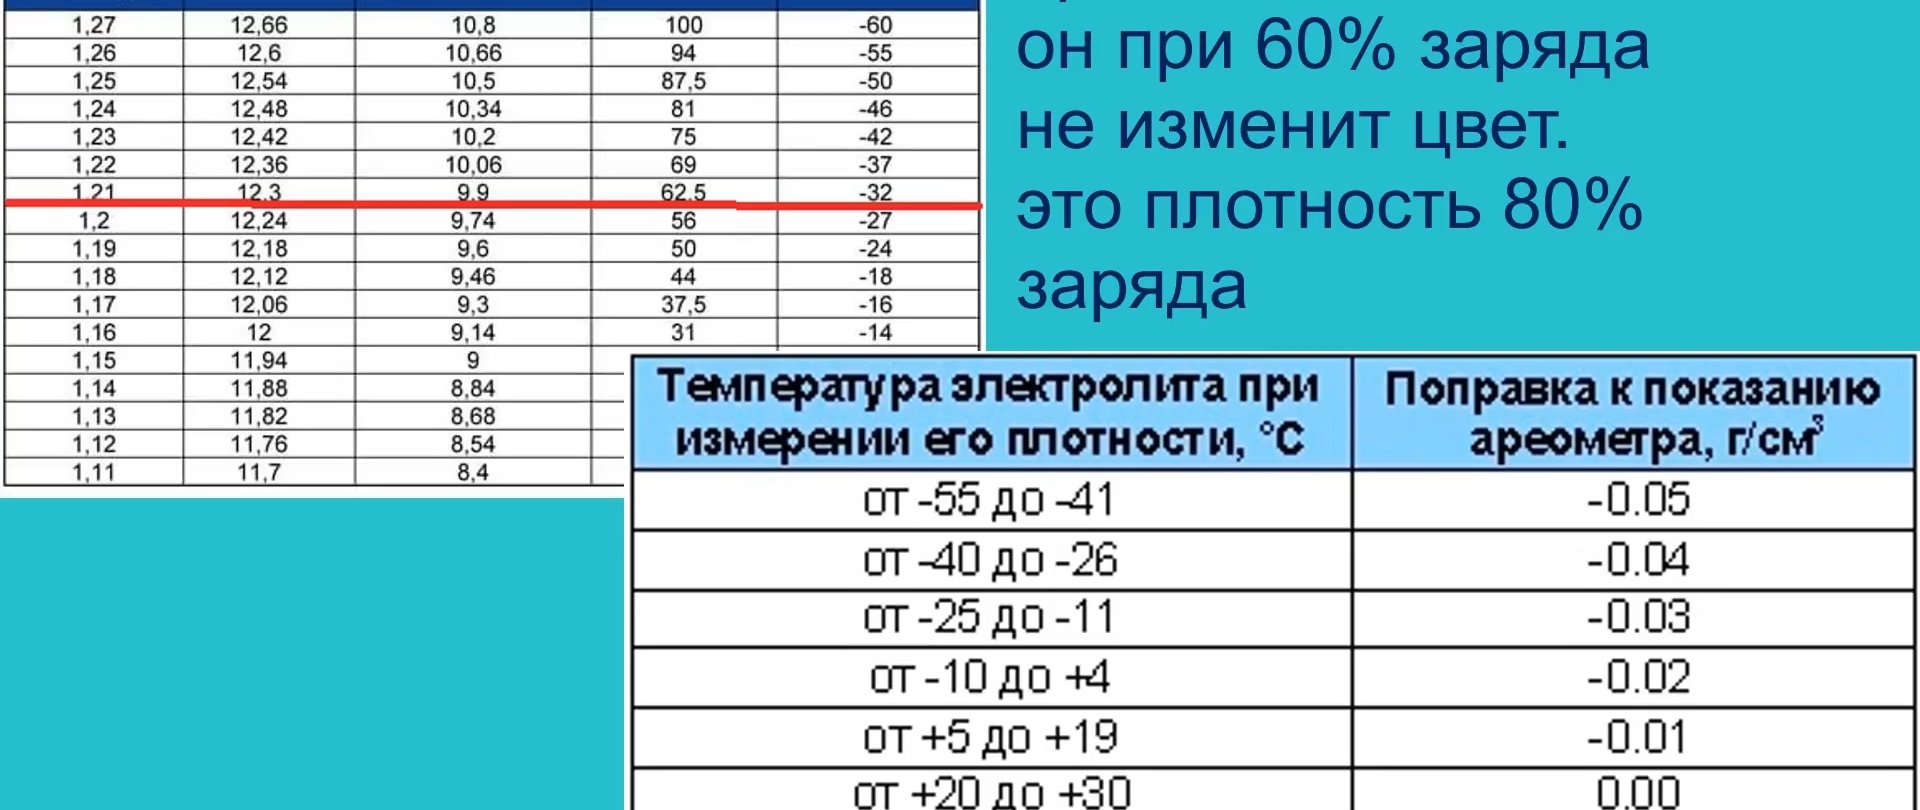
The indicator is designed for a certain electrolyte density and changes its color when it drops below 60% of the nominal one. But the battery requires charging when it loses 70-80% of its charge. Even with such a discharge, there is a possibility of electrolyte freezing. No, of course, it will not freeze to ice, but it will become inactive when exposed to low temperatures. And the battery will no longer crank the starter.

Density also depends on the ambient temperature. And in the cold, the solution in the jars becomes thicker, its concentration increases. The indicator lights up with a “green eye”, signaling that everything is normal. But, in fact, the battery turns out to be discharged.

And in the heat, the opposite effect is observed - the electrolyte liquefies, its density drops. The indicator signals the need to recharge. Although in reality there is no such need. In this case, when charging, the solution boils, the plates are destroyed, and the battery fails. These are the temperature paradoxes.

For the first time, such indicators began to be installed on hybrid low-maintenance batteries. It is also almost always installed in calcium.A classic hydrometer with a bulb cannot be inserted into them due to the lack of filler plugs. The manufacturer believes that such batteries do not require maintenance throughout their entire service life.
Why wasn’t it installed in the old “6ST55” and “6ST60”, a seemingly convenient thing? Therefore, in old batteries there was a large consumption of water for boiling. It was believed that every two weeks the driver would unscrew the plugs, add water and measure the density with a classic hydrometer.
Go ahead. Have you noticed that the charge indicator is usually placed in one of the middle cans. But it would be more correct to set it as a last resort. Why? Because the electrolyte boils away the most in them, they work in an enhanced mode relative to the others. Because the terminals are located on the outermost banks. And it would be wiser to monitor the condition of the electrolyte in these problem banks.
Let's summarize. Use this built-in low battery indicator wisely. You cannot blindly believe his testimony. It is better to periodically check the charge level and voltage using instruments: a reliable hydrometer with a bulb, a load fork and multimeter.
This will be much more correct.