The implementation of the proposed method of installing pillars is quite simple and can be done by any adult. It will not require expensive materials, and the pillars will subsequently withstand any fence made of mesh, corrugated board, wood, etc.
We install fence posts securely with our own hands
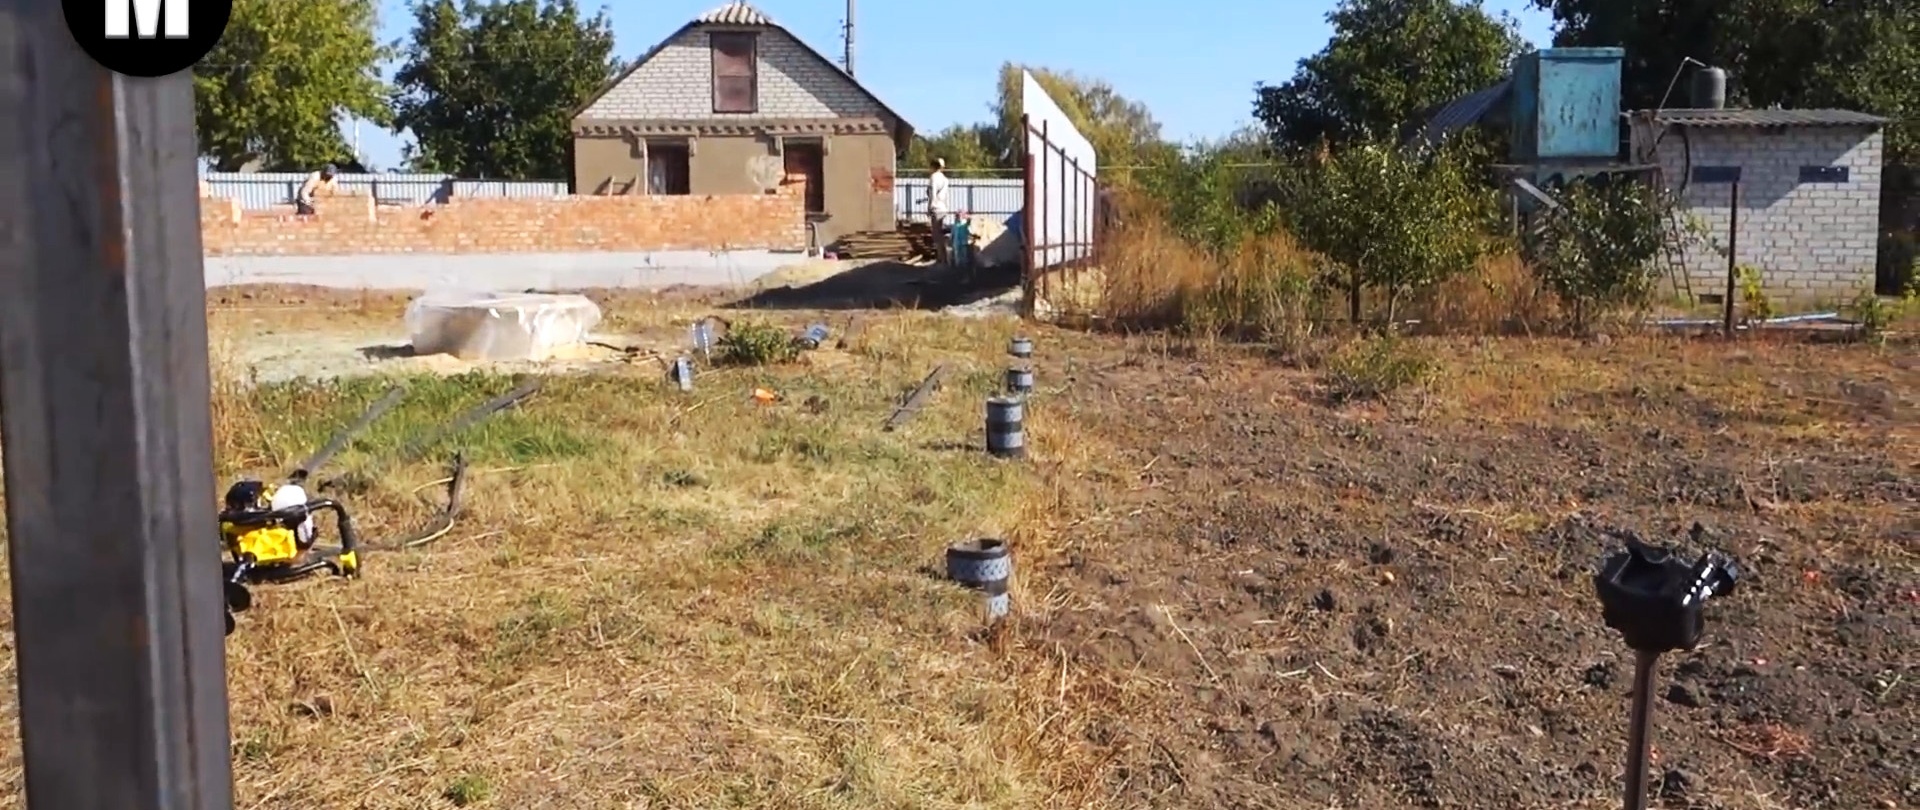
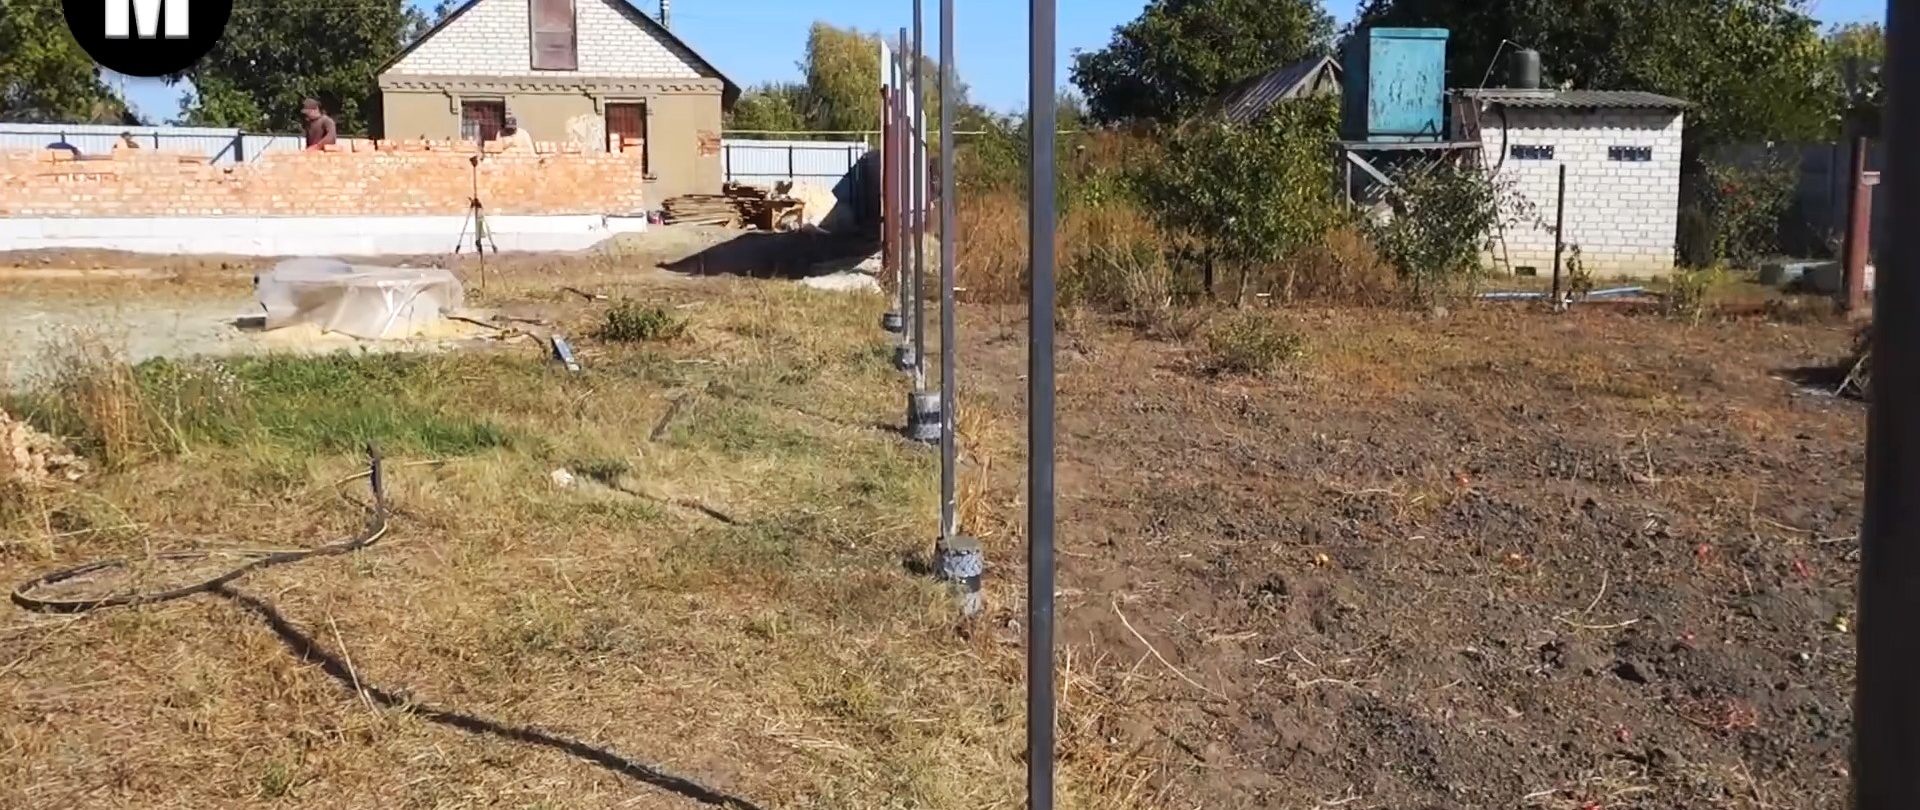
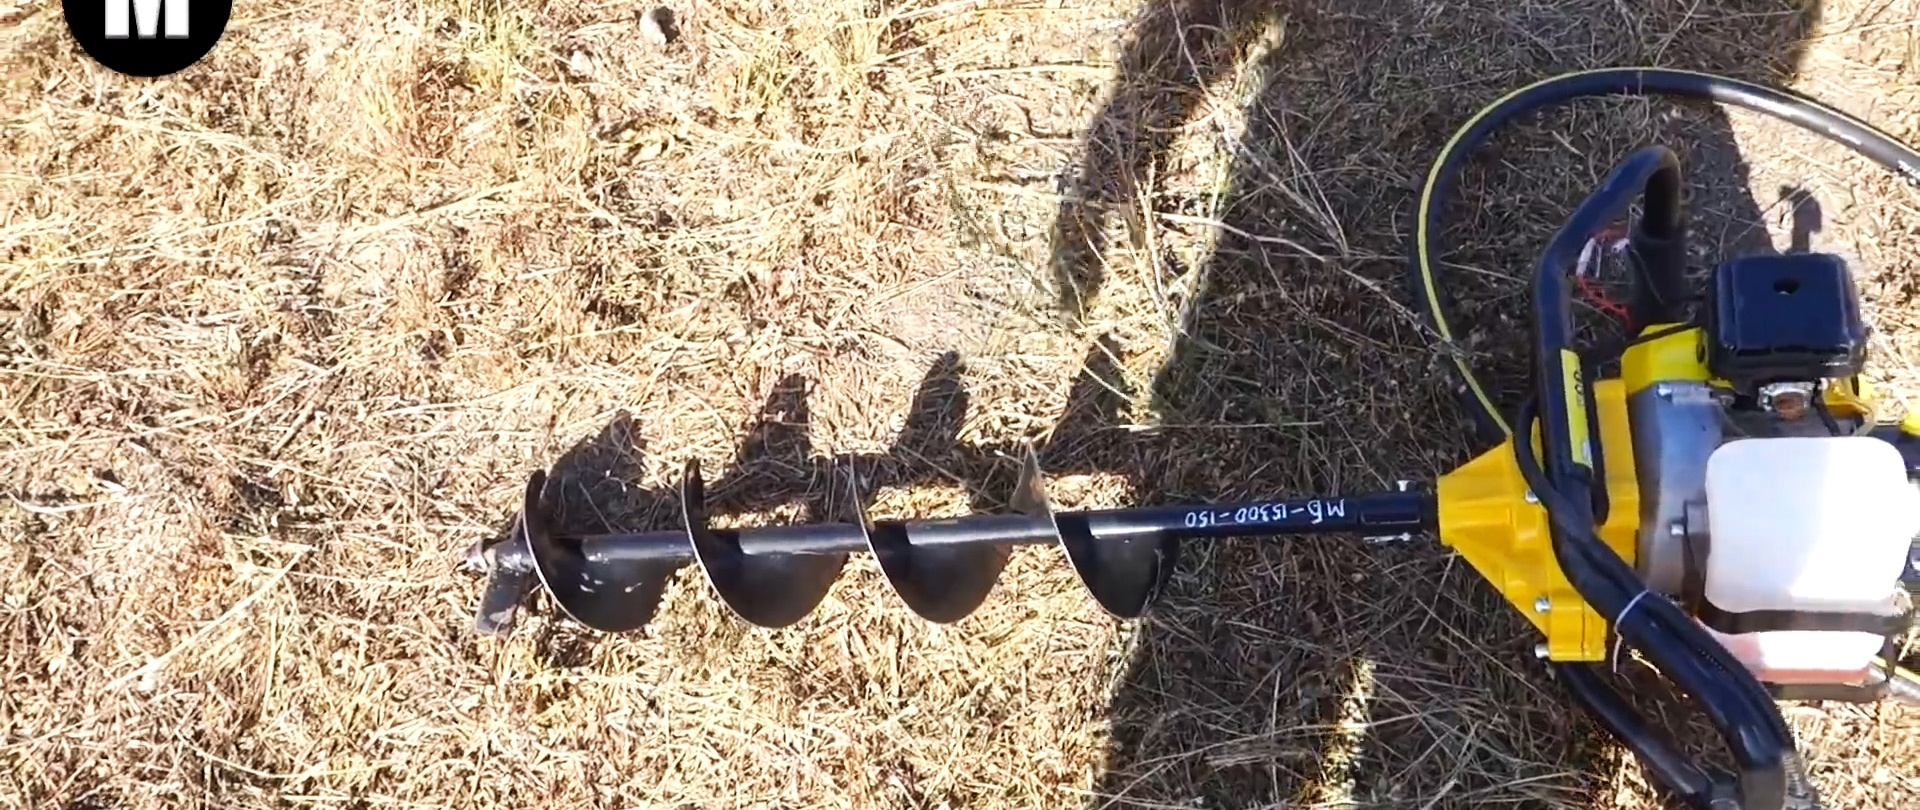
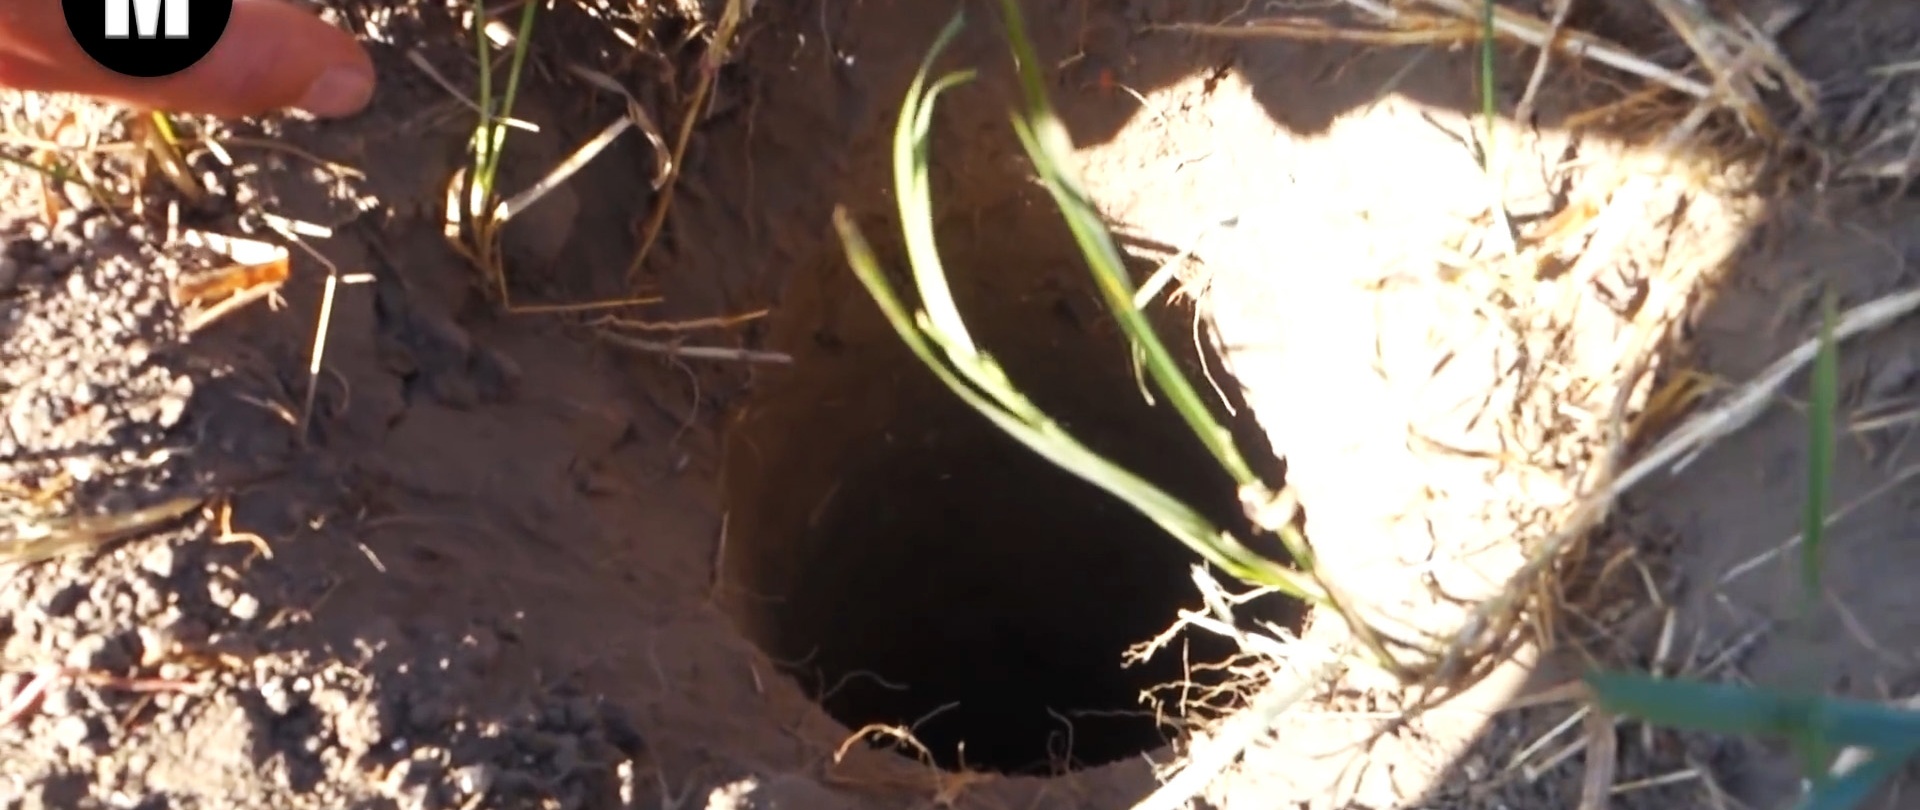
We begin the work by marking the places where the pillars will be installed and digging holes manually or using a drill. The optimal pit depth is 800 mm with a diameter of 150 mm. This is quite enough for pillars made of 40×40 mm profile square pipes with a wall thickness of 3 mm. Thinner pipes will be less strong and not as durable. The length of the pipes is 3 meters.
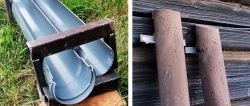
On a piece of pipe 80 cm long, we weld 2 pieces of reinforcement 100 mm long. They will ensure a stronger hold of the pillars in the concrete and will prevent them from falling away from the concrete as a result of winter frosts and summer heat.
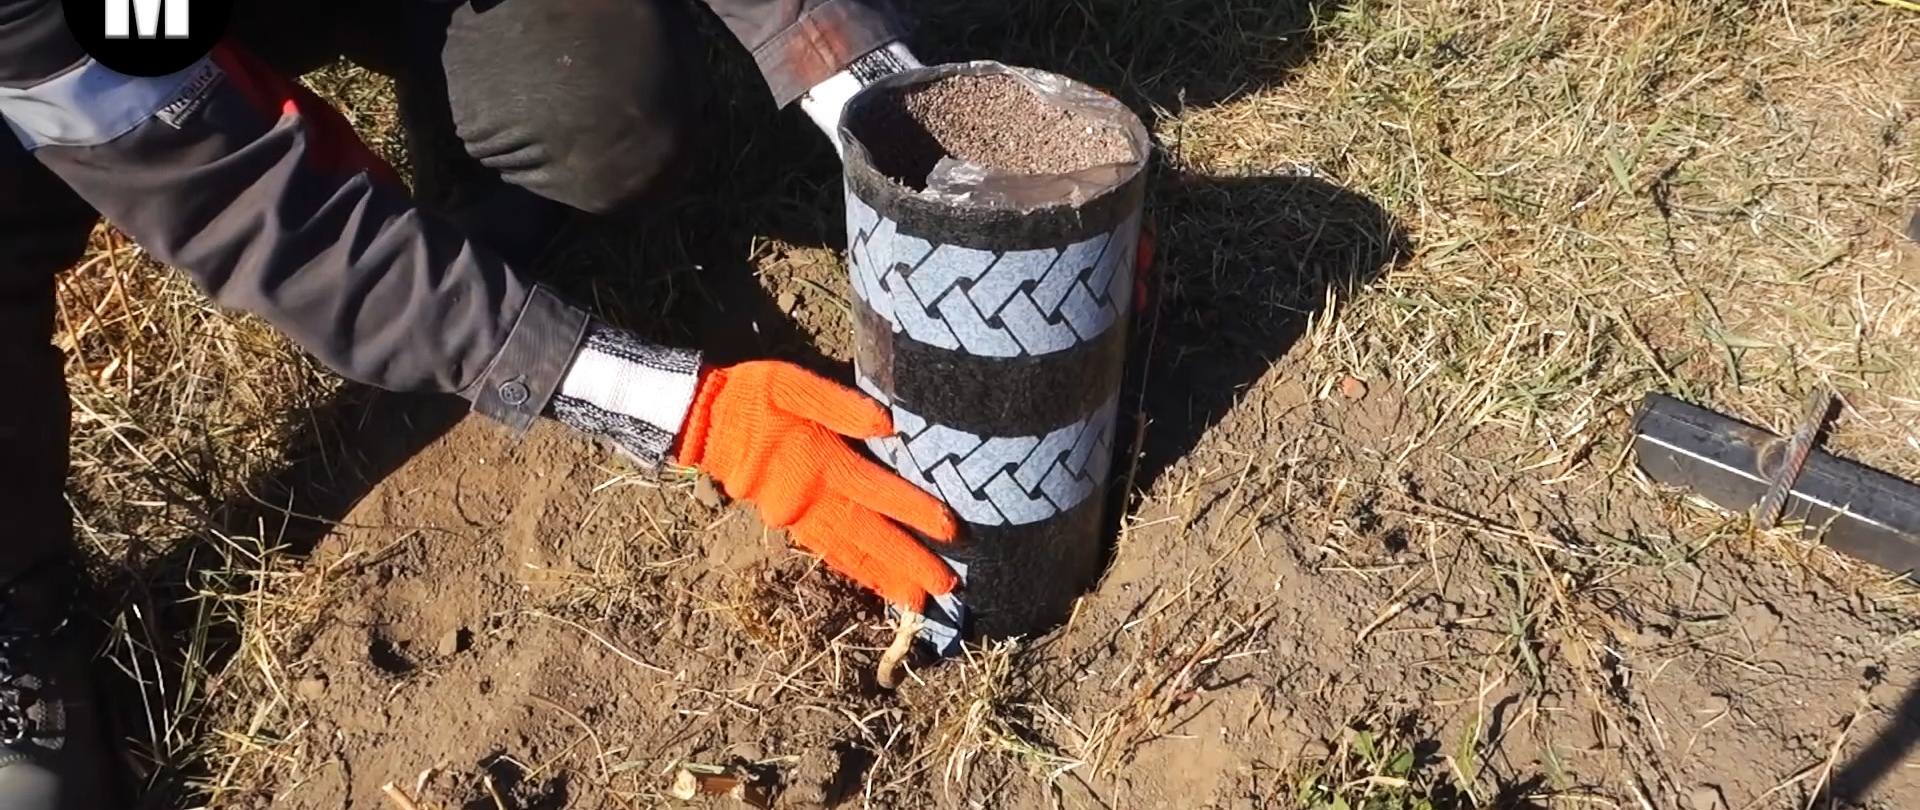
We will also need cheap ceramic insulation on fiberglass, which will ensure that the pillars stand forever and protect them from being squeezed out as a result of frost heaving. Moreover, the crumbs from the inside will provide better adhesion to the concrete.
The question may arise: why not use sewer plastic pipes with a diameter of 110 mm? It's all about the price. This roll is several times cheaper than plastic pipes of the specified diameter.
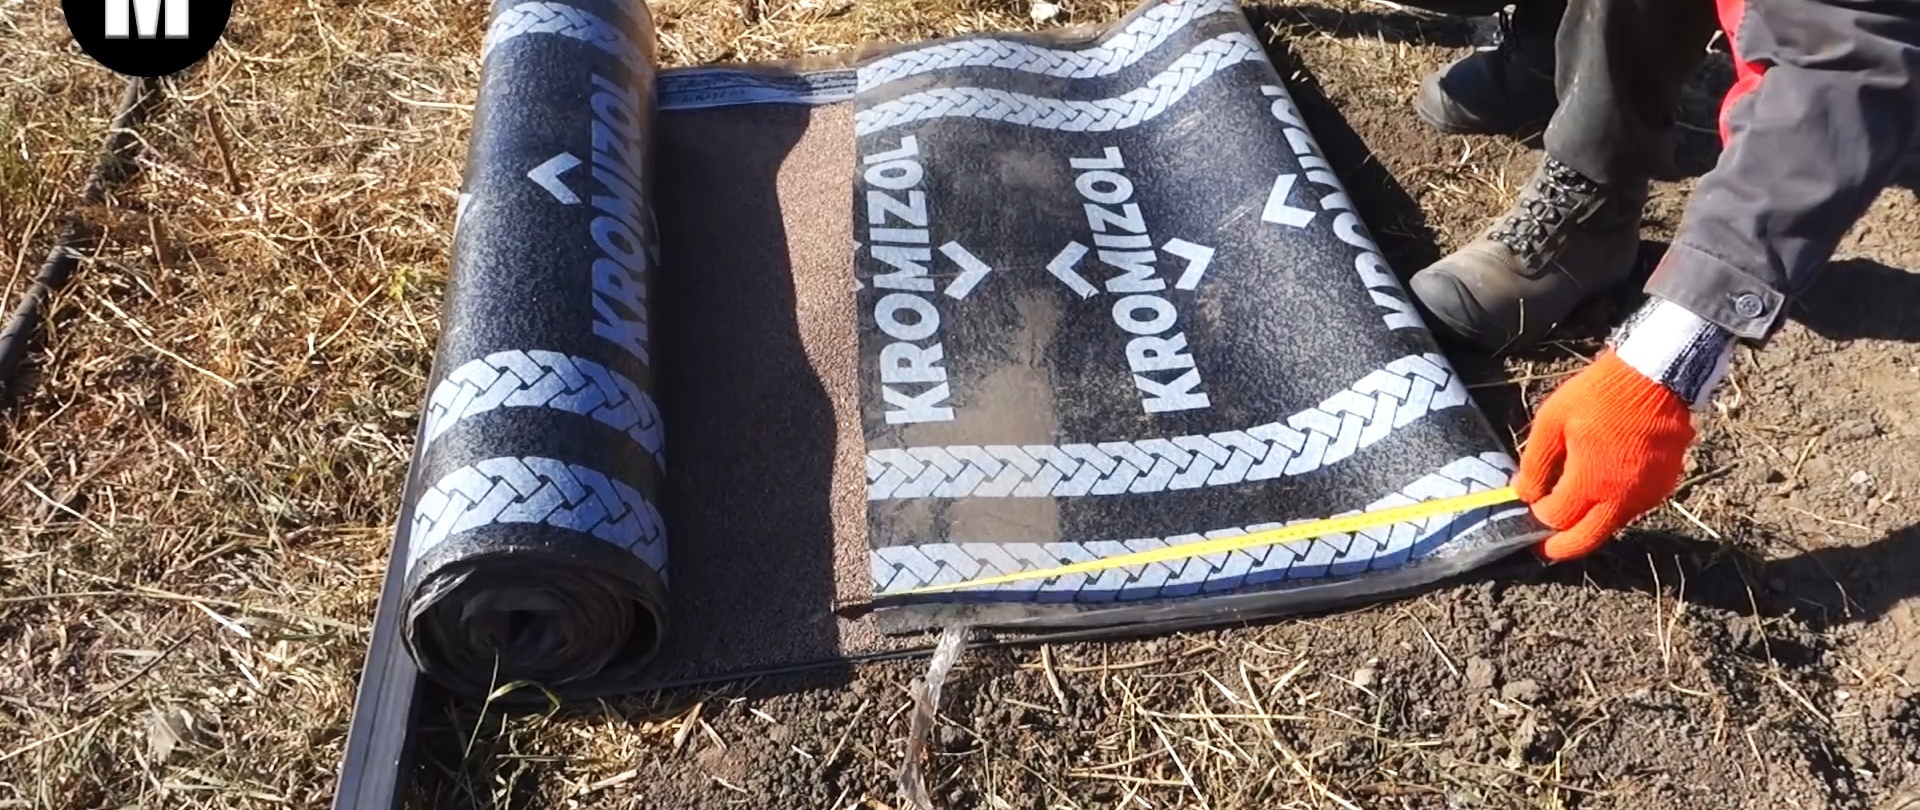
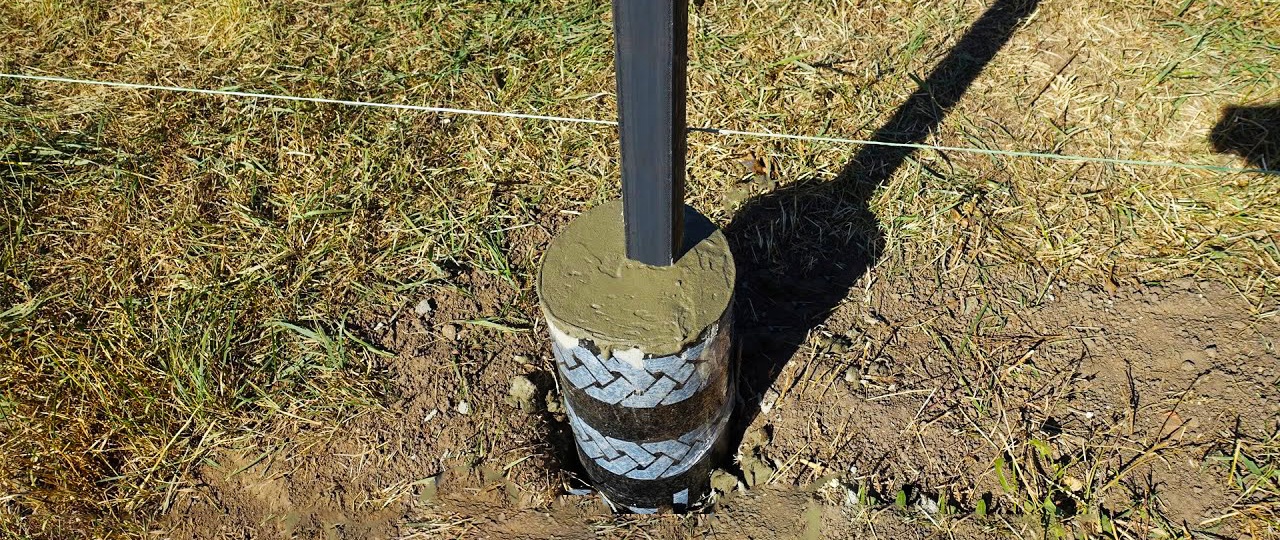
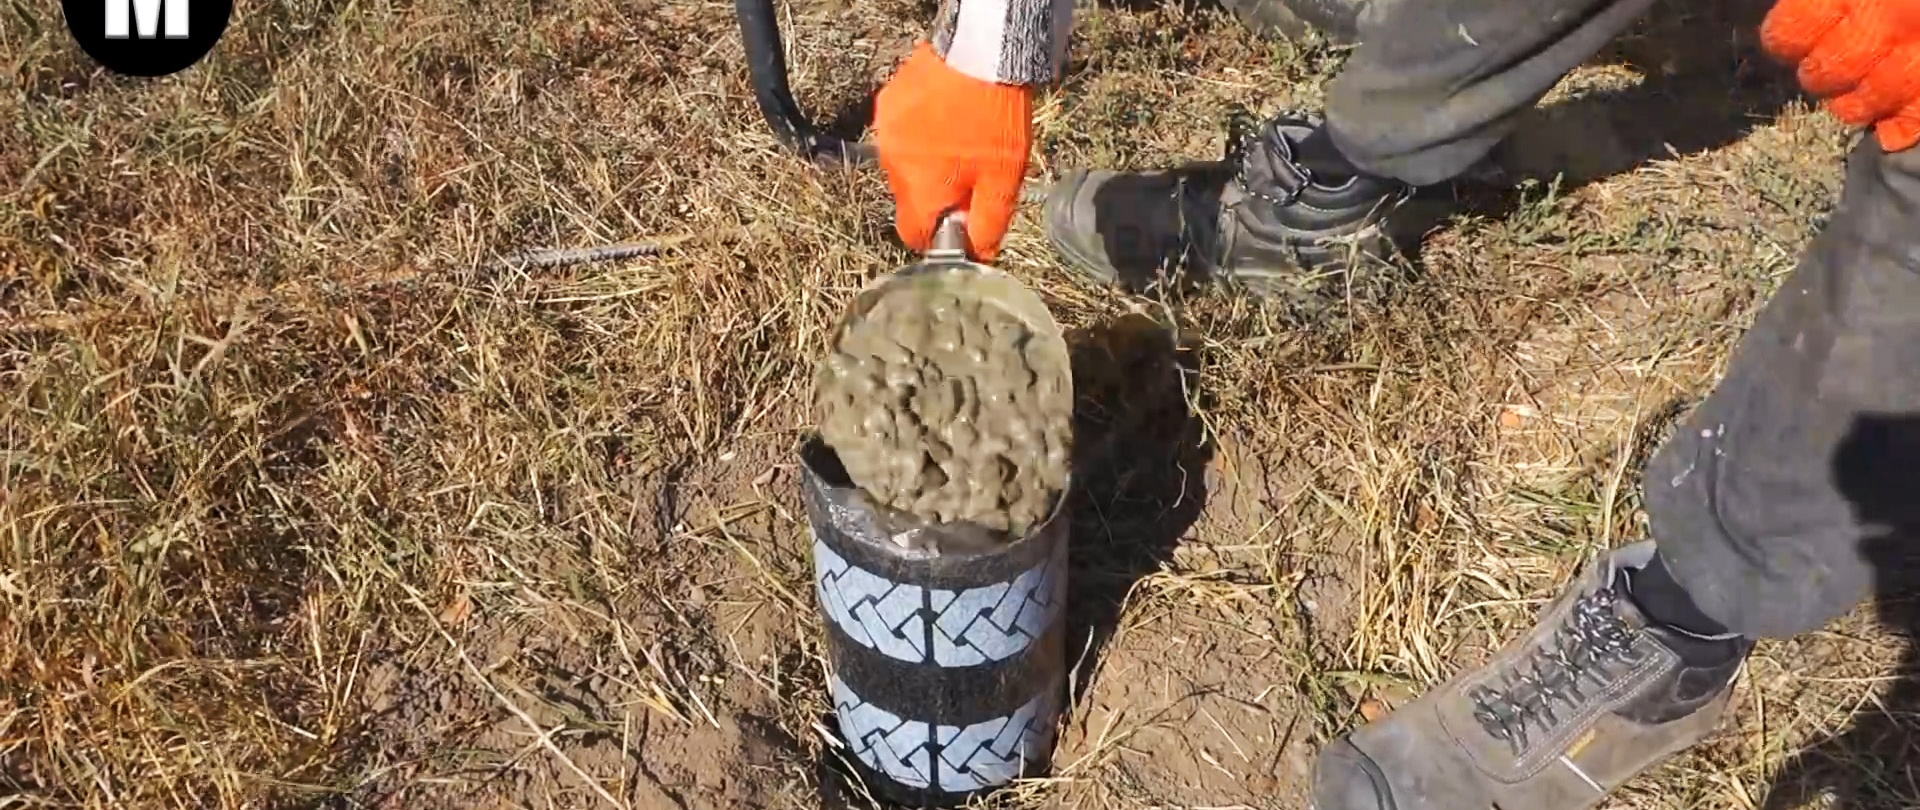
We cut a 50 cm strip from a meter-wide roll of roofing felt, roll it into a cylinder, and lower it into a hole drilled in the ground. The benefits of this are undoubted and multifaceted. Firstly, the quality of concrete improves, secondly, in the future the roofing material will serve as a waterproofing material, and thirdly, it will protect the column from the effects of frost heaving.
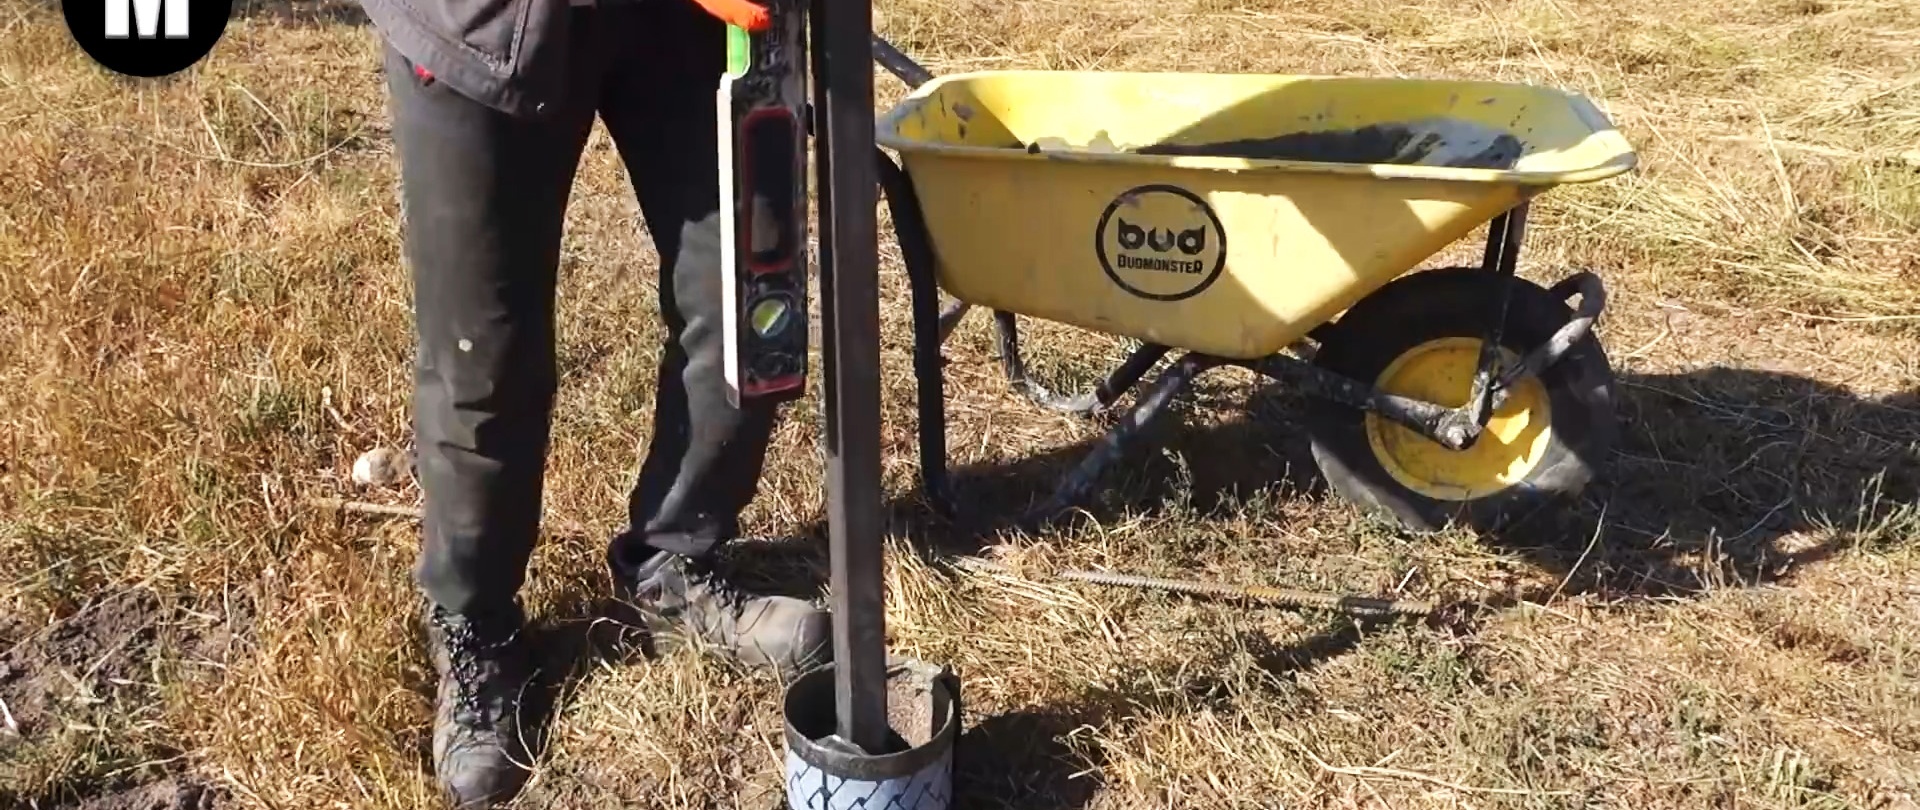
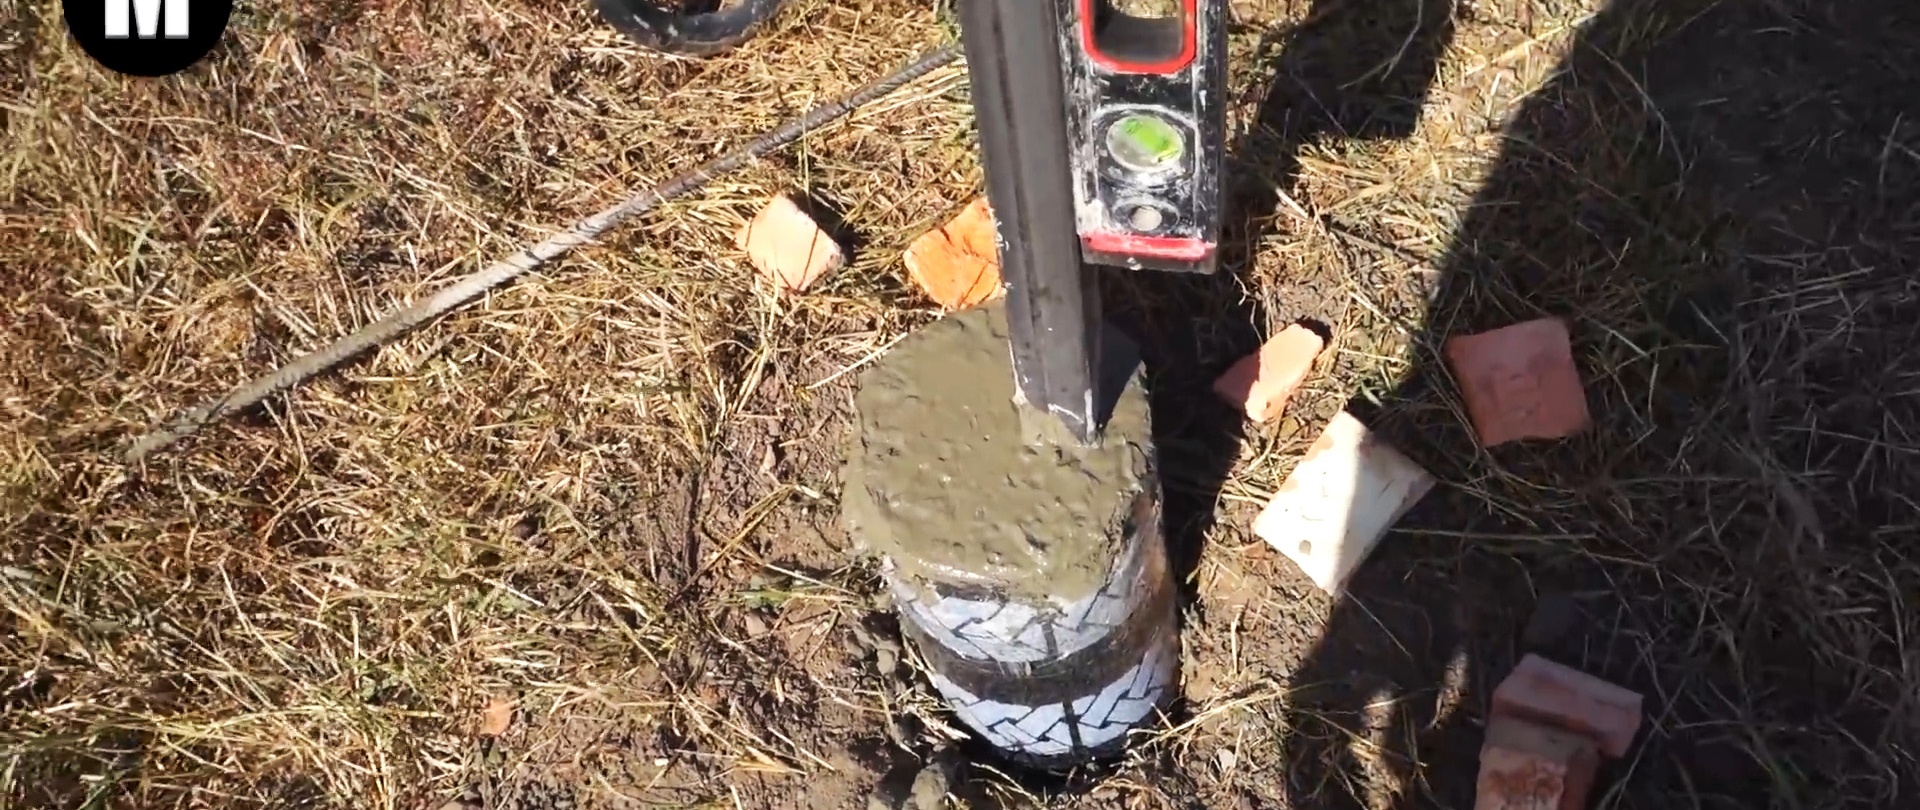
We pour 3 plastering buckets of concrete into the bottom of the pit with roofing felt, insert a post, center it using a level gauge and continue pouring concrete, periodically removing air using a rod from the reinforcement. We also place broken bricks in the liquid concrete to spread the pillar. We wrap the top of the roofing felt with tape to prevent the top of the roofing felt from bursting.
We put more concrete on top and make a mushroom shape so that rainwater or moisture from melted snow flows down the concrete and gets into the soil, rather than accumulating around the post.
It is more practical to first install 2 outer pillars, stretch a rope between them at the bottom, and then level each intermediate pillar. After the posts have been left in place for a week, you can hang a fence made of any materials on them.