A burner, or a compact stove, is a necessary thing on a hike. Or, it would be more correct to say; comfortable. Heat canned food or boil water to steam freeze-dried food or make tea.
There is no need to light a fire every time you want to sip some hot tea. Someone will probably say that you can take a thermos with boiling water with you. But a thermos is a bulky and heavy thing, and when hiking, every gram of weight in your backpack counts! The tile does not take up much space; it, along with a supply of alcohol, can easily fit into the same aluminum mug, for example. And getting water in the forest is not a problem - in summer and autumn in any stream. In winter, if you don’t want to dig a hole in the ice, there is a lot of snow on the branches. Buying a burner is also not a problem. There are so many species today! Alcohol, gas, wood chippers, large and small, etc. A gas stove is only good in summer, because in winter, at sub-zero temperatures, not a single gas canister can be lit. The gas just freezes! Tested many times! The price and brand of the gas cylinder do not matter in the cold! The most reliable burner for winter hiking is an alcohol lamp.And better than a home-made burner, in which you will be one hundred percent confident!
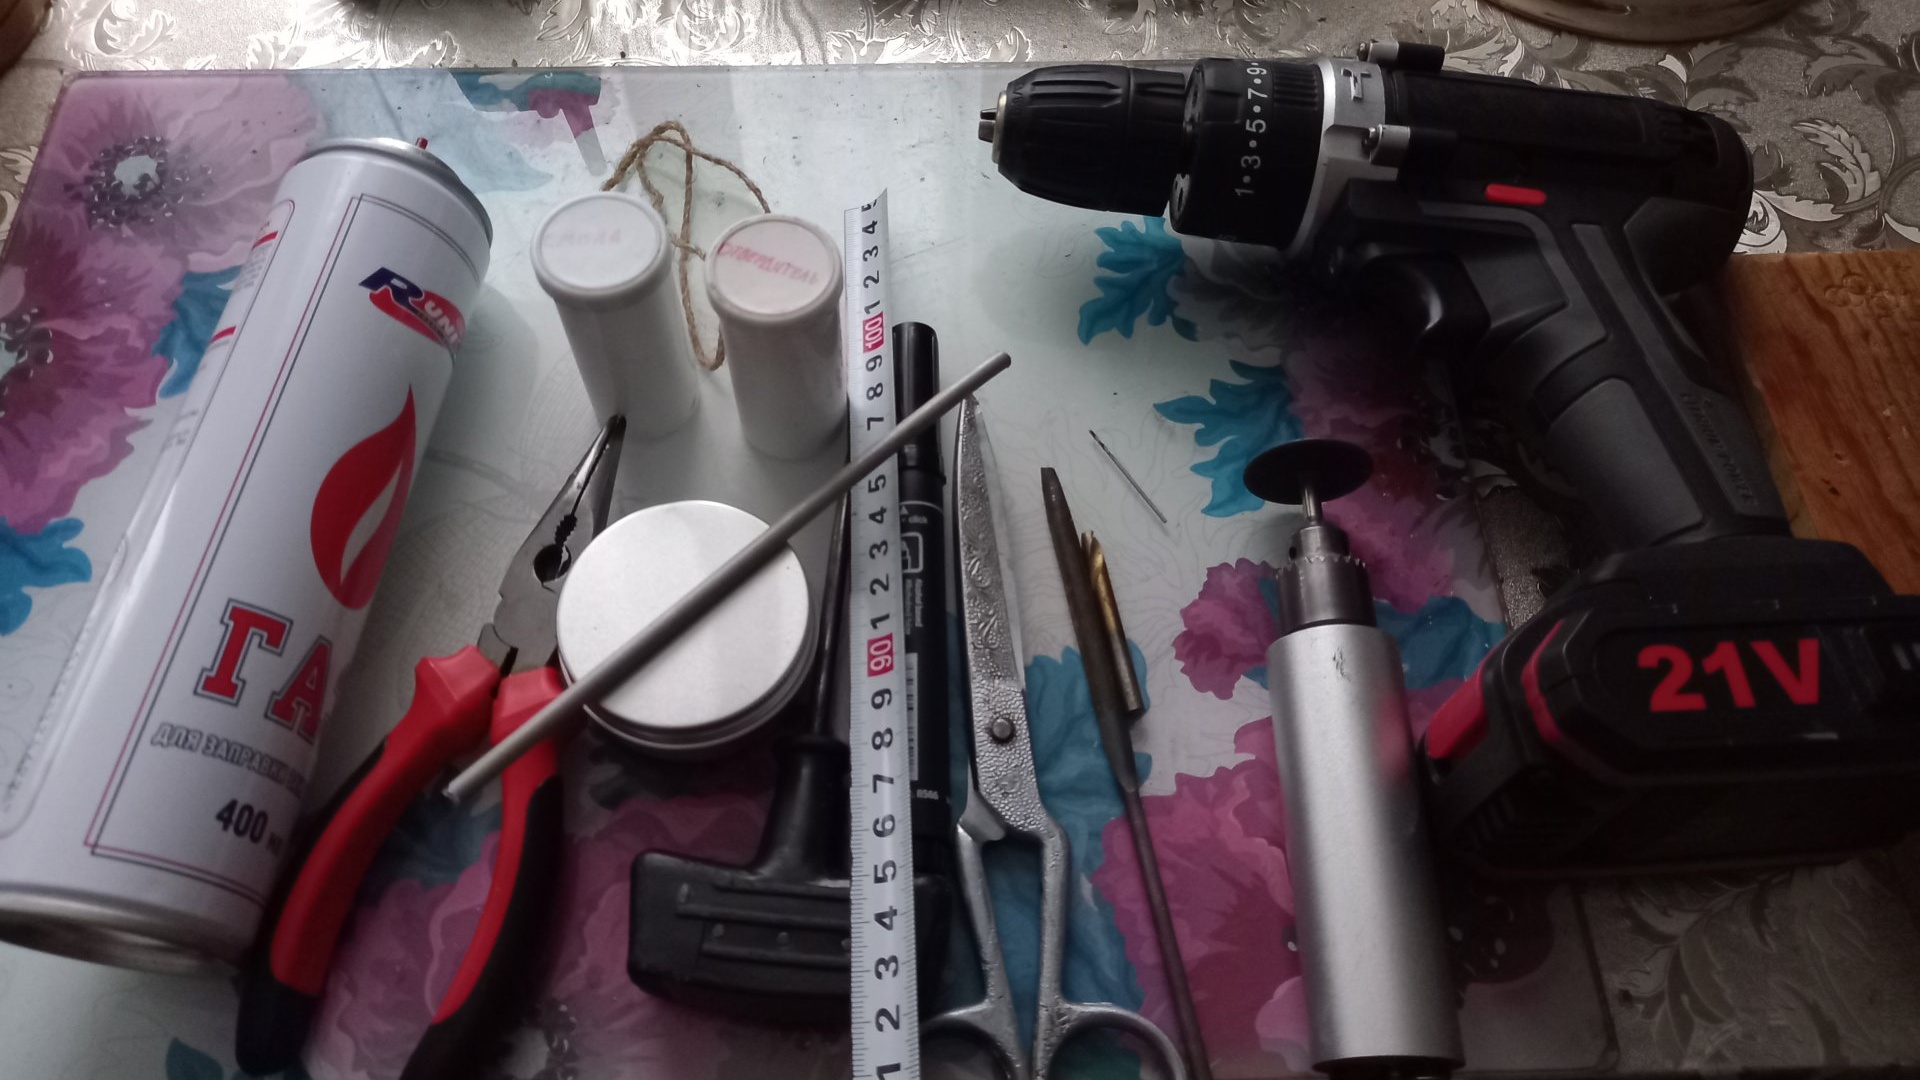
Will need
- An empty deodorant or gas bottle.
- Small metal container with a screw-on lid, 50-60 ml. With a diameter slightly larger than the empty container you selected.
- Aluminum or copper tube, 4-6 mm in diameter.
- HB, or linen rope, to fit the inner diameter of the tube.
- Needle file.
- Scissors.
- Ruler and marker.
- Awl.
- Pliers.
- Two-component adhesive, heat-resistant.
- Engraver or drill.
- Drills, one for 1mm, and the second for the thickness of the tube.
- Alcohol 96%
Making an alcohol burner
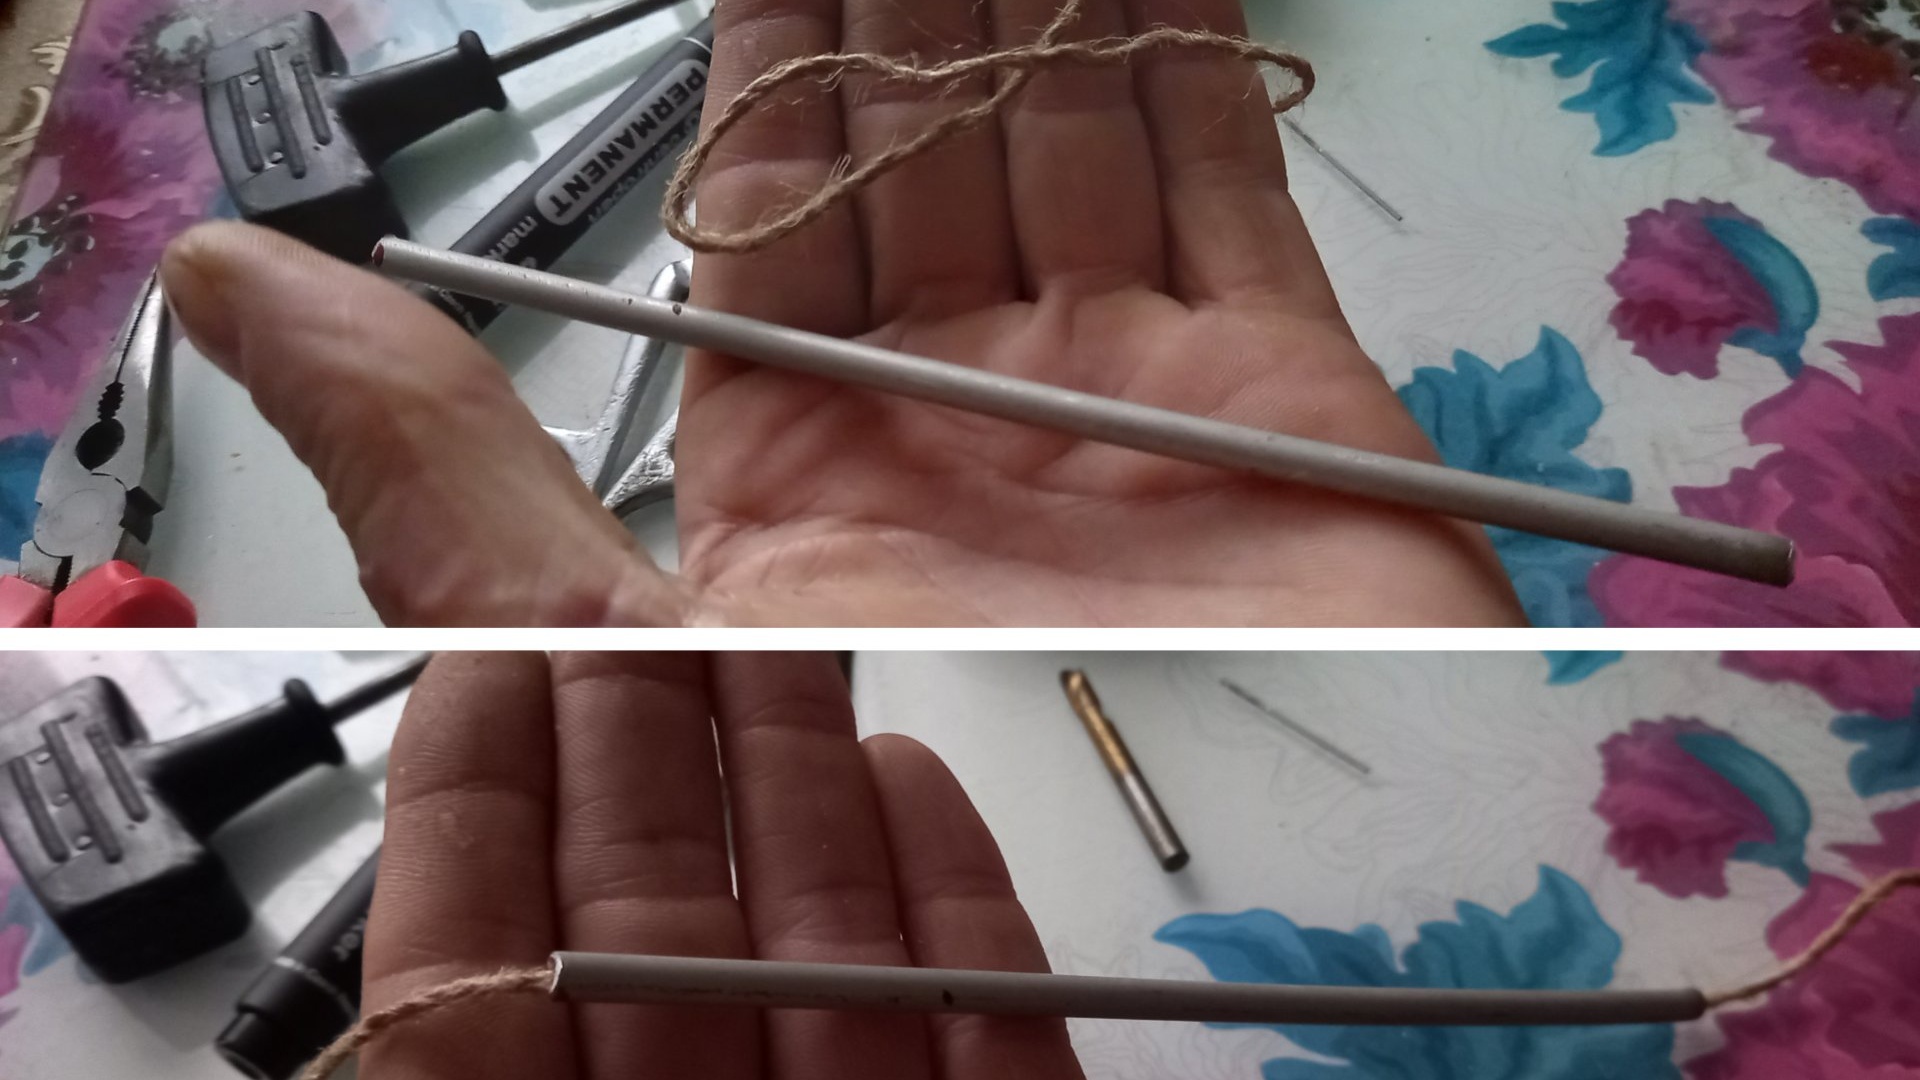
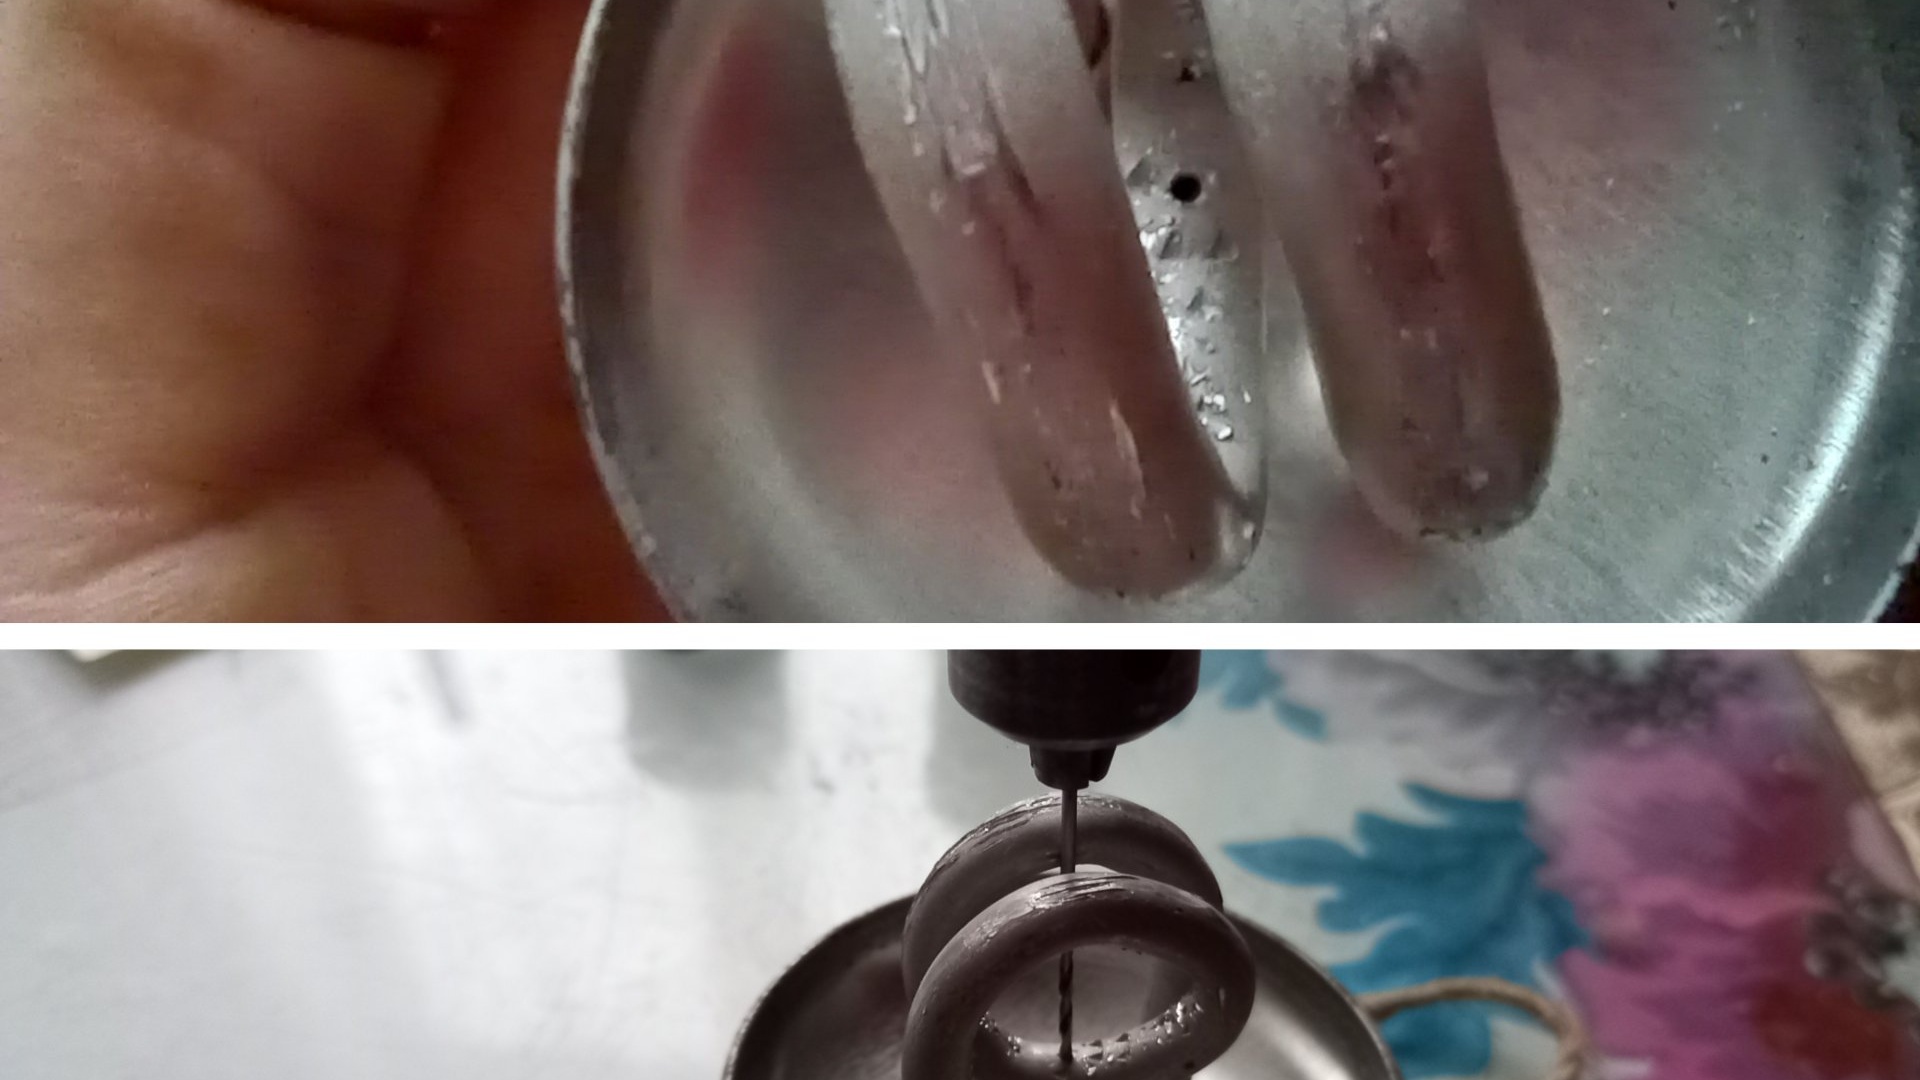
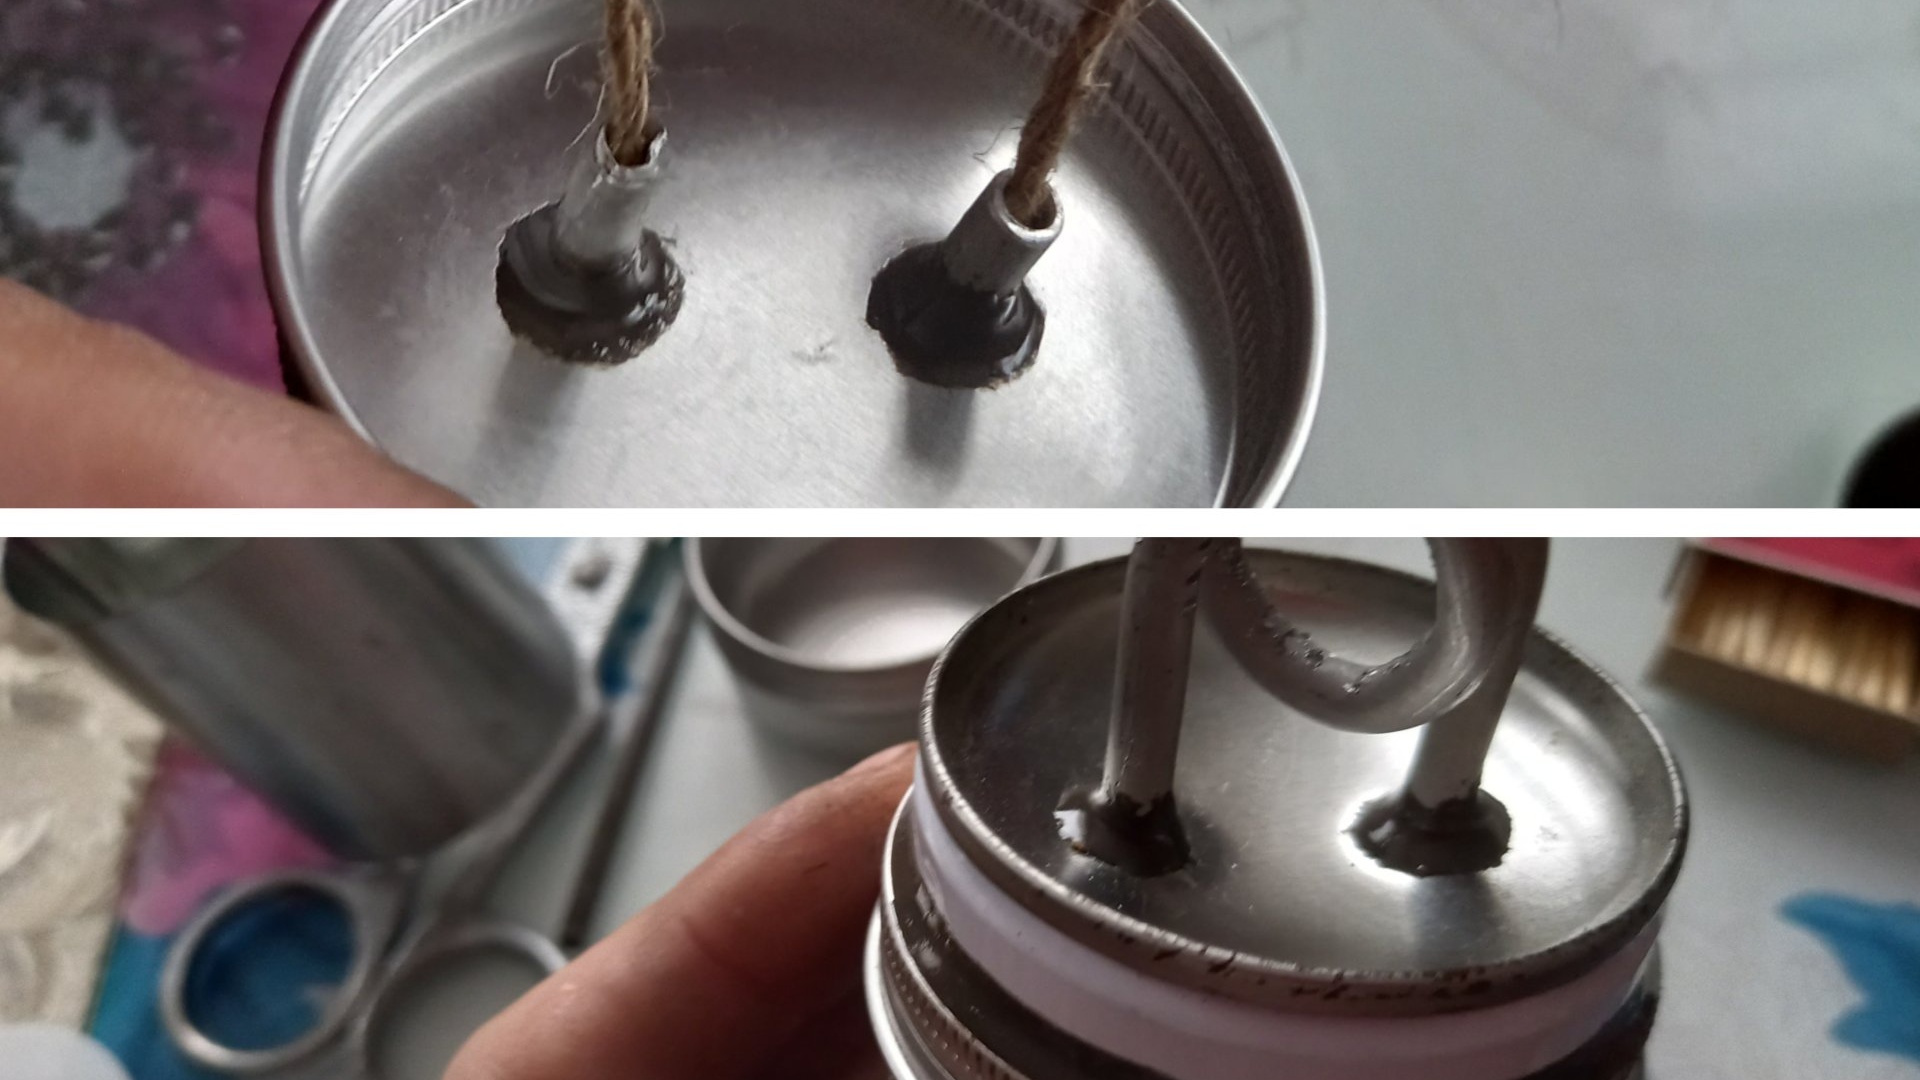
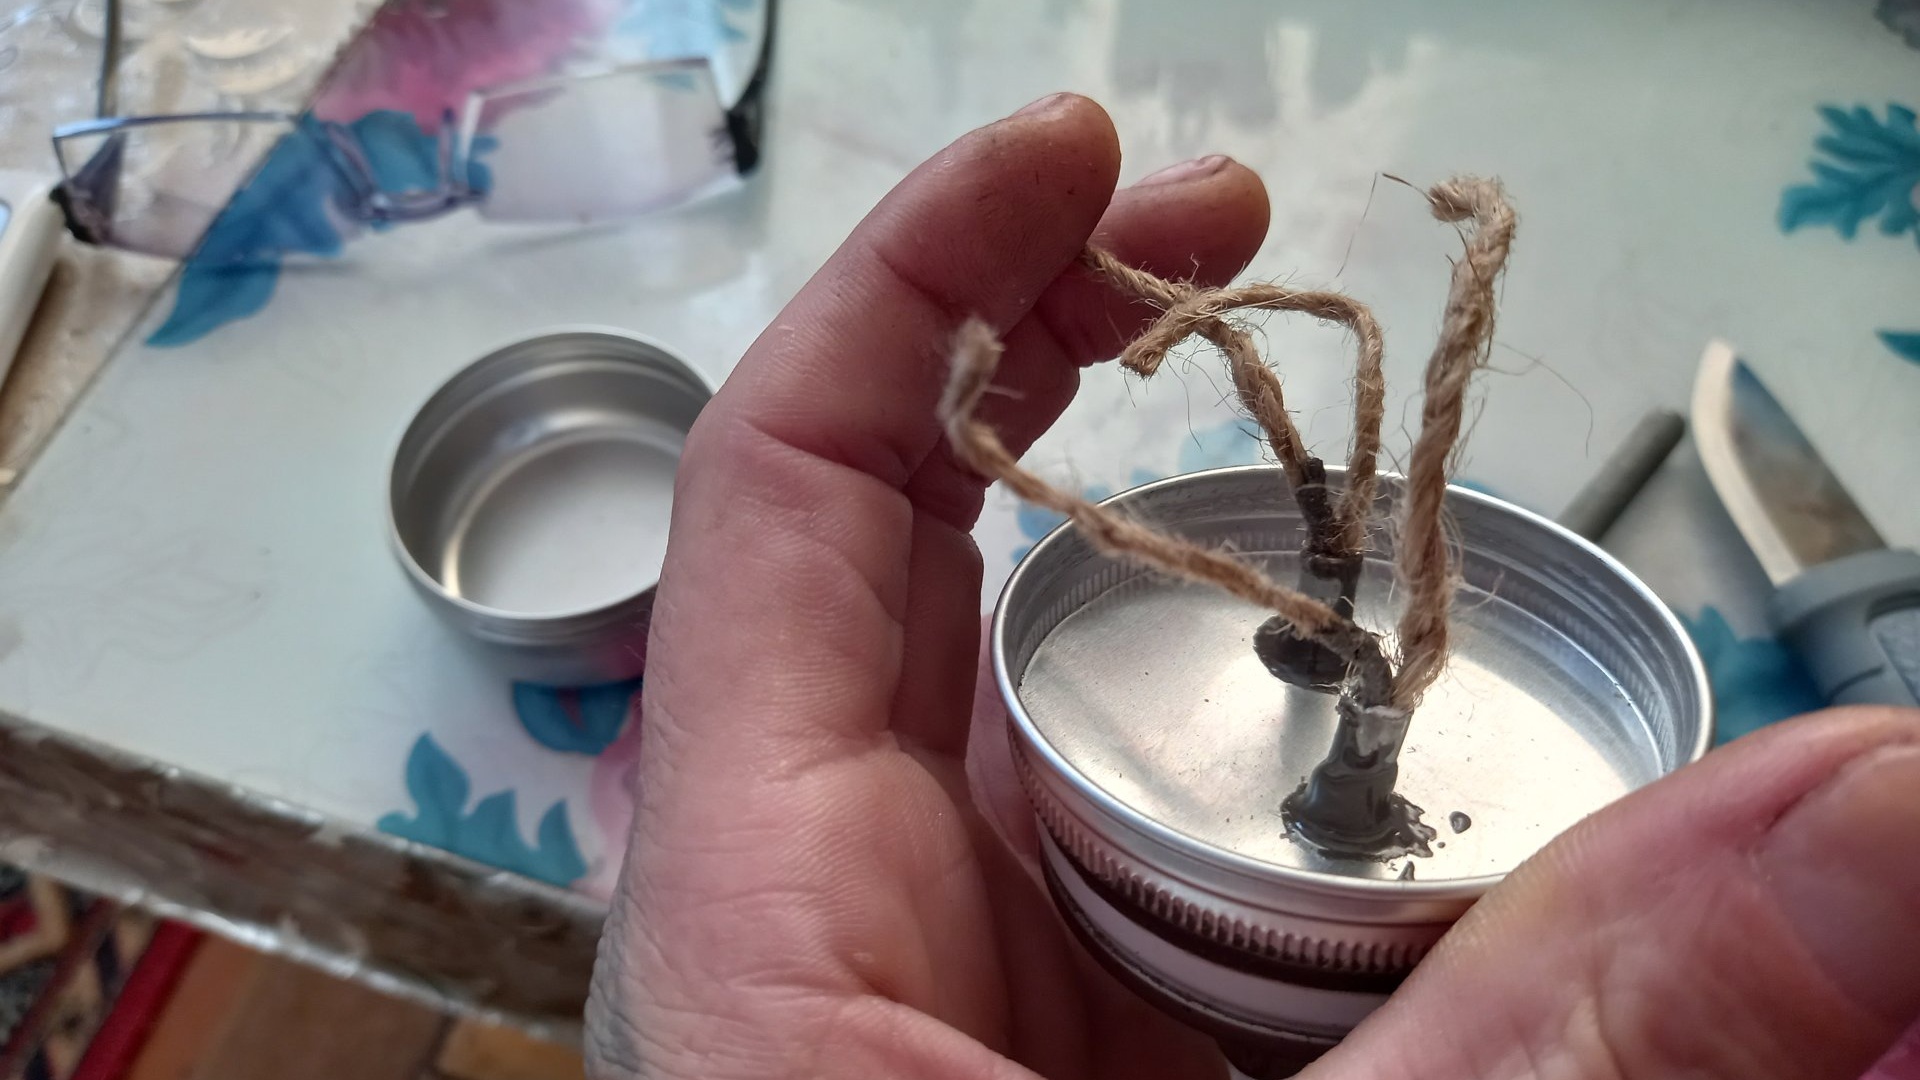
First, let's make a heating element that will evaporate alcohol and support almost reactive combustion of alcohol vapor. To do this, we thread the prepared linen rope into the tube so that there is a reserve of rope of about 5-7 centimeters at both ends of the tube.
Next, using pliers, twist the tube into a single spiral.
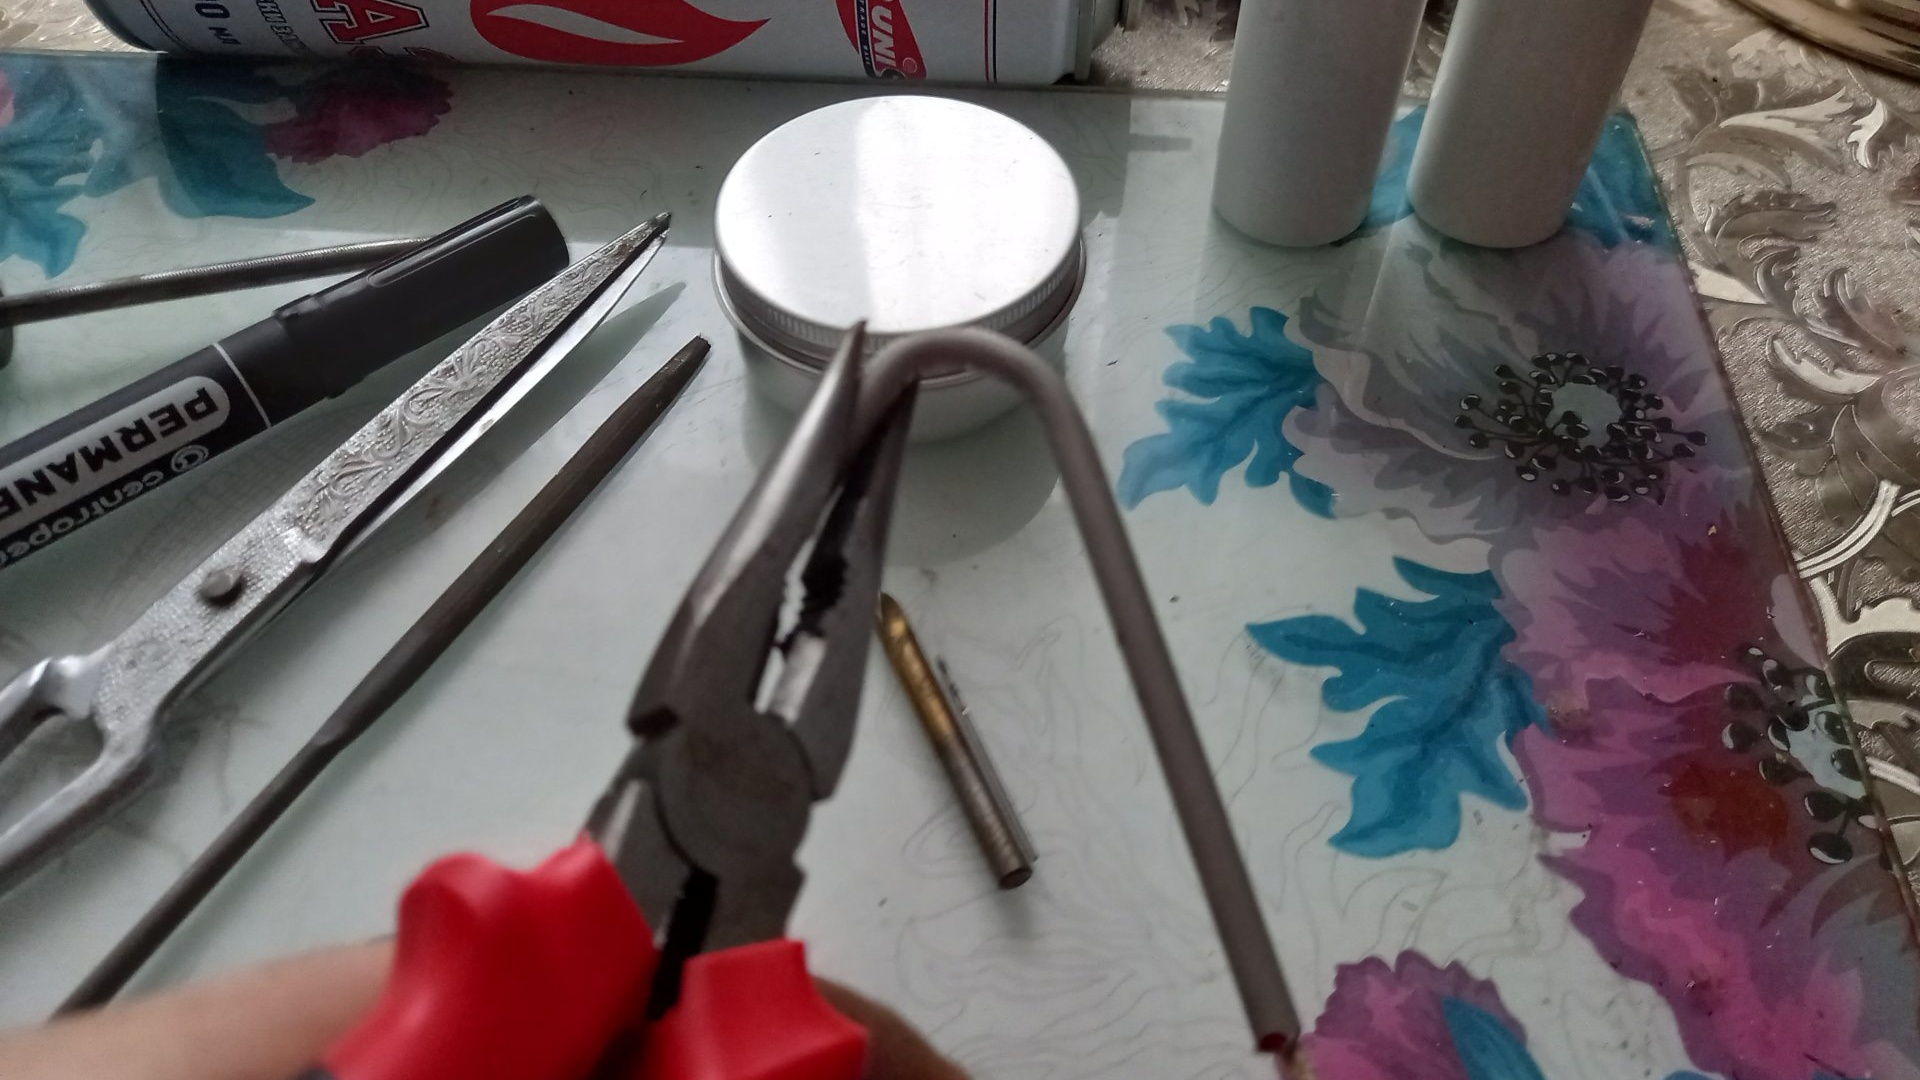
This is what it looks like, a squiggle.
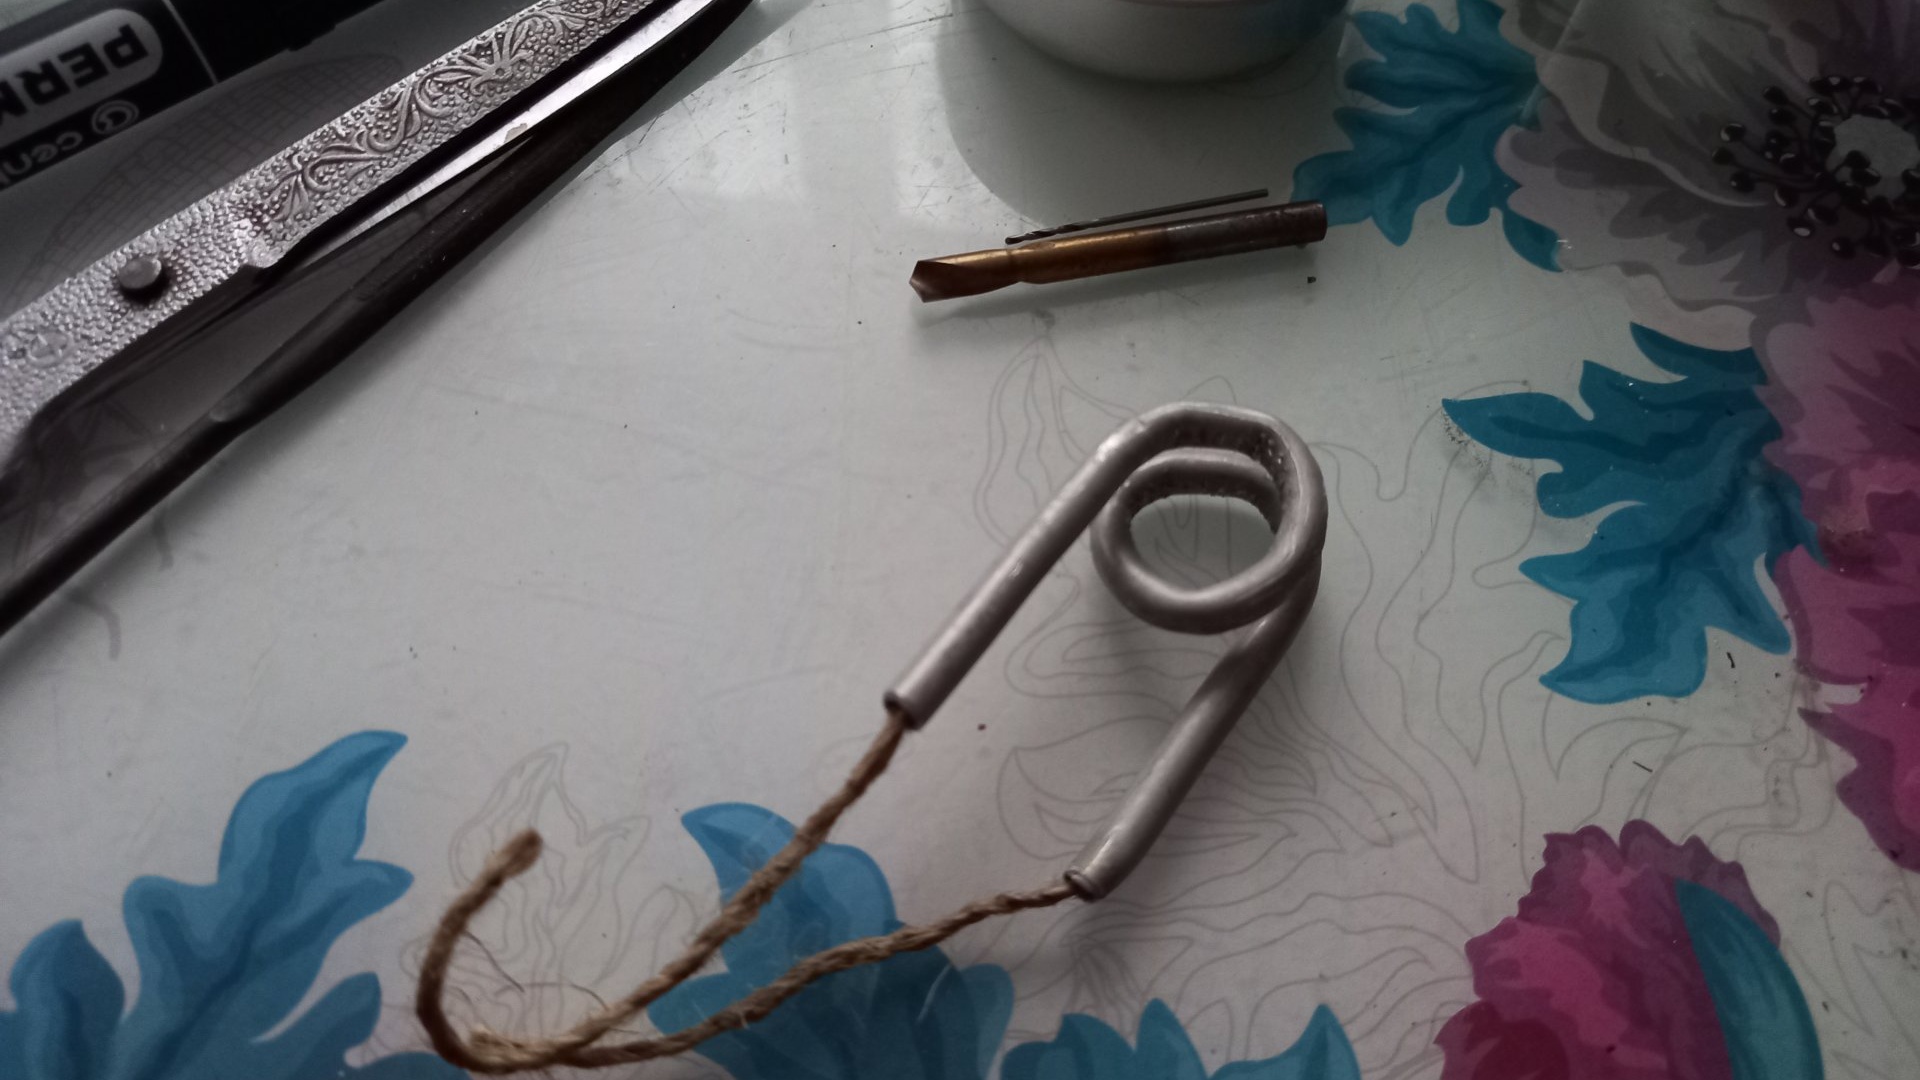
Then you should drill a thin 1mm hole in the middle of the spiral, from the inside. STRICTLY at right angles! So that later, when heated, the flame jet shoots exactly vertically, between the turns of the spiral. We spread the spiral turns 3-4 millimeters apart from each other and drill.
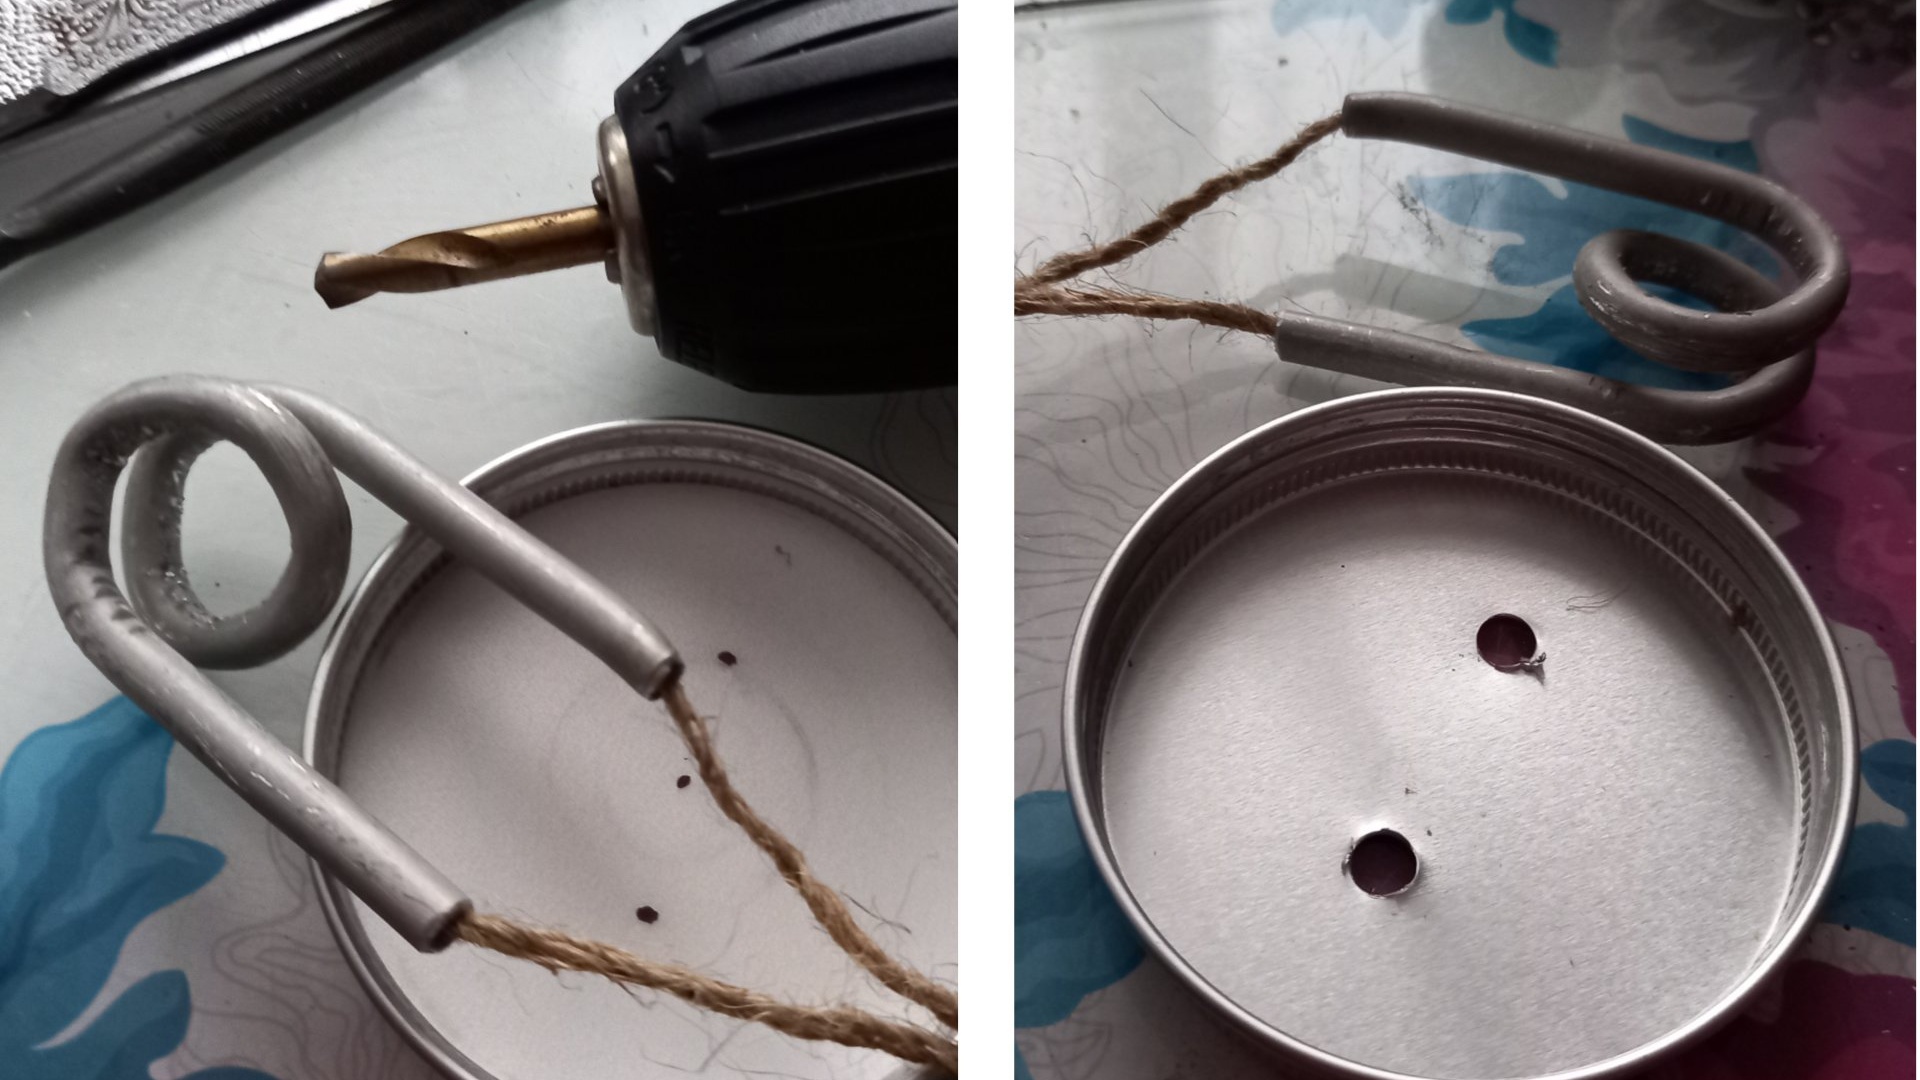
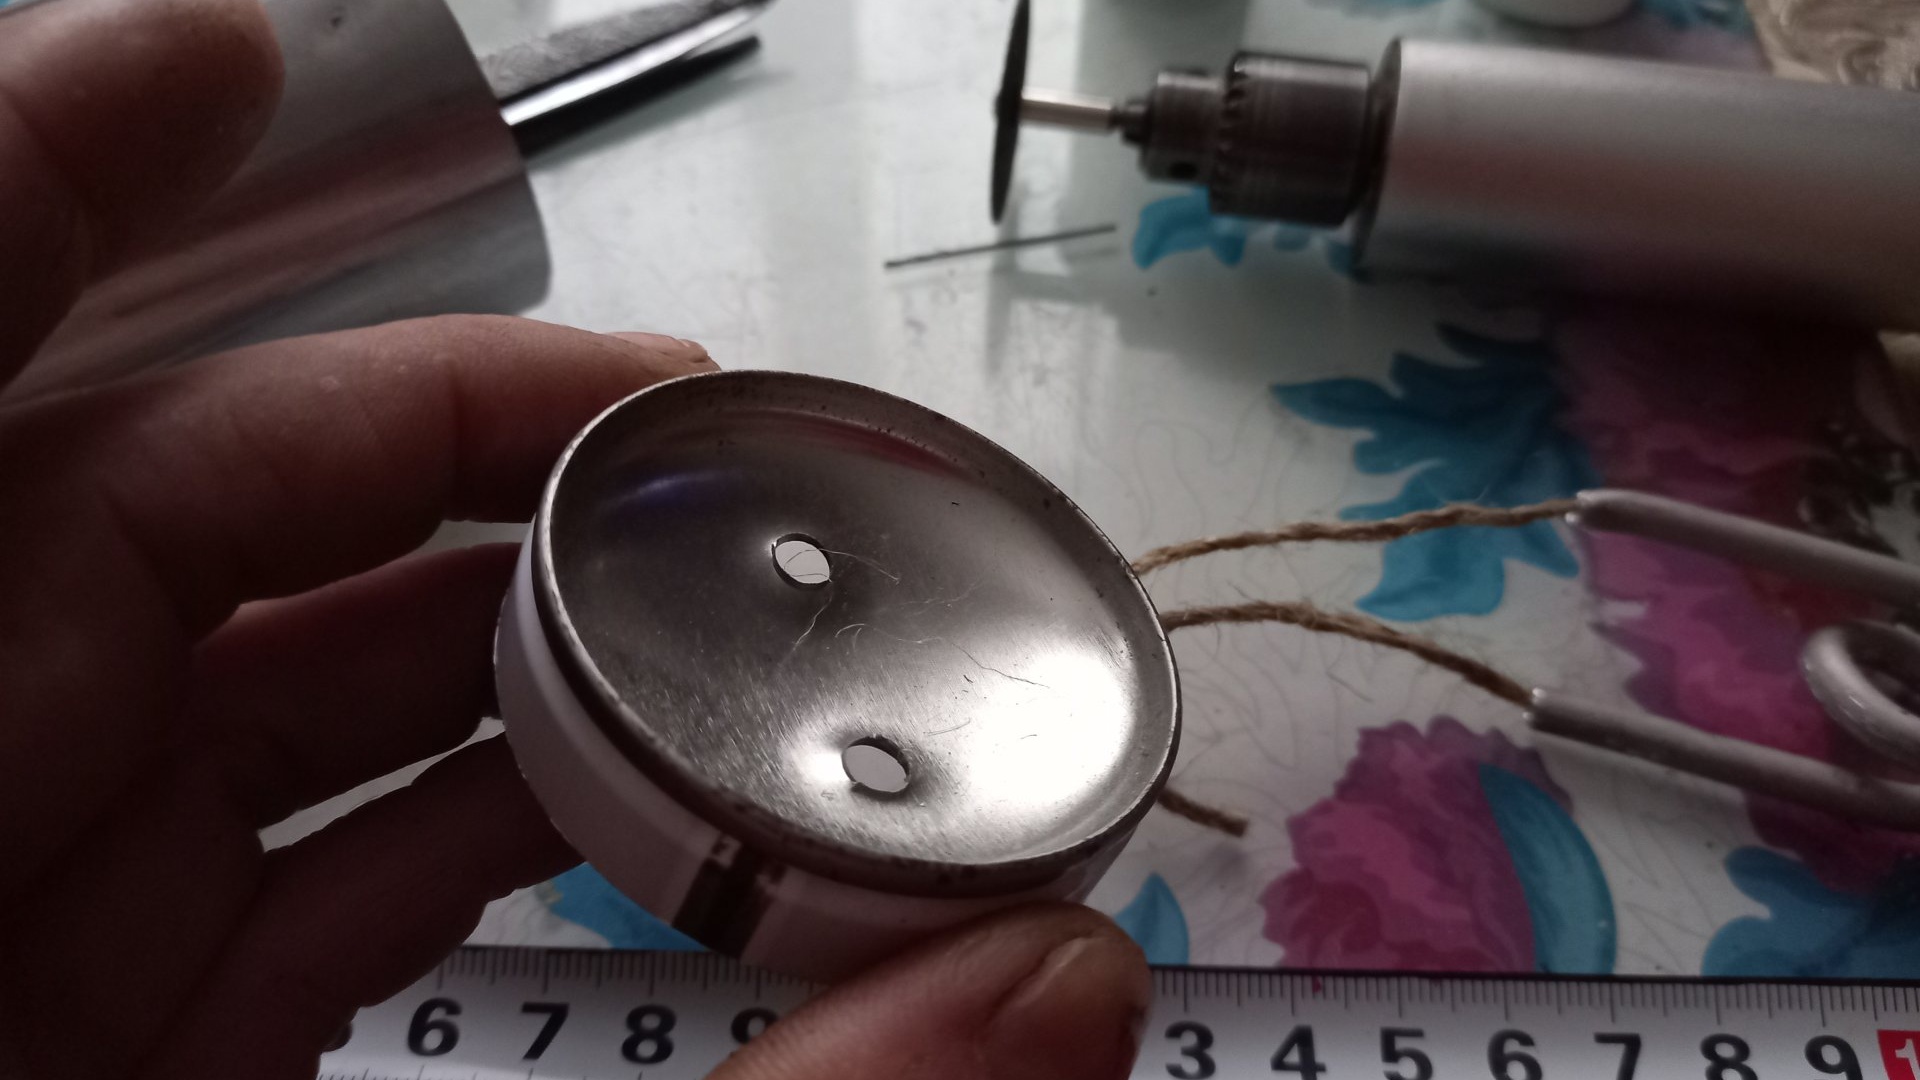
Next, prepare a container for alcohol. We determine the center on the lid, try on the ends of the spiral in the center, mark the locations of future holes with a marker, and drill.

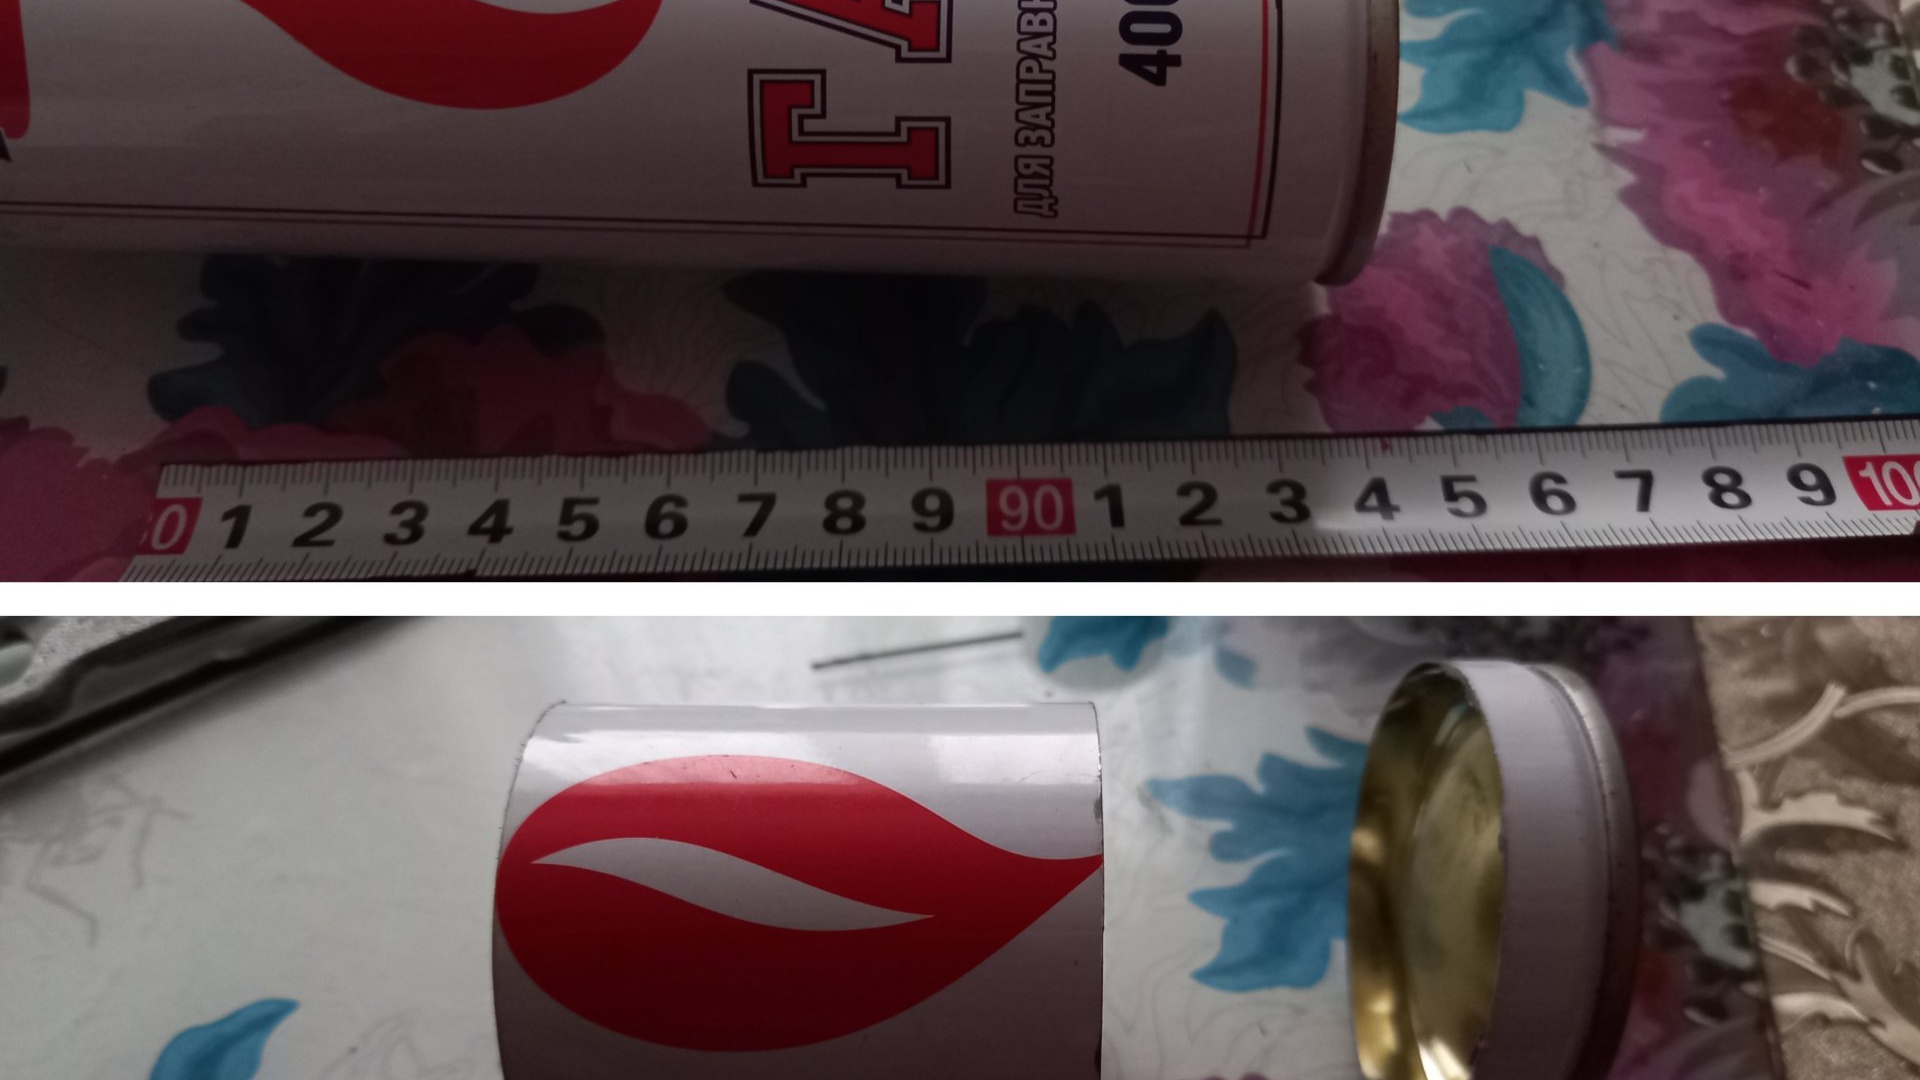
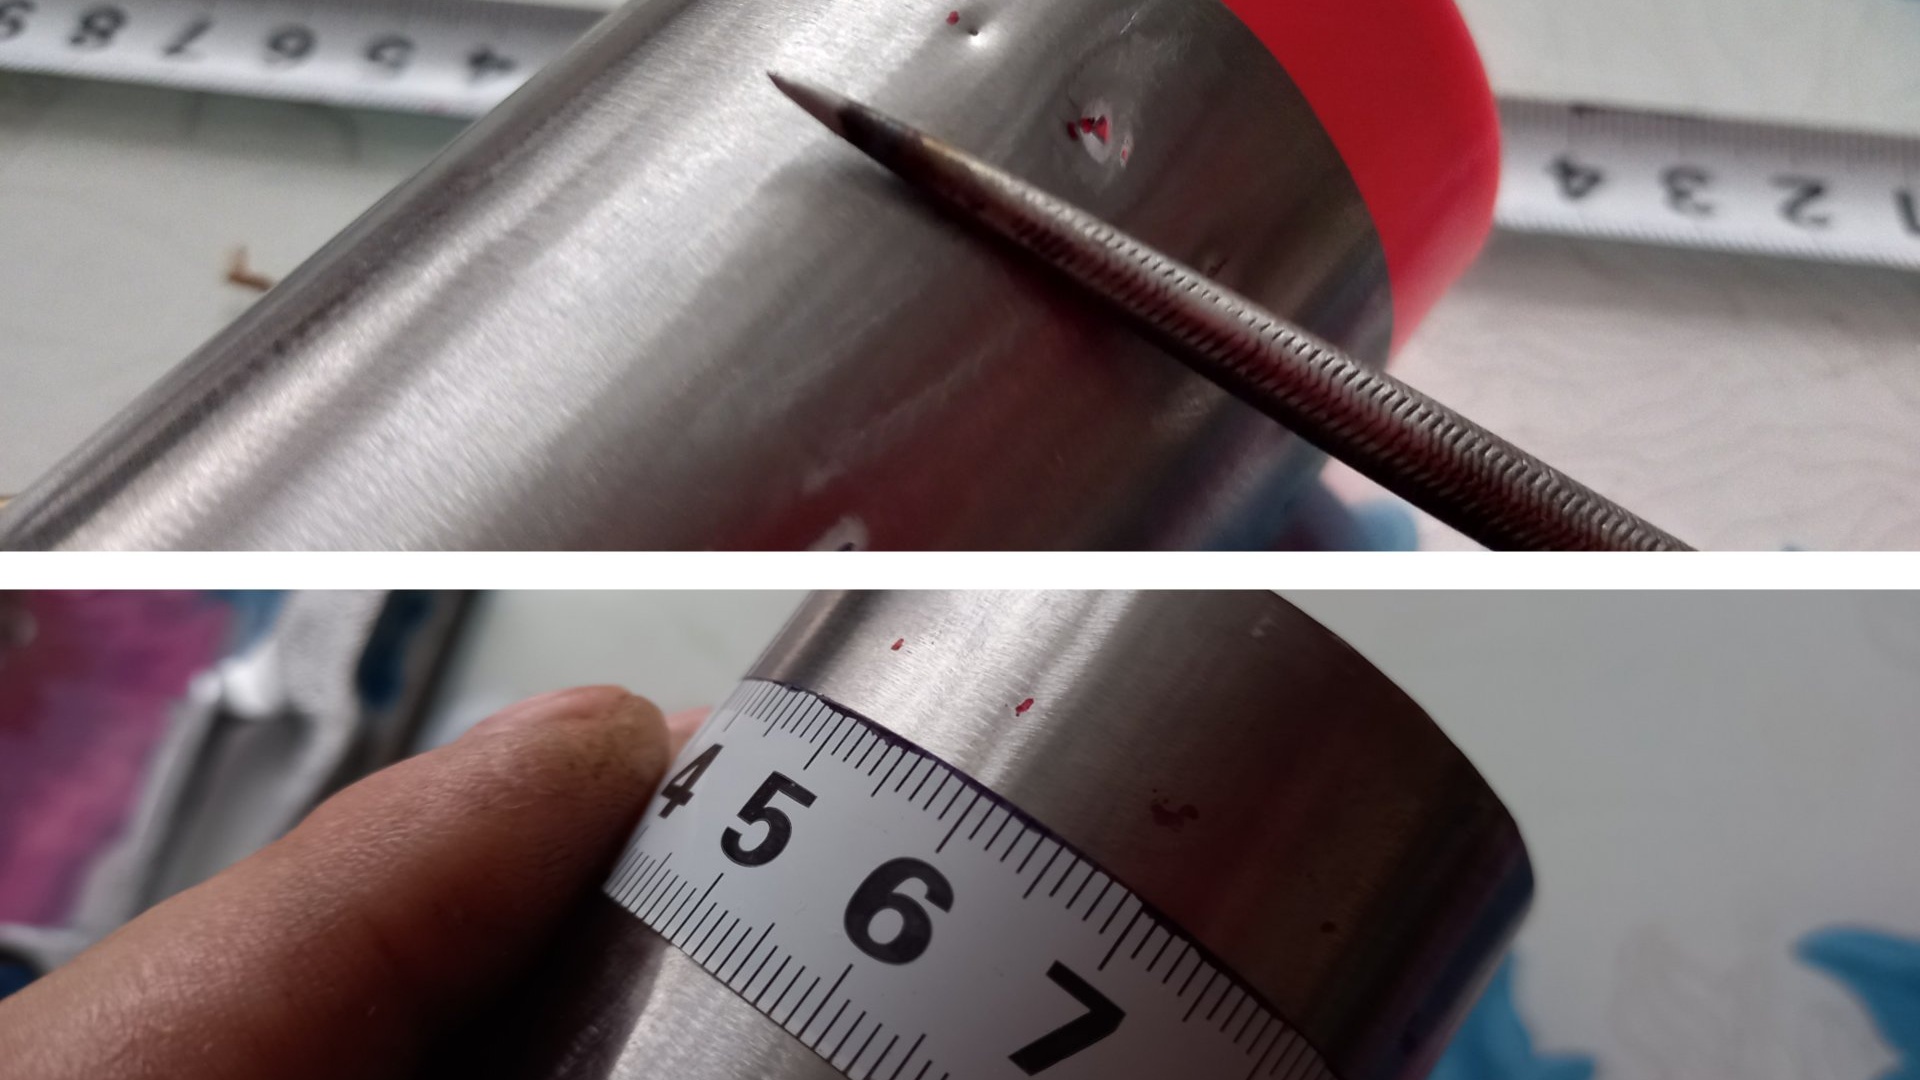
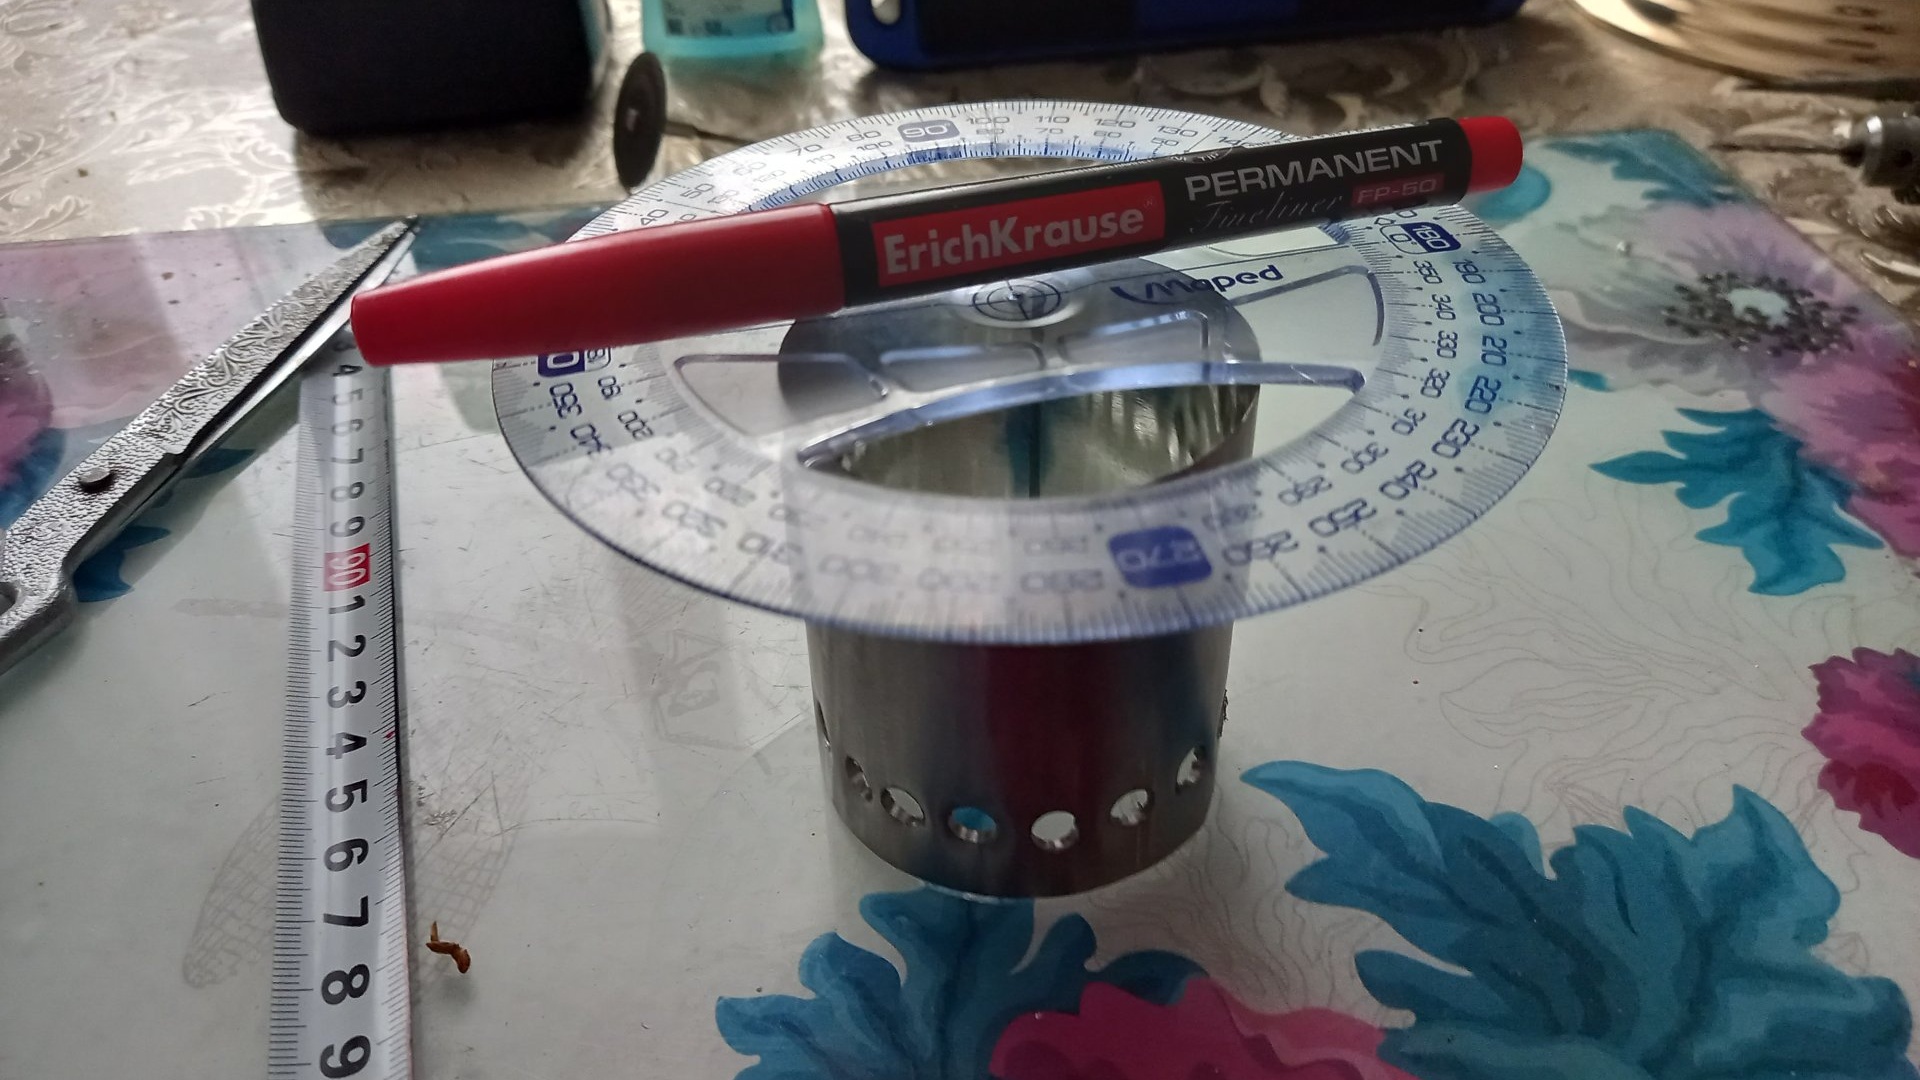
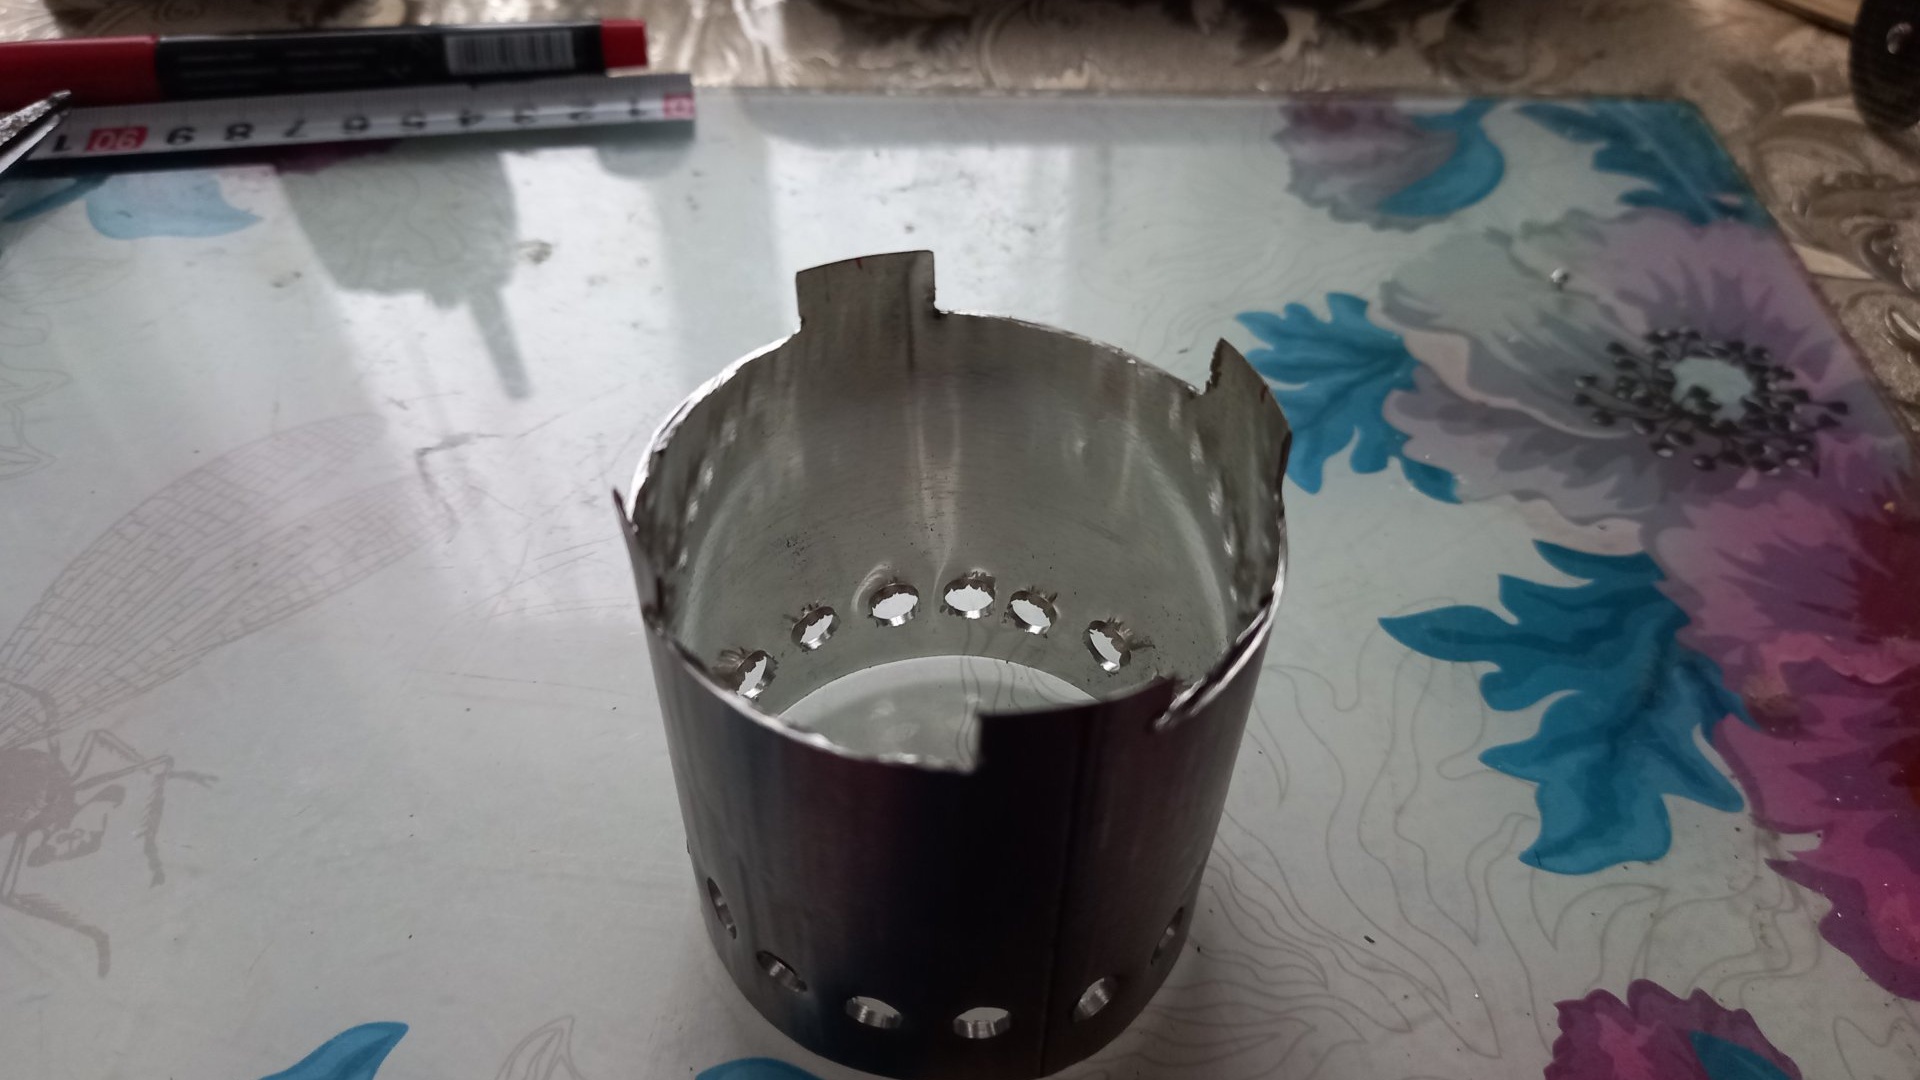
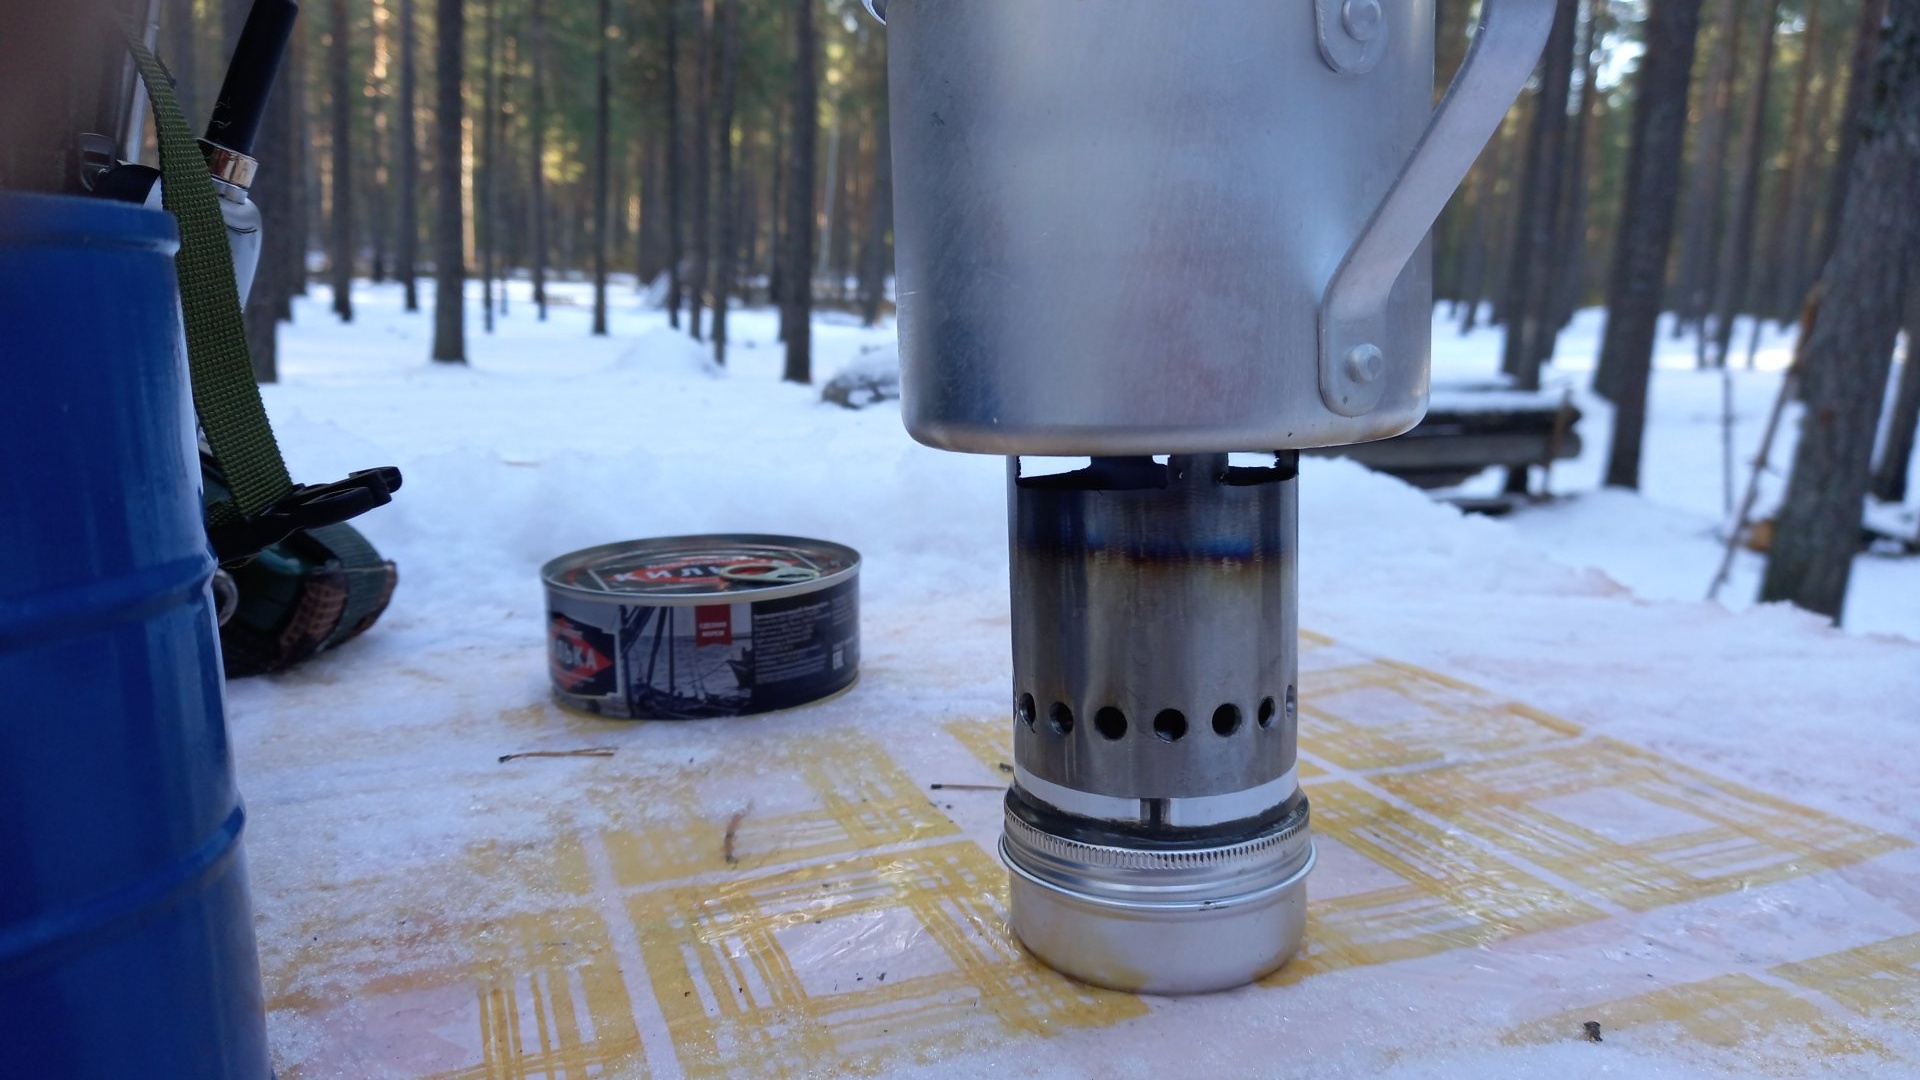
Now we will make a small tray from an empty container, between the container and the spiral. It is needed to pour a small amount of fuel into it and set it on fire, to warm up the coil and start the process of evaporation of alcohol. And, no matter what, there will be a layer so that the container itself heats up less.We will also cut out a stand for the mug from the balloon, which will also serve as protection from the wind. So, we measure 15 mm from the bottom of the cylinder and cut it off along with the bottom. And then we measure another 60 mm - this will be the stand.
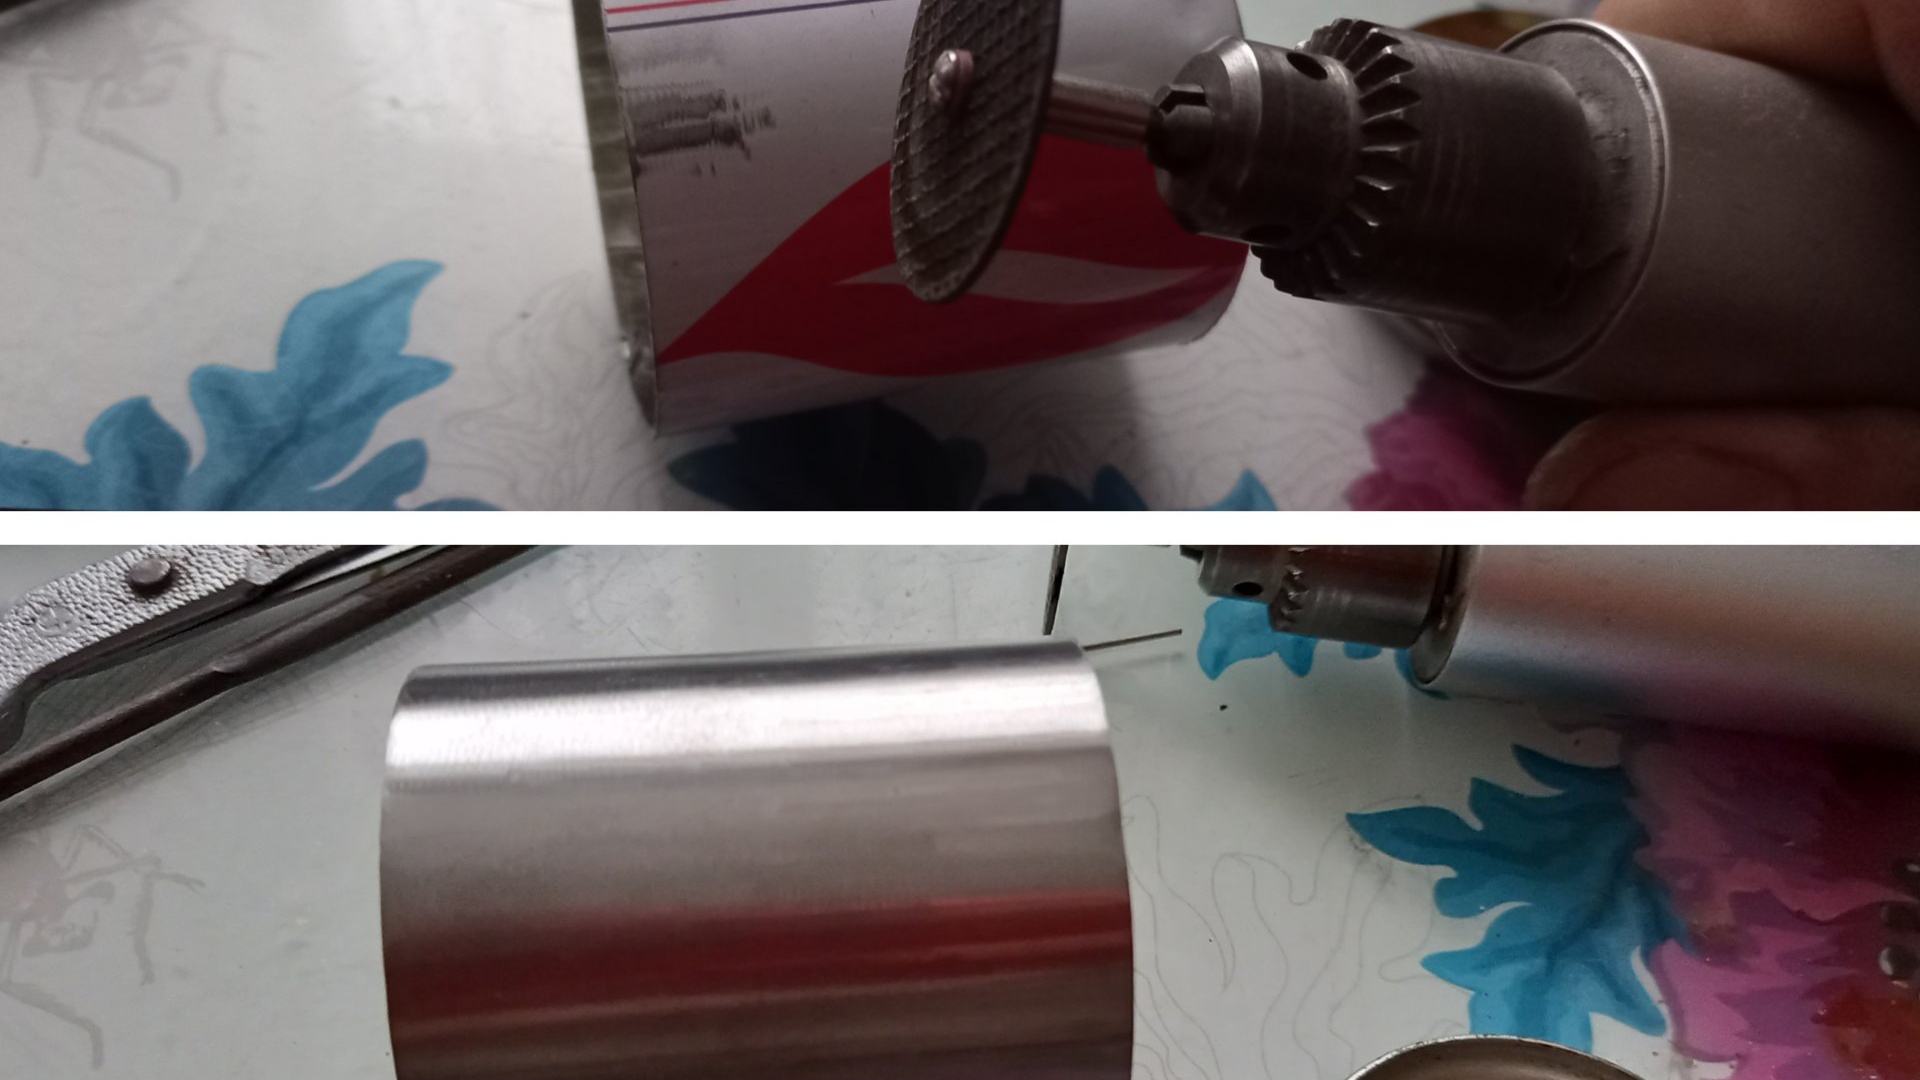
The future stand can be cleaned of the paintwork so that in the future it does not smoke until it is completely burnt.
Next, in the tray, also in the center, we drill a couple of holes for the ends of the spiral. Let's try it on.

We install the spiral 10-12 mm from the surface of the tray, put the lid of the container on the bottom, and try on the resulting heating part to the container itself. This is how it should turn out.
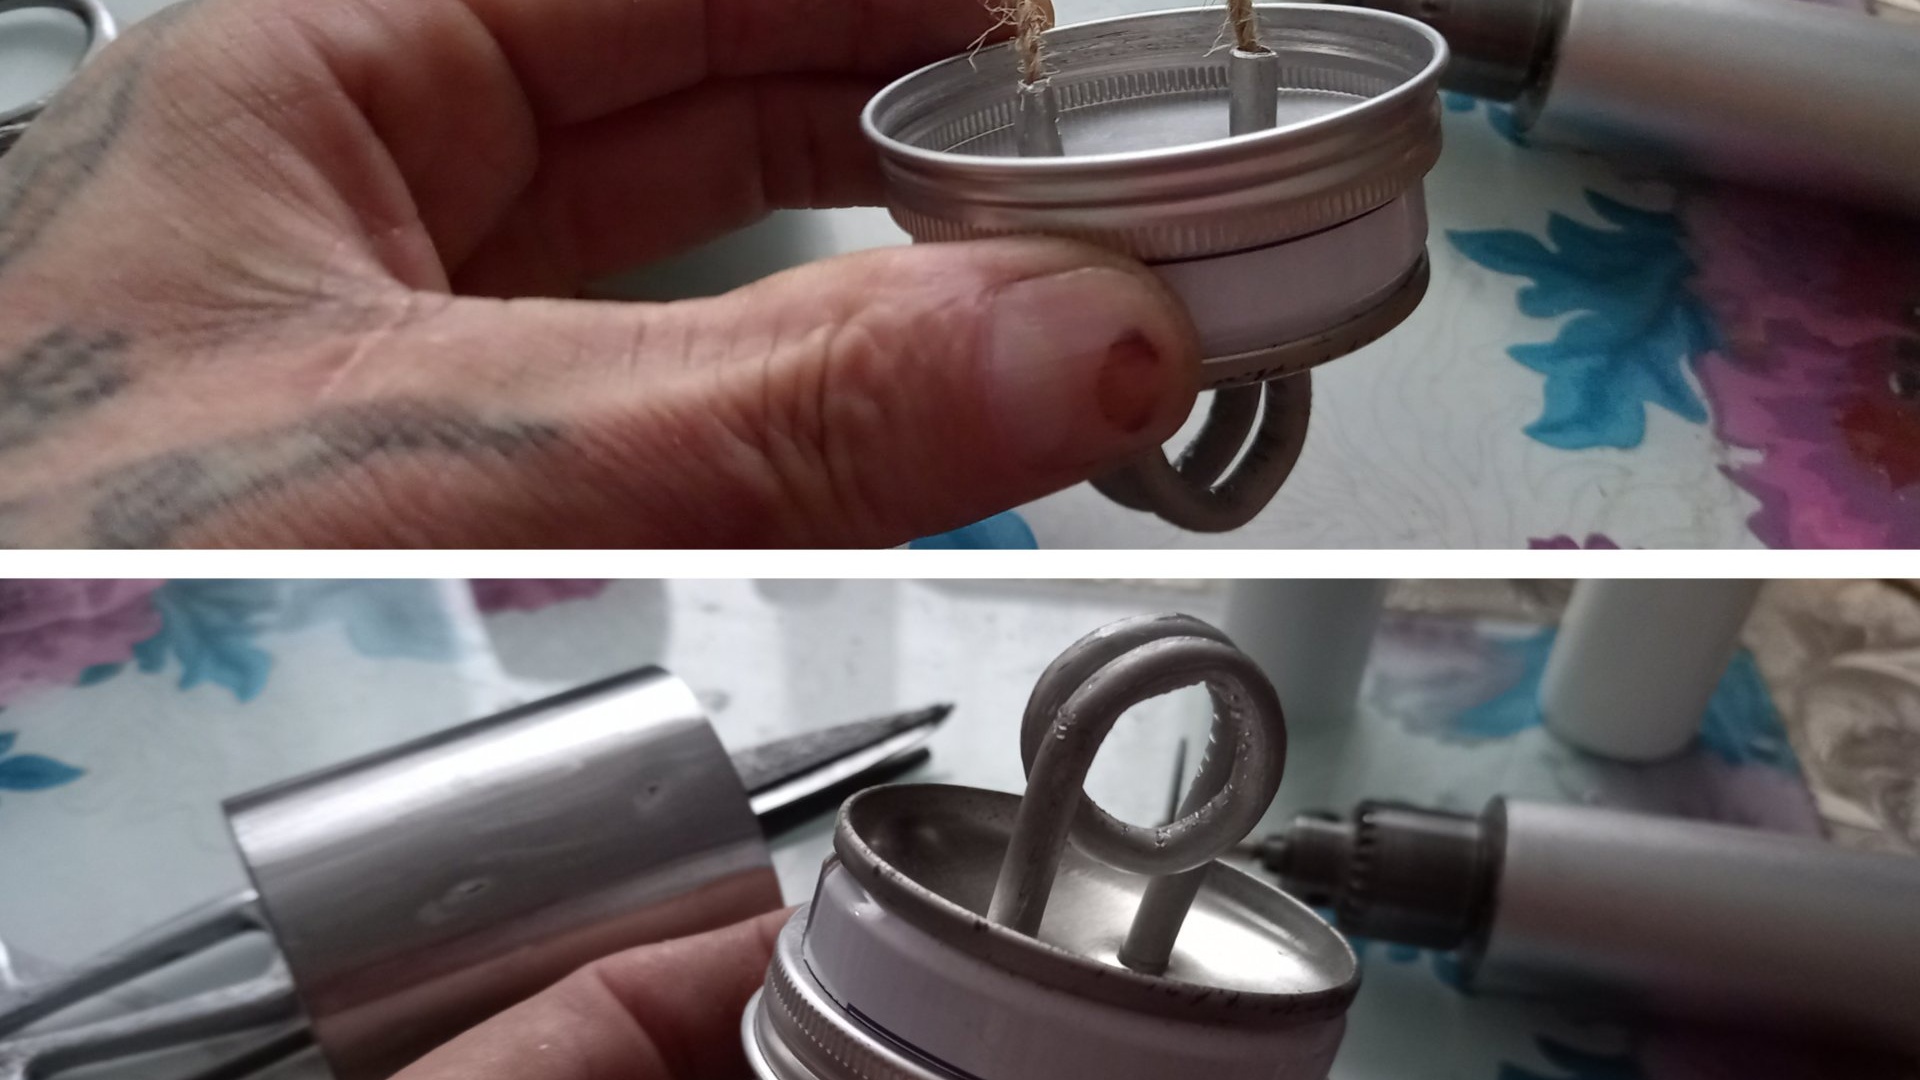
If everything is smooth and clear, then it is necessary to finally secure all the joints with heat-resistant two-component glue. Like this.
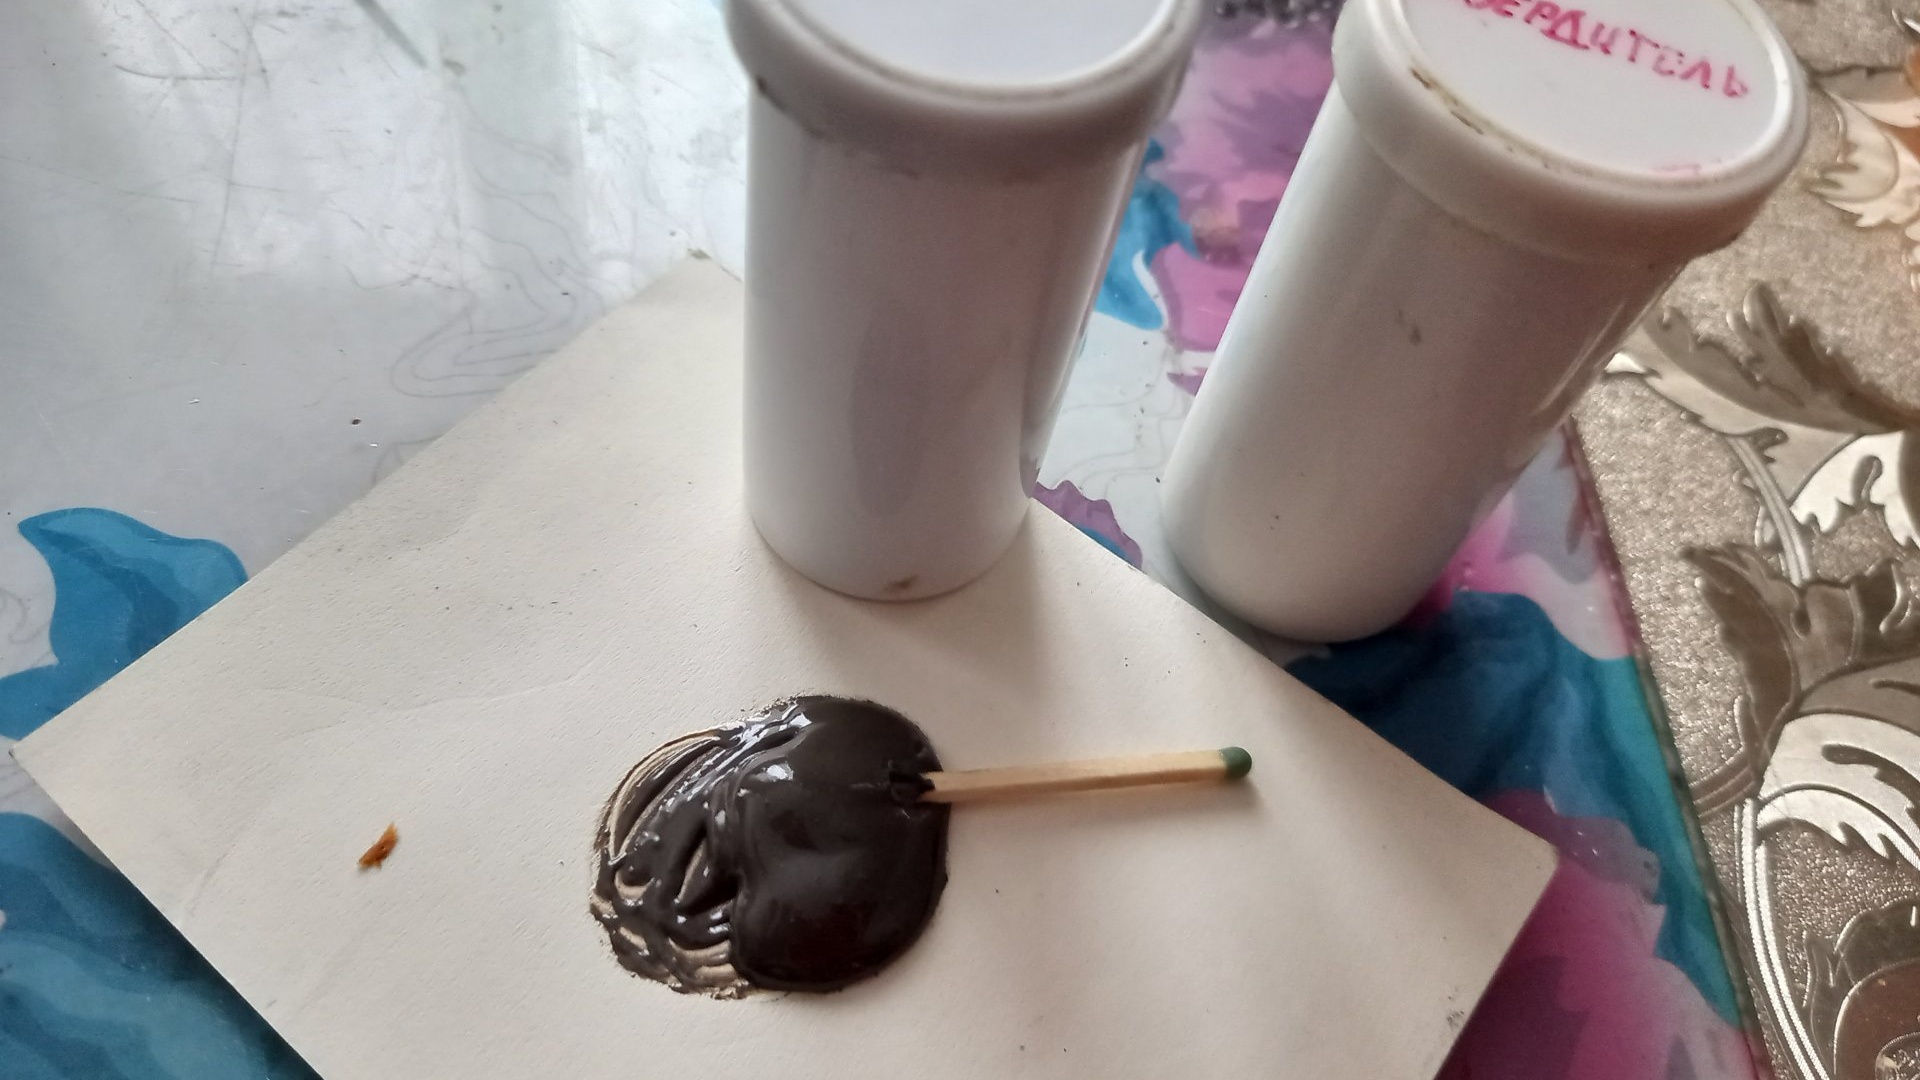
This glue can be purchased at any hardware store. It dries for at least a day, so we forget about the glued part of the burner, at least until the next morning. In the meantime, let's take care of the mug stand. The cut out 60 mm tube from the cylinder fits perfectly with the bottom of the same cylinder from which we previously made the tray, so all that remains for us is to drill along the lower edge of the air supply holes, every centimeter. Using an awl, we core the drilling points and drill with the same drill that we drilled the holes for the tube.
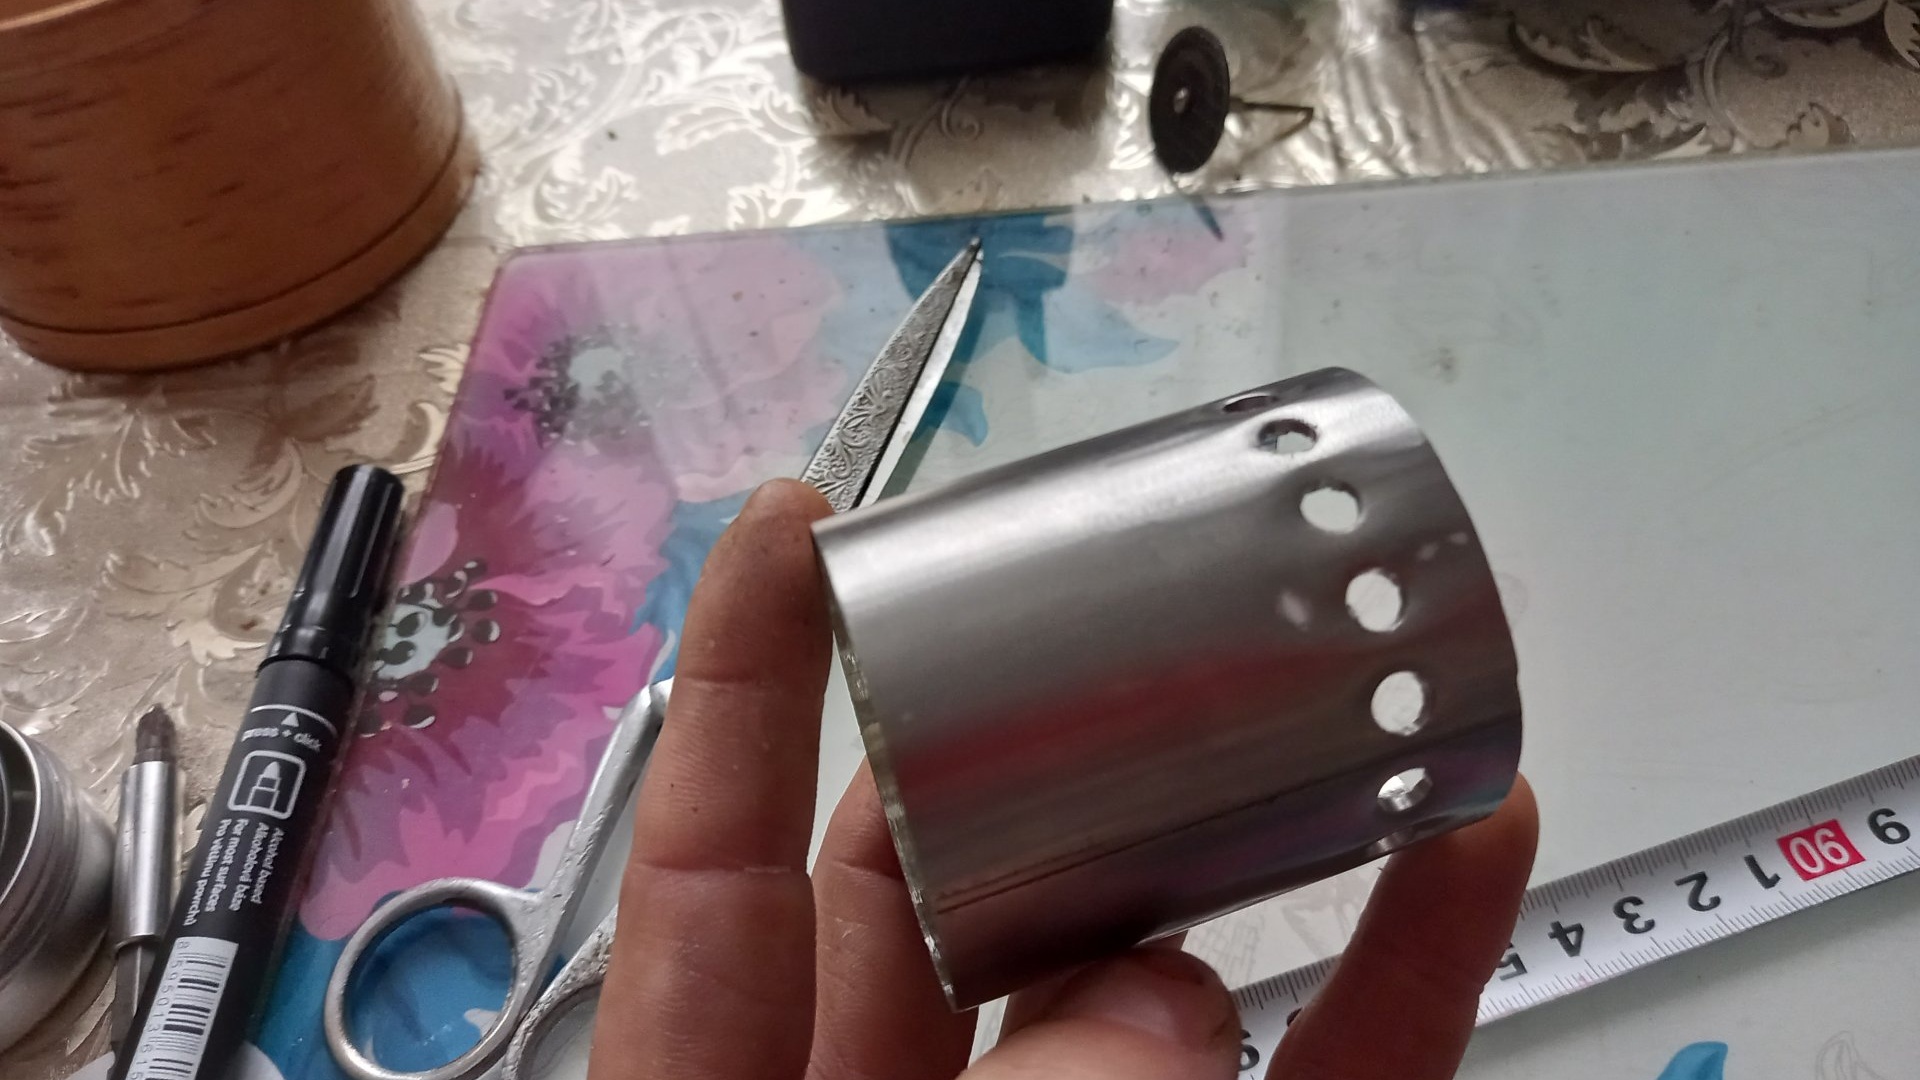
We also cut out something like the teeth of a tower on top so that there is a draft for the flame. Like this.
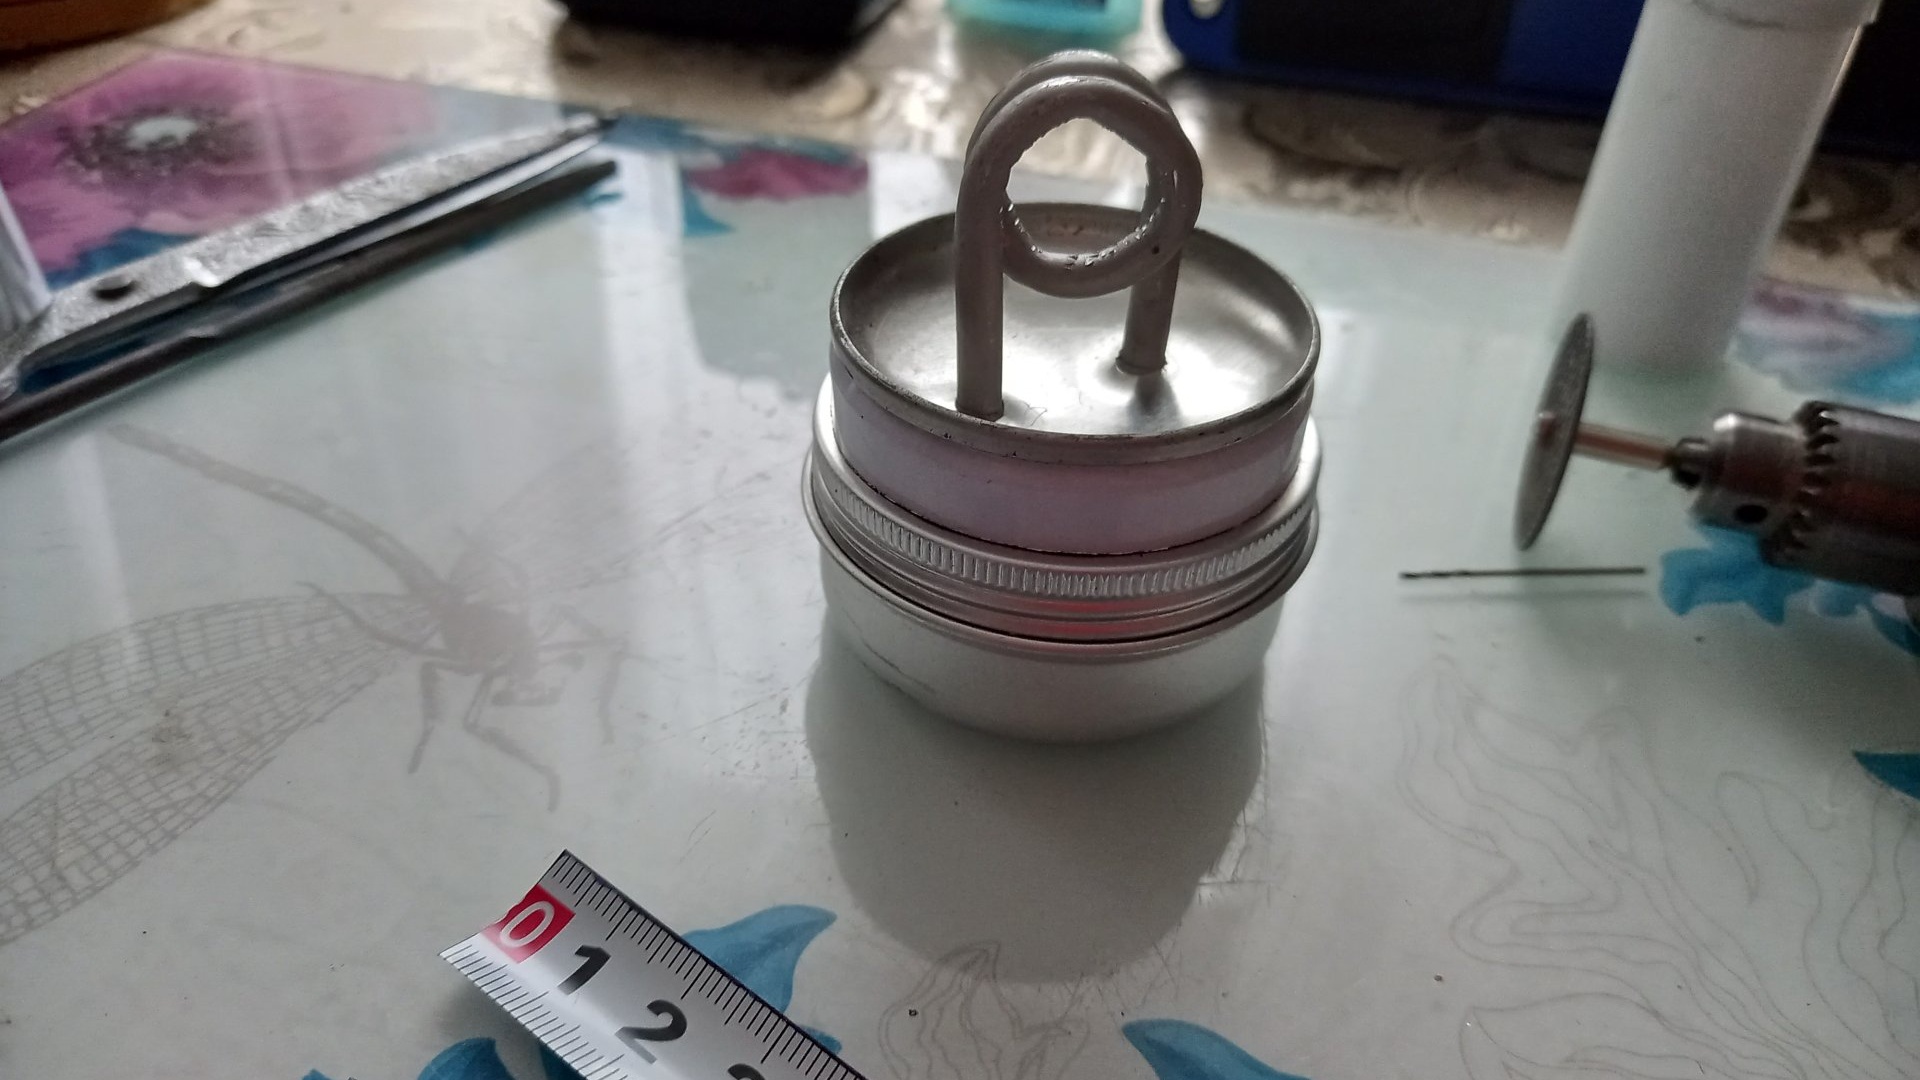
In the morning we check the successful (or not yet very successful) hardening of the glue. If the glue is hard and smooth, like polished stone, then everything went as expected. Let's try all the parts of the burner together.

To increase the absorption force, I tucked another piece of string into the ends of the tube with a round file. It will not be worse.
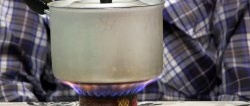
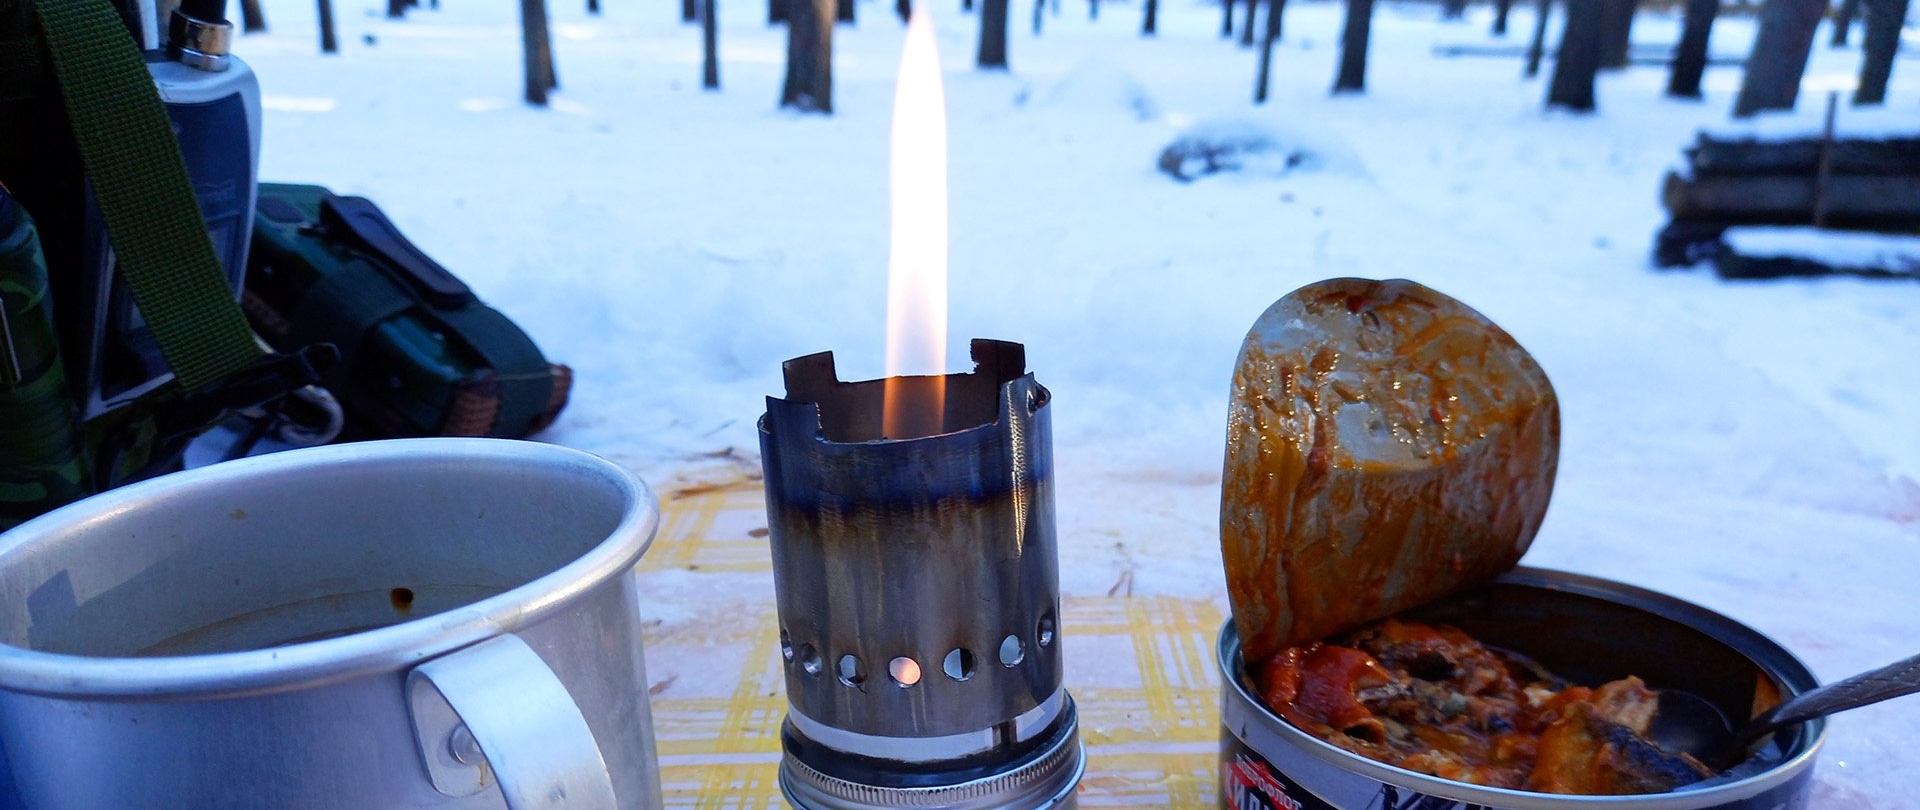
The time has come to test our creation.This coming weekend I went on a short hike and was very pleased with the results of the work done! I boiled half an aluminum mug of water (about 125 ml) in about 10 minutes. It took another 3 minutes to heat up the canned food.
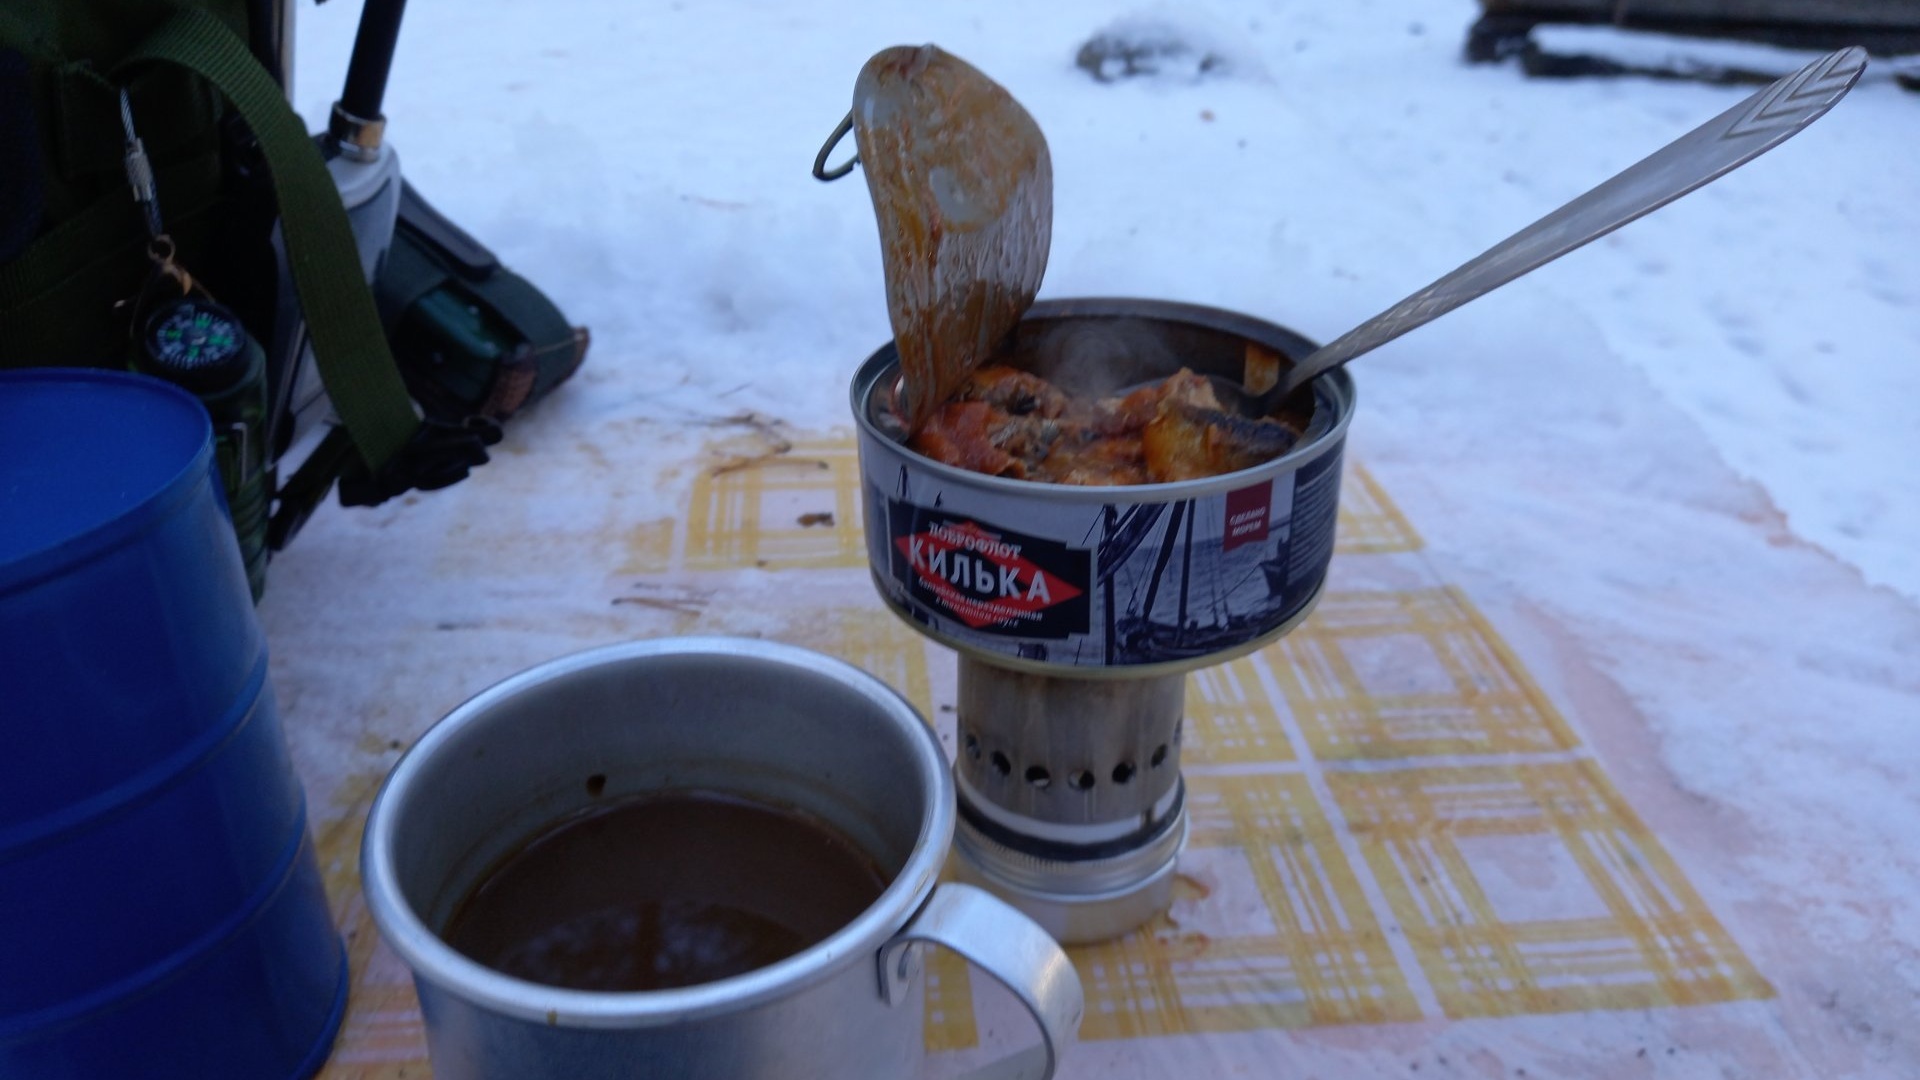
In total, it took me about half an hour to drink hot tea and eat warm food. I would have been fiddling with the fire for at least an hour, wasting time and my own energy and warmth. And a fire is good for large lunch stops, in order to warm up well before heading back after pleasant gatherings in nature.