Do it yourself
Life hacks, master classes, useful tips, recipes.
home » Games and toys » Stuffed Toys » Tilde » Snail using the tilde technique
Surely every needlewoman has heard the term “Tilda toy” at least once. But not everyone knows what it is. Tildas are unusual, bright, stylish toys that symbolize family comfort and warmth. The first craft using this technique was released in 1999, when Norwegian artist Toni Finnanger created a pattern and sewed an unusual doll. Today, needlewomen all over the world are looking for and making new toy patterns using this technique. The charming snail will be loved not only by children, but also by their parents, and will also become a real decoration for the home.

To work you will need:
• two pieces of fabric of any color,
• scissors,
• padding polyester,
• thread and needle,
• lace,
• satin ribbons,
• two beads,
• pendant for decoration.

Snail using the tilde technique

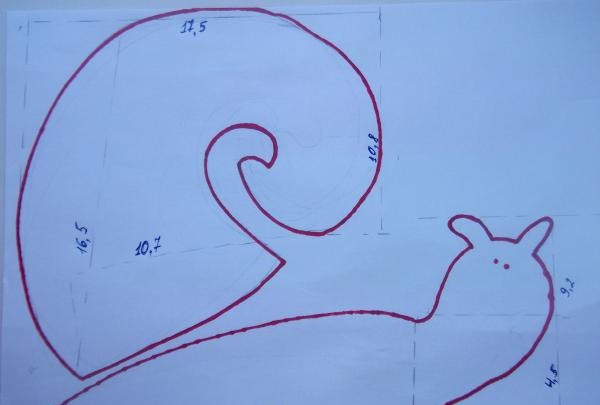
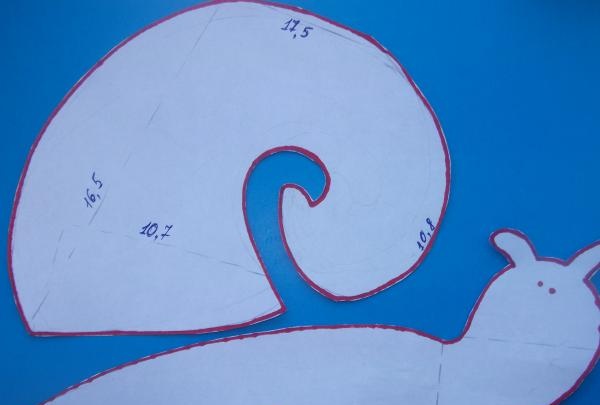
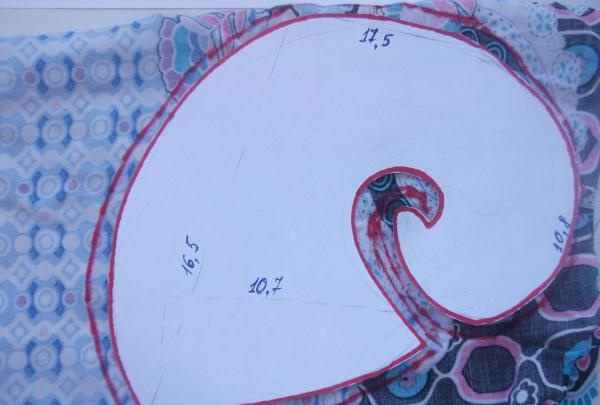
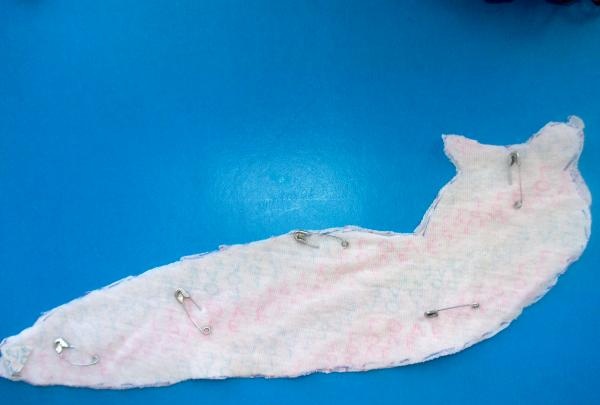
First you need to print out the pattern or draw it yourself. After this, you need to carefully transfer the diagram onto the fabric, after folding it in half face to face. Approximately 5 mm from the edge must be retreated, thus making seam allowances. Then you should cut out the parts of the future toy so that the fabric does not slip; it is recommended to fasten it with pins.
Snail using the tilde technique

Snail using the tilde technique

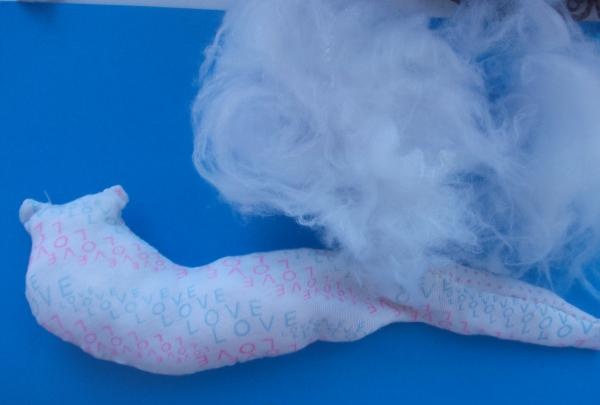
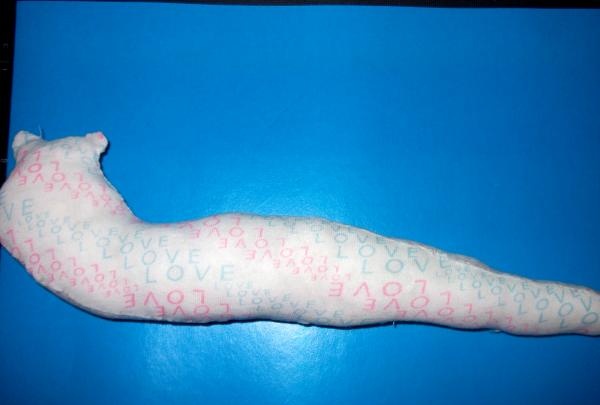
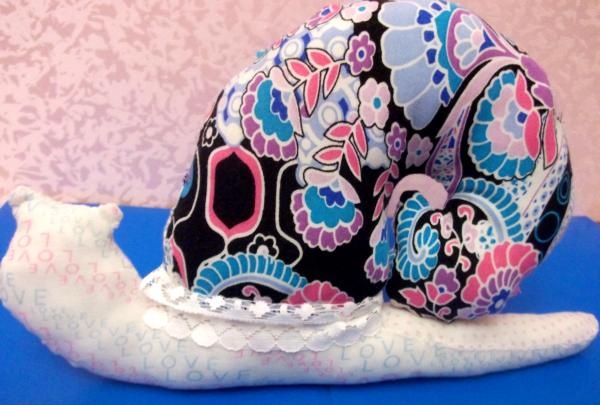
Now sew both parts of the snail's body together, but do not forget to leave a hole in the upper part. Having completed the work, you need to turn the resulting part right side out and thoroughly steam it with an iron. After this, you need to fill it with padding polyester, sew up the hole and move on to creating a sink.
Snail using the tilde technique

Snail using the tilde technique

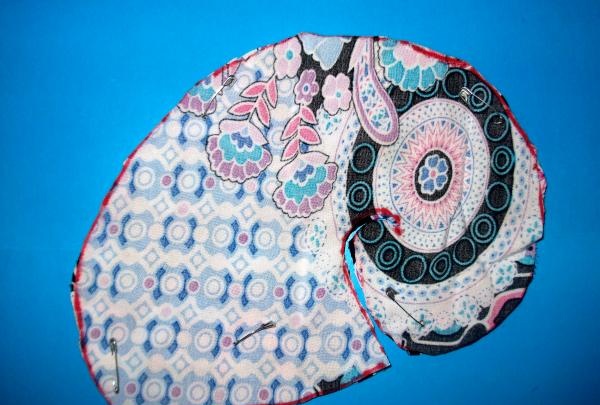
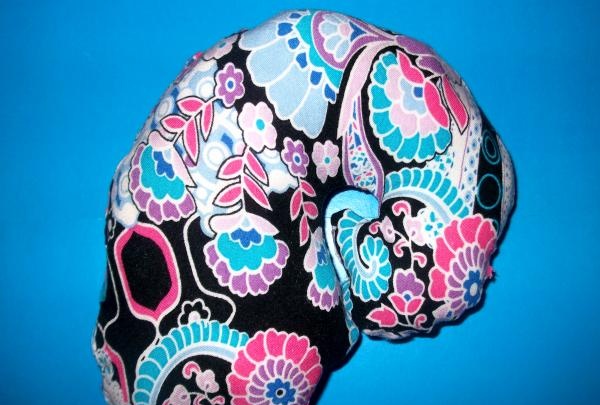
The operating principle is the same. First, the two parts are sewn together, then the fabric needs to be thoroughly ironed and stuffed with filler.
Snail using the tilde technique

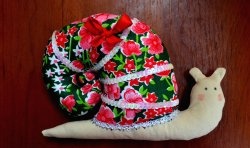
All that remains is to fasten the body and shell together. To hide the unsightly seams that formed during the sewing process, you can decorate the toy with lace.
Snail using the tilde technique

Snail using the tilde technique

Snail using the tilde technique

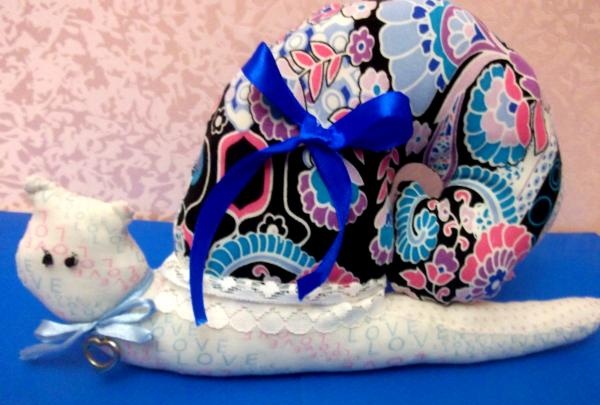
The snail is ready. All that remains is to decorate it. Sew beads in place of the eyes. For a snail they should be close together. You can hang a pendant on a thin satin ribbon around the toy’s neck, and decorate the shell with a bow. Use a red pencil to “brown” the snail’s cheeks.
Snail using the tilde technique

Snail using the tilde technique

Snail using the tilde technique

Snail using the tilde technique

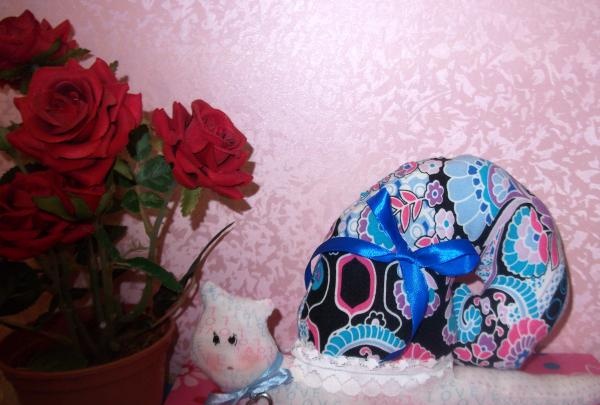
Such a bright, original, cute toy will become a real keeper of your home and will delight you for a long time.
Comment
  • bowtiesmilelaughingblushsmileyrelaxed relaxedsmirk
    heart_eyeskissing_heartkissing_closed_eyesflushedrelievedsatisfiedgrin
    winkstuck_out_tongue_winking_eyestuck_out_tongue_closed_eyesgrinningkissingstuck_out_tonguesleeping
    worriedfrowninganguishedopen_mouthgrimacingconfusedhushed
    expressionlessunamusedsweat_smilesweatdisappointed_relievedwearypassive
    disappointedconfoundedfearfulcold_sweatperseverecrysob
    joyastonishedscreamtired_faceangryragetriumph
    sleepyyummasksunglassesdizzy_faceimpsmiling_imp
    neutral_faceno_mouthinnocent
4 minus one =
Comments (0)

Homemade soap “Fir Branch” | Do it yourself

Floating cup - money waterfall | Do it yourself

Aquarium in a light bulb | Do it yourself

Men's shirt blouse | Do it yourself

«Do it yourself - with your own hands» - a site of interesting homemade products made from scrap materials and items at home. Step-by-step master classes with photos and descriptions, technologies, life hacks - everything a real master or just a craftsman needs for needlework. Crafts of any complexity, a large selection of directions and ideas for creativity.

We recommend reading

Washing machine error codes