A conventional fan has a number of disadvantages: noise and vibration from the blades, which collect dust and air pollution. In order to clean them, it is necessary to remove the protective grille. The speed of such fans is adjustable in only a few modes, and it can be difficult to adjust the blowing angle.
The alternative device we propose does not have these disadvantages. This development was invented by Dyson engineers, presenting an almost revolutionary solution in the field of air ventilation. Thanks to them, the world learned what a bladeless fan is. And today we will collect it at home.
Operating principle of a bladeless fan
The main difference between a bladeless fan and a conventional one is the changed direction of the ejected air flow.This is achieved due to the fact that the engine and impeller are placed vertically and hidden in the base, which is equipped with grilles. Through them, air flows pass into a frame placed above the base and equipped with slots around the perimeter for ventilation.
Materials, tools for a bladeless fan
To assemble this cutting-edge household gadget, we will need the following materials:
- Sections of PVC pipes with a diameter of 150, 125, 90 mm;
- Quick-drying glue for plastic, such as superglue;
- A small piece of blue plexiglass or plexiglass;
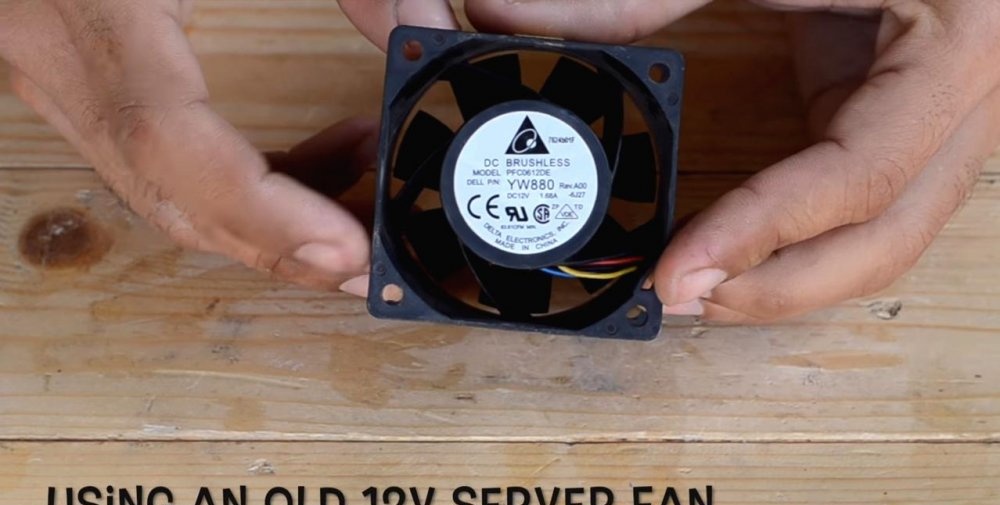
- Server cooler YW880, frame width 60 mm;
- White aerosol paint, 1 can;
- A piece of soft metal mesh with cells about 10 mm;
- Rheostatic speed control board, toggle switch;
- Solder, flux, thermal casings, self-tapping screws;
- A piece of LED strip, length - about 50 cm;
- Power supply (adapter) 12V/2 A;
- Insulating tape.
The tools we will need are:
- Miter saw or grinder (angle grinder) for cutting pipes from PVC pipes;
- Jigsaw for cutting curved lines;
- Drill or screwdriver with a 50-60 mm crown cutter;
- A set of drills of various diameters;
- Soldering iron, screwdriver, scissors, pliers, hot glue gun;
- Painting knife.
Work order
Preparing plastic pipes
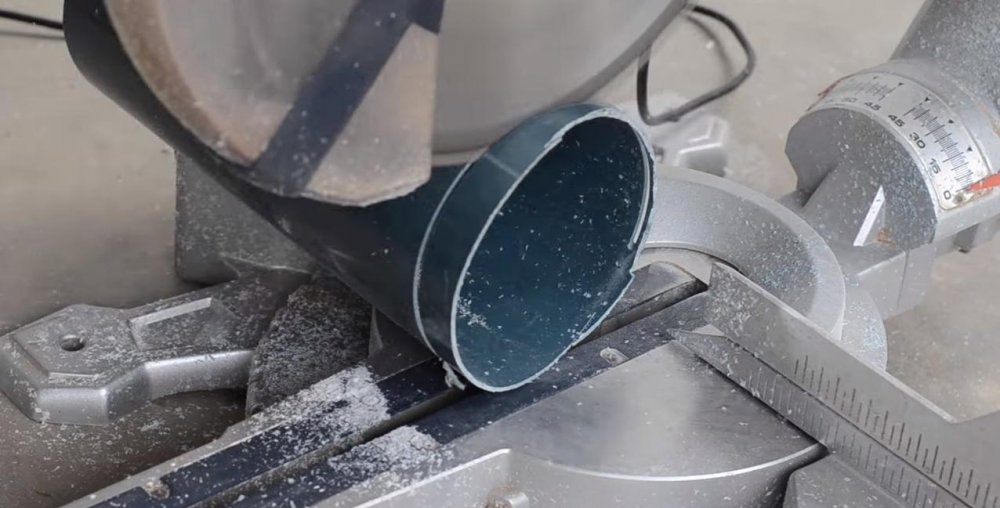
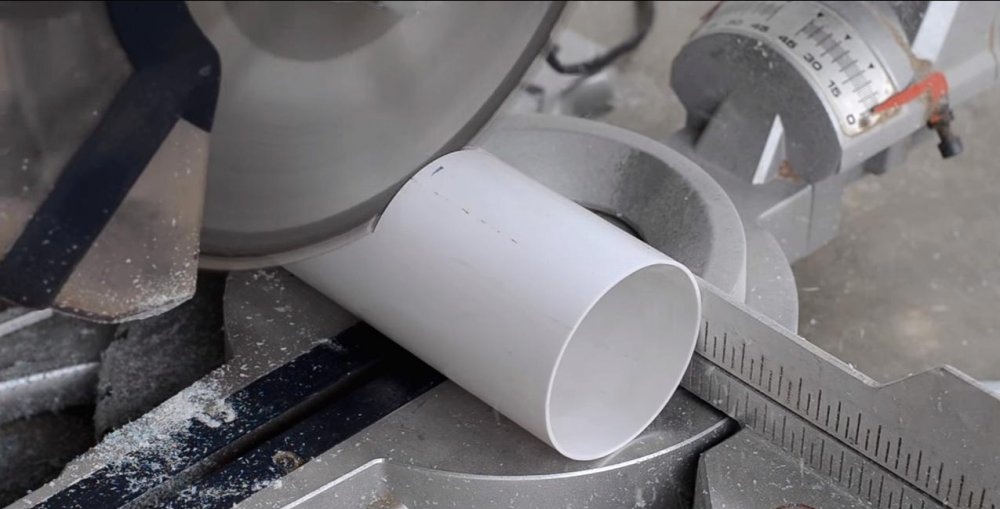
We take a piece of PVC pipe with a diameter of 150 mm and end it, aligning the edges. We mark a fragment about 100 mm long and make a cut with a miter saw or angle grinder.
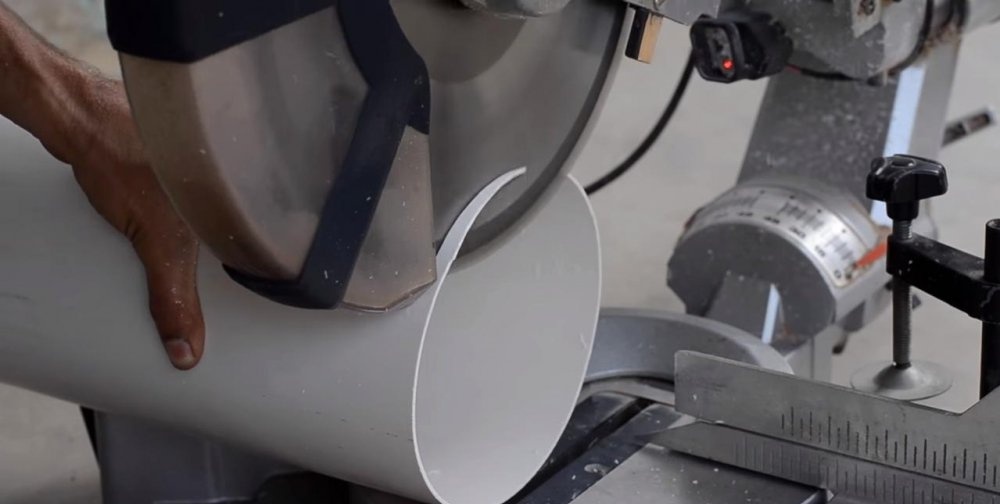
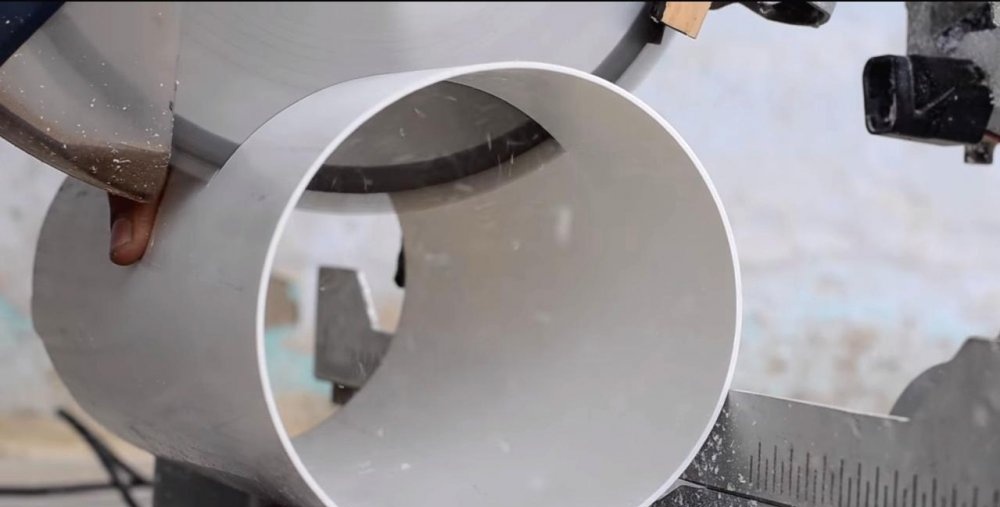
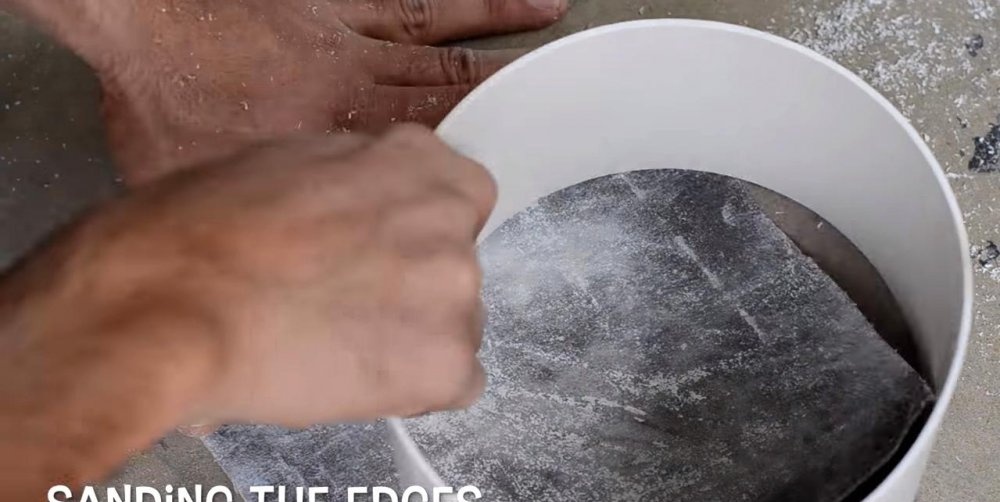
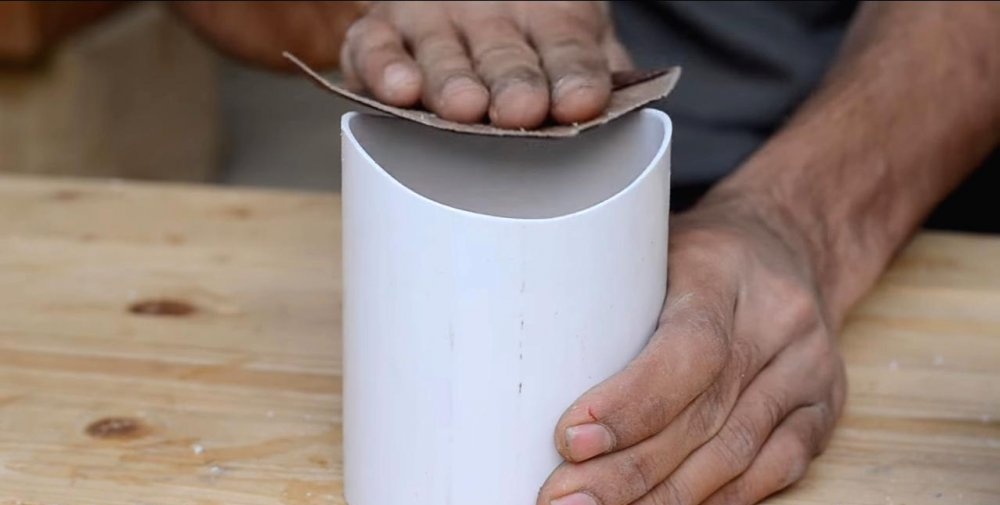
The edges of all pipes must be sanded to avoid burrs, unevenness and to improve the fit of the edges for adhesive joints.
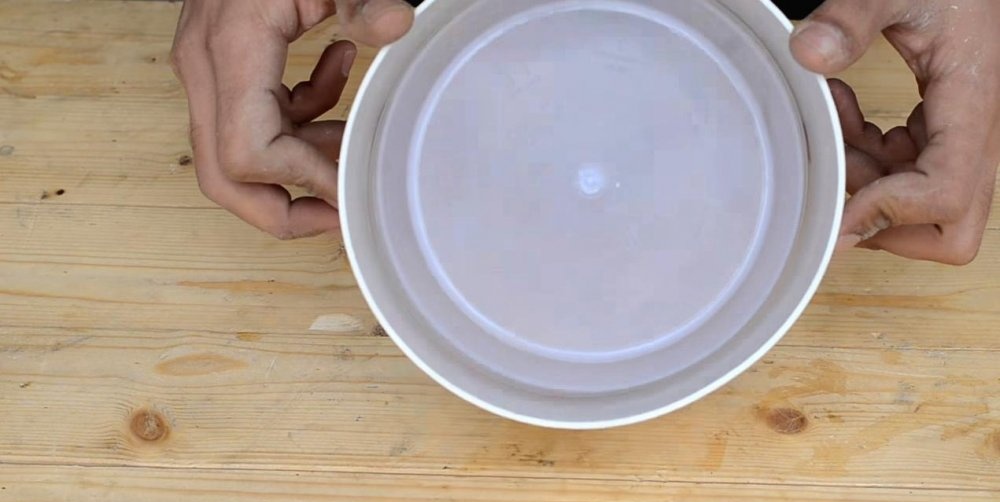
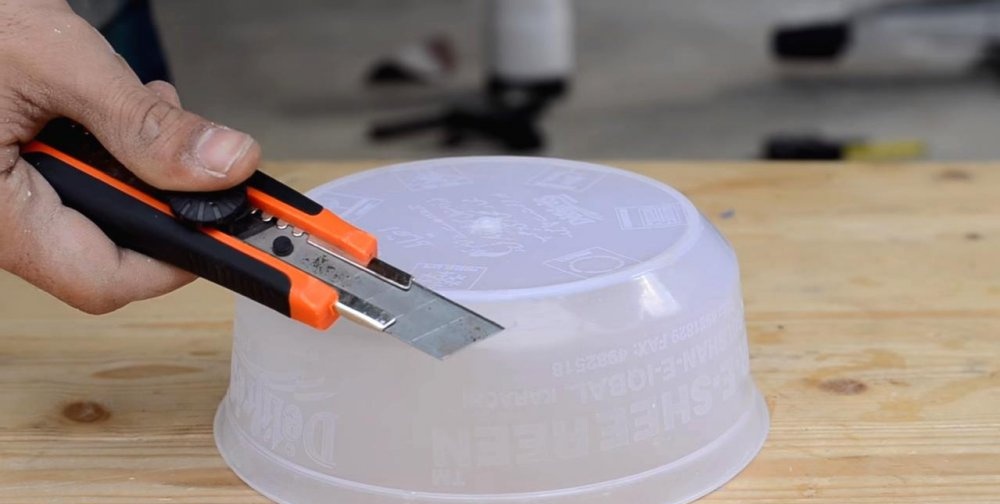
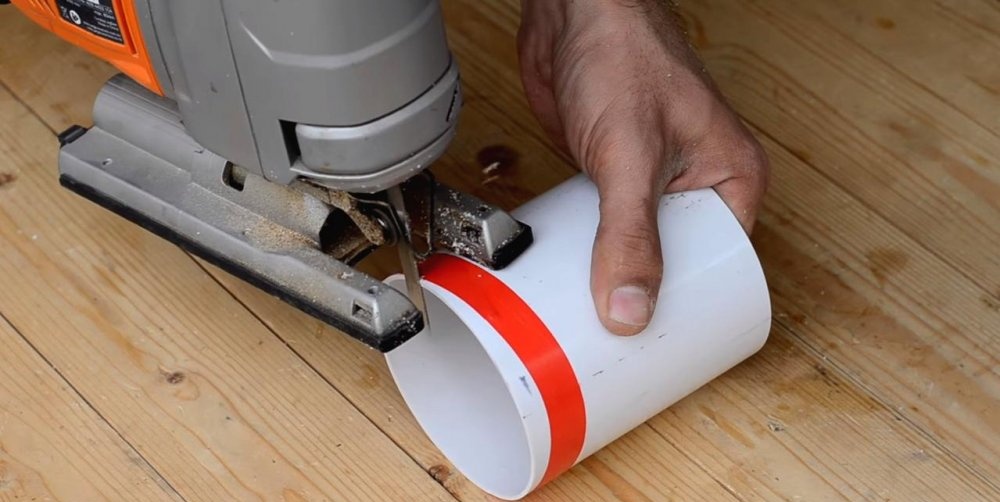
The next step is to select a plastic container that will fit tightly onto our section of pipe.We cut off the bottom of it with a painting knife, and use superglue to secure it to the top of the pipe.

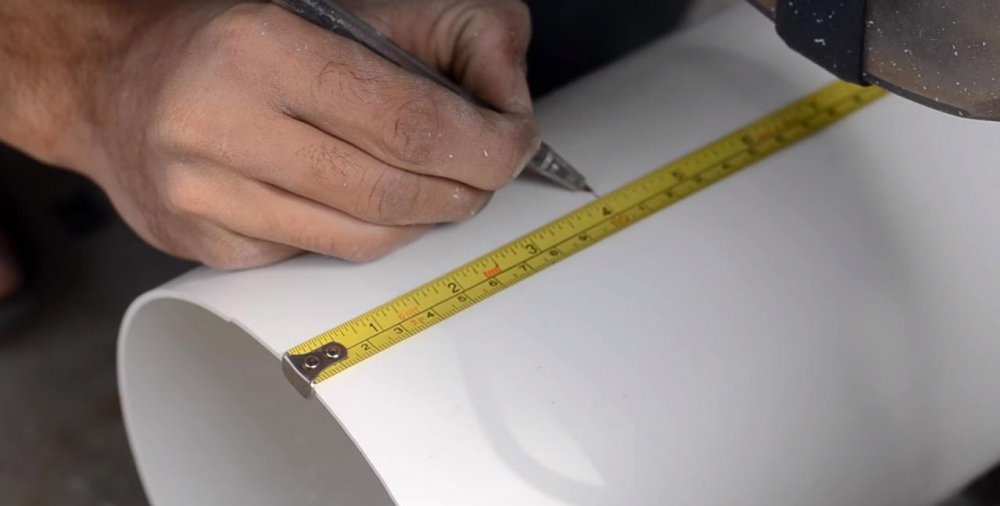
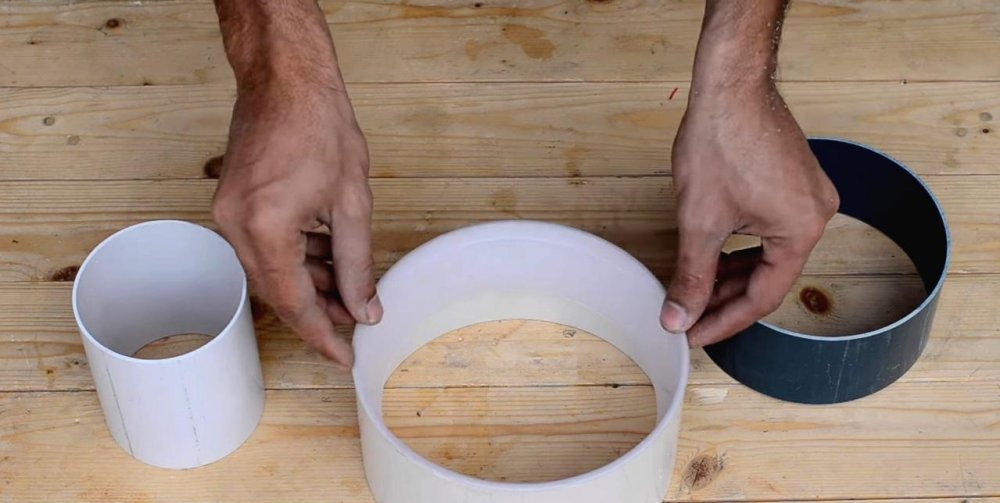
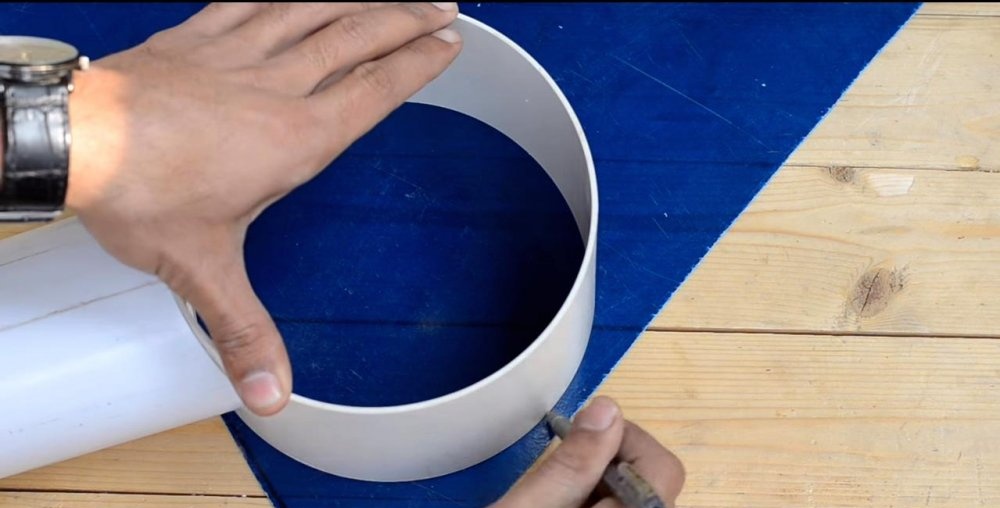
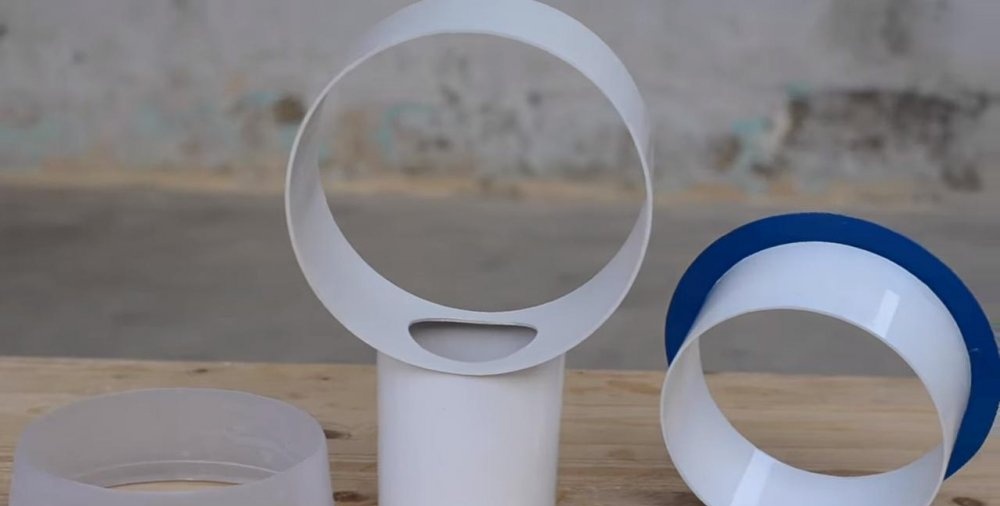
Then we take a pipe with a diameter of 125 mm and cut off a pipe 90 mm long from it.
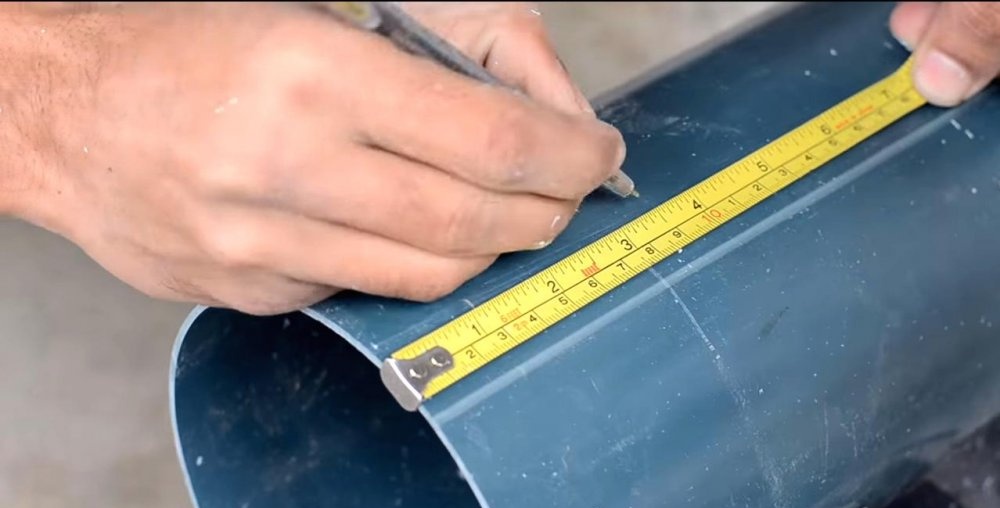
The next one will be a pipe with a diameter of 90mm, which we will also cut like the previous two. This is the base of our fan. The length of the segment is 120-130mm.
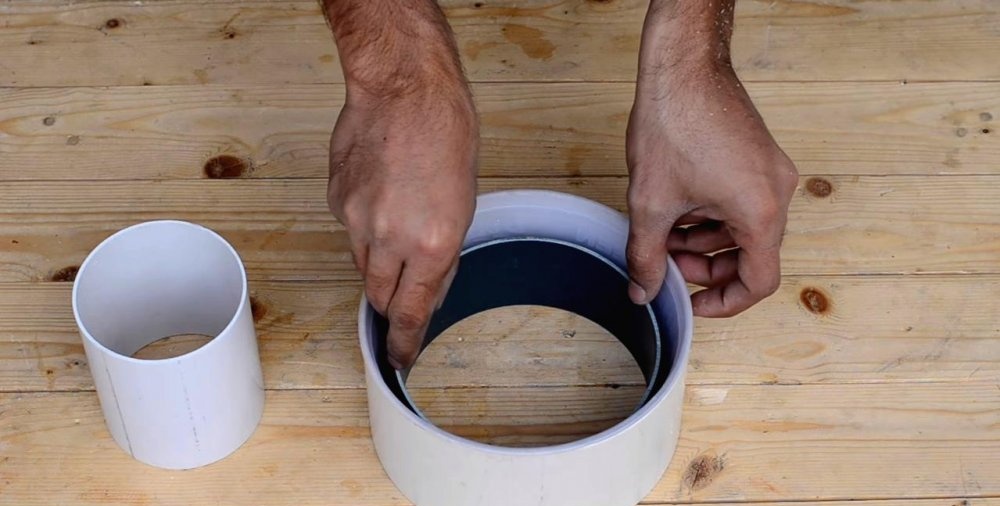
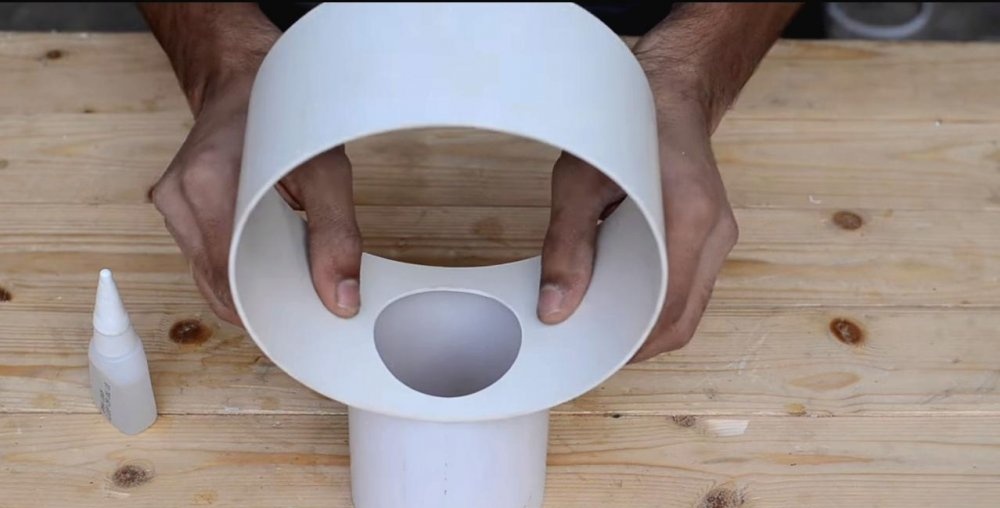
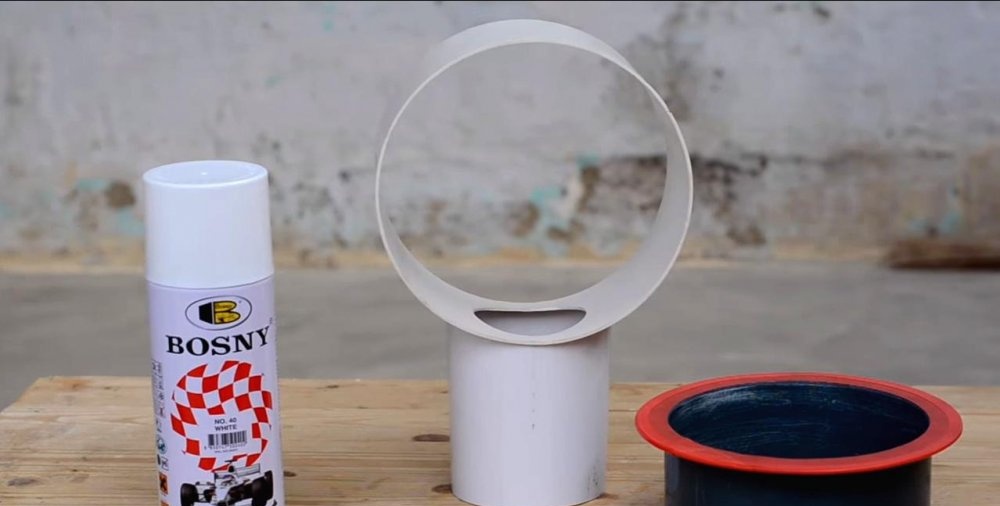
The basic plastic parts are ready. You can check how they will fit together by placing them in their places.

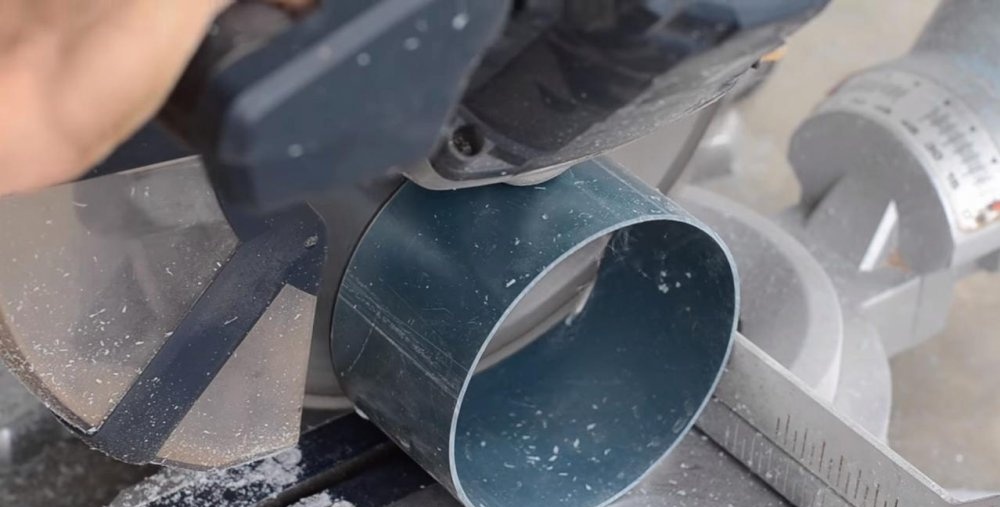
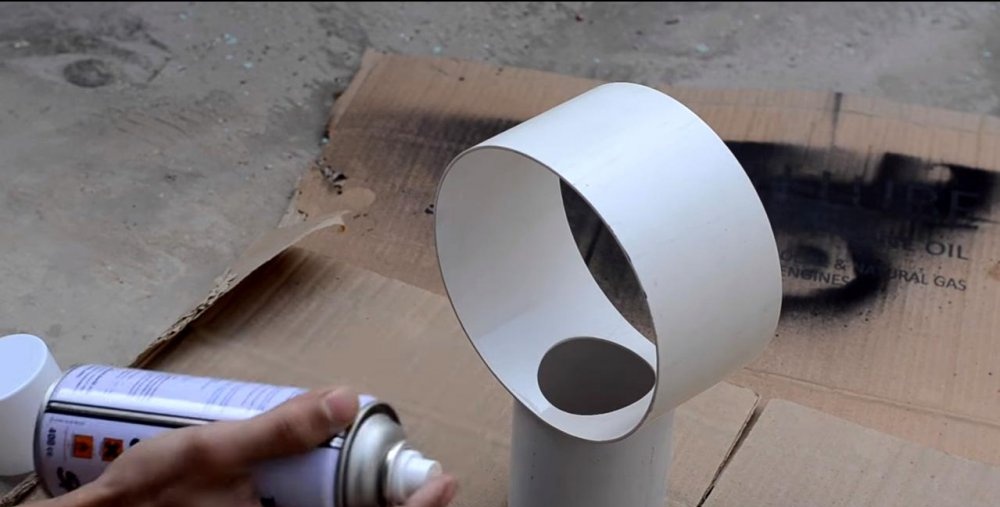
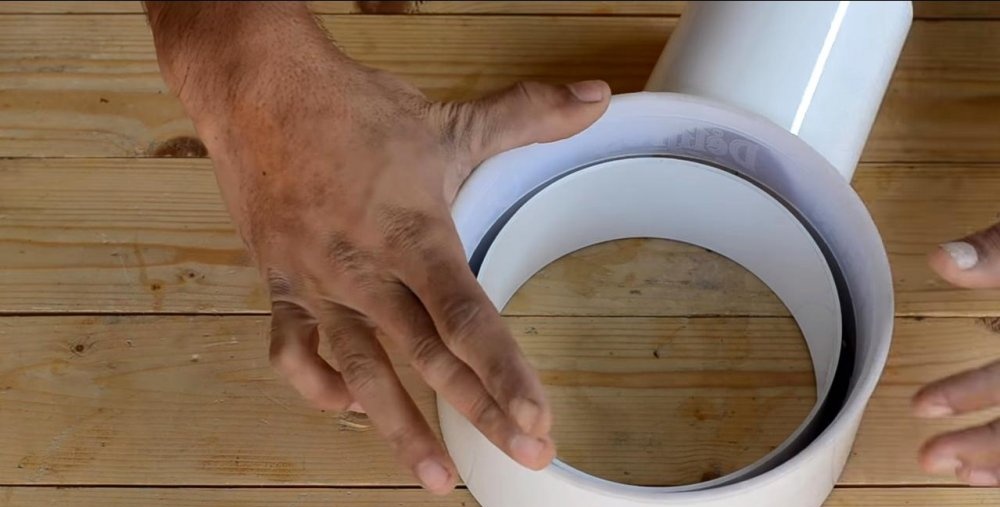
The fan frame sits perpendicular to the base, so the 90mm pipe needs to be slightly prepared by cutting off its edge according to the circumference of the frame. We mark it with a pencil, you can cut it with a jigsaw or the same grinder.
Unevenness in a curved cut can be smoothed out with sandpaper, removing burrs at the same time.
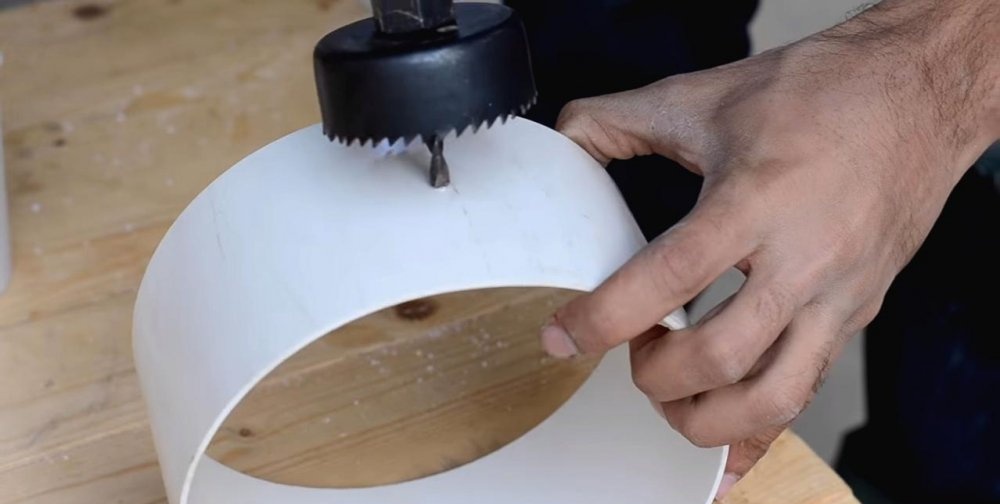
Using a core cutter with a diameter of 50-60mm, a drill or a screwdriver, we make a through hole in the middle of the largest pipe. This will allow air to flow through the base and into our frame. We fix our base with superglue.
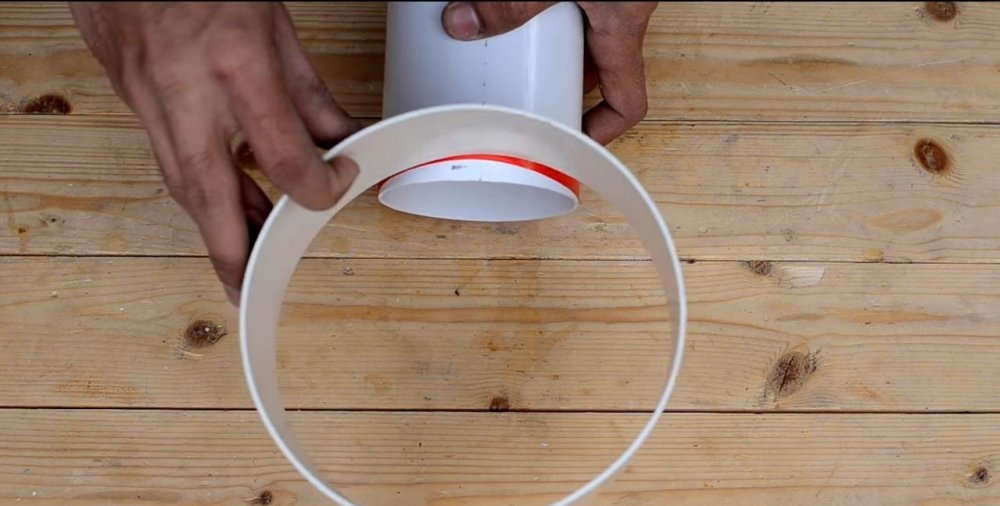
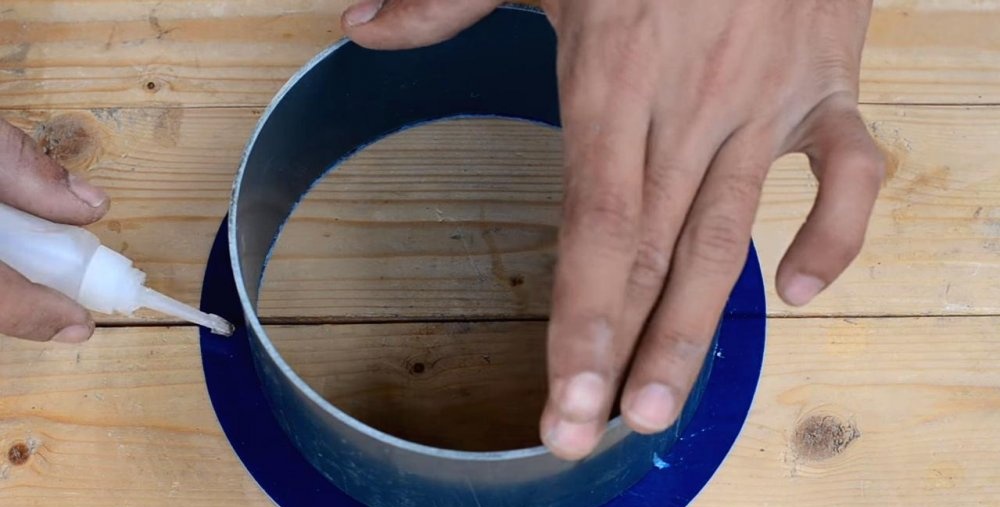
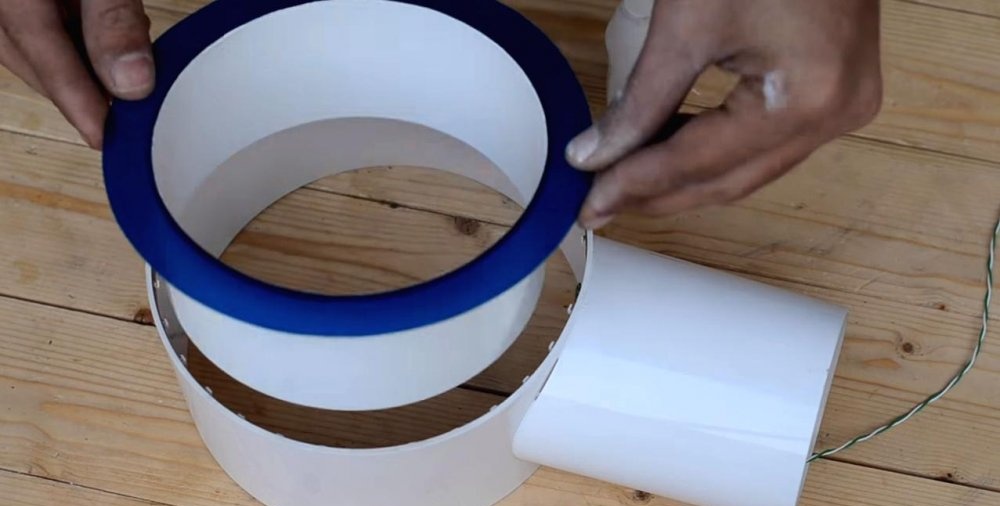
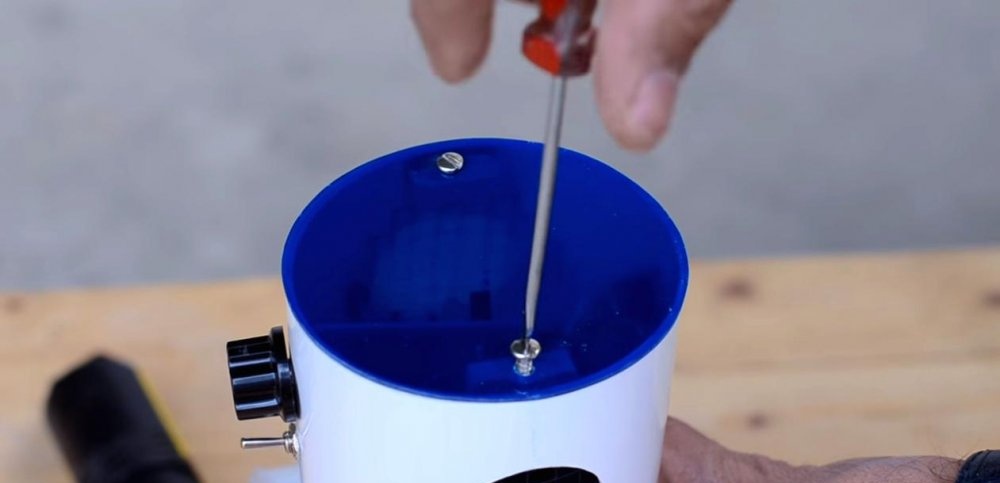
In order to close the fan frame, which consists of two pipe sections of different diameters, a plug is glued to one end of the smaller one. We make it from a sheet of plexiglass or blue plexiglass.
Having first marked the larger circle and then the smaller one, we cut off the plug ring.

Now it can be attached with superglue to the smaller frame pipe.
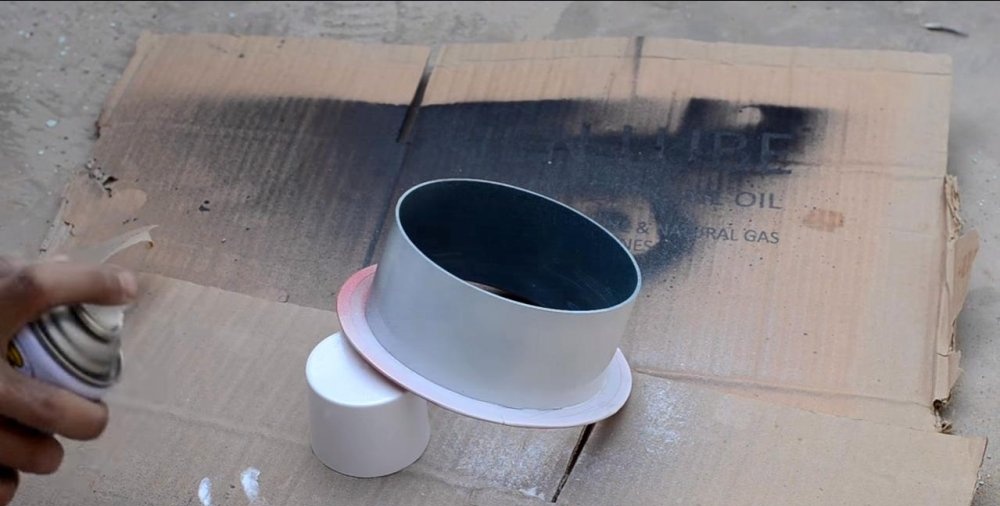
Using white spray paint and electrical tape as masking tape for plexiglass, we paint the plastic parts of our fan.
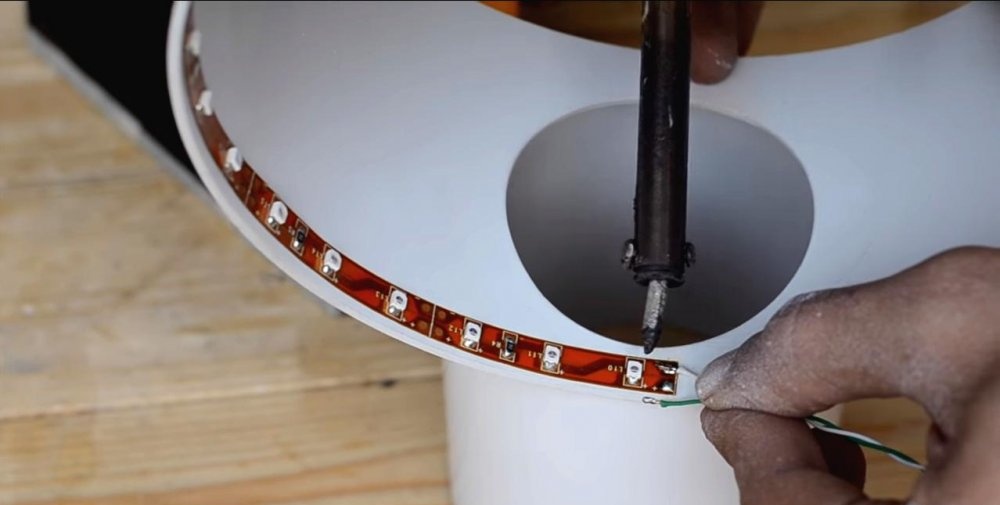
After the paint has dried, you can glue a piece of LED strip onto the larger pipe on the side of the plug.Don’t forget to immediately solder the contacts for the LED backlight and connect them to the base.
We fix both pipes of our frame with superglue.
Electrical part
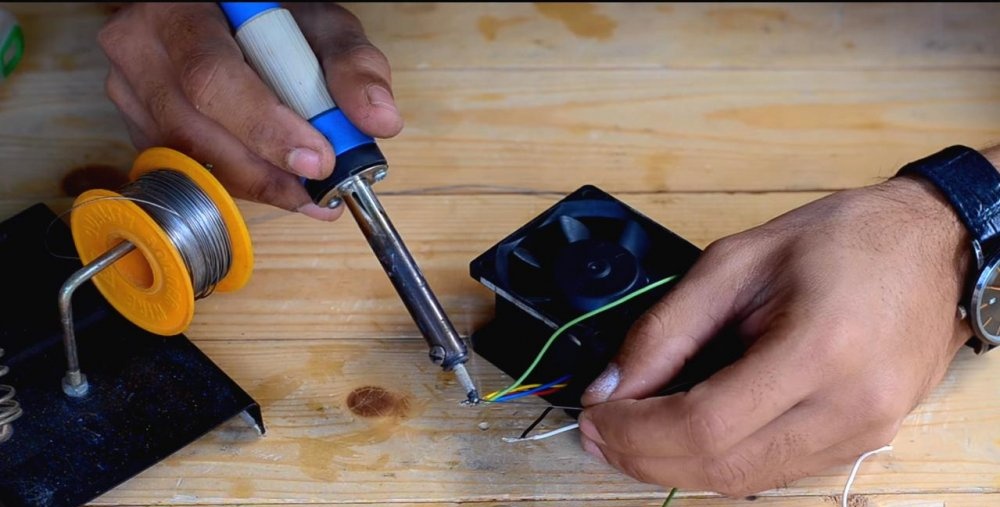
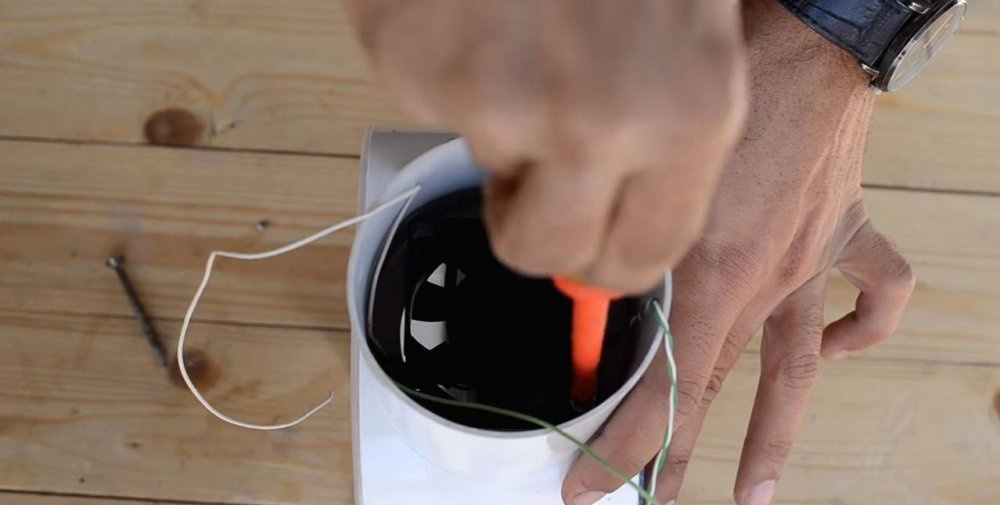
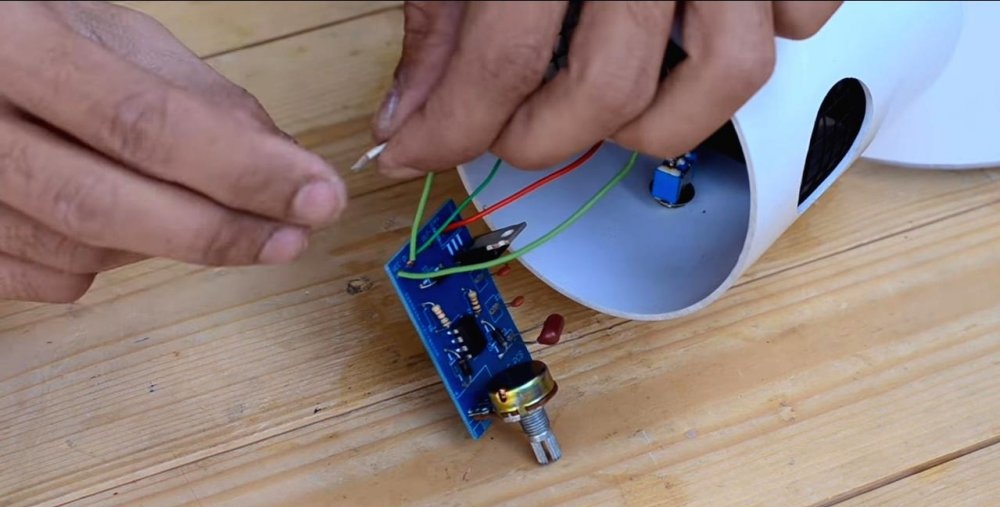
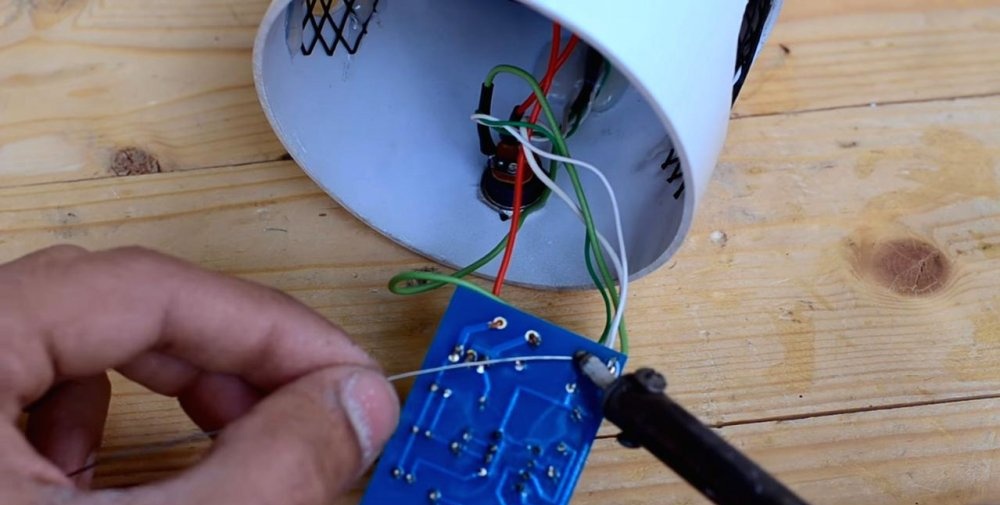
We begin to prepare the electrical filling of our fan by soldering the cooler contacts. It is better to take the wires with a reserve so that it is convenient to work with them when connecting the control board and toggle switch.
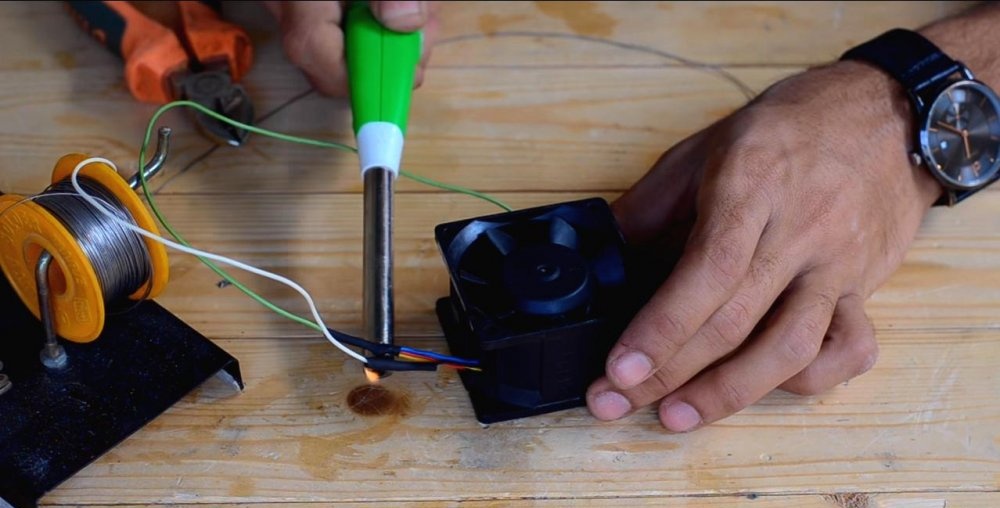
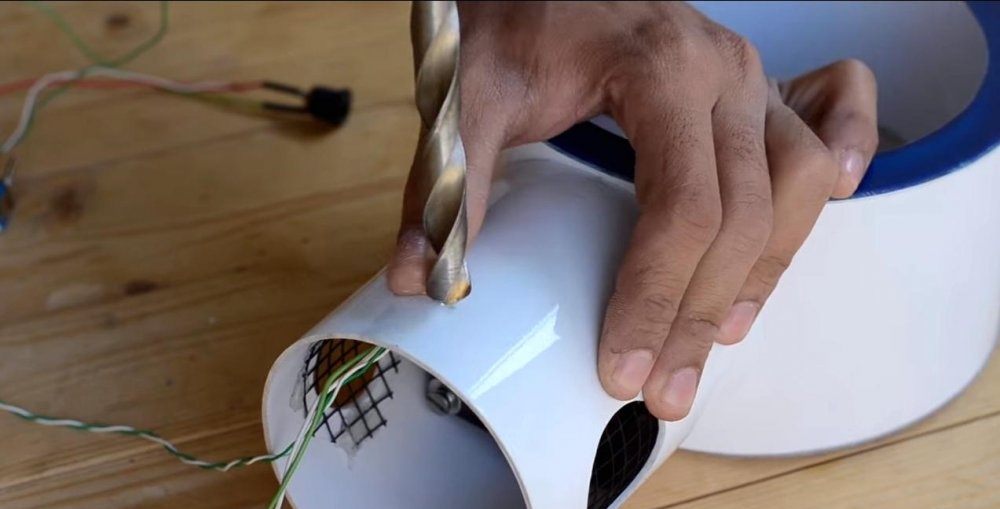
You can use a soldering iron to make mounting holes to securely secure the cooler in the base housing.
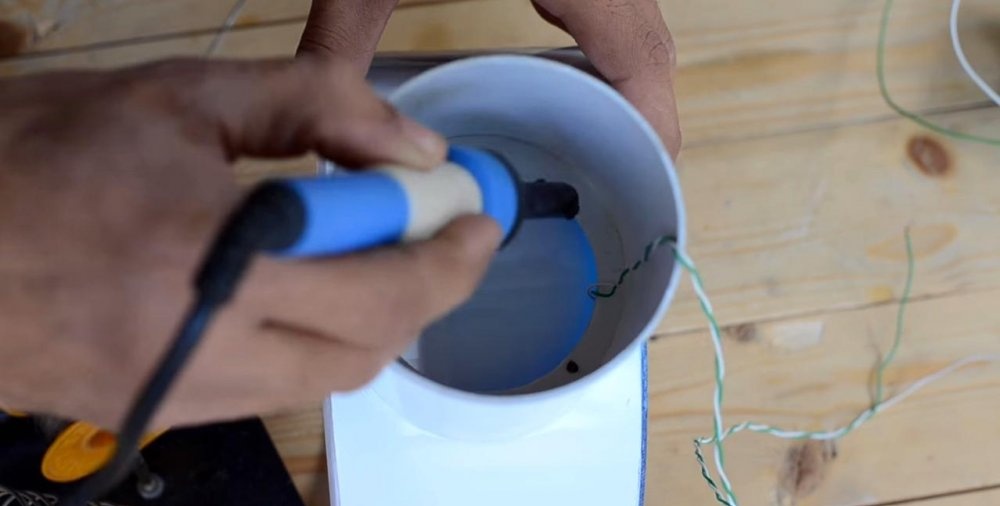
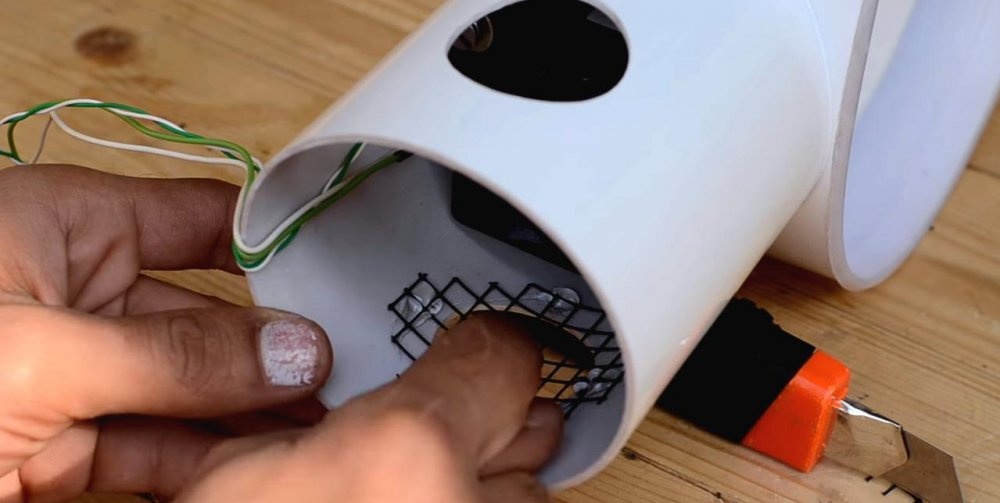
We fix the cooler and drill two ventilation holes in the base opposite each other. This can be done with the same core cutter.


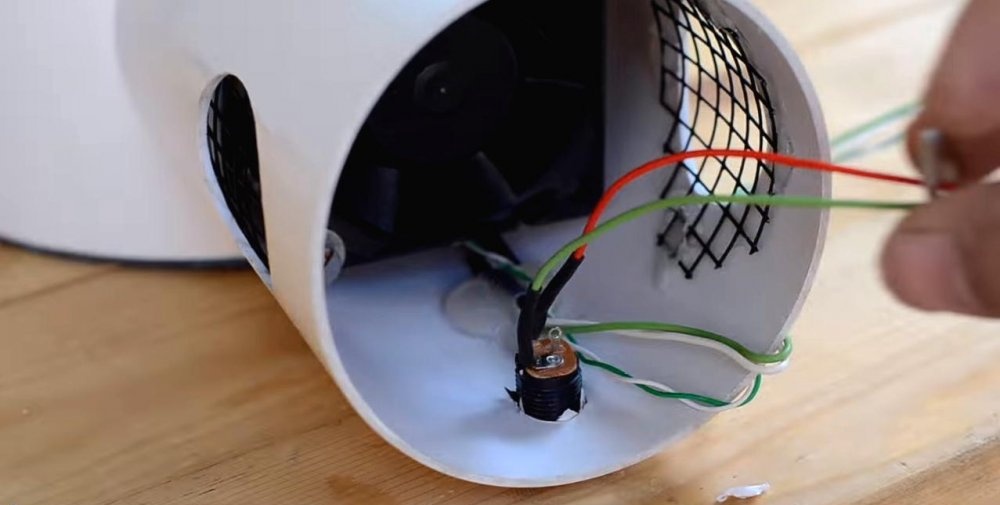
We close these holes with fragments of metal mesh, pre-cut to size.
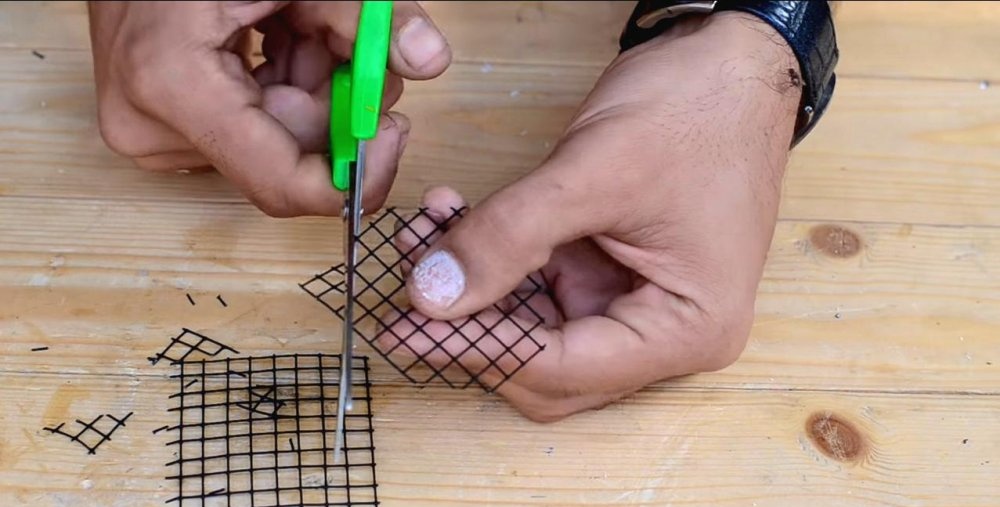
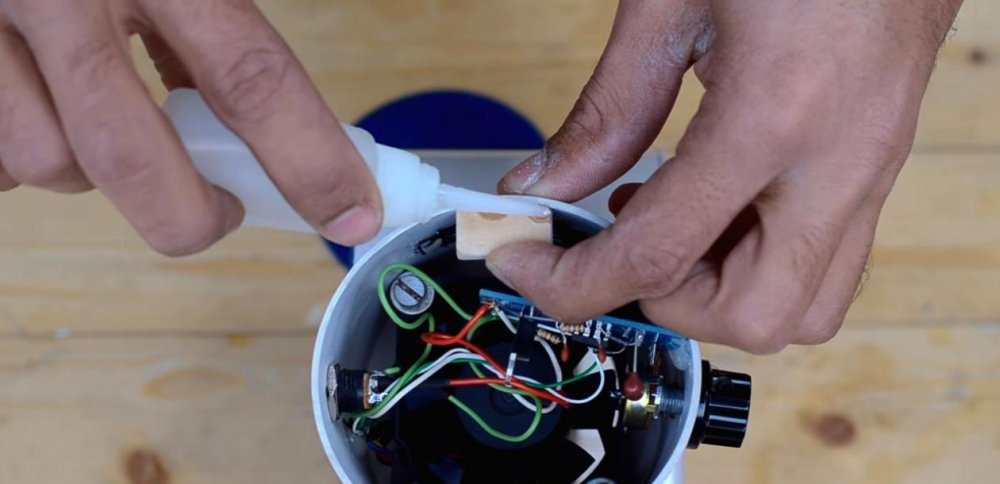
Glue the mesh fragments with a hot glue gun.
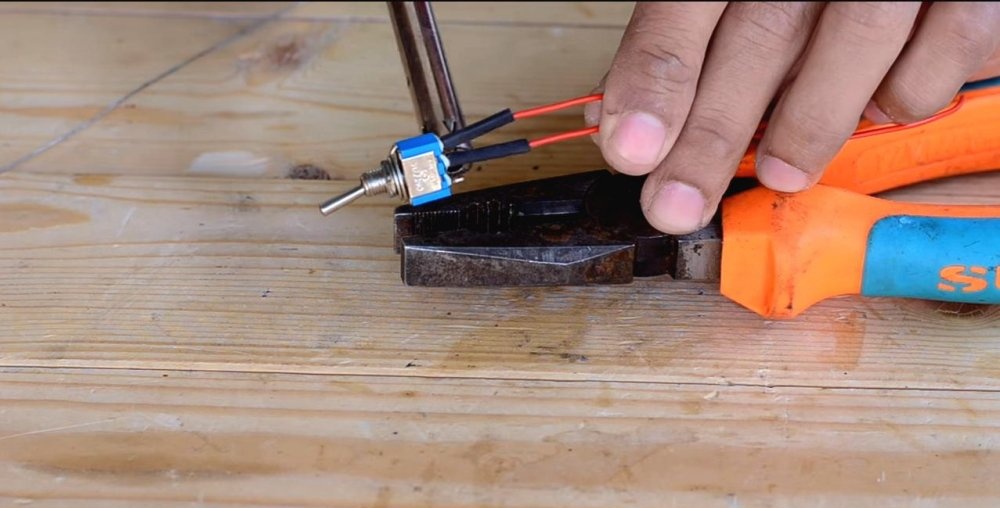
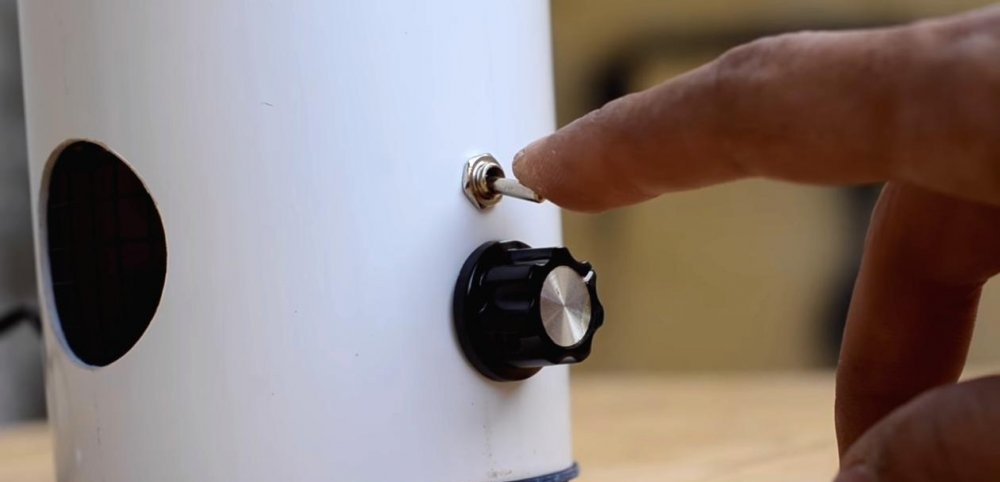
We solder the contacts of the toggle switch and the power socket. We cover the exposed contacts with heat-shrinkable casings, heating them with a lighter.
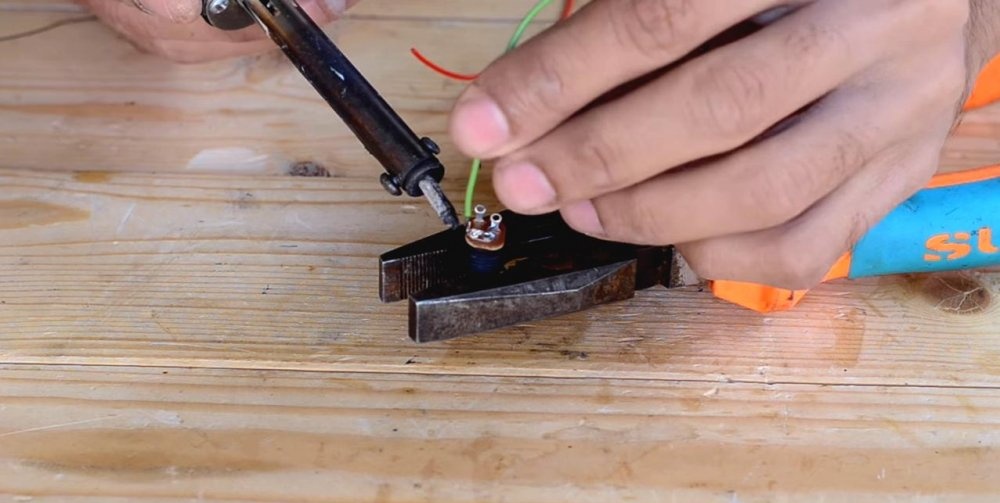
Now you can make holes for the toggle switch and power socket, and secure them to the fan base housing.

To rheostatically switch the fan speed, the author ordered a ready-made board with parts that he soldered himself. Today this is a more affordable option, although such a board can be bought ready-made at an electronics store.
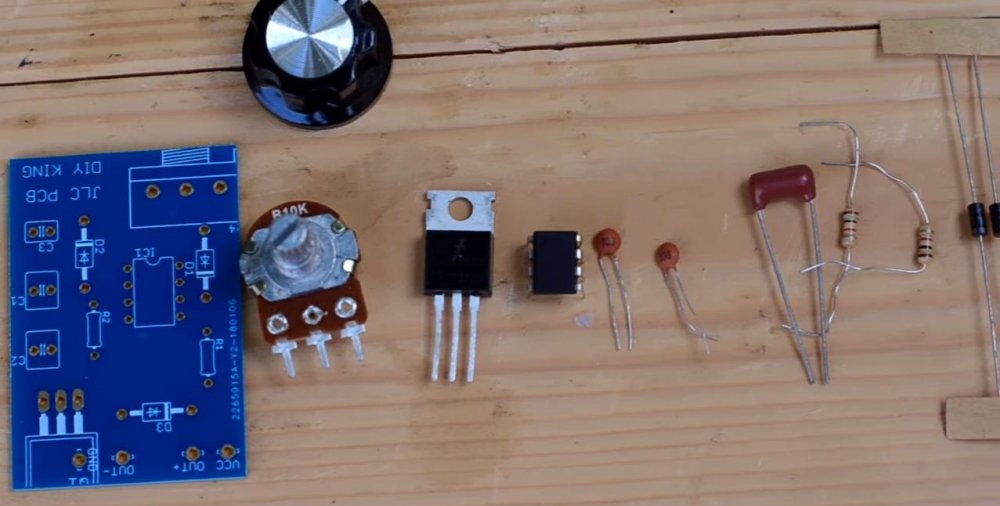
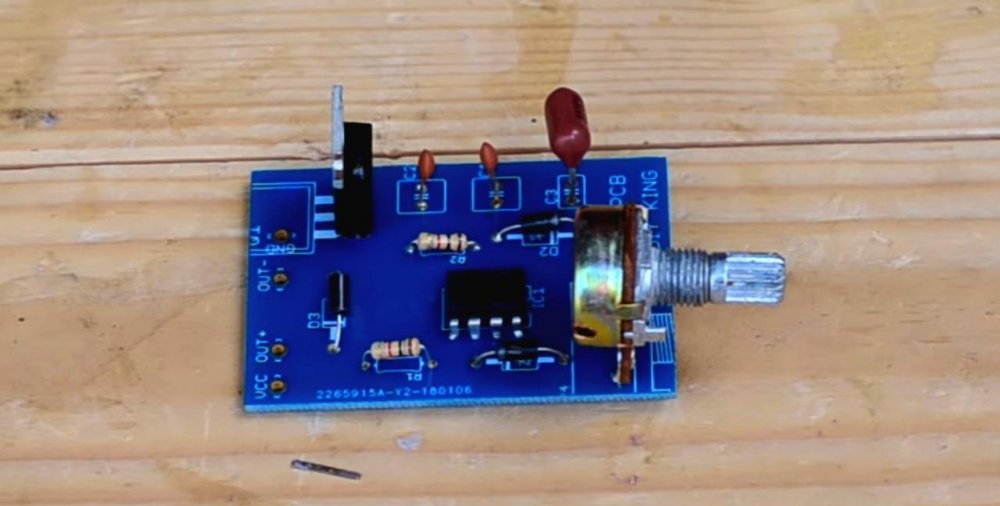
We connect our control board by soldering the contacts and secure it by fastening the rheostat to the wall of the case. We supplement the fasteners with hot glue.

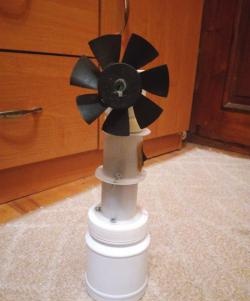
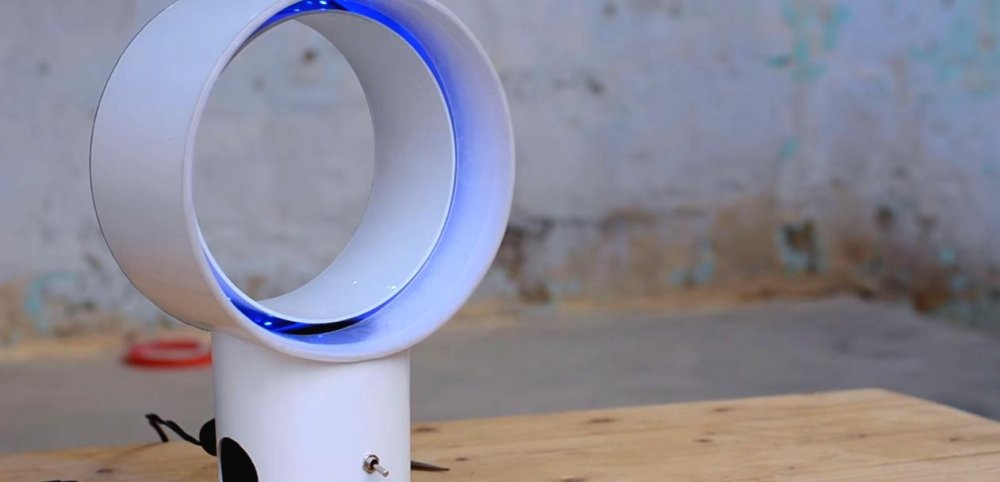
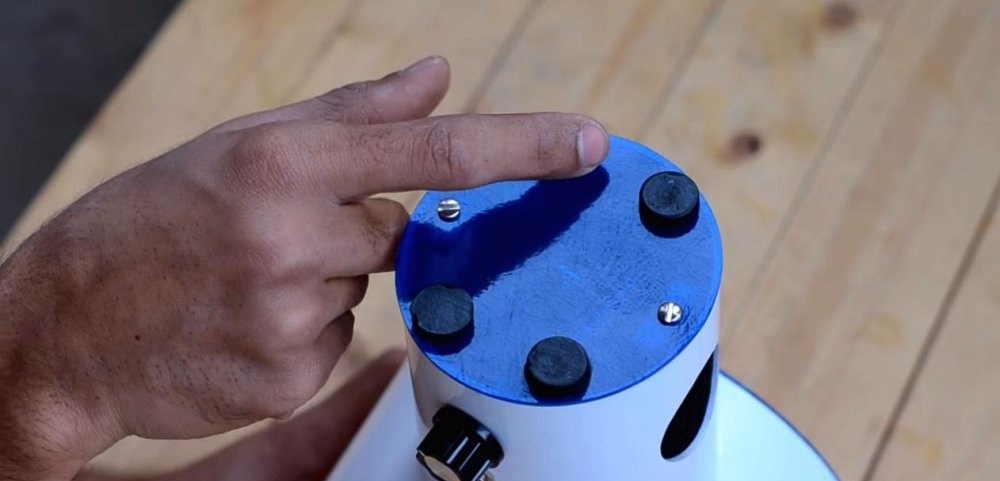
Our fan of the future is almost ready. All that remains is to secure the bottom from the remains of plexiglass, and glue rubber bearings for greater stability.
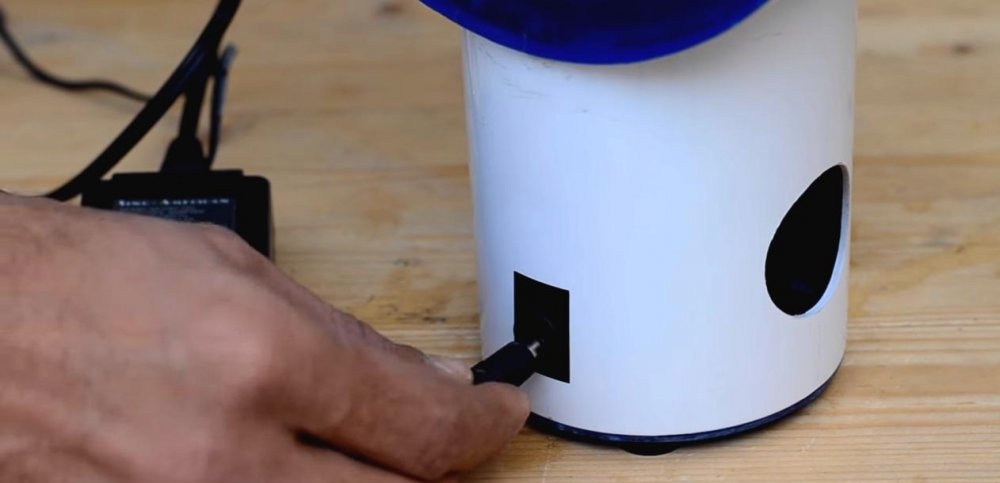
The fan is powered via a regular adapter with a suitable connector at the end. The output voltage and current ratings must correspond to the selected cooler.

It's time to turn on the miracle fan and test it in action.
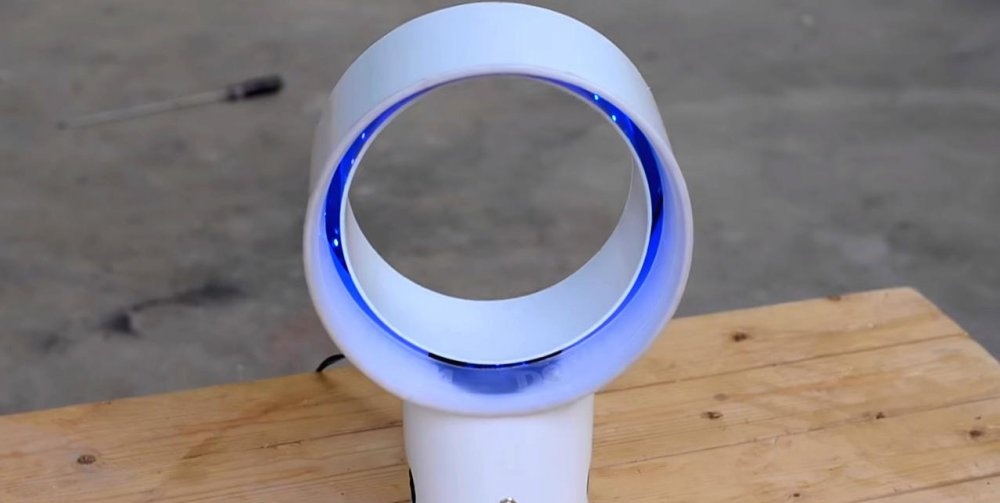
The aerodynamic frame of this device distributes air flows evenly, accelerating them almost 15 times. Such an advanced fan will help cope with the heat much faster and more efficiently than a regular household one. And the soft glow of the backlight will create a pleasant cool atmosphere on a hot summer day.