Do it yourself
Life hacks, master classes, useful tips, recipes.
home » Different » beauty and health » Openwork bracelet
As you know, when you first meet a person, they are judged by his appearance, clothes and how skillful and inimitable his style is. Both the guy and the girl must show their best side. Moreover, girls can be dressed modestly, but very elegantly. Each detail of a woman’s toilet should emphasize the previous one, but if any detail is missed, then all your efforts will go down the drain, and the example of bad taste will be remembered for a long time. Let your outfit be short and even slightly strict, but it must include something unusual - a kind of zest. Such a highlight can be an elegant, but at the same time not particularly eye-catching bracelet made by yourself.
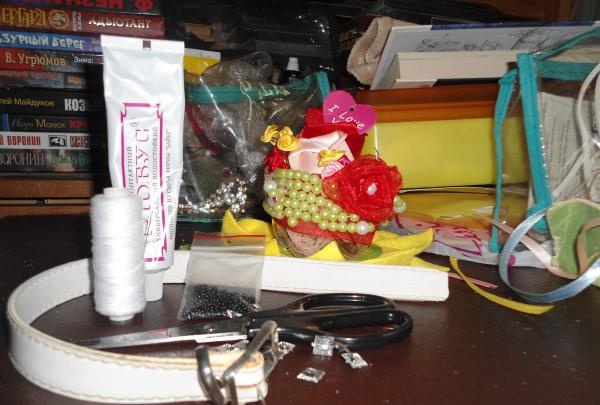
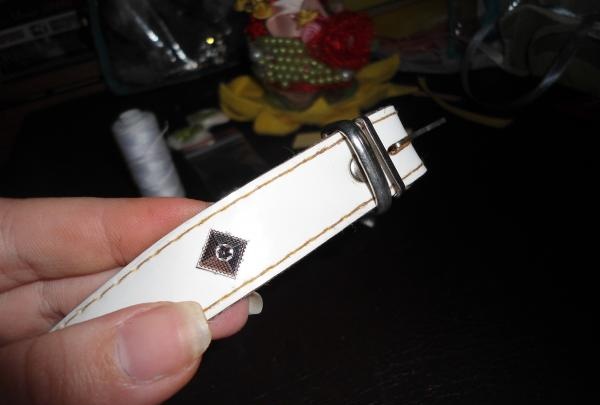
For our bracelet we will need the following materials: a piece of an old white belt (the base of the bracelet), black beads, silver glue squares, scissors, an awl, glue and thread with a beaded needle. You can change the colors and choose your own.

Openwork bracelet


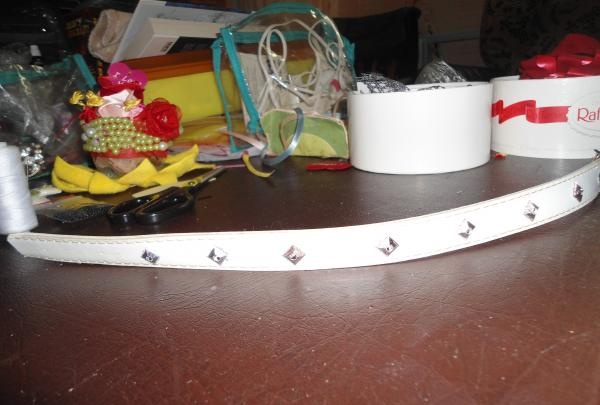
First of all, take our old white belt and wrap it around your hand two or three times (this depends on what kind of bracelet you want from two layers or three), cut off the unnecessary part.Then we make several holes with an awl, so that later the bracelet can be easily worn like a watch, and not be afraid that the clasp may break. At a distance of 3-4 centimeters, glue the squares, you can straight, or you can unfold them into a diamond shape, as shown in the photographs below.


Now we make the first stitch. We put 12 black beads on a needle and thread, and stretch them diagonally and fasten them on the back side, as shown in the next photo. Nota Bene! Remember that when you need to change the thread, you should not wind a huge skein, just the length that will wrap around part of your arm to the elbow is enough, otherwise it will get tangled and break.


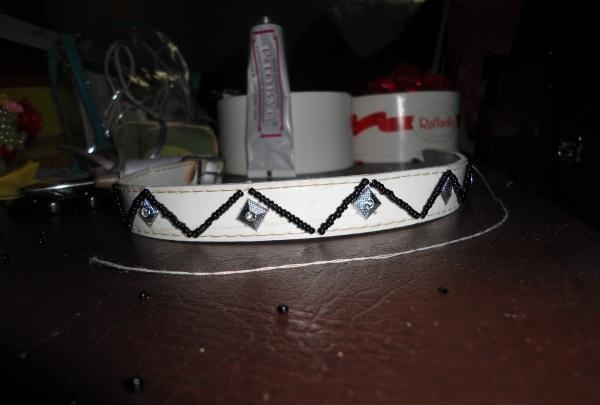
The pattern for this stitch is very simple, because you just need to make zigzag stitches all over the bracelet.


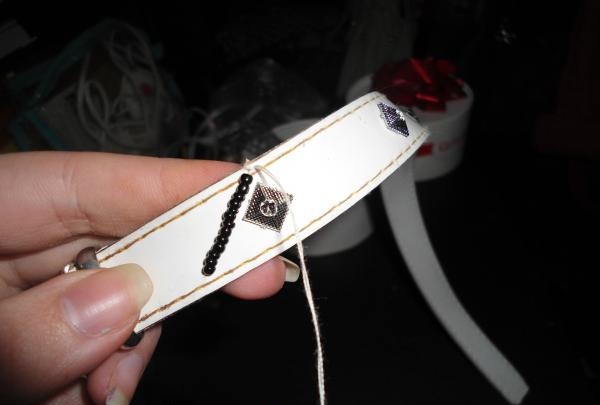
When we are done with the first zigzag, we proceed to the reverse zigzag. We do this procedure so that you get diamond shapes around the glue stones.


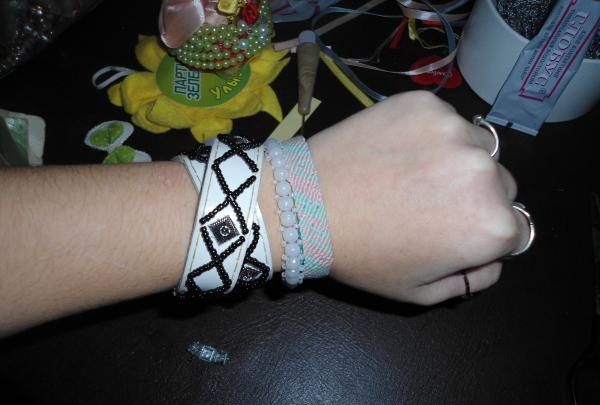
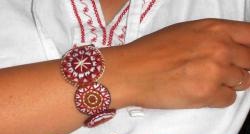
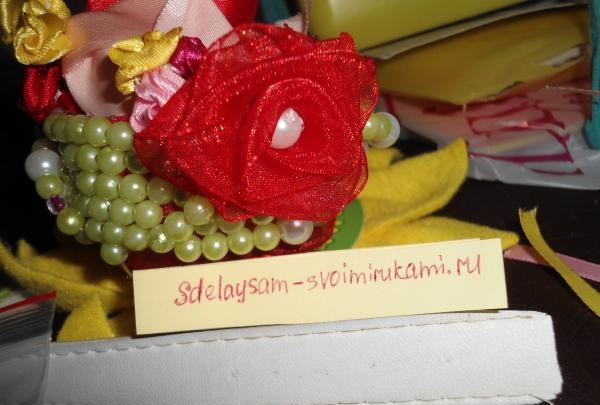
Congratulations, because your bracelet is ready! All that remains for you is to put it on and wear it with pride that it was made by your hands. Moreover, there is no shame in presenting such a bracelet to friends as a souvenir.


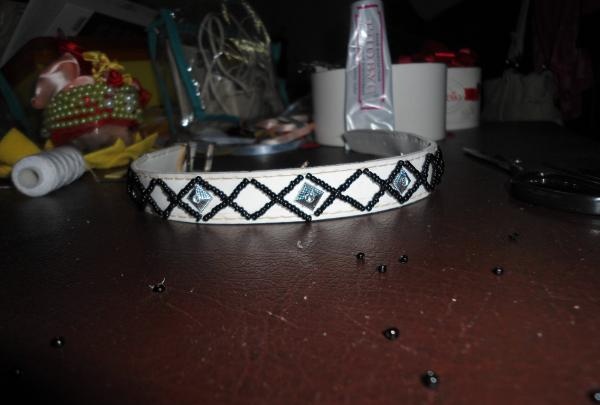
If you take the same colors as in this master class, then keep in mind that the bracelet will suit both white and black watches. The bracelet will add both harmony and a little discreet elegance to your overall look.

come back
Comment
  • bowtiesmilelaughingblushsmileyrelaxed relaxedsmirk
    heart_eyeskissing_heartkissing_closed_eyesflushedrelievedsatisfiedgrin
    winkstuck_out_tongue_winking_eyestuck_out_tongue_closed_eyesgrinningkissingstuck_out_tonguesleeping
    worriedfrowninganguishedopen_mouthgrimacingconfusedhushed
    expressionlessunamusedsweat_smilesweatdisappointed_relievedwearypassive
    disappointedconfoundedfearfulcold_sweatperseverecrysob
    joyastonishedscreamtired_faceangryragetriumph
    sleepyyummasksunglassesdizzy_faceimpsmiling_imp
    neutral_faceno_mouthinnocent
5+two=
Comments (1)
  1. Ksusha1214
    #1 Ksusha1214 Guests 28 August 2017 12:43
    0
    I have loved bracelets since childhood. When you make jewelry yourself, wearing it is even more enjoyable. Today I will make such a bracelet!

Do-it-yourself powerful power supply from a microwave transformer

Textile doll | Do it yourself

Tire column

make your own pincushion with your own hands

«Do it yourself - with your own hands» - a site of interesting homemade products made from scrap materials and items at home. Step-by-step master classes with photos and descriptions, technologies, life hacks - everything a real master or just a craftsman needs for needlework. Crafts of any complexity, a large selection of directions and ideas for creativity.

We recommend reading

Washing machine error codes