The main properties of every thing around us are its relevance, functionality, safety and appearance. By creating or already having a ready-made board (for example, from Aliexpress) of a power supply, you can improve it and select the appropriate housing for it. But in order to make it as convenient, beautiful and compact as possible, it is better to make the box yourself, using available materials.

What will be needed to assemble the block
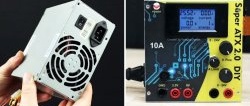
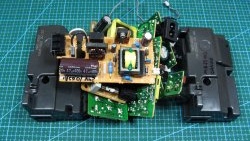
So, take the mounting module of a 12V and 10A switching power supply, in a metal box, without additional elements - http://alii.pub/69vqwn
It will require a step-down DC-DC converter with voltage and current regulation at 8A - http://alii.pub/69vqtj
To make the thing as safe as possible, it is convenient to take an ordinary sewer pipe with a diameter of 110 mm as the future housing.
A 3-4 bit digital ammeter-voltmeter is used as a future tracking scale - http://alii.pub/69vqup
You will also need:
- 2 double multi-turn potentiometers of 100 kOhm - http://alii.pub/5o27v2
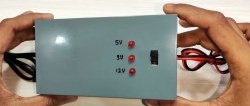
- connectors for connecting loads;
- grounded socket 15A 250B,
- single pole switch - http://alii.pub/5mk6b7
Scheme of a universal block made of ready-made modules

An elementary circuit that does not even require knowledge of electronics and circuit design.
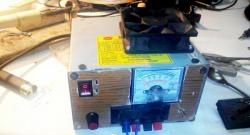
Making a case and a universal block with your own hands
A piece of pipe cut to size (it should accommodate both finished boards and several parts for them) is heated with an industrial hair dryer until soft.
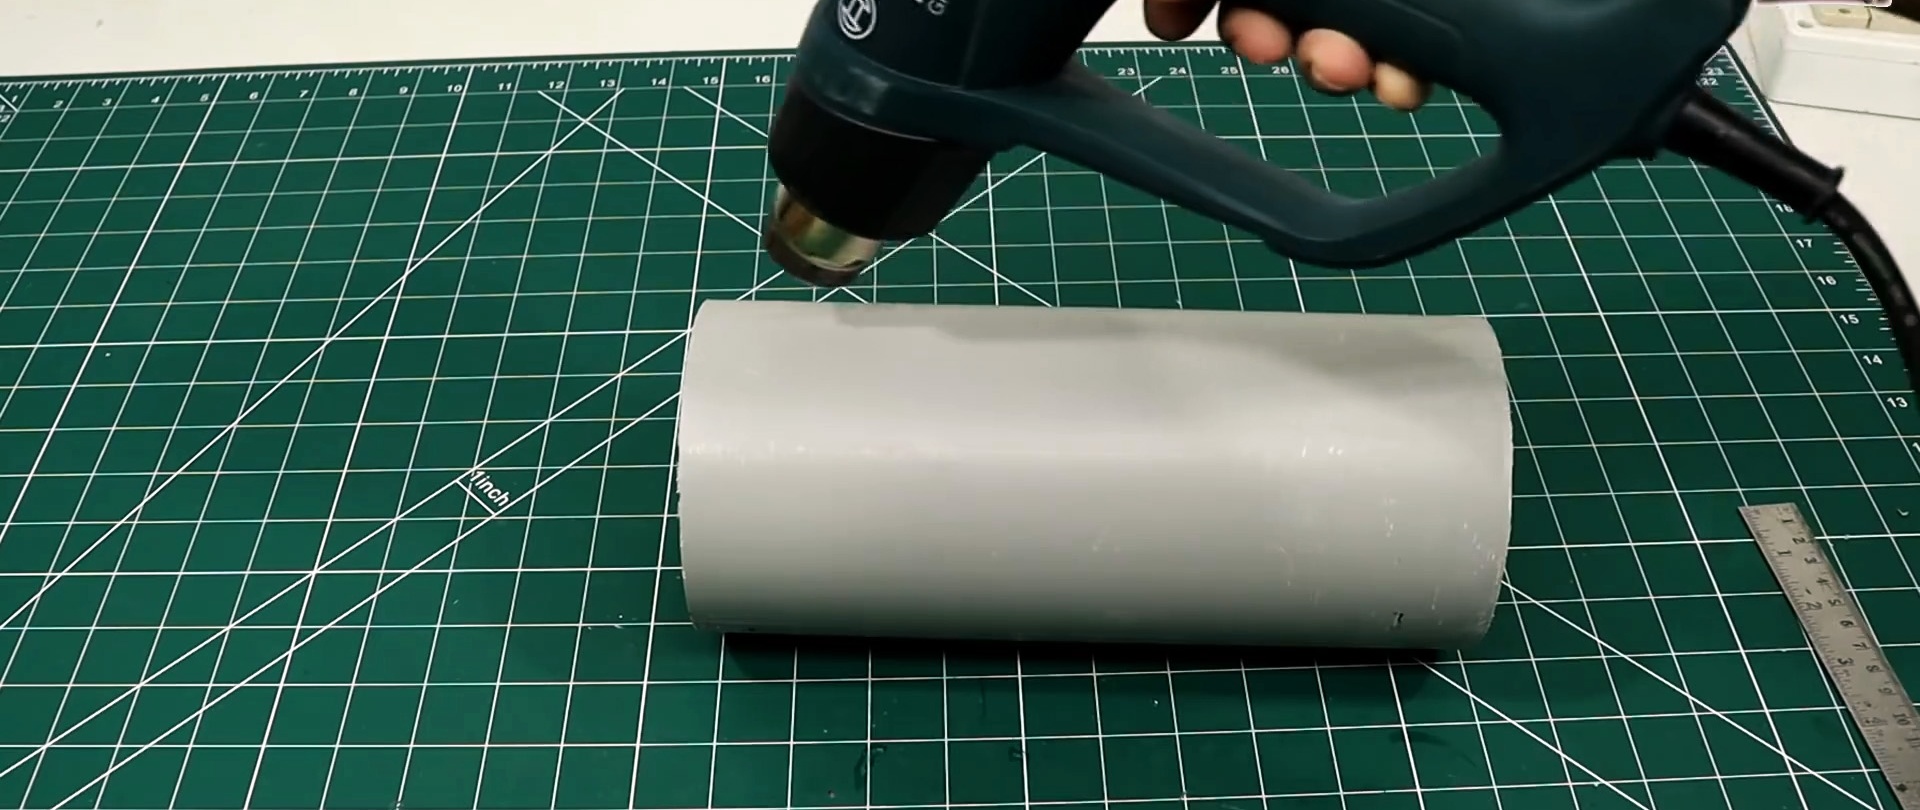
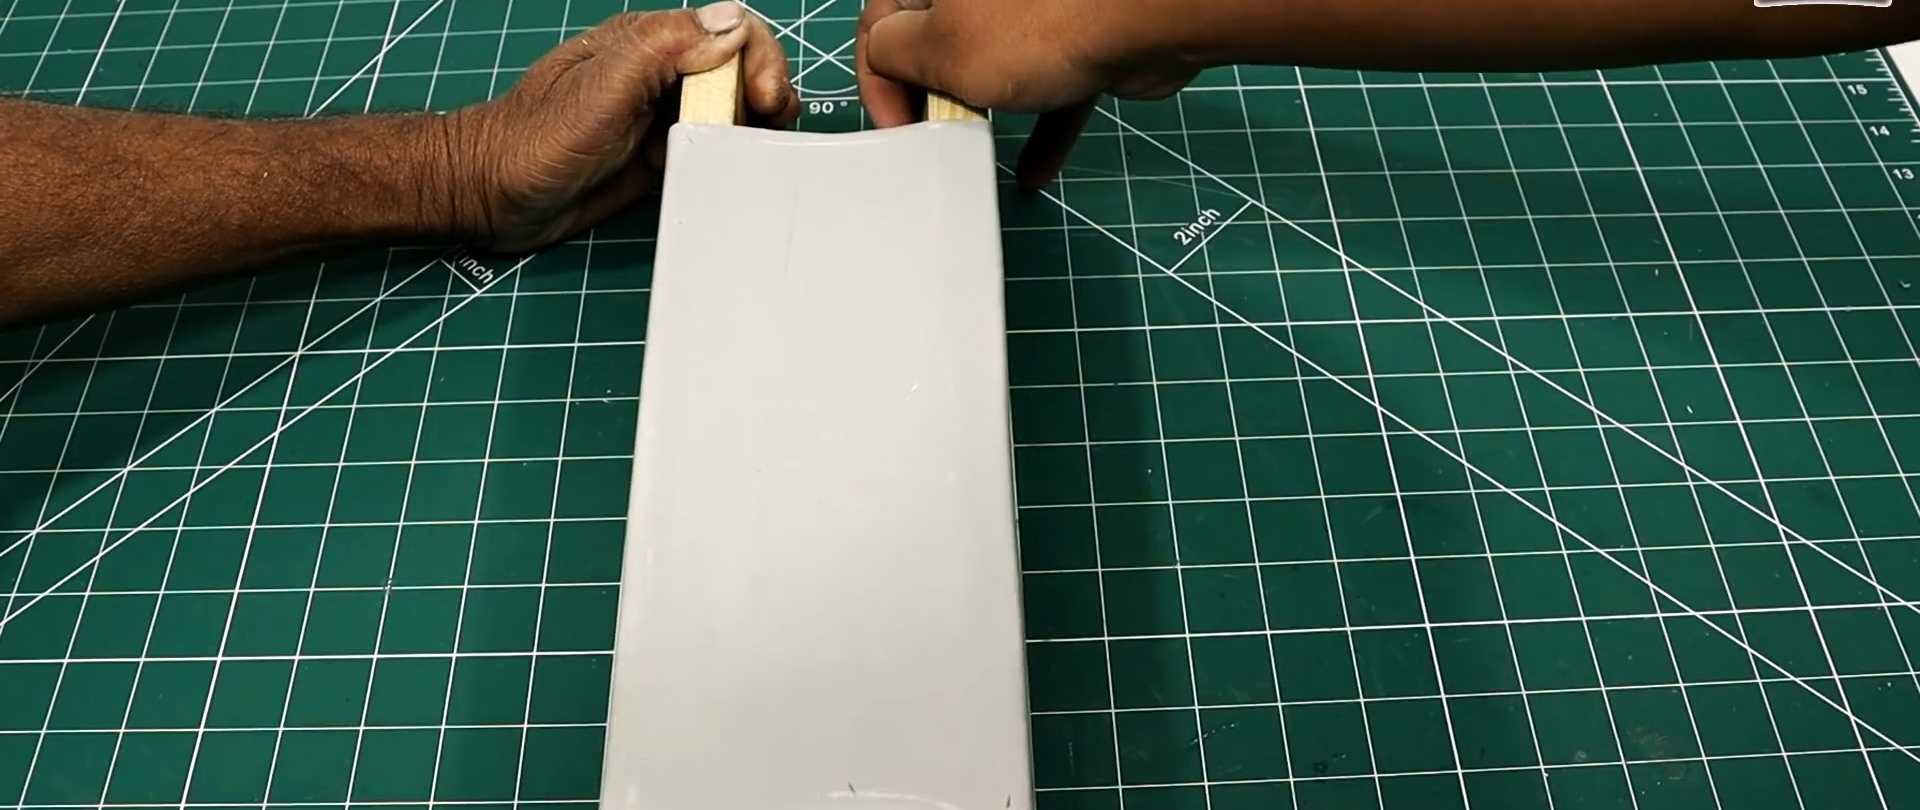
Using pre-prepared wooden blocks, it is converted into a rectangular channel with a cross-section of 100x75 mm.
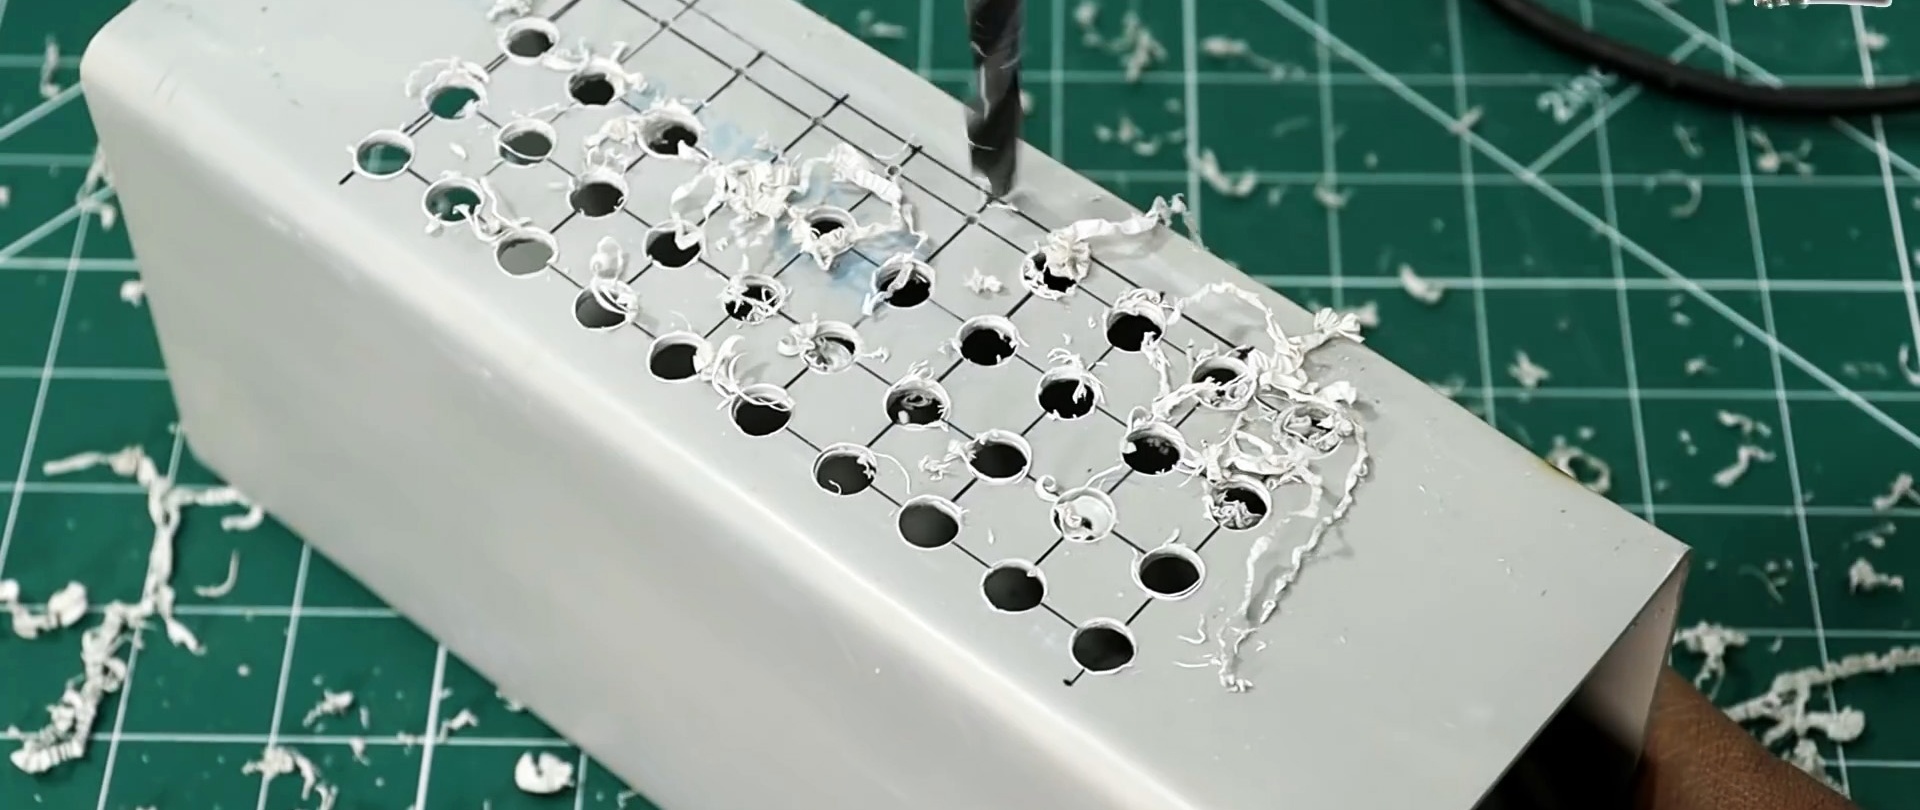
The sections of the resulting workpiece are sanded with sandpaper. Markings are applied on two sides along the entire length of the workpiece and holes are drilled for cooling.
Next, end caps are cut from the same plastic.

One of them houses the previously selected electronic elements (except for the socket and switch). They must be positioned so that they do not interfere with the details of the main circuit. Holes are prepared for them.
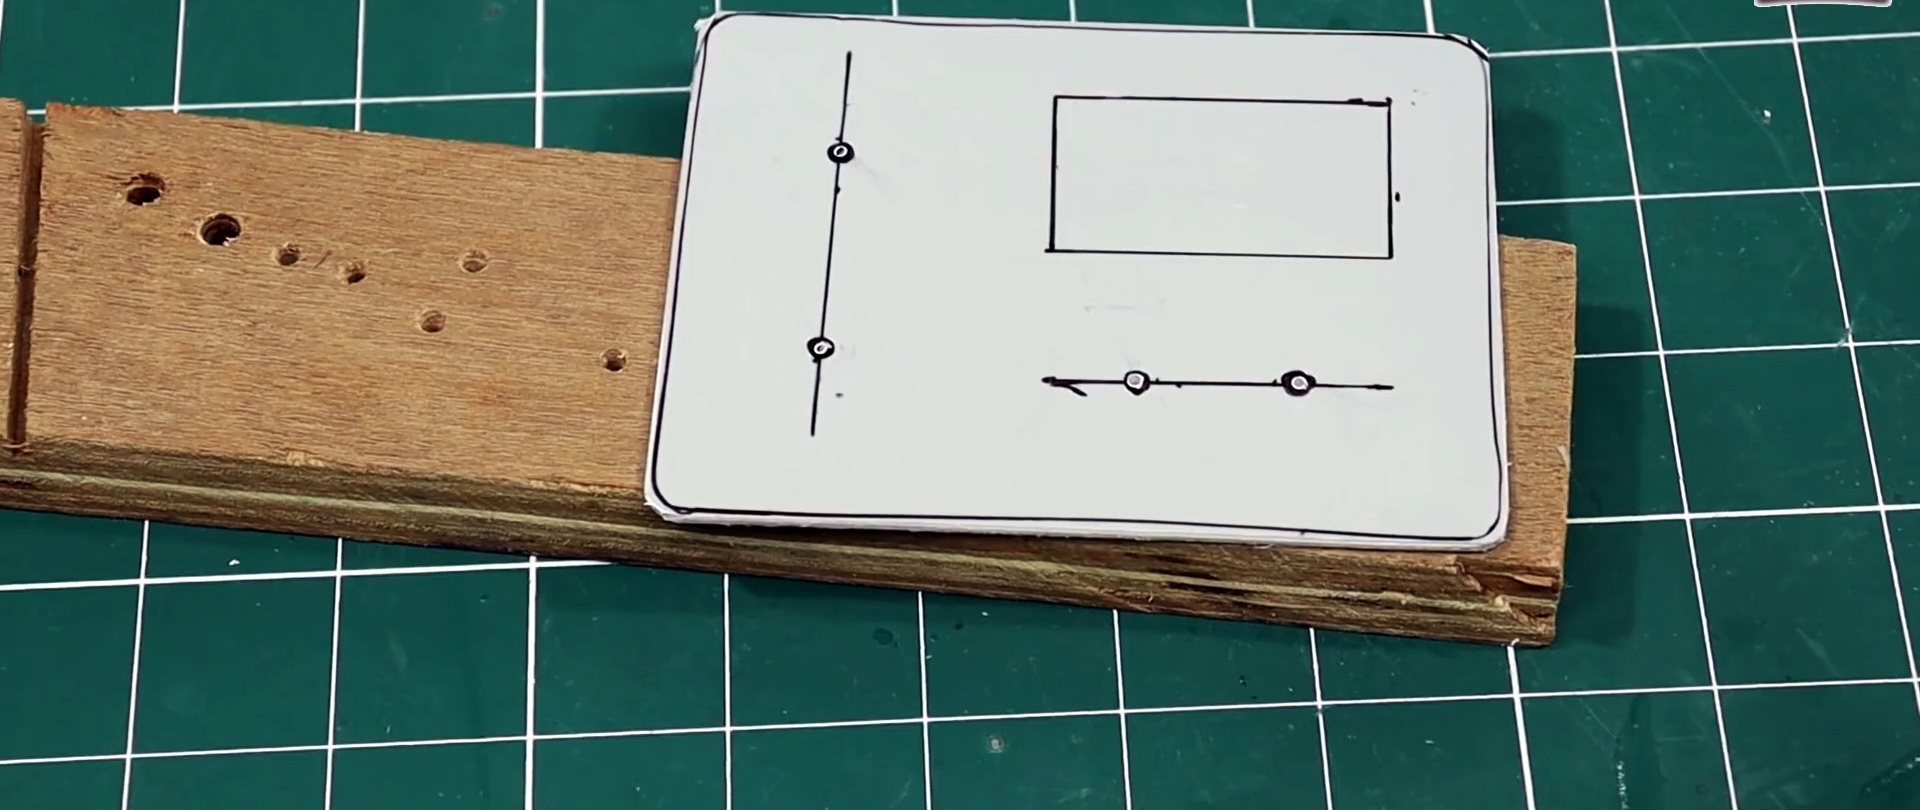
The necessary fastening and preparation of parts for connection is carried out.
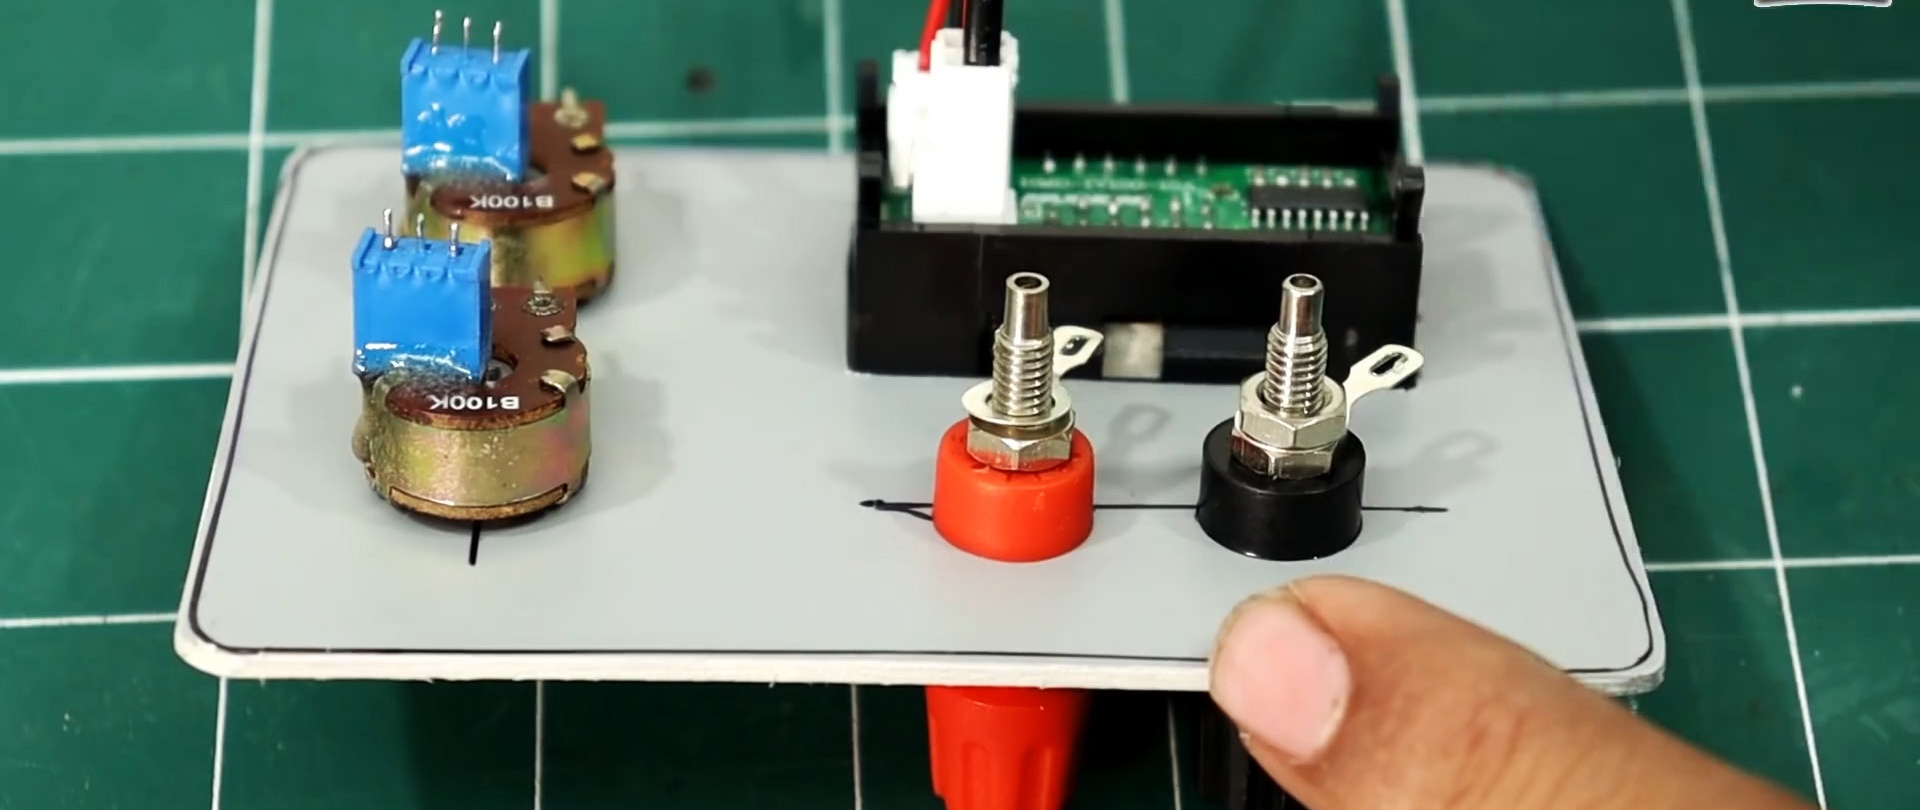
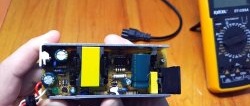
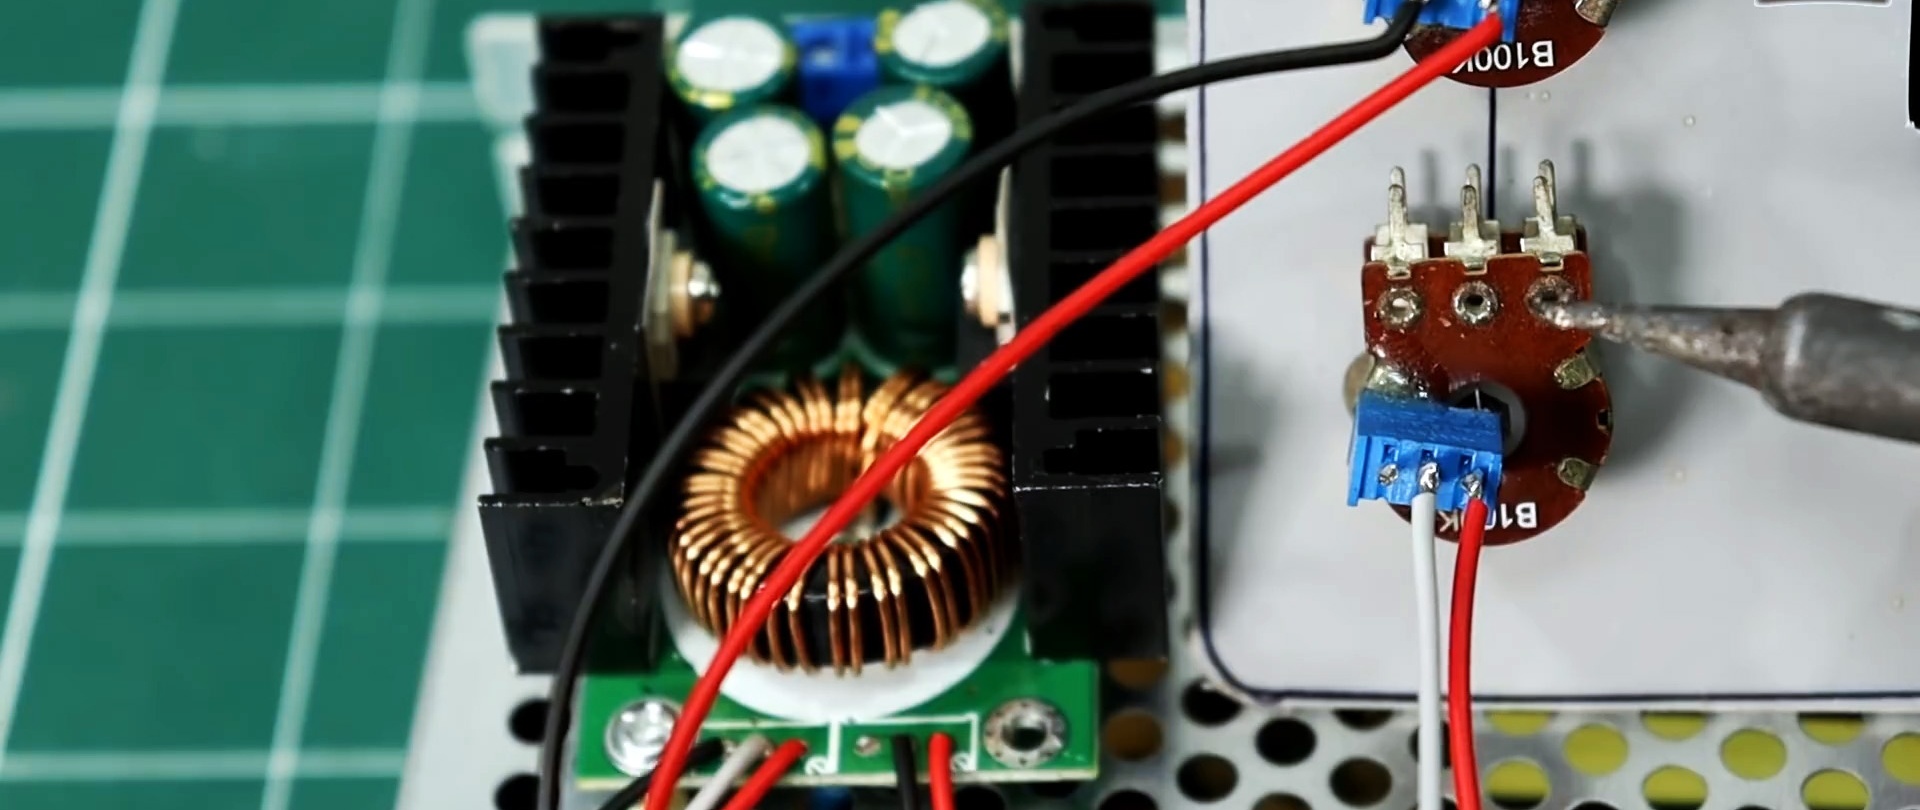
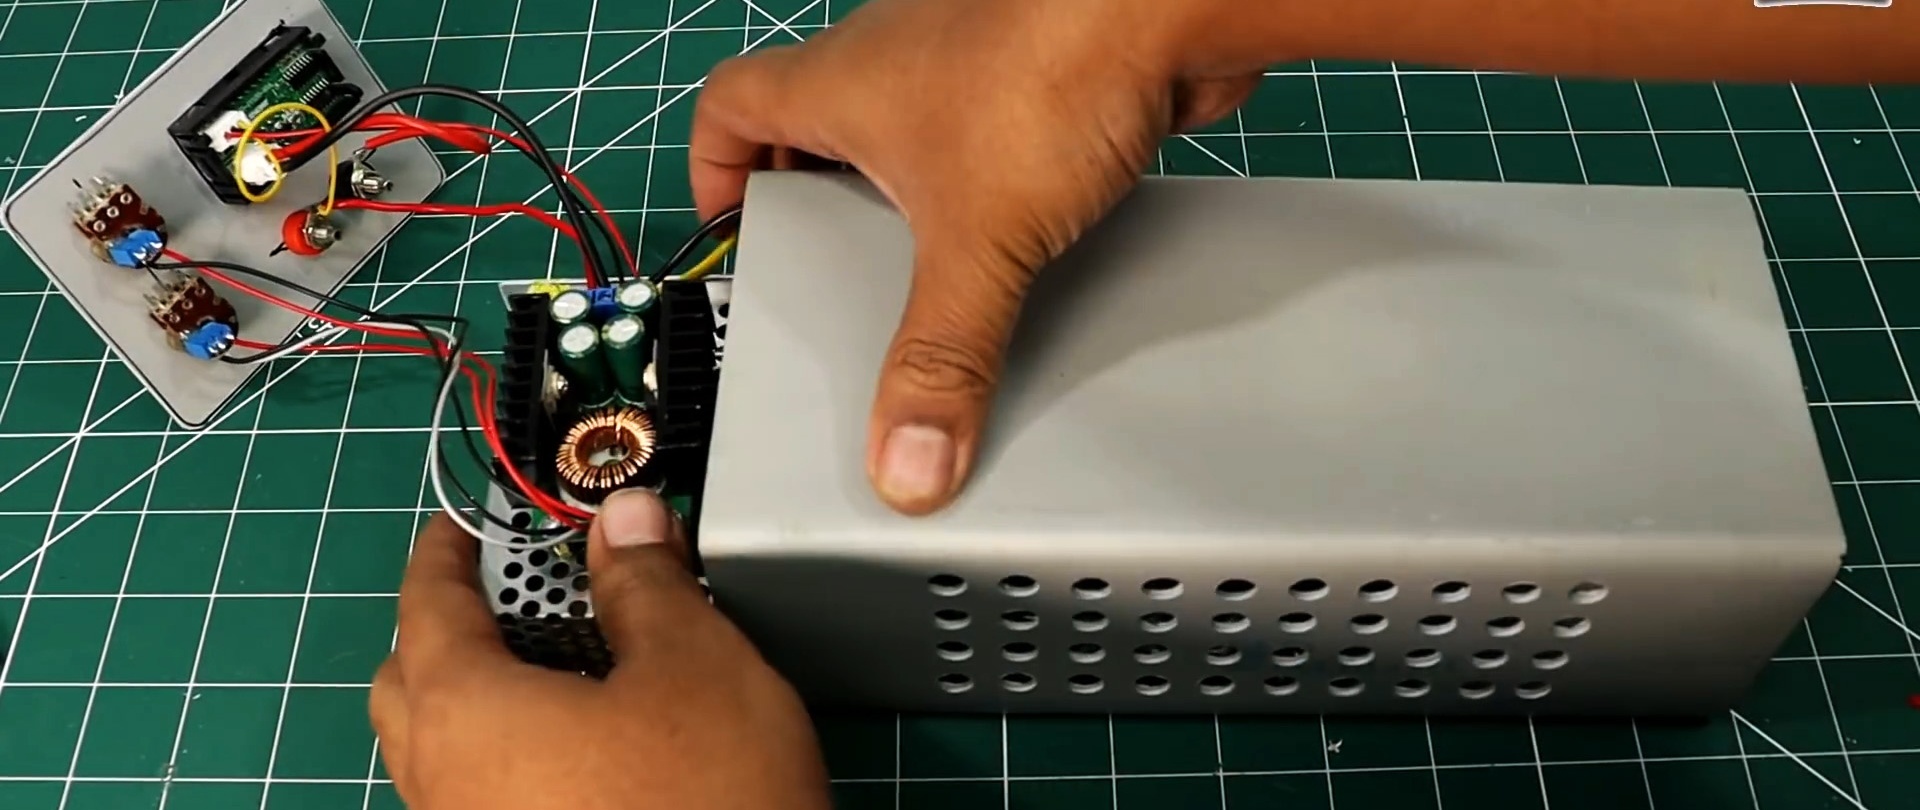
The variable resistors located there are unsoldered from the converter board, and wires are connected to the free contacts for subsequent connection with potentiometers installed on the plug.

The housing is removed from the pulsed current source, and the converter board is attached to it (low legs are used). The wires from the contacts of the soldered resistors are connected to the potentiometers on the plug. It is important to keep the connection!

The connector terminals and DSN are unsoldered.
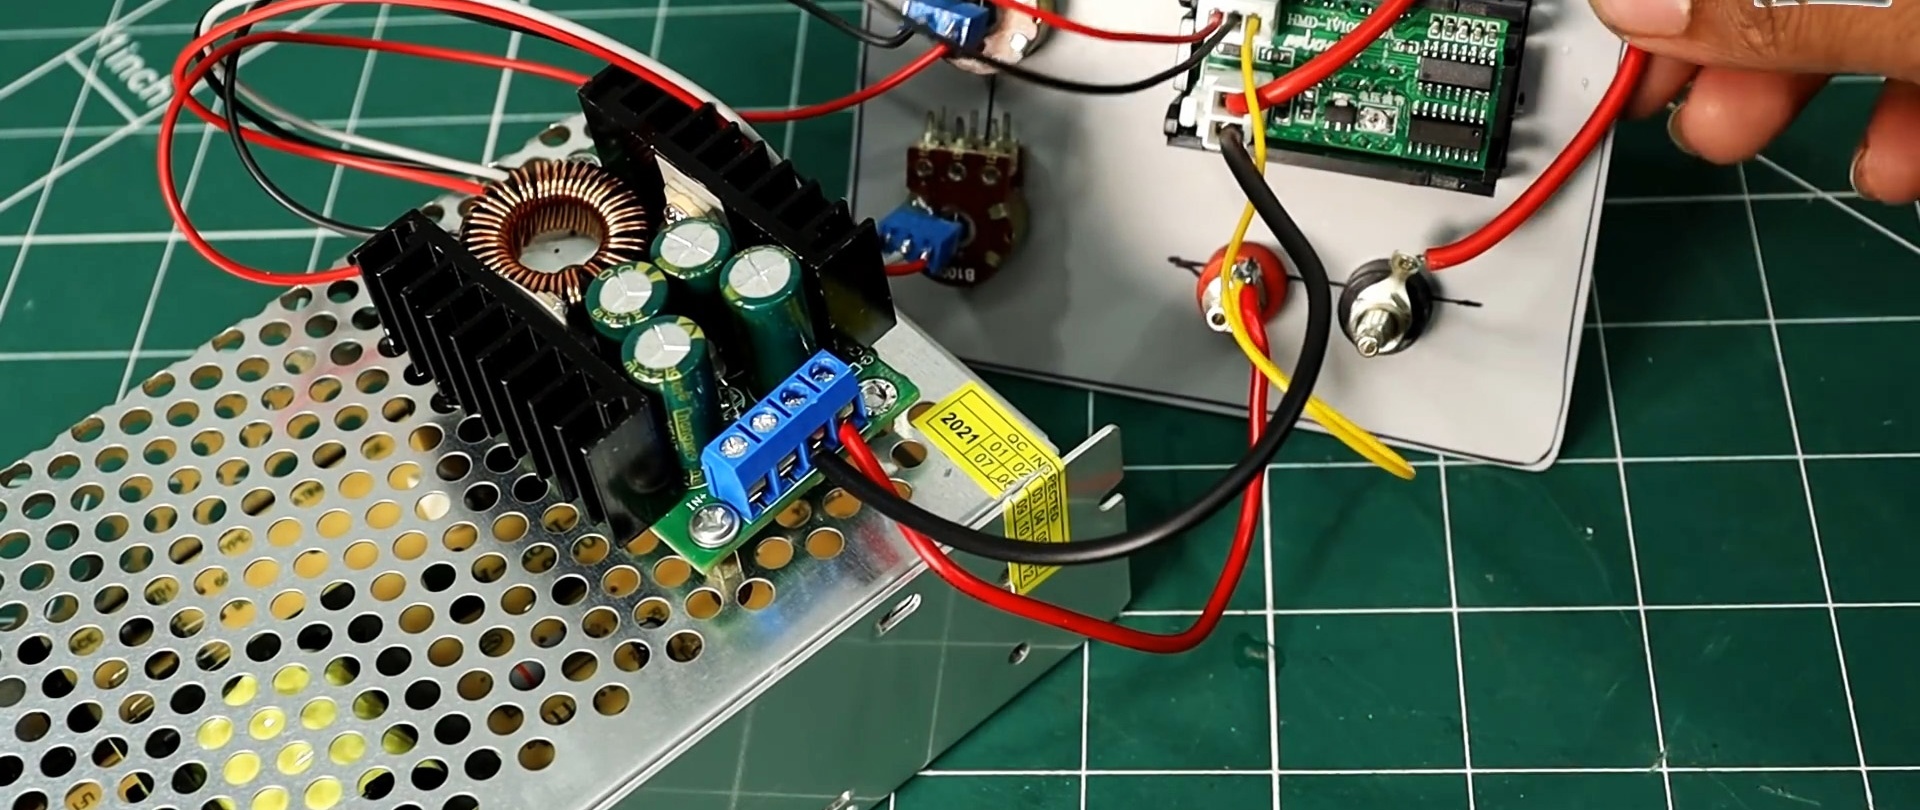
The ends from them are connected to the converter board block (right side). The left side of the header connects the DSN and leads two wires (yellow and black) to the JBN board (right side).

The resulting assembly is placed in the housing and fixed in it.

The remaining elements (NC176 and SPST-S) are installed on the rear plug in the same way. The right contact of the socket (phase) is connected to the switch (red wire). Next it goes to the leftmost contact of the JBN board block. A black wire (zero) and a yellow one (ground) are attached next to it.

The end caps are glued to the main body. The “legs” are installed.


The new power supply is ready. The converter has short-circuit protection and will not produce more than 10 A of current. It would also be a good idea to install active cooling in the form of a small cooler. To make the case collapsible, instead of glue to fix the ends, you can use small corners with screws.