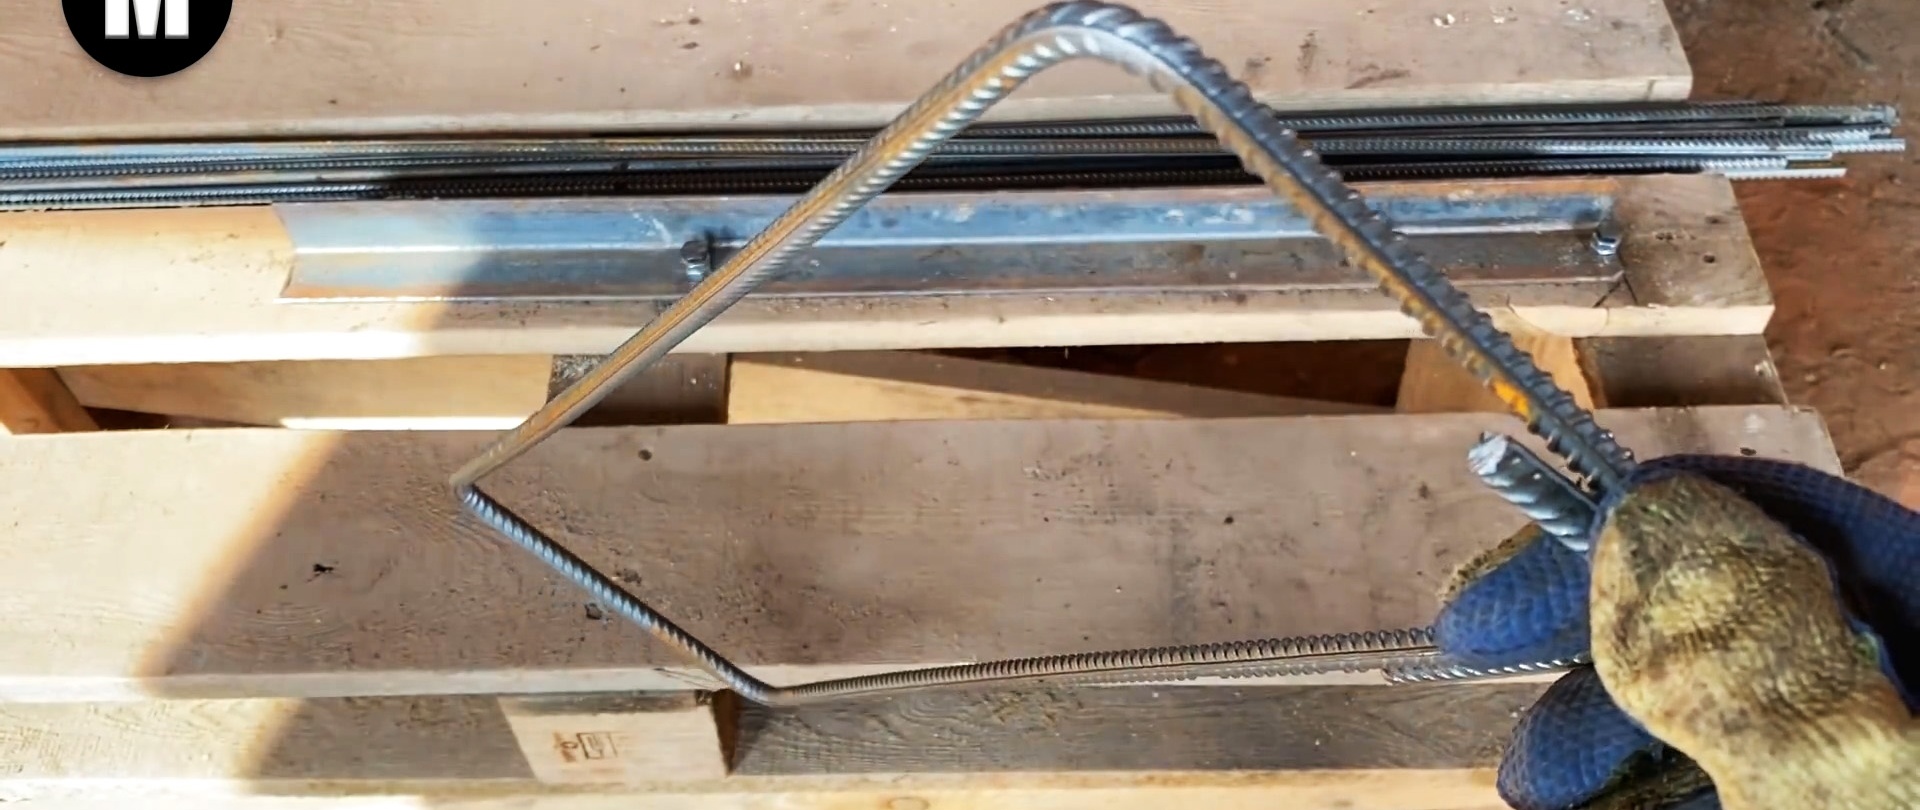
Clamps for the reinforcement frame are made using “clamp benders”, which cost a lot of money. But perfectly straight clamps can be made using a simple device that any adult can assemble. Moreover, this does not require special knowledge, professional training or scarce materials.

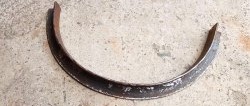
We will bend the clamps under a foundation 60 cm deep and 25 cm wide. Naturally, for a different foundation the sizes of the clamps will change. The clamps, taking into account the protective layer (3 cm on top and sides, and 7 cm on the bottom) will have a length of 50 cm and a width of 19 cm.


Making a simple bending jig
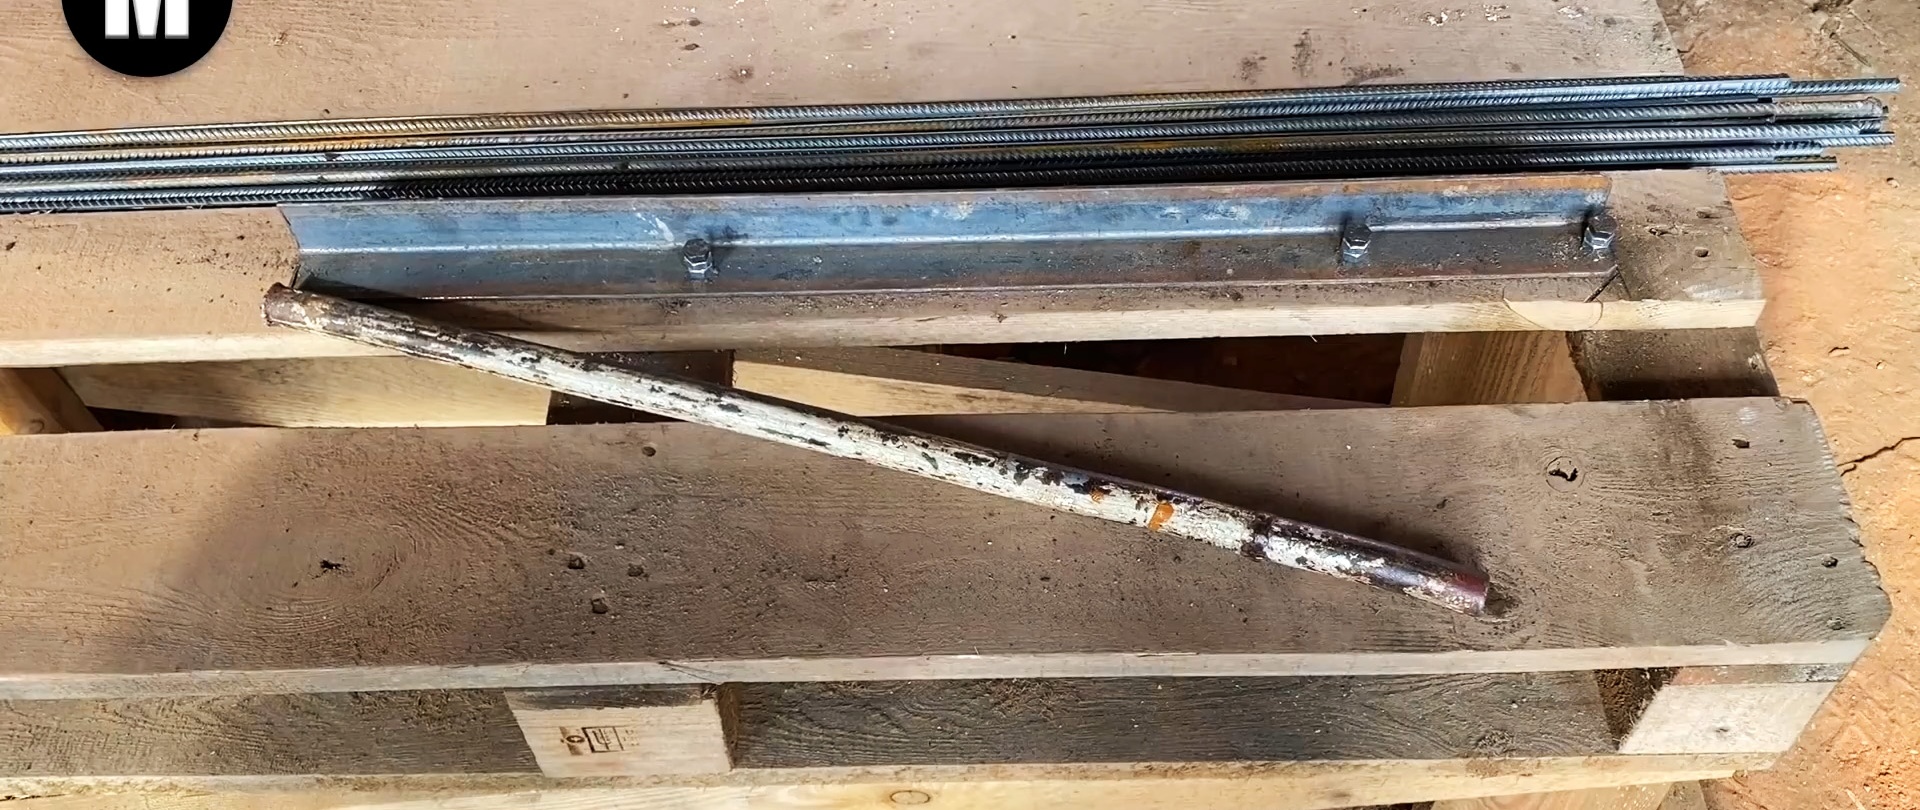
For such clamps you will need a steel angle 4x4 cm long, greater than the maximum size of the clamps, equal to 50 cm. We will use an angle 74 cm long, which suits us quite well.

You will also need 3 bolts with a diameter of 8 mm, which will be stops and end points for bending the clamps. You will also need 6 nuts, which we screw 2 at a time under the bolt heads, and 3 washers. We will bend the clamps from reinforcement with a diameter of 8 mm.

We drill holes in the corner flange to ensure a distance between the outer bolts of 48 cm, and 17 cm between adjacent bolts. Moreover, the right bolt should be no more than 5 mm from the edge of the corner. Screw the corner to a hard surface.
Let's start bending the clamps
To do this, we divide a standard reinforcement rod 6 m long into 4 sections of 1.5 m each. We place the clamp blank between the bolts and the inside of the angle flange so that the outlet behind the right bolt is about 5 cm. We put a meter-long section of thick-walled pipe on it and bend the reinforcement 90 degrees.

Then we transfer this segment to the opposite bolt, pressing it very tightly against the corner and bolt. Using a pipe, we bend the opposite side of the workpiece also at a right angle. Next, we set the corner by the middle bolt and bend the reinforcement by the same 90 degrees. We try to make bends in one plane, so as not to have to straighten the clamps later.
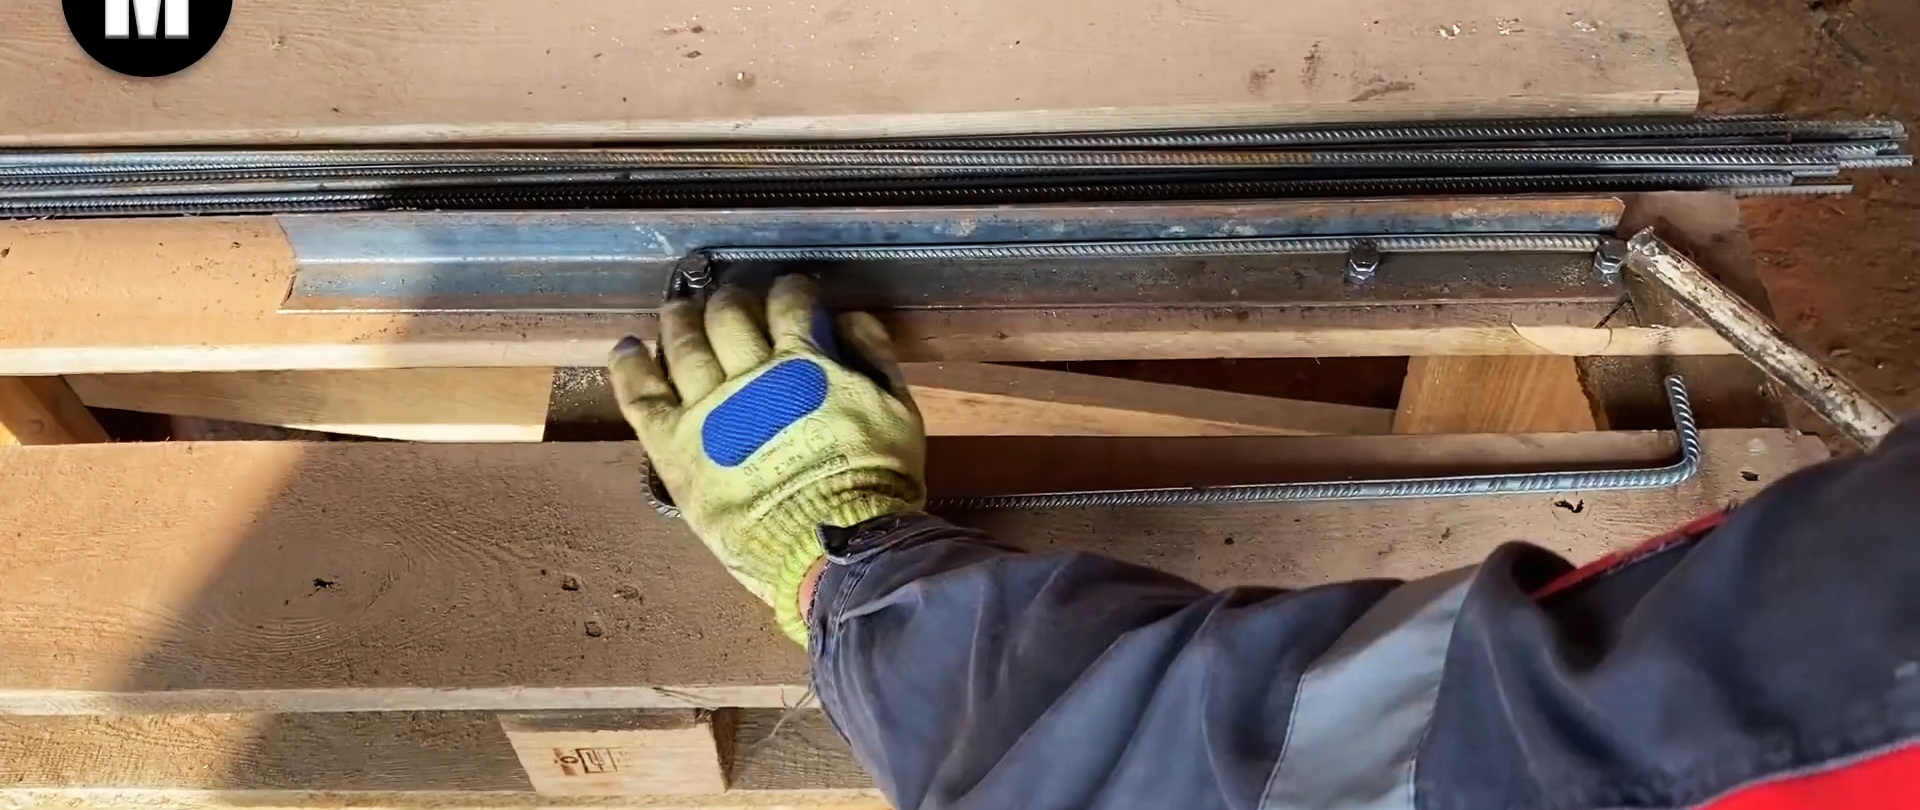
We again hold the workpiece by the far bolt and bend the end at a right angle. Finally, we place the workpiece behind the middle bolt and finish making the clamp. According to this scheme, we make the required number of clamps and connect the reinforcement cage.