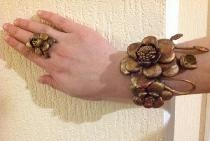
To make a bracelet from satin ribbons and beads you will need:
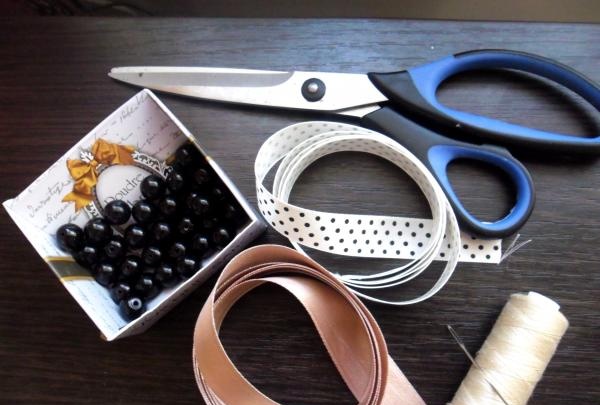
1. Satin ribbons of different widths
2. Beads 10-12 pieces, depending on the size of the bracelet and the size of the beads
3. Needle and thread according to the color of the ribbons
4. Scissors
5. Lighter to burn the edges of the tape.
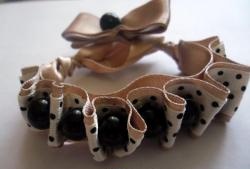
For the bracelet, you need to choose ribbons of two colors. One tape can be taken 1.5-2 centimeters wide, and the second one narrower - 1 centimeter. It is necessary that the narrow tape fits on top of the wide one, and the edges of the bottom tape are clearly visible. A wide ribbon will need 100 centimeters, and a narrow ribbon – 30 centimeters.The color of the ribbon should be chosen according to your own preference.
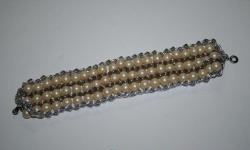
When choosing beads for a bracelet, you should consider their size and the size of the ribbon. For larger beads, you should choose ribbons of sufficient width. By choosing different colors of ribbons and beads, you can create many original bracelets for each set of clothes. Multi-colored bracelets that even children can wear also look original.
It is important that the colors of both ribbons match each other and the color of the beads.
Making a bracelet.
The first stage is preparatory.
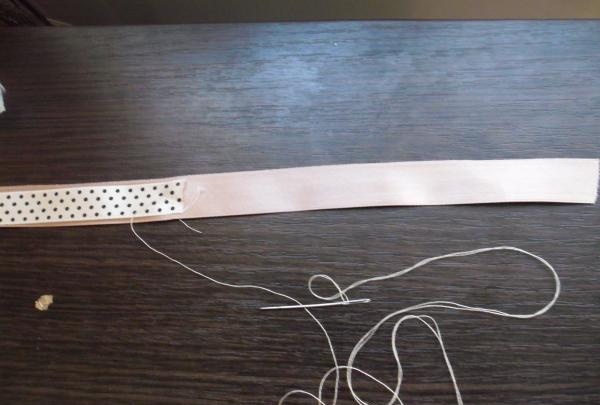
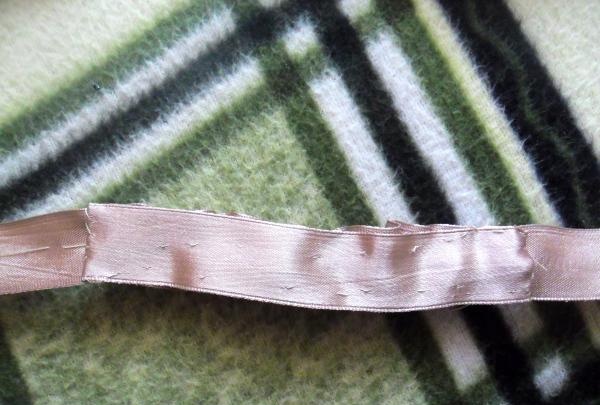
First you need to lay out the tapes on a convenient surface. First you need to lay out a wide tape, retreat 10-12 centimeters and put a narrow one on top. In the middle of the tape you need to sew it with a regular seam, you can sew it on a machine. The seam is only needed to prevent the tapes from slipping.
The second stage is assembling the bracelet.
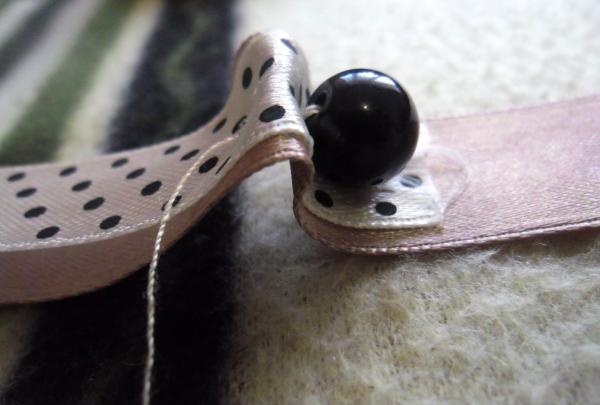
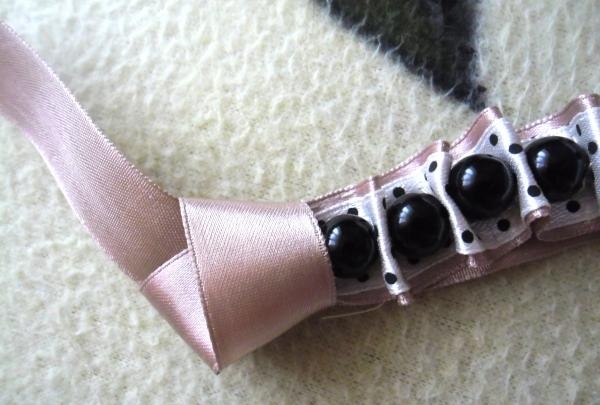
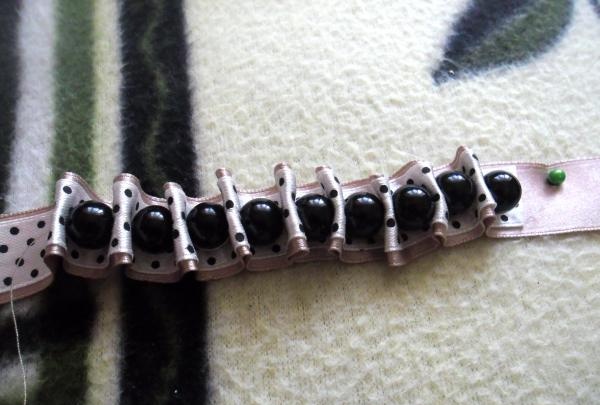
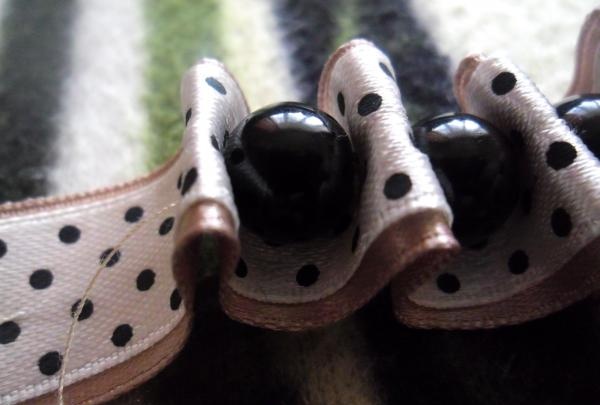
Next you need to sew all the beads to the ribbons one by one. At first glance, this may seem simple, but here is the rub. Satin or silk ribbons are too slippery. Beads are also not easy to sew on. The first bead needs to be sewn simply, without constrictions. Next, a small fold should be formed from the ribbons so that the bead looks like between two tubercles. The fold of ribbons must be secured with thread. When sewing on beads, you should take into account their rounded shape and leave enough space between the folds so that the bracelet does not bend in different directions. One bead should be left to decorate the snap bow. When all the beads are already sewn, you should thread a needle and thread through all the folds and beads so that the bracelet comes together into a single whole. This stringing of beads can be done two or three times to make the decoration more durable.
Photo 6 The inside of the bracelet will not be very attractive. All seams and threads will be visible here.This can be decorated with a small piece of ribbon. To do this, you need to measure how much tape you need to cover the seams, and cut off the required piece from the tape, the one that is wider. Carefully, making a minimum of visible seams, you need to sew a piece of tape onto the inside of the bracelet to hide the seams.
The third stage is assembling the bow-clip for the bracelet.
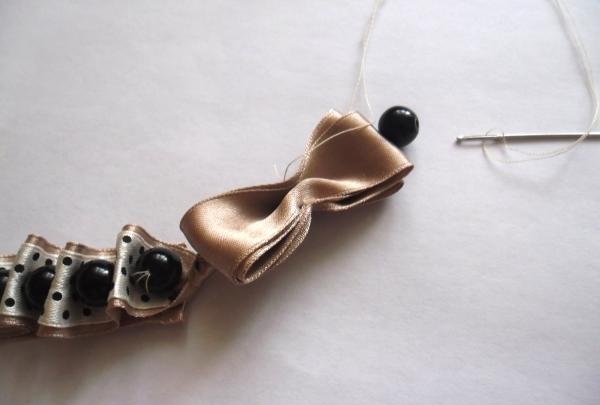
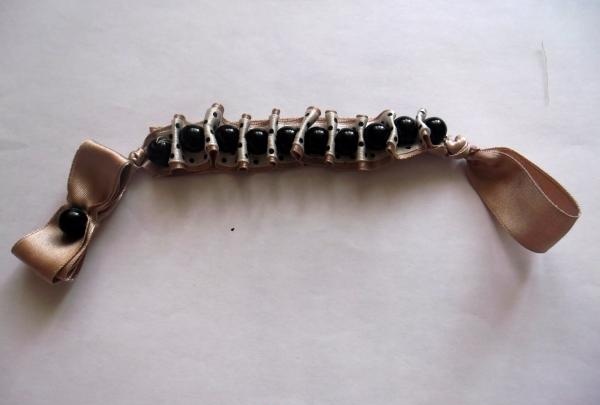
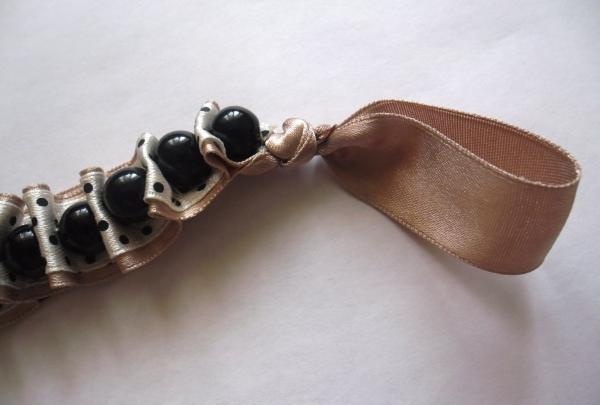
Use a lighter or matches to burn the edges of the ribbons so that the threads do not split. On the side where the smaller part of the ribbon protrudes, you need to fold it in half and tie a knot near the first bead. The knot should be neat; it needs to be tightened gradually. There should be a lot of wide tape left on the other side. You need to make a bow out of it, which will serve not only as decoration, but also as a latch for the bracelet. The ribbon needs to be folded several times. You can wrap it around two or three fingers, depending on the size of the bow you want. In the middle you need to sew the folded ribbon with a gathering seam to make a bow. In the middle of the bow you need to sew the remaining bead.
It is important to take into account the size of the bow and loop. The bow should go through the loop and hold the bracelet.