The Huichols treat nature with special reverence. The center of the mandala - the square symbolizes 4 elements: earth, fire, air and water. According to Indian beliefs, Ojo de Dios is able to heal and protect. It is hung on the wall and used in various rituals. In general, Ojo de Dios amulets are destined to bring good luck.
Now there is one person known in the world who creates the most beautiful and unique mandalas, he did it with his art, his name is Jay Mohler. You can be inspired by his work by visiting his page on the Internet, and if you wish, you can even purchase one of his amulets.
A few words about materials.
It is best to use natural materials - wood and wool. If possible, the yarn should not be very “shaggy”; acrylic, cotton and wool are perfect. You can use toothpicks and barbecue skewers as slats.This is perfect for small sized mandalas. Reiki for large mandalas can be found at construction markets and hardware stores.
In addition, it will be very beautiful if you decorate your amulet. For this purpose, you can use beads, decorative feathers, buttons, ribbons, beads, and so on. The main thing is not to be afraid to show your imagination. I suggest you weave a mandala like this.

This way you will get an idea of the simplest weaving of mandalas ojo do dios. You can choose the color combination at your discretion, the main thing is that the colors match each other. So let's get started.
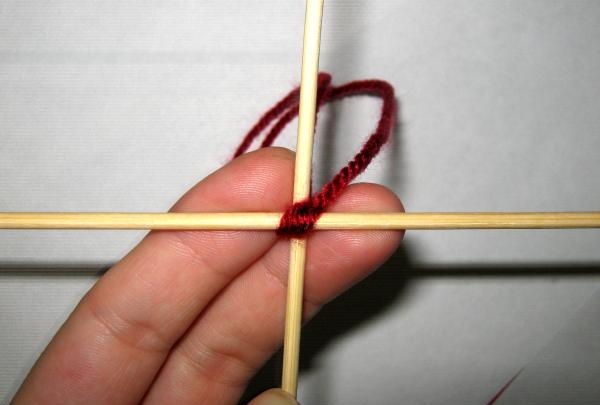
1. Take 2 slats and secure them exactly in the middle with a thread in several turns.
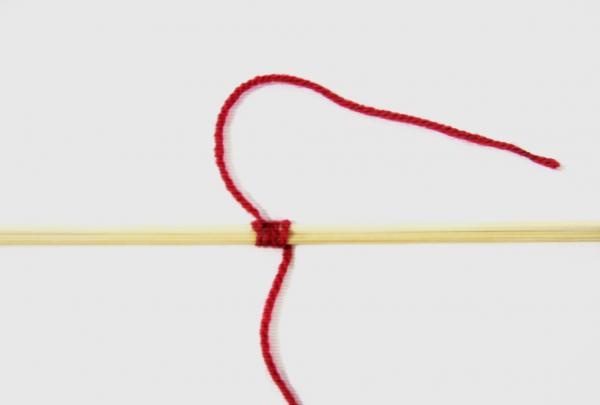
First, we secure the thread with a knot, and then wrap it around both slats several times.
2. Turn the attached slats crosswise and wrap them diagonally several times. First on one side, then on the other.
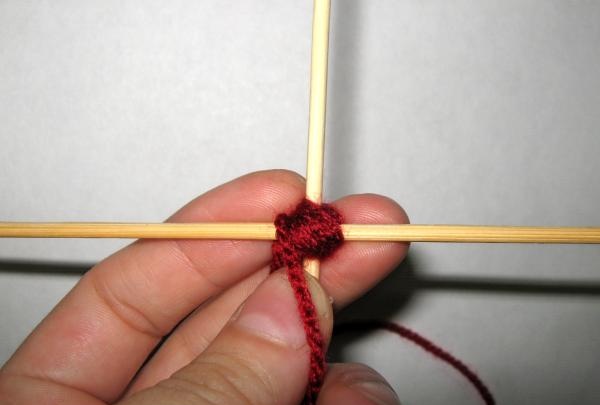
The main thing is that the slats hold tightly and do not fidget. We wind it as many times as necessary.
3. Now we need to make squares on our 2 slats. I will do it in the same color, but you can use another one. You need to wrap the thread around each rail in a circle. We wrap it around one strip, placing the thread on top. Let's make a turn.
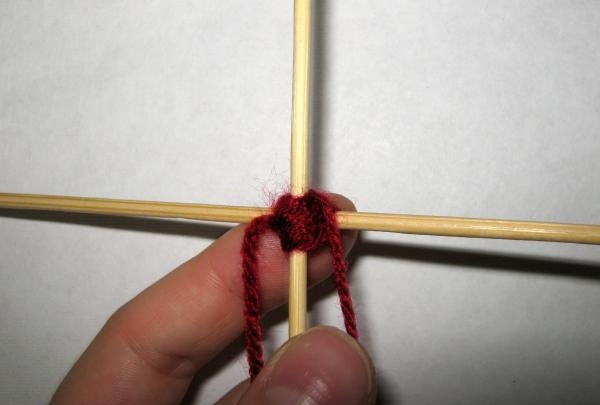
When the thread is at the top again, we transfer it to the second rail and so on.
We do this until we get a square. The size of the square is at your discretion. It should work out like this.
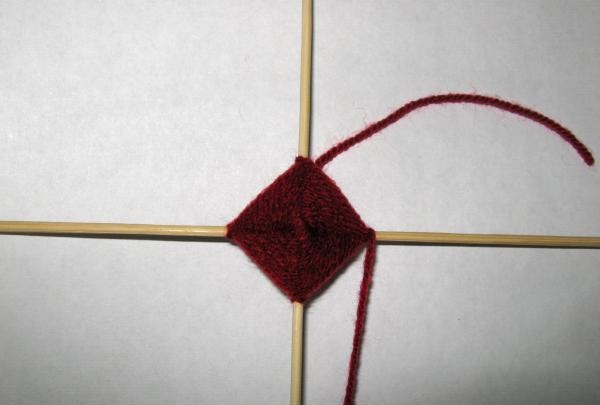
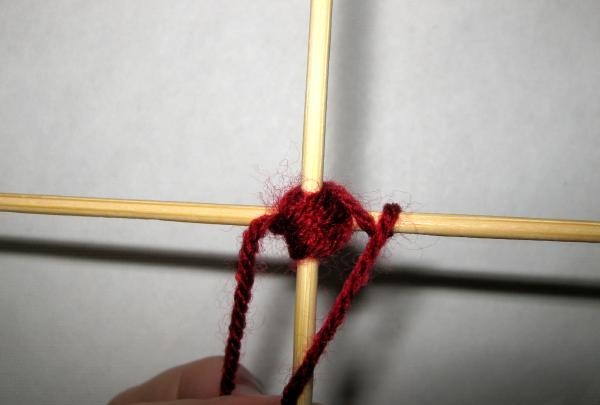
Fasten the thread and cut it on the wrong side.
In general, we make all the knots on the wrong side so that they are not visible.
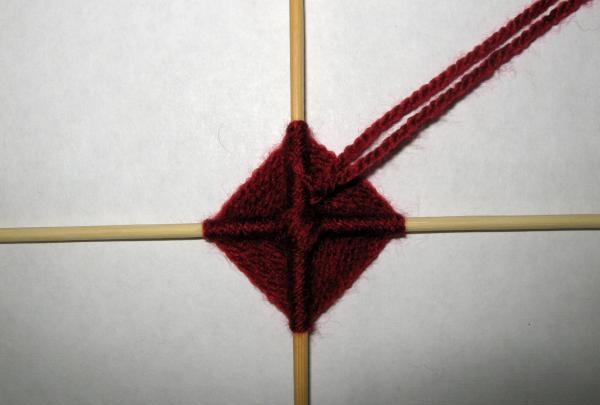
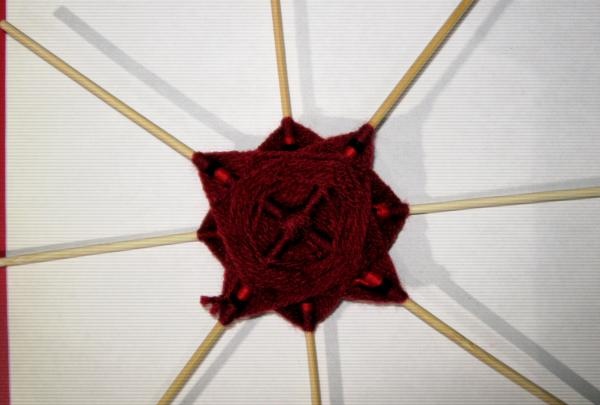
4. This is the top square for me, I want the center to be more interesting, so I take a thread of a different color, tie it on any of the slats and repeat the 3rd point. It turns out like this.
5. I take a thread of another color and repeat the 3rd point again. It turns out like this.
6. Now we need to make the bottom square. It should be slightly larger than the top one. The principle of operation is the same as with the top one. We take 2 other slats and thread and repeat points 1-3. Again I used 3 colors. As a result, we get 2 such squares.
7. Now we need to connect them together. One square from the top (smaller size), 2nd from the bottom. This is perhaps the most crucial and difficult moment in all weaving, since we need to make sure that everything is smooth and neat and the squares do not move apart. We place one square on top of the other and, pressing it in the middle with a finger, tie the thread to one of the slats of the lower square, leaving the tip so that we can tie this thread later.
In general, the process of work is similar to point 3, only now, having wound the thread around one of the slats, we pass it under the next two slats and wrap it again, and so on in a circle.
It is very important here that the squares do not move apart and monitor the thread tension. We wrap it in a circle in this way 10-15 times until we feel that the structure is strong and does not move apart. We stop at the stick to which we tied the thread at the beginning and tie the “working” thread to the “tail” we left. It should look something like this.
And this is how it looks from the inside out.
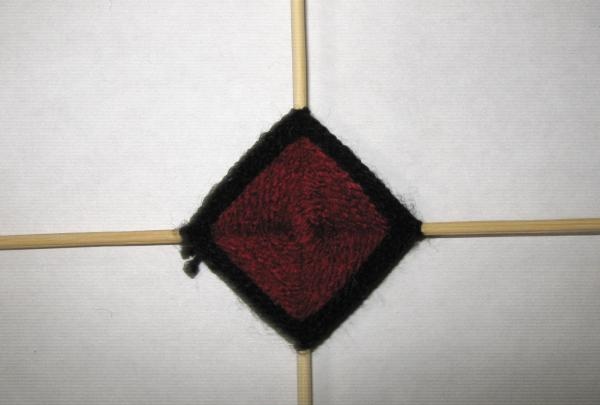
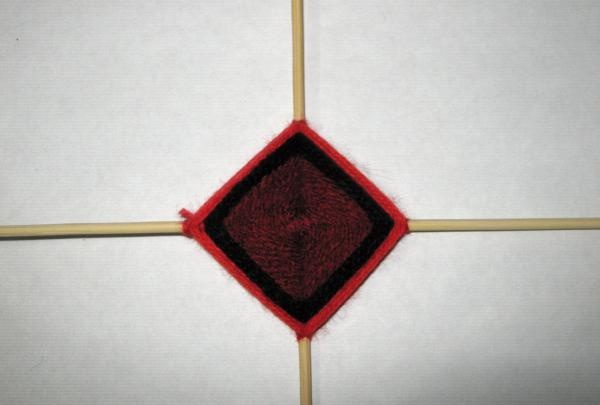
8. Now take a thread of another color and repeat all the same steps, winding it through 2 sticks. Like this.
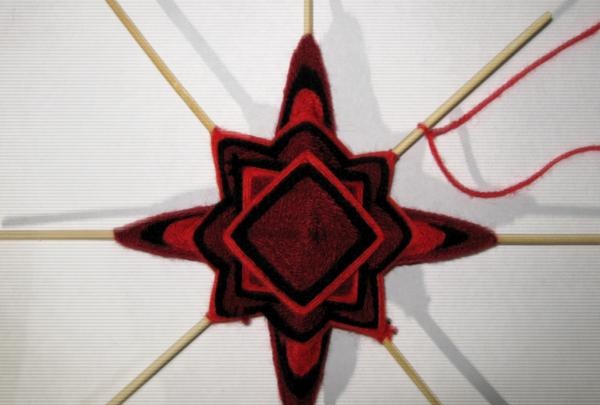
9. Next we weave the next element, I’ll call it “petal”. In total you need to weave 2 “petals”. We tie the thread as in the photo.
We pass it under the mandala and wrap it around the opposite end of the rail. Next, we again pass under our mandala and again wrap the opposite end of the rail.We do this until we are satisfied with the result. The main thing is to remember how many full revolutions we made. This is necessary in order to weave the second symmetrical “petal”. I got 6 full turns.
10. We tie the thread to another stick and again make 6 turns.
11. Now I want to repeat both "petals" with another color. I made 10 windings on 2 “petals”.
12. I take another color and repeat step 11. This is how it happened.
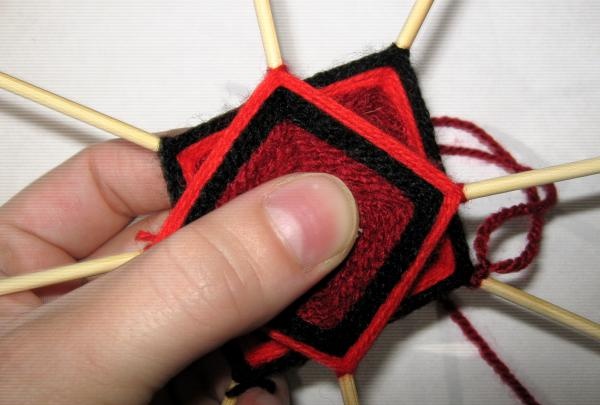
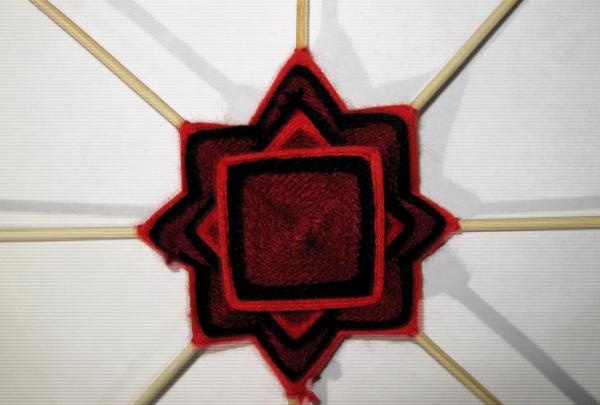
13. Next we will weave the “square” element. We tie the thread as in the photo.
We pass it from below through one rail and wrap the next rail, throwing the thread on top.
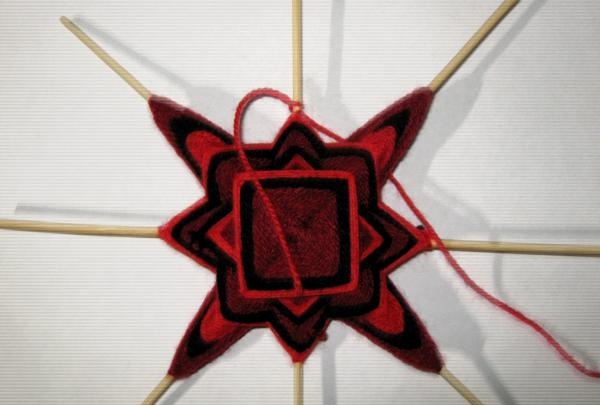
And so on in a circle. This is what happened.
I take a thread of a different color and repeat the same thing.

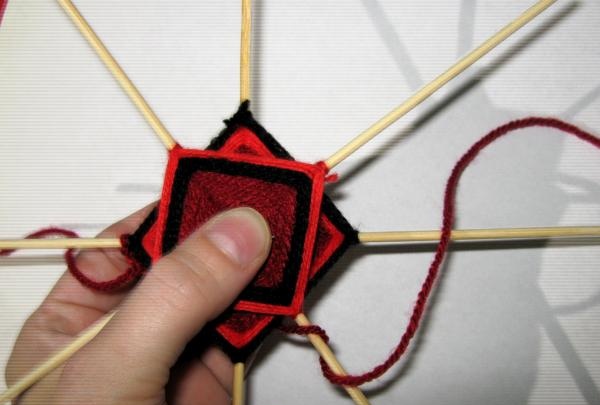
14. We repeat the same operation on the upper square, that is, now we tie the thread to the stick of the upper square and repeat step 13. It turned out like this.
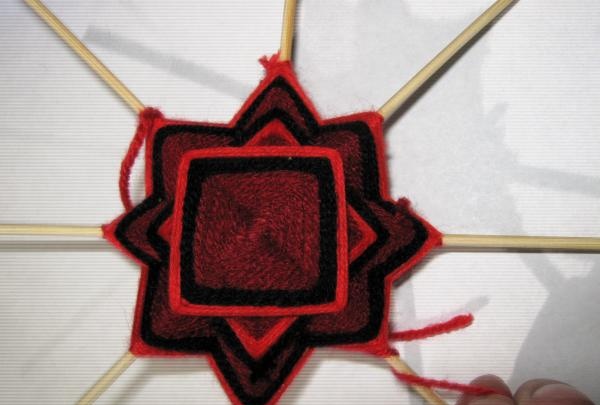
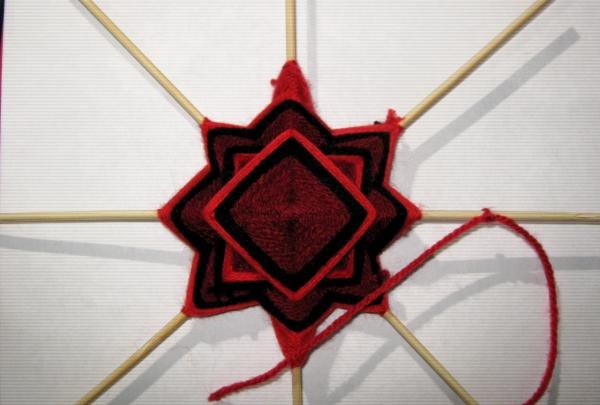
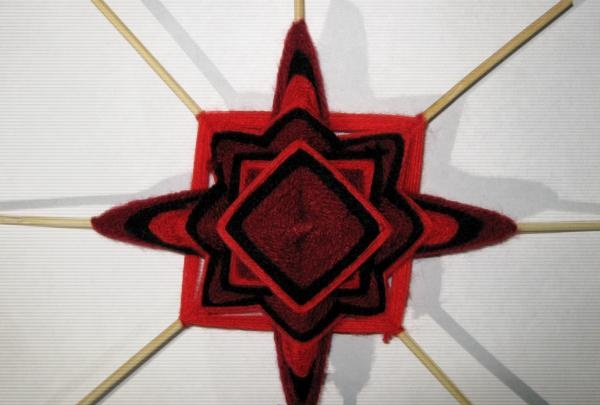
15. Next, I weave “petals” again, but on the bottom square. 12 turns with a thread of one color, 12 with a thread of another color and a edging of 10 turns with a thread of the 3rd color. Like this.
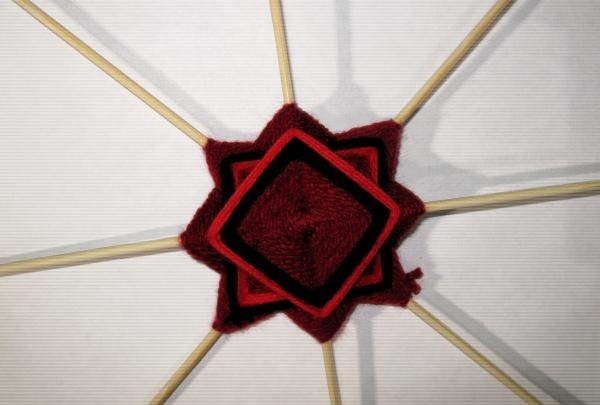
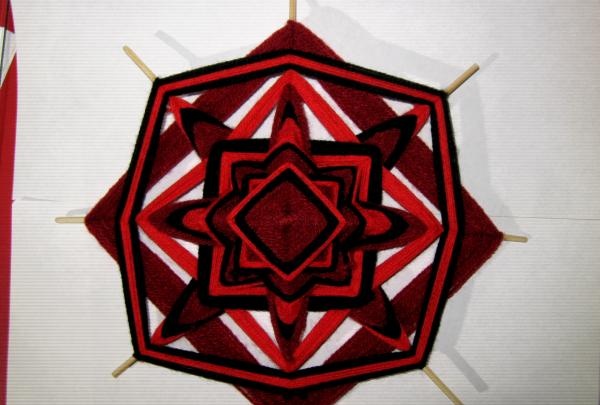
16. The next element is an “octagon”, that is, I simply tie a thread on one of the slats and wrap each slatted in a circle. I wrapped it 3 times with black thread, 5 times with red and again 3 times with black. Like this.

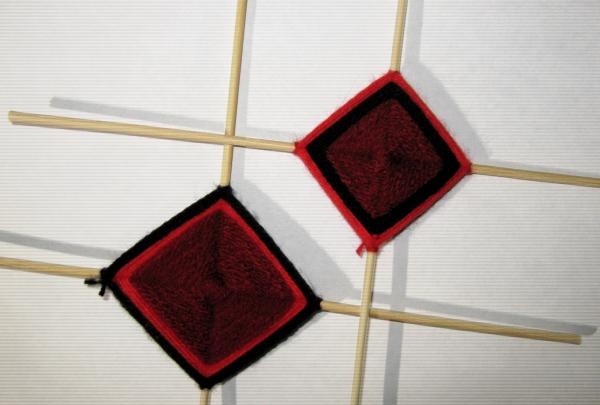
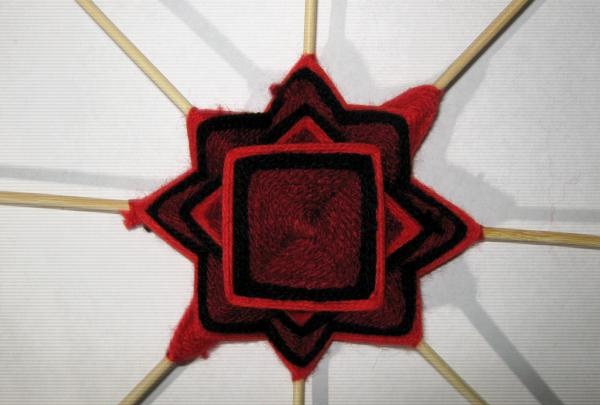
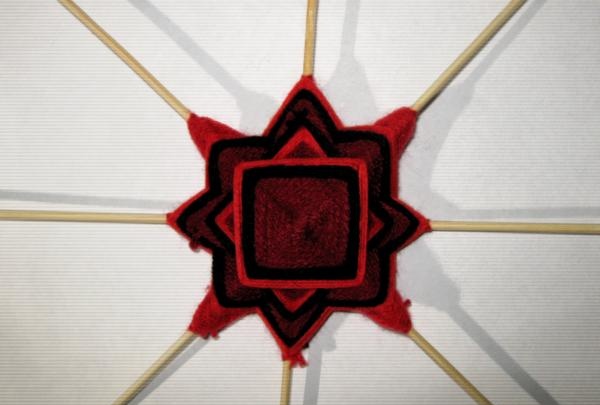
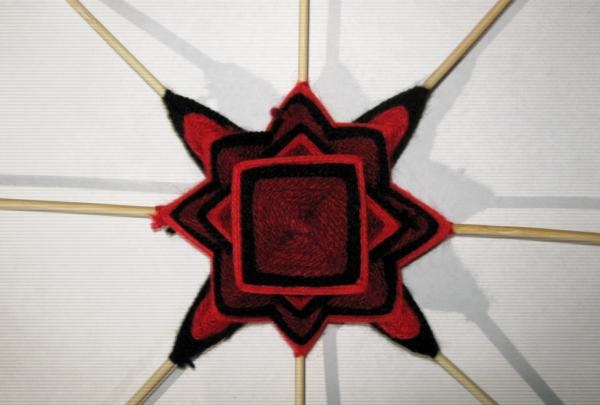
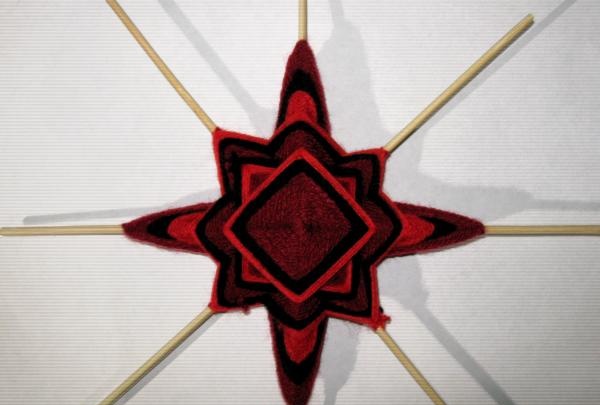
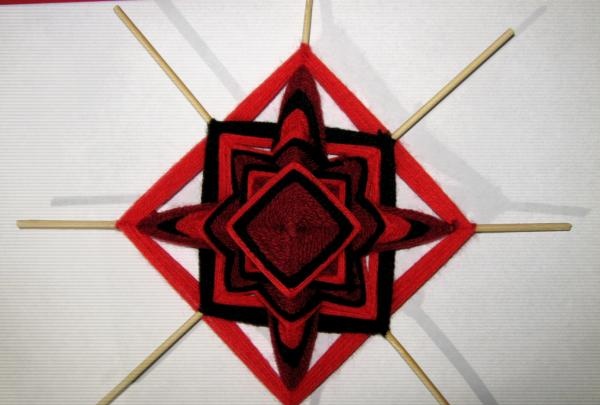
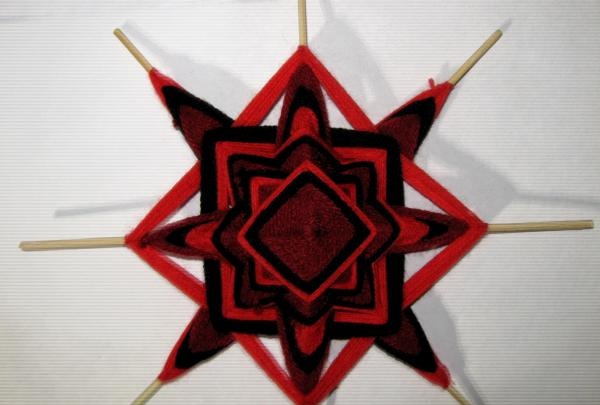
17. Next, I weave another “square” on the top with a thread of a different color. Our mandala is ready.
18. Trim off the excess ends of the slats. Something is missing, isn't it? To make it even more beautiful, I colored the ends of the slats with a marker so that they wouldn’t stand out too much and decorated the mandala with beads.