We will need:
- fabric or non-slip rubberized material;
- hook 4.0 mm;
- acrylic melange threads for tying;
- multi-colored threads for pompoms;
- needle with thick cotton thread.
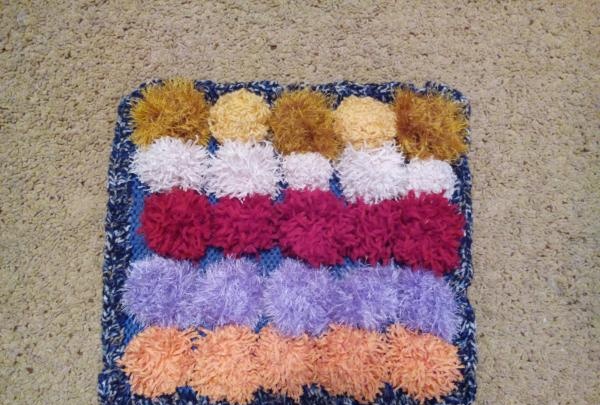
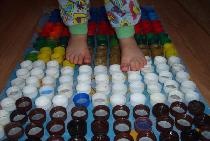
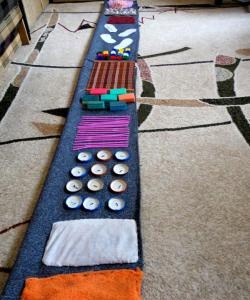
Step one. We take the basis for our future rug. It can be fabric or rubberized. The latter texture is more convenient for tying, due to the ready-made holes in it. Another advantage is that the child will not slip on such a mat while massaging his feet or playing with it. If you don’t have one, then replace it with any thick fabric. The non-slip backing can be made later and sewn onto the fabric mat. The size of the rug can be made to any size, as well as its shape. In this example, the rug will be square.

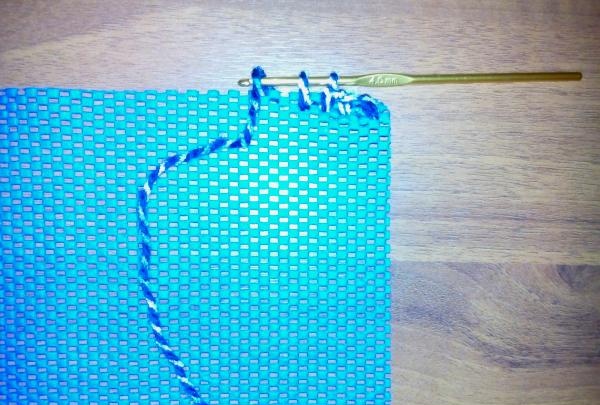
Step two. We tie the base with a metal hook. Thick, dense threads are suitable for this. The edges of them will keep their shape even after washing. This edging will prevent the edges of the product from fraying and will give the rug an attractive appearance. The first row of edging consists of products knitted around the perimeter - single crochets.The thread must be secured to the product so that the first loop is formed on the hook. Now insert the hook through the warp from front to back, throw the working thread onto the hook, and pull it back out. Thus, we got two loops on the hook. Throwing the thread onto the hook, pull it through two loops at the same time. We get one loop on the hook. Then we continue tying the future rug, inserting the hook into the subsequent holes of the base, repeating the above steps.
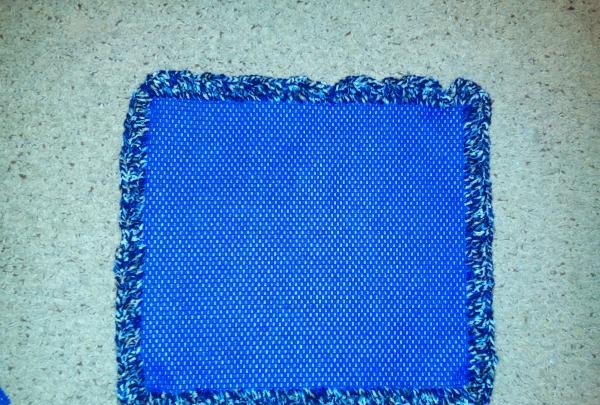
Step three. We tie our base with the next second row, doing double crochets. In the second row we knit two double crochets. In this case, we insert the hook under each loop of the previous row. This will create a “wave” effect. If you want fewer twists of the frill, then it will be enough to make one double crochet at a time. Throw the working thread onto the hook. Insert the hook from front to back and grab the thread from the back of the warp. Pull it to the front side. It turned out to be three loops. Grab the yarn again with the hook and pass it through the two loops on the hook. There are two loops left. Pull the yarn through these remaining loops one last time, making one. Now you need to repeat all the same steps. We knit in the same loop. The result will be two stitches on one loop of the previous row. Then we repeat the steps.
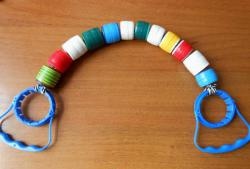
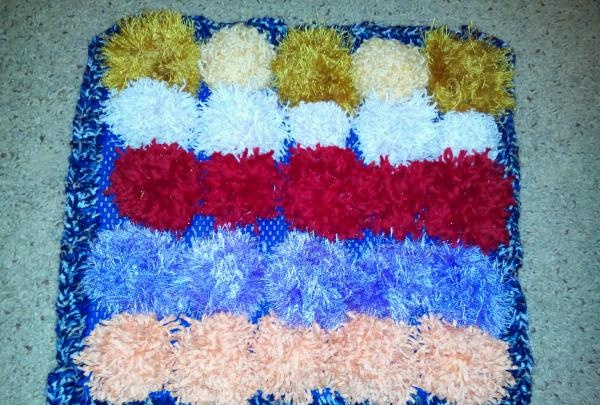
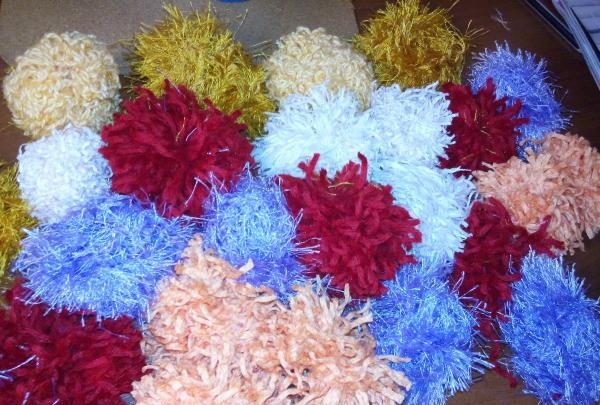
Step four. Preparing pompoms. We take threads of different colors and textures. The downside of “grass” type thread is that it frays. But these pompoms look more fun on a mat and will give you the feeling of walking on real grass. If we use threads of different composition, we will give the child the opportunity to feel a variety of tactile sensations when their feet touch the rug. Some are softer, some are tougher.Pom-poms are knitted by winding the thread with the left hand around three fingers of the right hand folded together. The thicker the threads are wound, the more magnificent our pompom will be. Therefore, it will look more beautiful on the rug. After winding, carefully remove our “bun” from the fingers of the right hand and pull it in the middle with a thread. The thread can be tied several times and tied tightly in a knot. You have to pull it tight. Now you need to cut the loops on it and trim the longer protruding threads. The pompom is ready. In our version, you need to knit 25 pom-poms of different colors (5 multi-colored sets).
Step five. Take a thick, strong thread and a needle with a large eye. It is necessary to sew all the prepared pompoms to our base. You need to sew it firmly, but carefully, without pulling the base together. It is advisable to take the thread for the needle to match the base so that it is less noticeable.
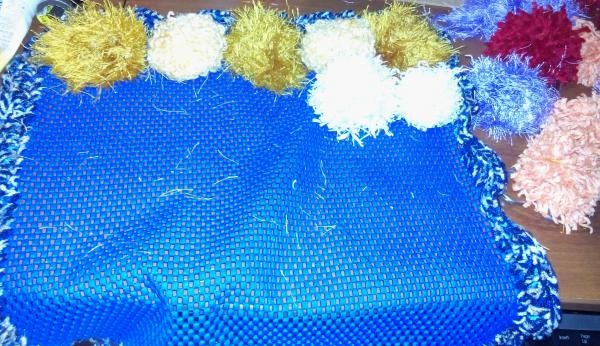
Step six. Shake off any remaining thread and fluff up the pompoms. The massage mat for the baby is ready.