Do it yourself
Life hacks, master classes, useful tips, recipes.
home » Handicraft techniques » Scrapbooking » Scrapbooking cards » Men's postcard in the form of a shirt
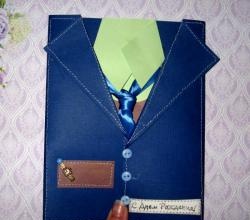
Always a pleasure to do present family, friends, and it doesn’t matter what the occasion is, maybe some kind of special event, such as a birthday, anniversary, or maybe just some kind of gratitude, for example, on the professional day of a teacher or medical worker or simply thank someone for the specified service. The occasion, in general, is not important, and the most important thing is that there must be a greeting card in which you can write both congratulatory poems and simple words of gratitude. Nowadays, uniqueness, originality and handmade are highly valued. Therefore, it will be quite interesting to master this master class and learn how to make an interesting, and most importantly, unusually shaped postcard, in the form of a shirt, to congratulate a man. Such an unusual postcard can surprise, for example, men such as a boss, director, manager, teacher, doctor, lecturer. It will look both respectable and at the same time very memorable, since it is hand made, and these are valuable gifts these days.
To make a postcard we will need:
• Kraft cardboard size 15*30 cm;
• Paper for scrapbooking in green and brown tones in the form of different male patterns, take three sheets of 15*15 cm;
• Round picture for a clock;
• Cutting out a beige feather;
• Brown suede cord;
• Bronze metal key;
• Black grosgrain ribbon with polka dots;
• “Happy Holidays” stamp and black ink;
• Brown pearl half beads;
• Watercolor paper;
• Curb hole punch;
• Double-sided tape;
• Wooden button;
• Ruler, pencil, scissors;
• Lighter, glue gun.

To make a postcard we need

To make a postcard we need


Kraft cardboard is quite thick, so it is very suitable for the base of a postcard. The sheet is just the right shape, 15*30 cm, we divide it in half along the larger side and fold it.

Kraft cardboard is quite thick

Kraft cardboard is quite thick


We get a closed base of 15*15 cm. Place the bend line up, take rulers and measure 3 cm from the top on both sides, put marks.

We get the closed form of the base

We get the closed form of the base


Starting from the sides and towards the center, measure 5 cm each. We make cuts on the top of the card, leaving the bottom ones alone for now.

Bend towards the center

Bend towards the center


We bend both cuts towards the center to form a collar. On the back, draw the necessary cutting lines with a simple pencil and cut off the back of the base.

Expanding

Expanding


We unfold it and get this base made of kraft cardboard. Immediately take watercolor paper and cut out a rectangle from it for the inside of the card.

Watercolor rectangle

Watercolor rectangle


A watercolor rectangle 11.8*14.8 cm, glue it with a strip of tape inside the postcard.

cut out two different rectangles

From scrap paper


From scrap paper we cut out two different rectangles, also 11.8*14.8 cm.

cut out two different rectangles

From trimming the back of the base


From the trimming of the back part of the base, the craft cardboard left, we cut out two small rectangles for the pockets. From the third color of scrap paper we also cut out two rectangles and a paper tie. Glue the picture onto one rectangle. Using a stamp, we make a congratulatory inscription on a white sheet and cut it out.

From trimming the back of the base

Cut a piece of cord


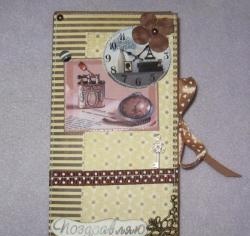
We cut off a piece of the cord, thread the key through, attach the cord to the workpiece, and glue the pocket on top. On the other side we also glue a pocket, a tie in the center at the top, and a round picture of a watch and an inscription on it at the bottom. We also cut off two quadrangles for the collar. We stitch all the pockets, tie, pictures, collar and inscription with the machine.

Cut a piece of cord

cut two pieces the width of the pocket


Now we glue the feather at the bottom, and from the grosgrain tape we cut out two pieces the width of the pocket, burn the edges and glue them to the pockets. We glue the scrap rectangles onto the base and sew each one on. Inside the card, on watercolor paper we glue strips of paper lace strips, which we punch holes from the remnants of scrap paper.

cut two pieces the width of the pocket

Men's postcard in the form of a shirt


Glue the button and beads, you're done! Thank you all for your attention!

Men's postcard in the form of a shirt

Men's postcard in the form of a shirt
come back
Comment
  • bowtiesmilelaughingblushsmileyrelaxed relaxedsmirk
    heart_eyeskissing_heartkissing_closed_eyesflushedrelievedsatisfiedgrin
    winkstuck_out_tongue_winking_eyestuck_out_tongue_closed_eyesgrinningkissingstuck_out_tonguesleeping
    worriedfrowninganguishedopen_mouthgrimacingconfusedhushed
    expressionlessunamusedsweat_smilesweatdisappointed_relievedwearypassive
    disappointedconfoundedfearfulcold_sweatperseverecrysob
    joyastonishedscreamtired_faceangryragetriumph
    sleepyyummasksunglassesdizzy_faceimpsmiling_imp
    neutral_faceno_mouthinnocent
5+two=
Comments (0)

DIY transformable hanger

Transparent rose | Do it yourself

New Year's decor: "Winter's Tale". | Do it yourself

Let your shoes be stylish: 5 types of simple but interesting lacing

«Do it yourself - with your own hands» - a site of interesting homemade products made from scrap materials and items at home. Step-by-step master classes with photos and descriptions, technologies, life hacks - everything a real master or just a craftsman needs for needlework. Crafts of any complexity, a large selection of directions and ideas for creativity.

We recommend reading

Washing machine error codes