Do it yourself
Life hacks, master classes, useful tips, recipes.
home » Present » Postcards » Postcard box in shabby chic style
In the modern world of arts and crafts, a very popular and widespread technique for working and making various paper products is scrapbooking. A very interesting and creative technique due to its diversity and a very rich range of materials. This technique can use completely different decor both in color and materials. And more professional scrapbookers are already mastering a newer direction in this technique, the so-called shabby chic. What is his secret and what does it look like on the products? You can make not just postcards, envelopes, albums, notepads, photo frames, but you can further improve them and make them a little more complicated, so to speak. Basically, shabby lies in the fact that the paper contains traces of unevenness and abrasions, and the products can also be multi-layered, which adds volume. Now let’s look at one of the interesting and quite educational master classes, which will teach us how to make a beautiful three-dimensional postcard-box in which you can put a chocolate bar or money.

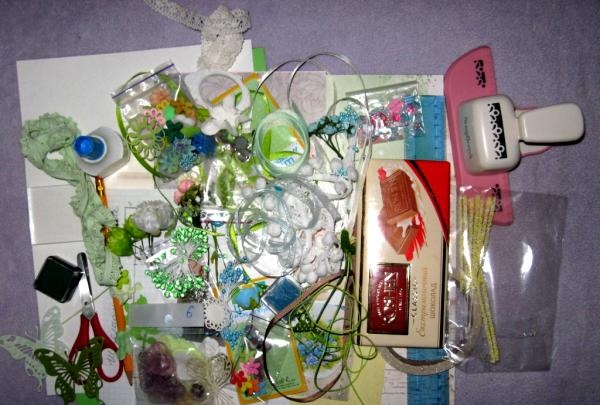
For the master class we take:
• Salad cardboard sheet A4 format;
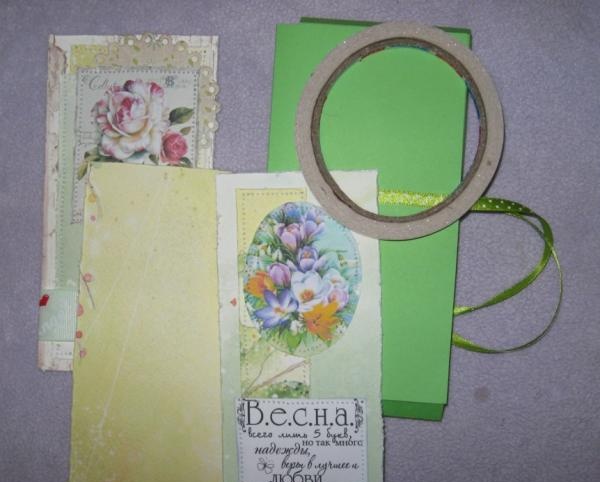
• Paper with spring motifs in green and yellow colors, several different sheets;
• Postcard layout;
• Flower pictures and poems about spring;
• Cut out circles small and large;
• Paper hydrangea flowers are white and blue;
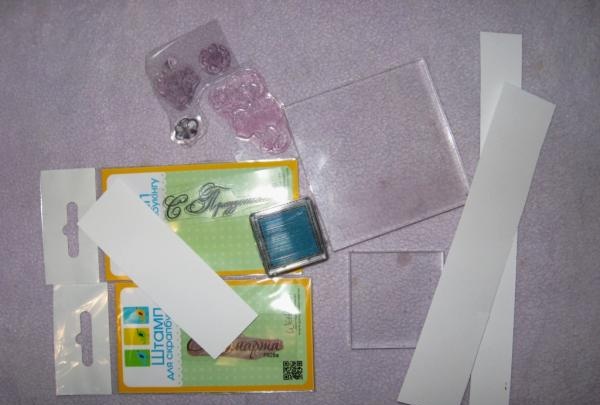
• “Happy Holidays” stamp and blue ink;
• Lemon-colored polymer frame;
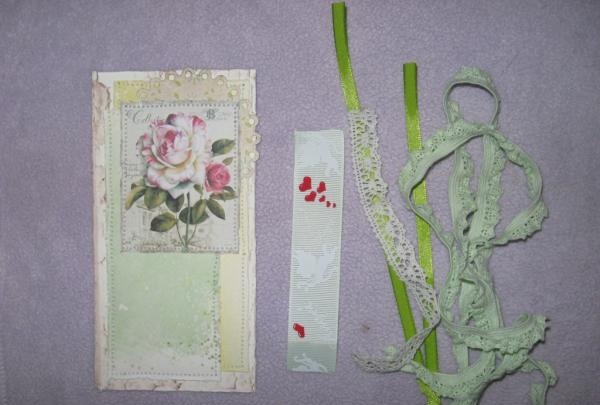
• White ribbon with bobbles;
• Mint lace with elastic;
• White cotton lace;
• Lettuce sprigs;
• Peach gardenia flower, complex stamens and berries in sugar; Salad satin ribbon is not wide;
• Wooden flower buttons;
• Half pearl beads;
• Rep ribbon with print, 25 mm wide;
• Polymer flowers of small diameter;
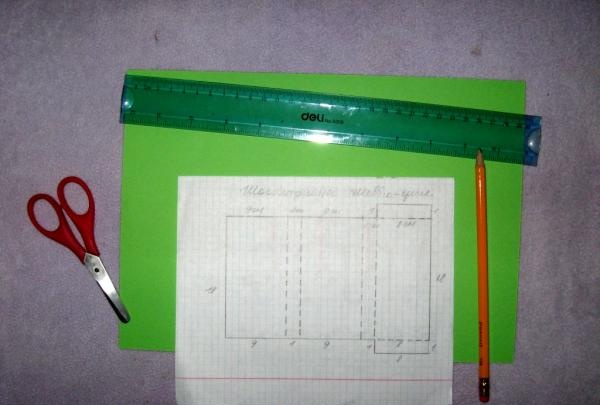
• PVA glue, ruler, scissors, double-sided tape, pencil, glue gun.
Postcard box in shabby chic style

Postcard box in shabby chic style

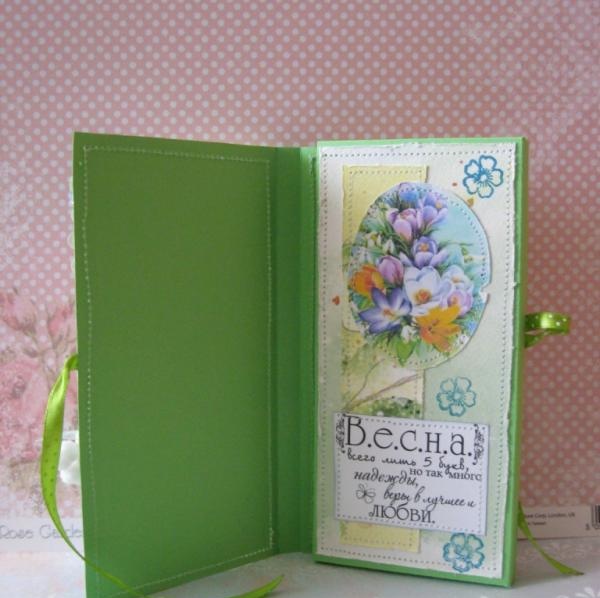
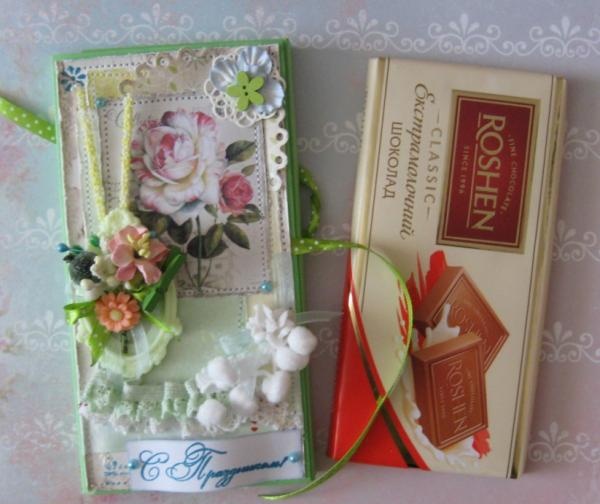
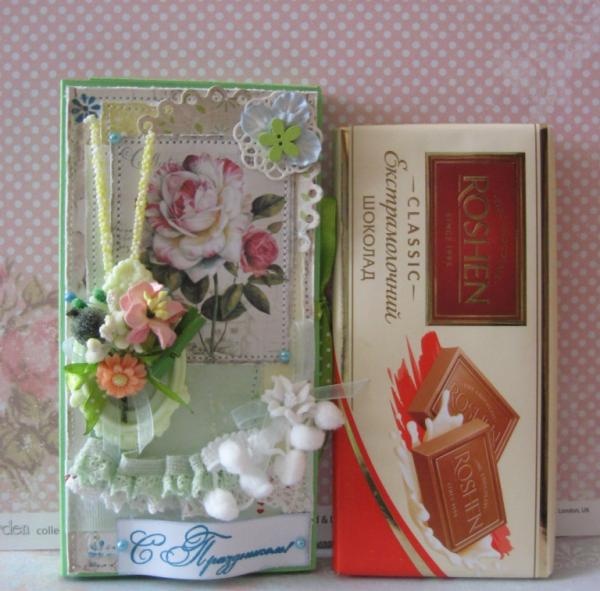
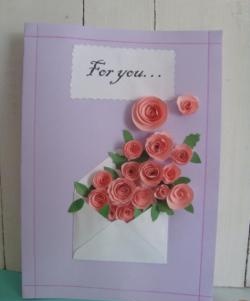
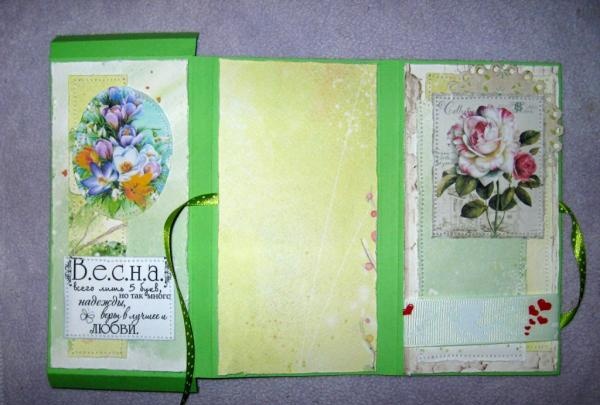
The width of the sides of our postcard will be 9 * 9 and 8 cm, and the height will be 18 cm. The diagram clearly shows the distance between the sides and the tails to make a pocket for the box.
Postcard box in shabby chic style

Postcard box in shabby chic style

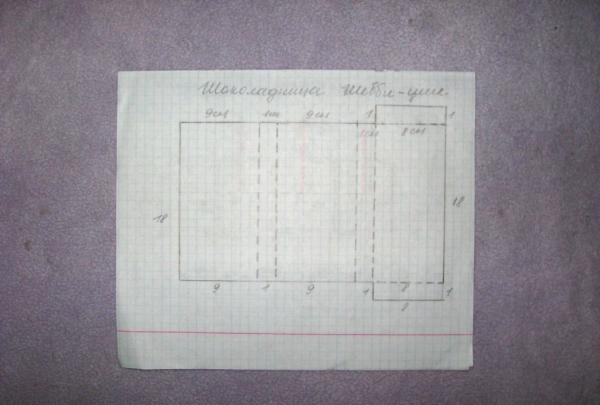
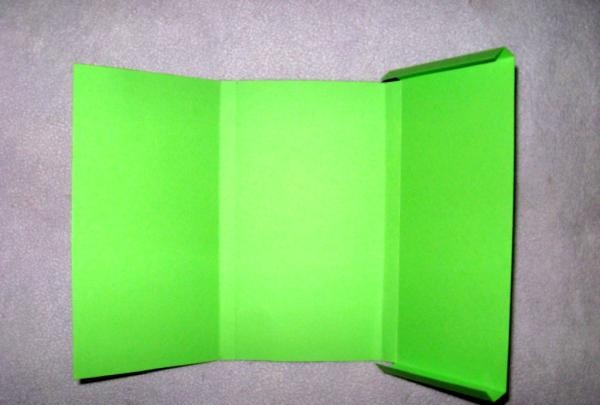
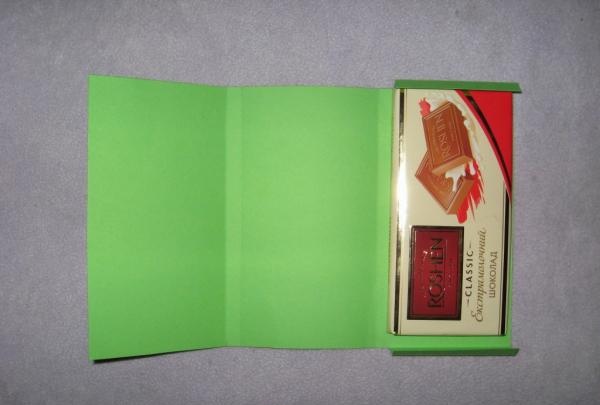
We transfer the entire dimensions of the postcard according to the diagram onto light green cardboard, which we immediately place in a horizontal position. We make all places of bends using the end side of scissors under the ruler. You can try on a chocolate bar in your pocket, it fits perfectly there.
Postcard box in shabby chic style

Postcard box in shabby chic style

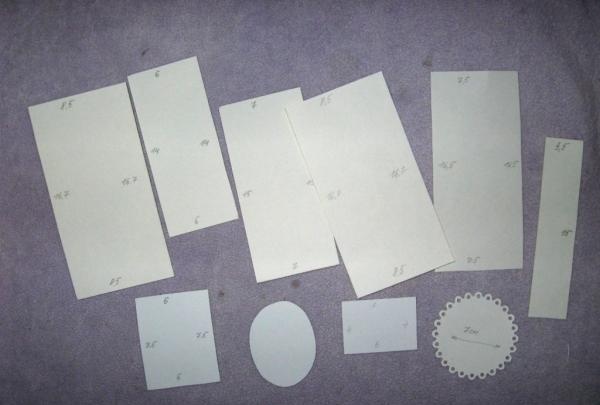
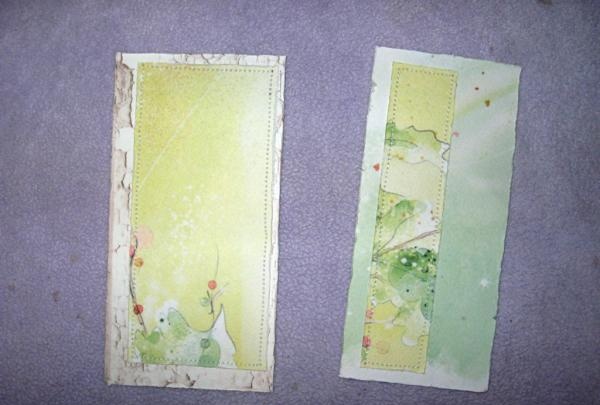
Now we take several sheets of scrap paper and cut out rectangles of the same size as in the photo.
Postcard box in shabby chic style

Postcard box in shabby chic style

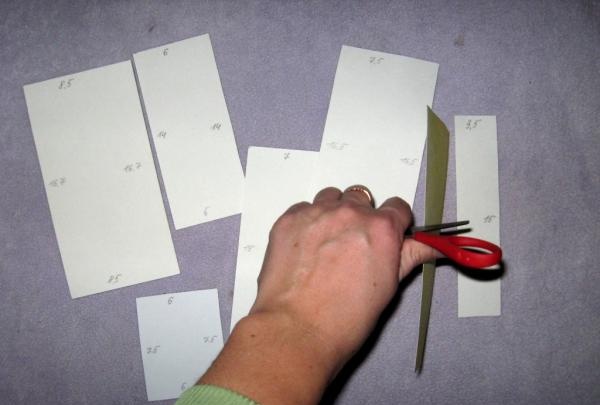
Now several rectangles need to be scratched along the edges with scissors. This is called adding antiquity to the shabby chic style.
Postcard box in shabby chic style

Postcard box in shabby chic style

Now we glue the smaller pieces to the larger ones using strips of double-sided tape. We sew them on with a machine.
Postcard box in shabby chic style

Postcard box in shabby chic style

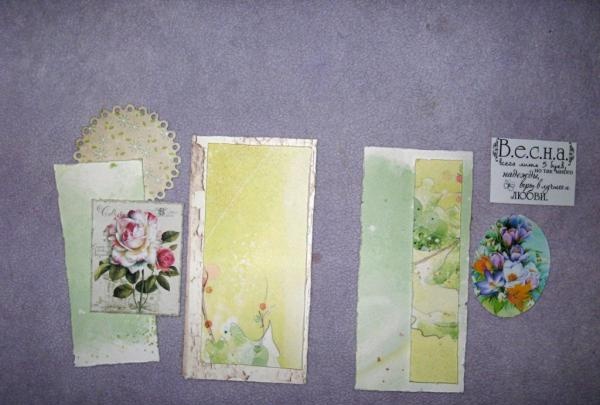
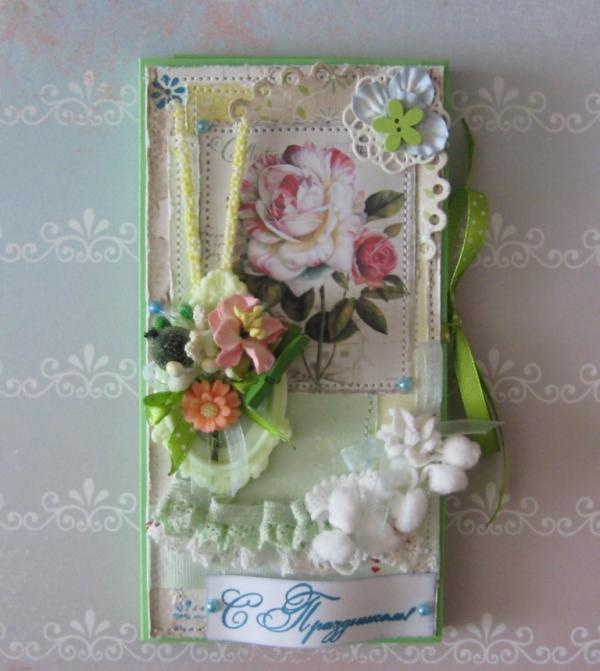
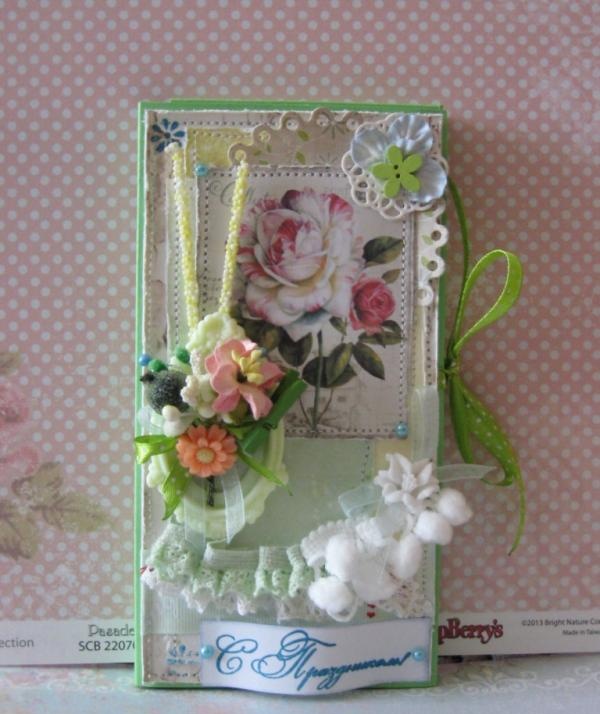
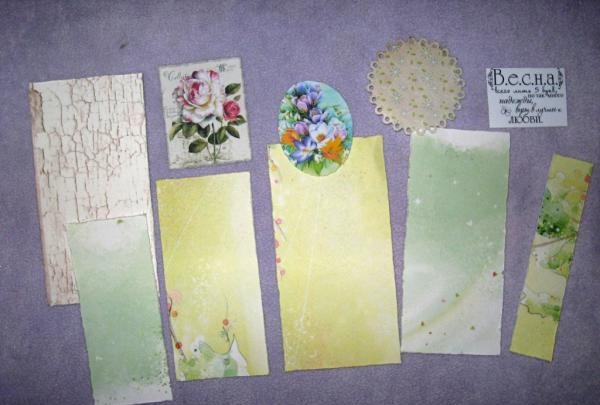
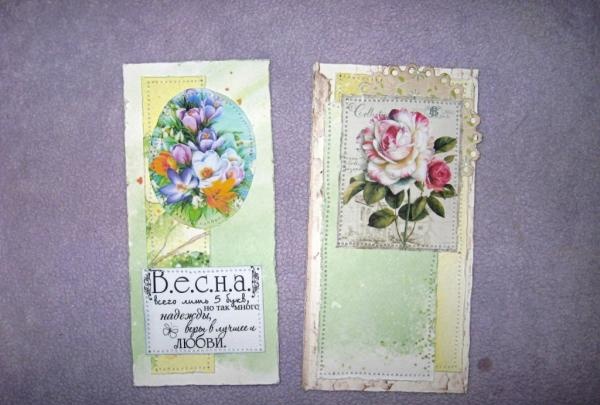
Now we glue circles, pictures and a poem on top.
Postcard box in shabby chic style

Postcard box in shabby chic style

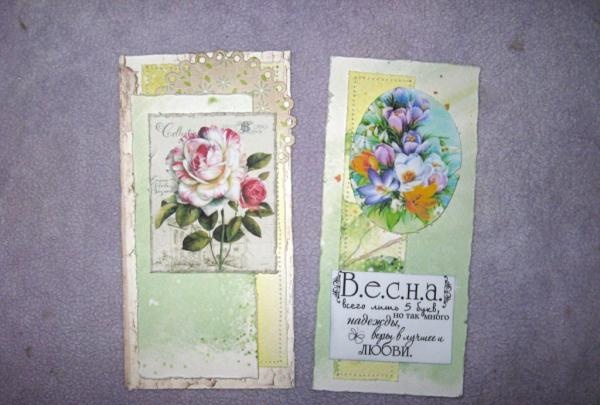
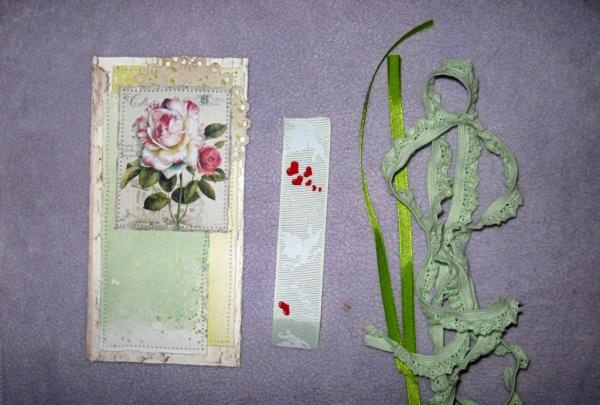
We also sew them on with a machine. Now we will decorate the front blank of the postcard. Cut off a wide grosgrain ribbon, mint lace and satin ribbon.
Postcard box in shabby chic style

Postcard box in shabby chic style

We glue a strip of tape to the cardboard base on the front and back, this will be the closure of the card. Now we glue all three blanks onto the base with strips of tape.
Postcard box in shabby chic style

Postcard box in shabby chic style

We sew each side separately with a machine. We glue the pocket with PVA glue, forming a box.
Postcard box in shabby chic style

Postcard box in shabby chic style

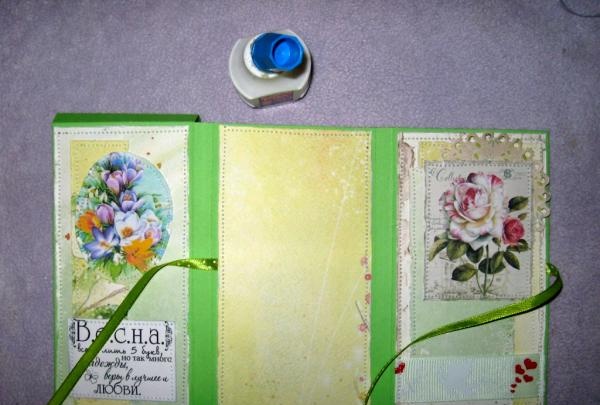
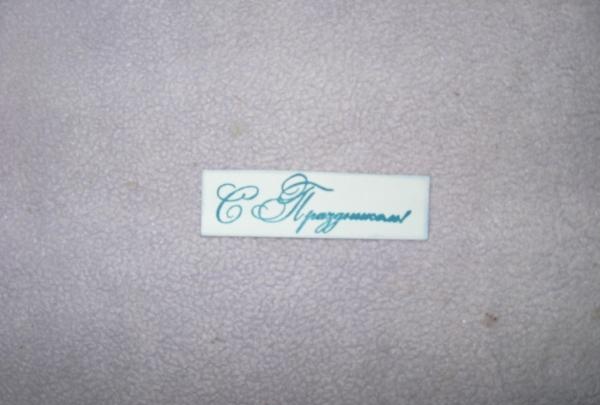
We take a stamp, put it on an acrylic block and stamp the inscription “Happy Holidays” on white paper. It needs to be tinted with the same ink.
Postcard box in shabby chic style

Postcard box in shabby chic style

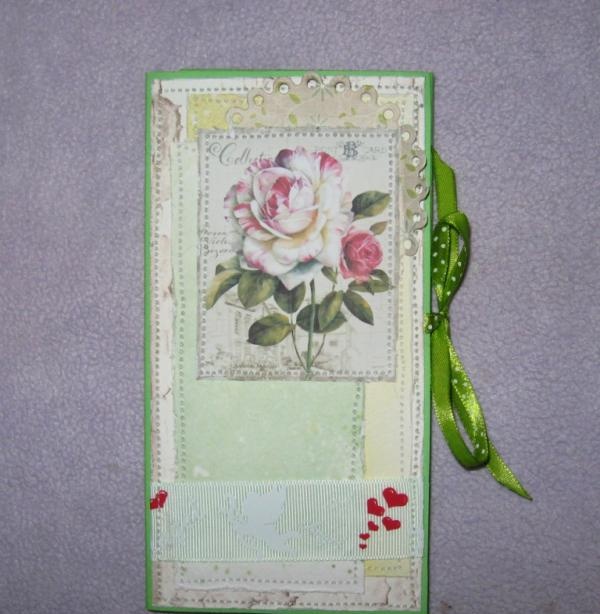
We glue the inscription at the bottom of the postcard. Under the picture we lay out and glue first white lace, then mint lace and a ribbon with bobbles.
Postcard box in shabby chic style

Postcard box in shabby chic style

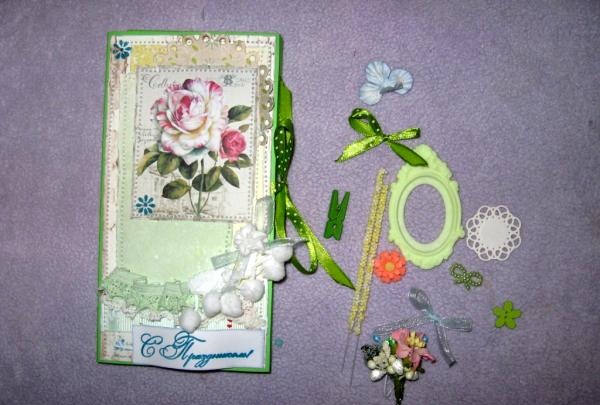
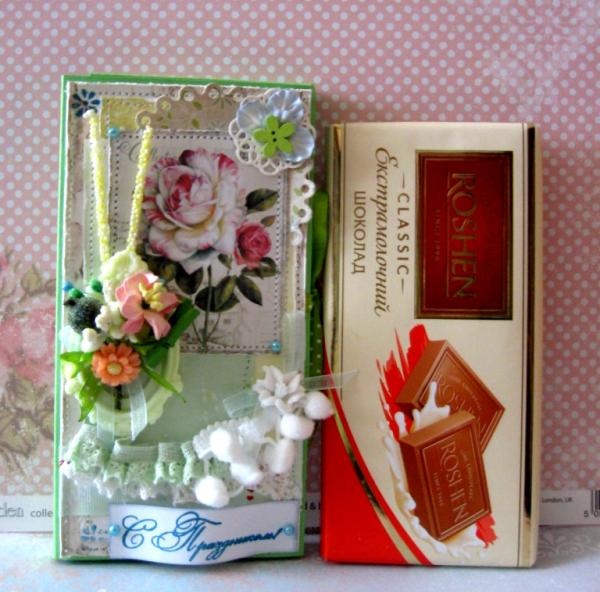
All that remains is to glue on the frame, bouquet and other decor. We glue everything as in the photo. The postcard-box is ready! Thank you for your attention!
Postcard box in shabby chic style

Postcard box in shabby chic style

Postcard box in shabby chic style

Postcard box in shabby chic style

Postcard box in shabby chic style
Comment
  • bowtiesmilelaughingblushsmileyrelaxed relaxedsmirk
    heart_eyeskissing_heartkissing_closed_eyesflushedrelievedsatisfiedgrin
    winkstuck_out_tongue_winking_eyestuck_out_tongue_closed_eyesgrinningkissingstuck_out_tonguesleeping
    worriedfrowninganguishedopen_mouthgrimacingconfusedhushed
    expressionlessunamusedsweat_smilesweatdisappointed_relievedwearypassive
    disappointedconfoundedfearfulcold_sweatperseverecrysob
    joyastonishedscreamtired_faceangryragetriumph
    sleepyyummasksunglassesdizzy_faceimpsmiling_imp
    neutral_faceno_mouthinnocent
5+two=
Comments (0)

How to make a powerful LED strobe using just one transistor

How to make a high-quality pipe saddle for angled tapping

How to clean cupronickel spoons | Do it yourself

Pickled cabbage leaves for cabbage rolls

«Do it yourself - with your own hands» - a site of interesting homemade products made from scrap materials and items at home. Step-by-step master classes with photos and descriptions, technologies, life hacks - everything a real master or just a craftsman needs for needlework. Crafts of any complexity, a large selection of directions and ideas for creativity.

We recommend reading

Washing machine error codes