Do it yourself
Life hacks, master classes, useful tips, recipes.
home » Present » Postcards » Postcard with voluminous roses in a wicker basket
If you love roses, then this master class will definitely interest you. He will teach you how to create an original card with a wicker basket and voluminous miniature roses.
Postcard with voluminous roses

Before you begin, you need to collect the following set of materials and tools:
  • scissors;
  • colored double-sided paper;
  • plain colored paper;
  • ruler;
  • sheet of cardboard;
  • simple pencil;
  • tube with PVA glue.

So, first you will learn how to make a wicker basket from ordinary colored paper.
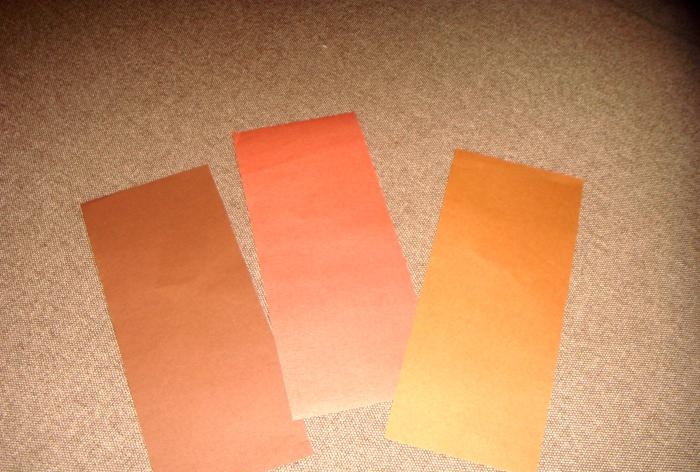
In the set, find sheets of brown shades, preferably 2-3 tones (darker and lighter).
Postcard with voluminous roses

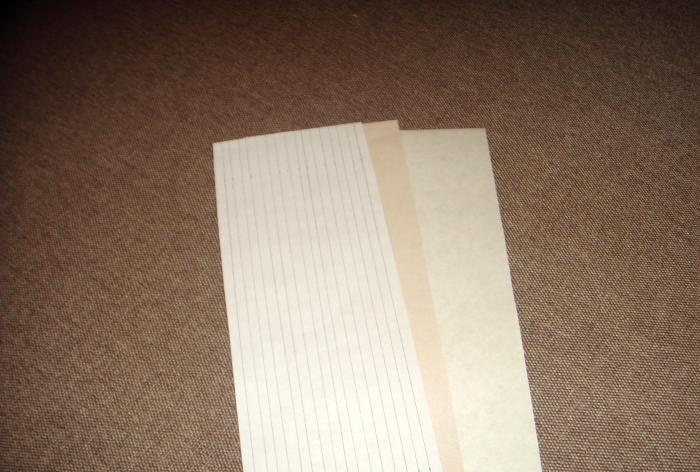
On the white side of the sheets, draw strips 5 mm thick under the ruler with a simple pencil.
Postcard with voluminous roses

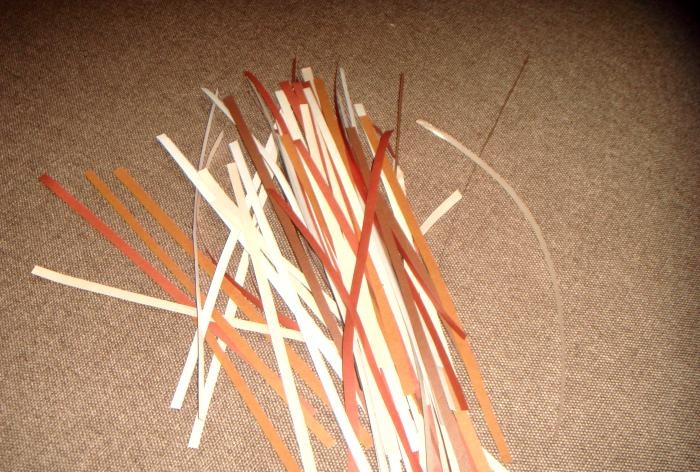
Cut all three leaves into thin strips.
Postcard with voluminous roses

Now start weaving from paper blanks. Take white paper, apply a horizontal strip of glue on top and glue 35 strips vertically, alternating light and dark shades of brown.
Then, in a checkerboard pattern, weave the loose strips between the glued ones. You will gradually end up with a canvas with small squares.
Postcard with voluminous roses

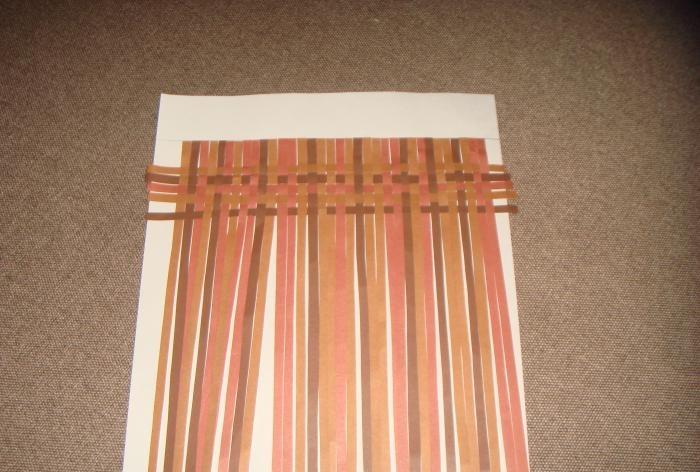
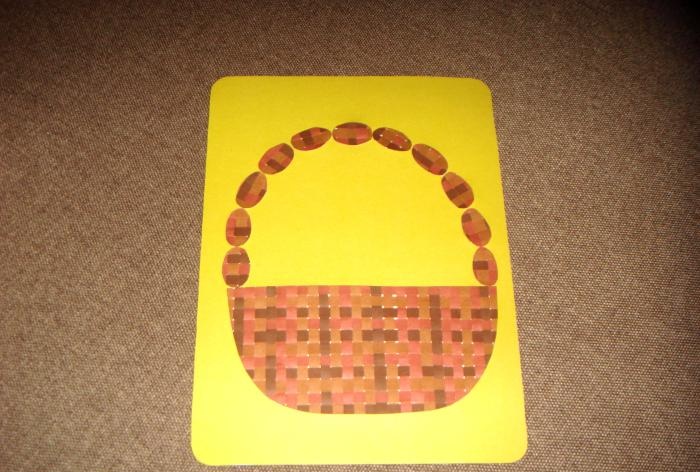
For the bottom of the basket you need a wicker about 10 cm wide, and for the handle you should get two strips measuring 3 cm by 10 cm. Don't forget to glue the wicker fabric onto a sheet of white paper.
Postcard with voluminous roses

Next you will need a basket stencil. Draw her silhouette on a piece of paper or print an image from the Internet.
Postcard with voluminous roses

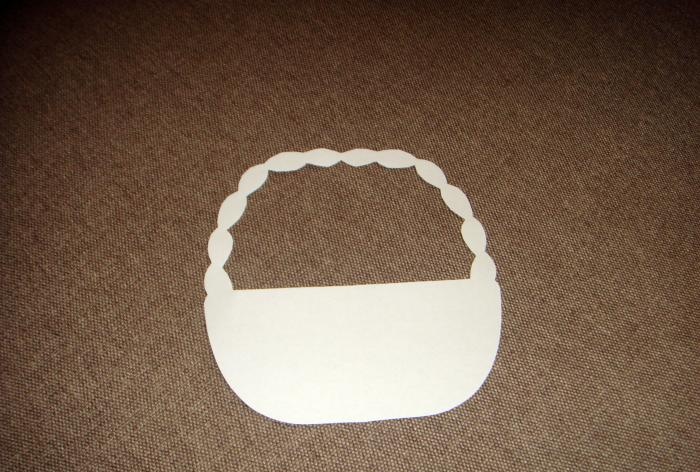
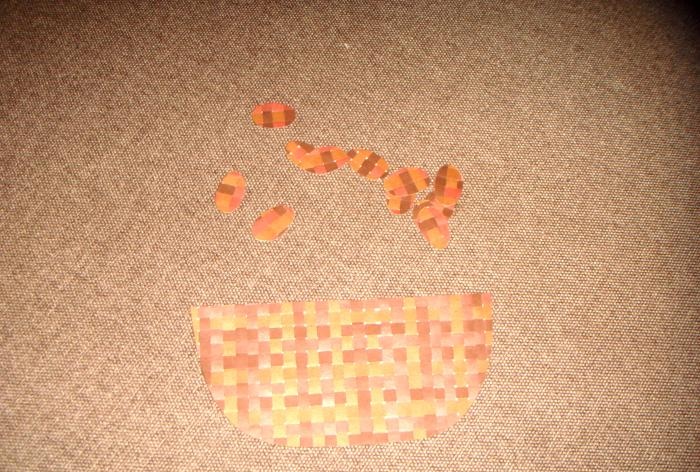
Using the stencil, cut out the bottom of the basket and individual ovals to make a handle.
Postcard with voluminous roses

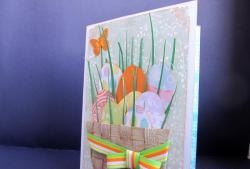
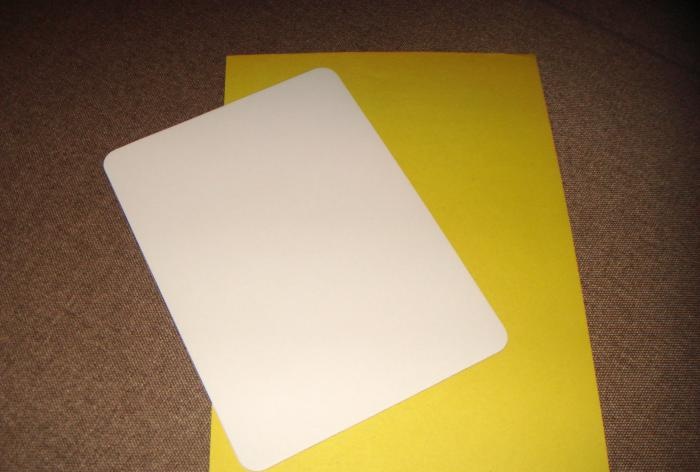
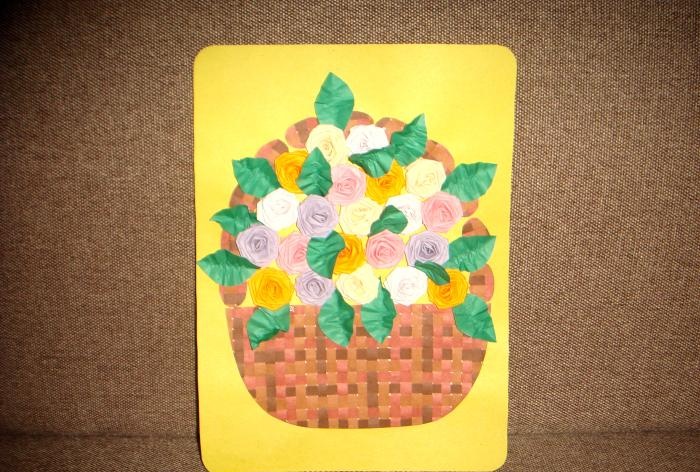
Make the base of the card. Take a sheet of cardboard, round its corners and cover it with colored paper of any shade. A yellow background will look good.
Postcard with voluminous roses

Fix the parts of the basket on the base: first the wicker bottom, and then the handle.
Postcard with voluminous roses

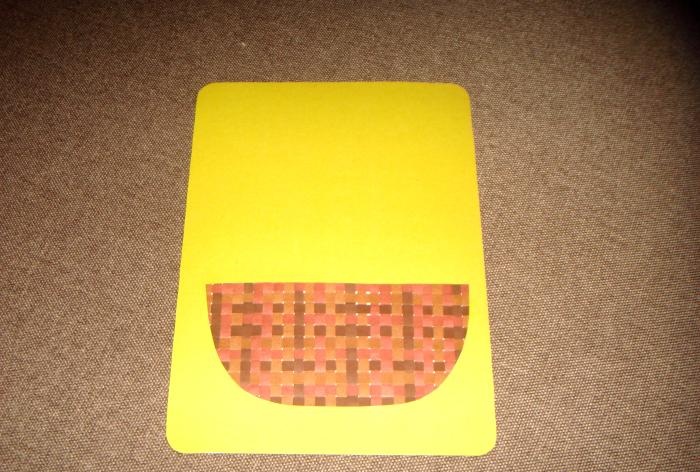
The basket is still undecorated, but it already looks nice.
Postcard with voluminous roses

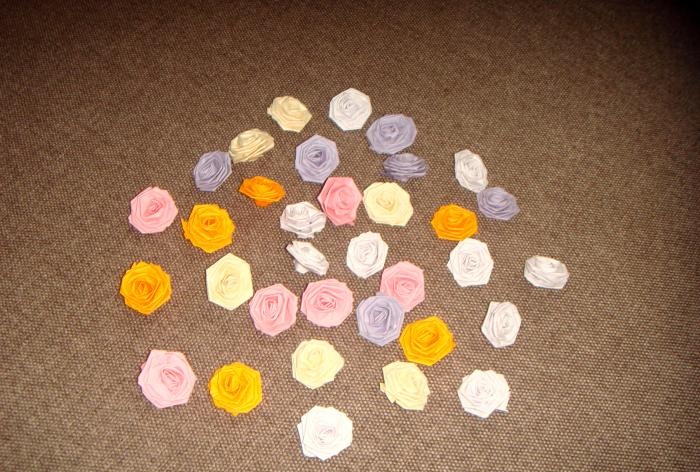
Now start making roses from double-sided colored paper.
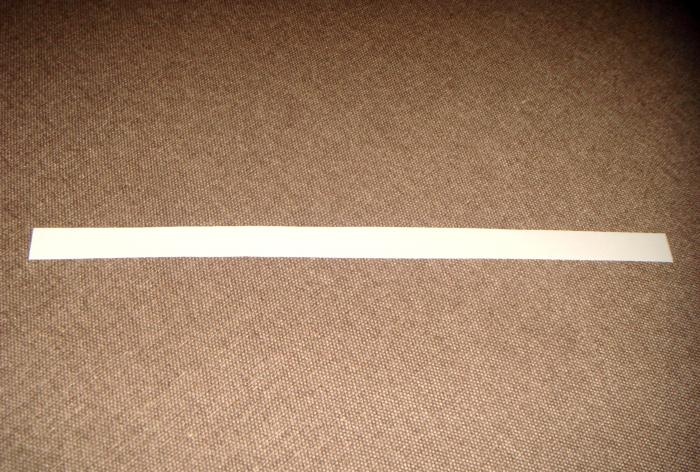
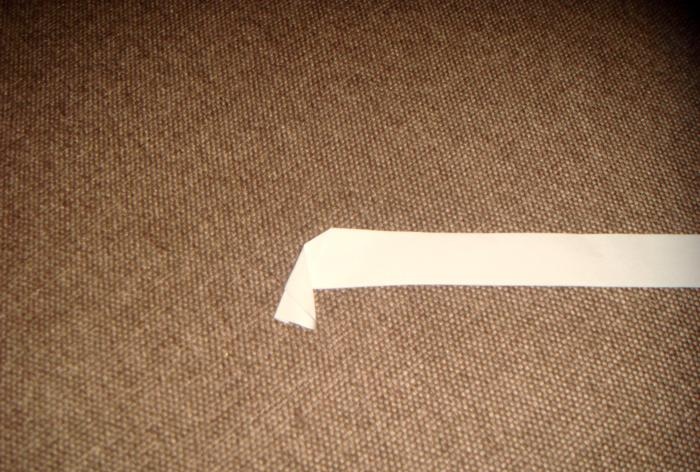
For one rose you need a long strip of paper 15 mm wide.
Postcard with voluminous roses

Fold the upper left edge of the paper blank as shown in the photo.
Postcard with voluminous roses

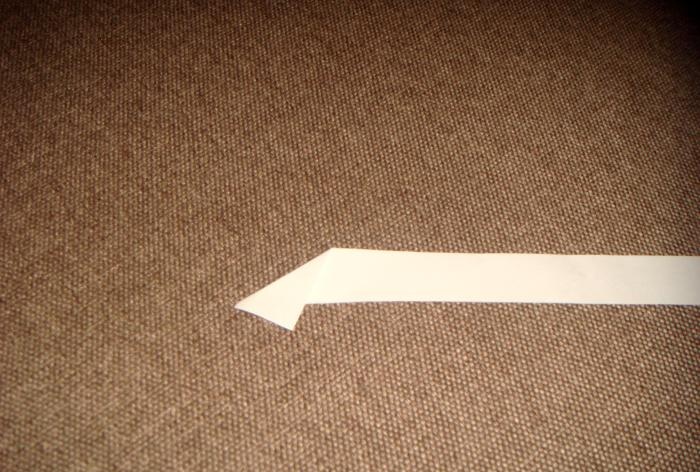
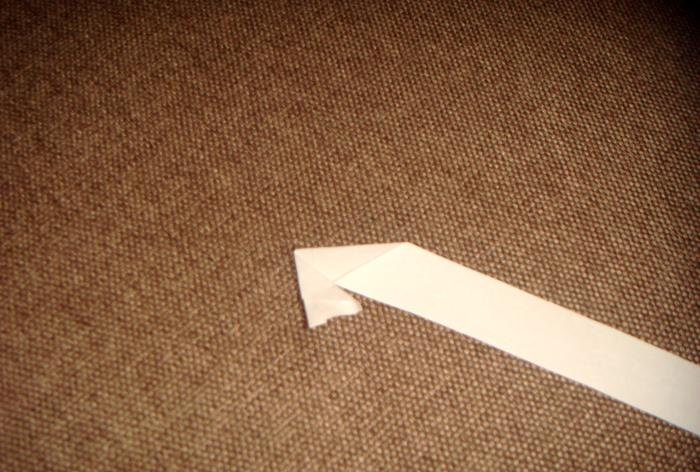
Then fold it outward again. A triangle emerges.
Postcard with voluminous roses

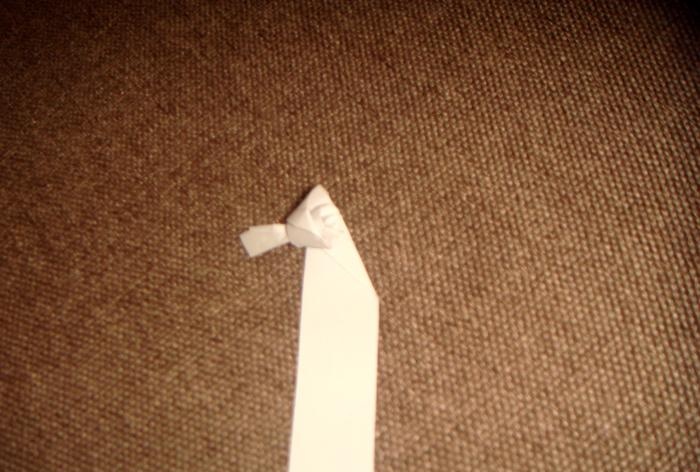
Next you need to bend the strip itself so as to capture the upper corner.
Postcard with voluminous roses

Twist the strip around the triangle until a small corner remains on top.
Postcard with voluminous roses

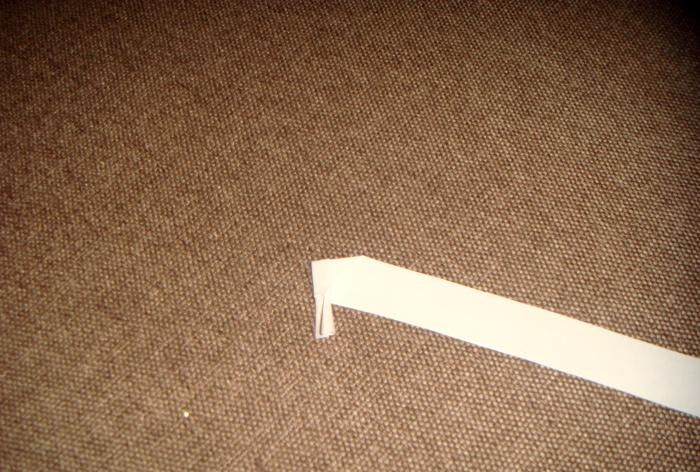
Fold the strip again.
Postcard with voluminous roses

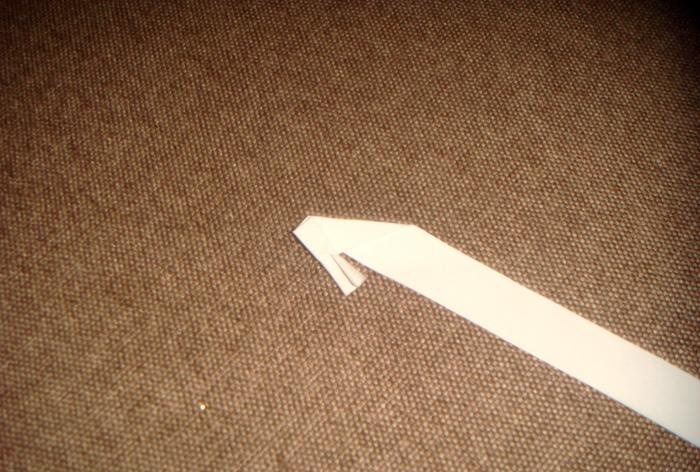
And continue twisting it around the triangle.
Postcard with voluminous roses

Gradually, your rosebud petals will form.
Postcard with voluminous roses

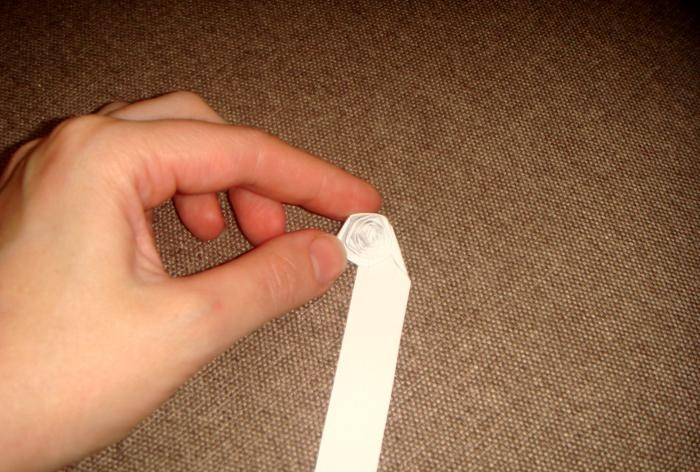
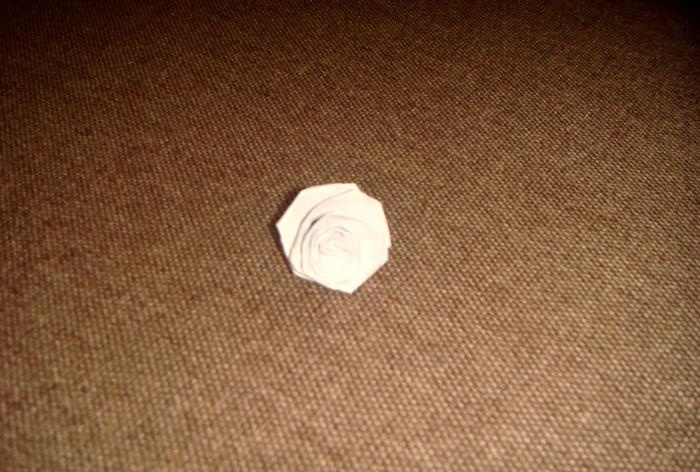
This is what the finished flower looks like.
Postcard with voluminous roses

Glue the edge of the paper and the triangle on which the spirals were wound so that the layers do not unwind.
Postcard with voluminous roses

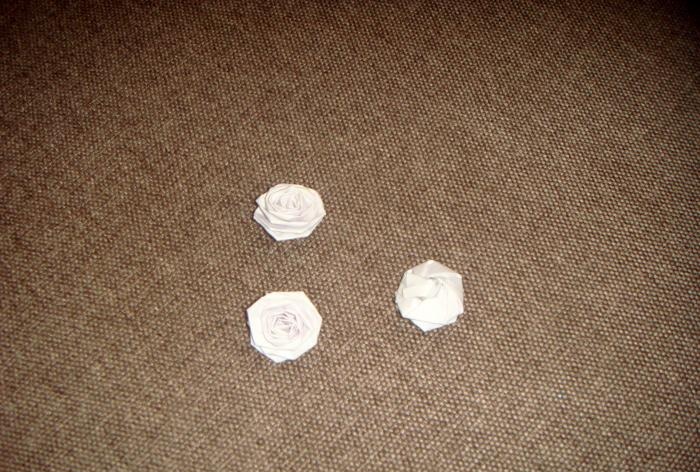
Make more roses in pink, yellow, orange and lilac.
Postcard with voluminous roses

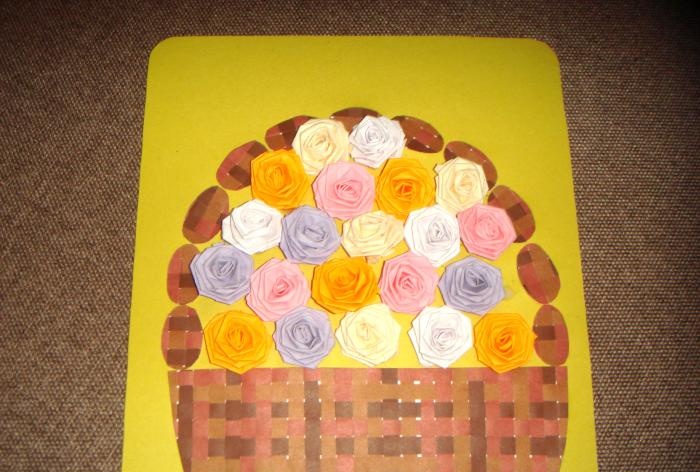
Glue the finished lush buds onto the postcard. Place the flowers between the basket itself and its handle.
Postcard with voluminous roses

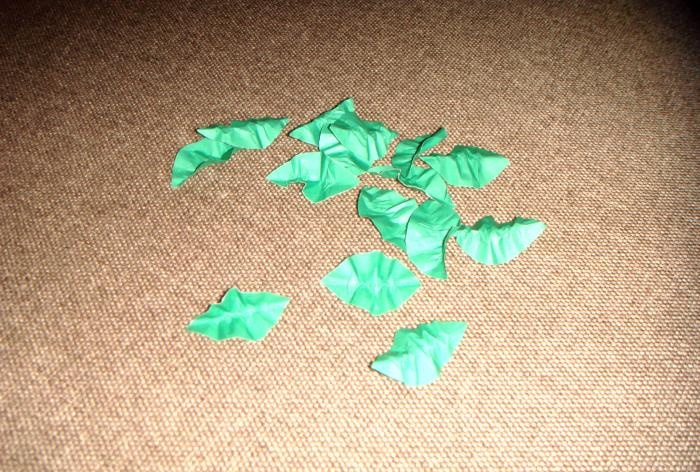
The only thing missing is leaves. Cut them out of double-sided green paper and fold them in half to make an accordion shape. You will get voluminous leaves.
Postcard with voluminous roses

Glue them between the flowers.
Postcard with voluminous roses

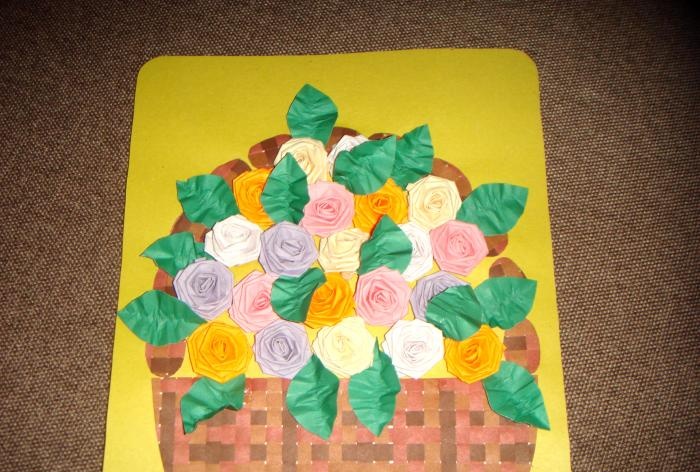
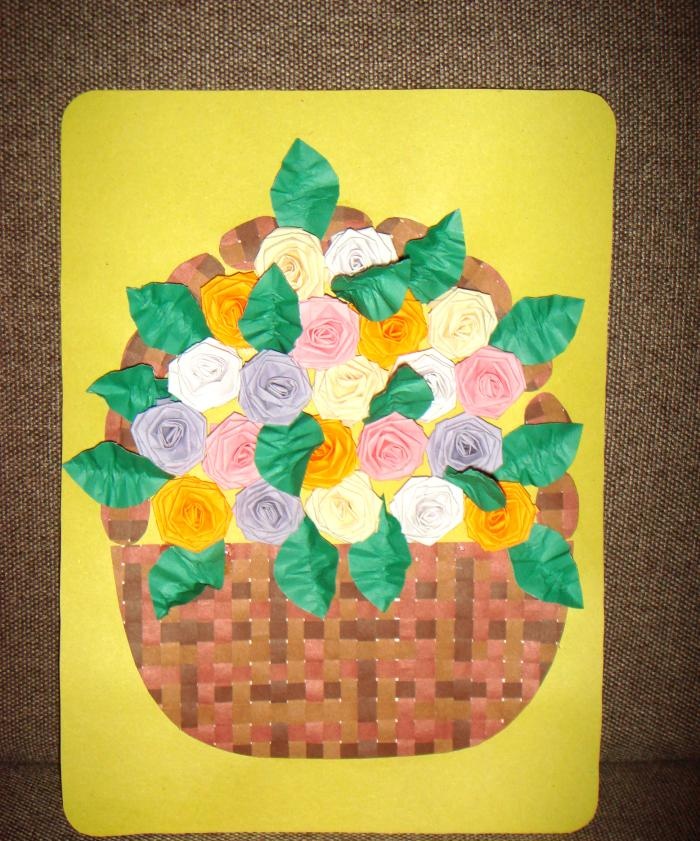
It turns out to be a stunningly beautiful card with a wicker basket and miniature multi-colored roses.
Postcard with voluminous roses

A great souvenir for a colleague or friend for any summer holiday.
Postcard with voluminous roses
come back
Comment
  • bowtiesmilelaughingblushsmileyrelaxed relaxedsmirk
    heart_eyeskissing_heartkissing_closed_eyesflushedrelievedsatisfiedgrin
    winkstuck_out_tongue_winking_eyestuck_out_tongue_closed_eyesgrinningkissingstuck_out_tonguesleeping
    worriedfrowninganguishedopen_mouthgrimacingconfusedhushed
    expressionlessunamusedsweat_smilesweatdisappointed_relievedwearypassive
    disappointedconfoundedfearfulcold_sweatperseverecrysob
    joyastonishedscreamtired_faceangryragetriumph
    sleepyyummasksunglassesdizzy_faceimpsmiling_imp
    neutral_faceno_mouthinnocent
3+three=
Comments (2)
  1. Iogo
    #1 Iogo Guests 10 August 2017 18:25
    0
    Previously, as children, we often made cards for our parents and friends. And I would continue to consider this activity a simple child’s play if it weren’t for this wonderful card with roses! This is truly valuable and worthy present.
  2. Natalia
    #2 Natalia Guests 21 August 2017 21:12
    1
    Very beautiful card, interesting idea. Thank you, we will definitely do this with the children.
    And in general, your site is wonderful, probably the third one that I have seen, which does not cruelly steal the work of entire master classes from others.

Sew a sleep mask using satin ribbons | Do it yourself

Do it yourself - crafts and master classes | Page 251

How to make a tool for installing forged rivets from an old shock absorber and bearing

8 popular ways to remove ice from car windows

«Do it yourself - with your own hands» - a site of interesting homemade products made from scrap materials and items at home. Step-by-step master classes with photos and descriptions, technologies, life hacks - everything a real master or just a craftsman needs for needlework. Crafts of any complexity, a large selection of directions and ideas for creativity.

We recommend reading

Washing machine error codes