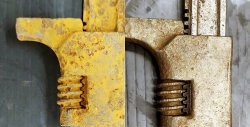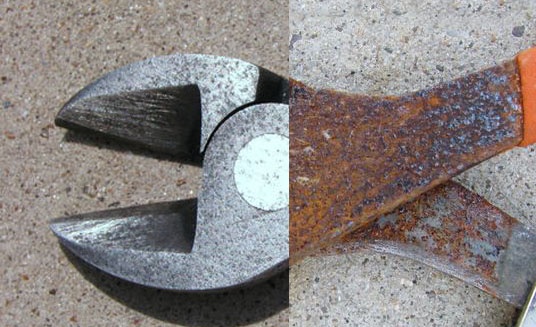

This method of restoring the surface and removing rust is suitable for those who want to return old steel items to their normal appearance and remove traces of corrosion.
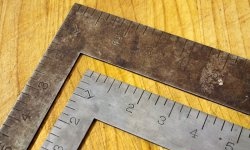
Probably, many of you found interesting antiques in your grandmother's closet, or when buying an old house, which were all rusty and had to be thrown away due to the impossibility of returning them to their original appearance.
This method removes rust from the surface of iron without mechanical effort. We will use electrolysis.
Of course, this method does not provide a 100% guarantee of recovery, but it is the most effective method that I know.
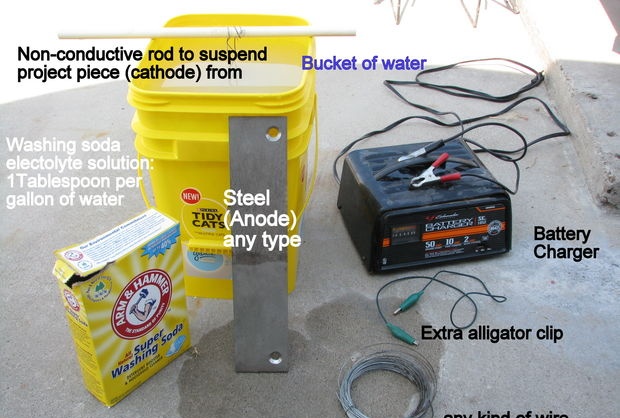
You'll need:
Power supply
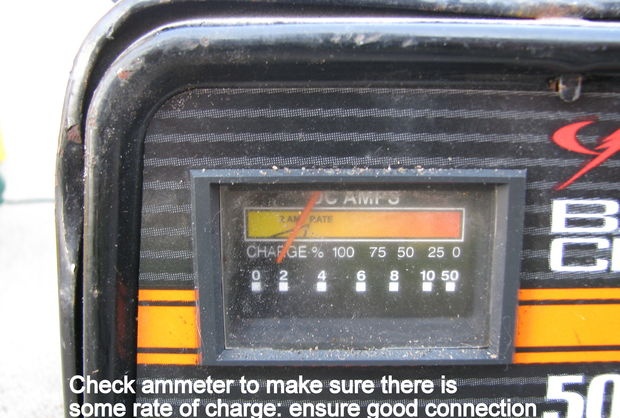
Low-voltage power supply voltage 6-30 volts and current from 10 amperes. I took the car charger. Of course, you can use sources with a lower current strength, then the time of the chemical reaction will increase proportionally and will take a decent amount of time. To control the process, it is desirable that the source be equipped with an ammeter.
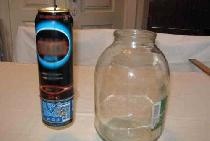
Plastic bath
A plastic or plastic container is a chemical resistant container.The dimensions are several times larger than the object whose surface you are going to restore. Empty containers of construction paints or mixtures work well.
You may also need a second container to store the solution. Unless, of course, you plan to store it. The properties of the solution are not lost during storage, unless it is necessary to mix it before use.
Washing soda
The main component in starting a stable chemical reaction is washing soda. Not baking soda, but specifically soda, used when washing clothes (Soda ash - sodium carbonate). Sold in stores with household chemicals.
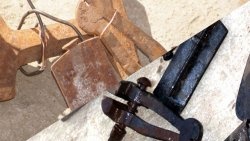
Anode steel
For the anode you will need steel - a sheet of steel, a piece of iron, fittings, etc. The larger the anode area, the better and faster the chemical reaction will proceed.
Device
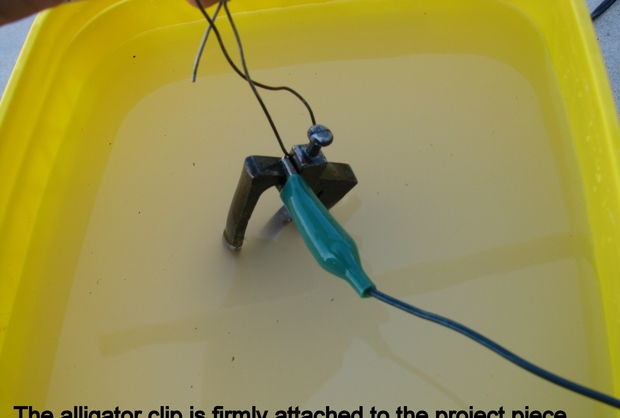
A device for hanging the object being restored so that all surfaces are free. Because if you simply put an object on the bottom, those parts that were in contact with the bottom will not be restored. I took a piece of plastic pipe and wire.
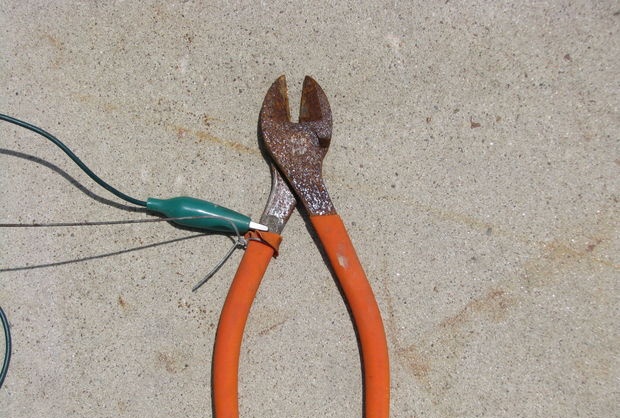
Wires
Take the wires you don't mind so as not to damage the wires of the car charger.
Security measures


Carry out all work only in an open place. As a result of the reaction, a large amount of hydrogen is released, which is extremely explosive.
Never carry out work in a garage or other closed places.
The preparation plan is as follows:
- Fill the container with the required amount of water. Add soda at the rate of 1 tablespoon per 3 liters of water. Move everything until completely dissolved. To make the soda dissolve better, use hot water if possible.
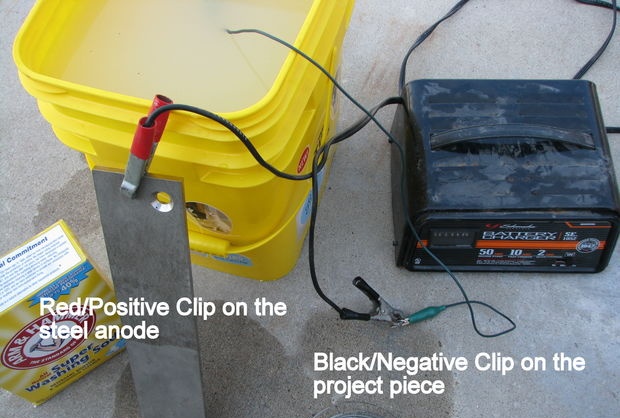
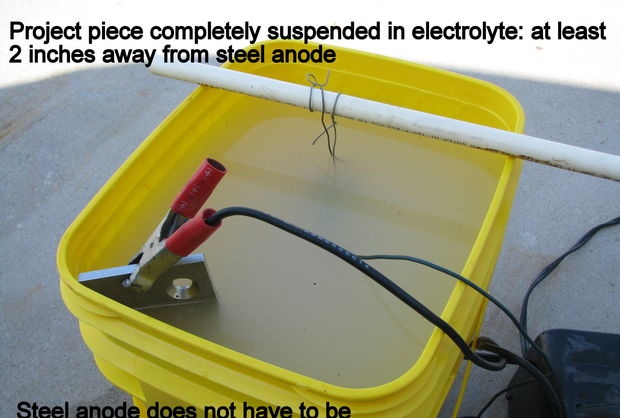
- Install a device to hang the item. Suspend the recovery item in the water so that it is completely submerged in the solution. Connect the negative wire of the source.
- Place the anode steel into the solution. The steel cutter does not need to be completely submerged, but make sure it is more than half submerged. We connect the positive contact of the source to the anode. The anode should be located at a distance from the cathode, preferably on the sides of the vessel.
If the cathode and anode are too close, this will cause a significant increase in current in the circuit and can damage your source.
You can also use more than one anode, taking, for example, several pieces of reinforcement, to increase the surface area. The anodes must be placed on different sides and connected to the positive side of the source. This will be even good, since you won’t have to turn the object, and the reaction will proceed evenly from all sides.
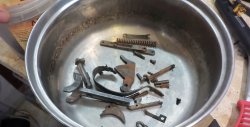
You can also simultaneously restore several items at a time.
All manipulations must be performed only with the power supply turned off!
Once all the wires are connected, everything is installed - turn on our charger. Let's look at the ammeter. The charger should show the current flowing through the circuit.
Begin surface restoration and rust removal
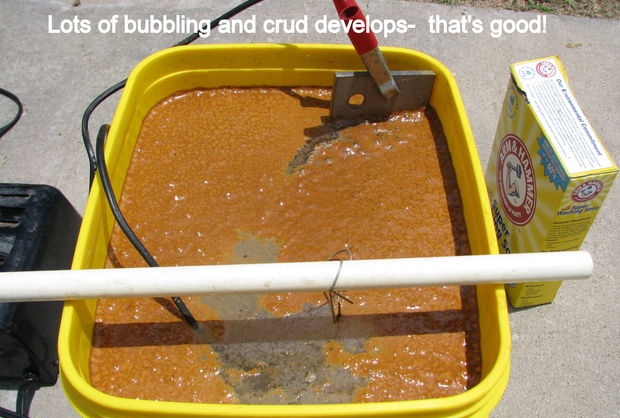
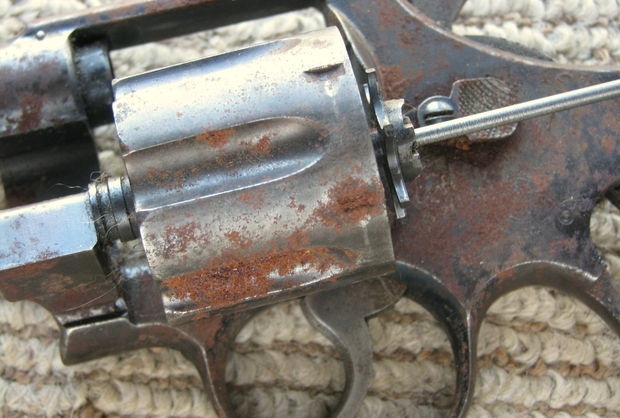
Immediately after power is applied, bubbles will begin to appear on the surface. A little later a rusty veil will begin to appear. These are completely normal signs of normal electrolysis.
The reaction time depends on many factors: current, surface area of the anode and cathode, solution temperature, its concentration, etc.
This time can vary from half an hour to several hours, everything is purely individual.
You need to monitor the process every hour.That is, you turn off the charger, lift the cathode from the objects, and see how the reaction proceeded. Turn over periodically so that recovery occurs evenly on both sides.
Most likely the whole process will take several hours. Everything will depend on how rusty the item is. Nothing bad will happen if the source works more than necessary.
After use, the solution can be drained somewhere in the garden - it is non-toxic. Or pour into another container and leave until next time.
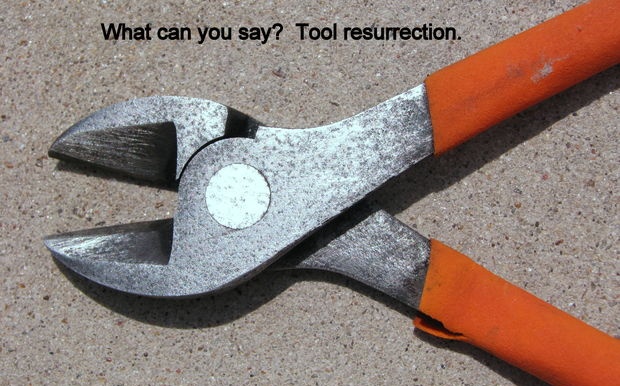
Let's summarize the surface restoration
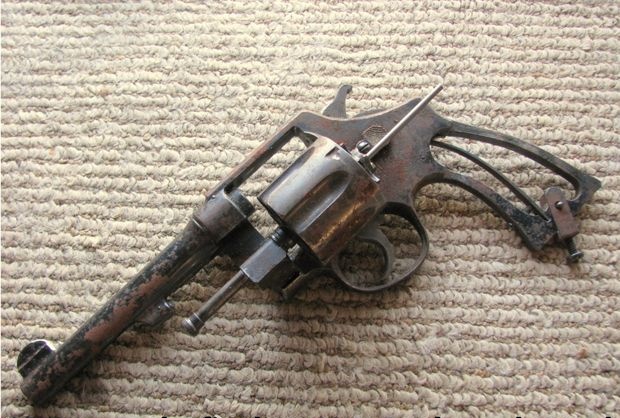
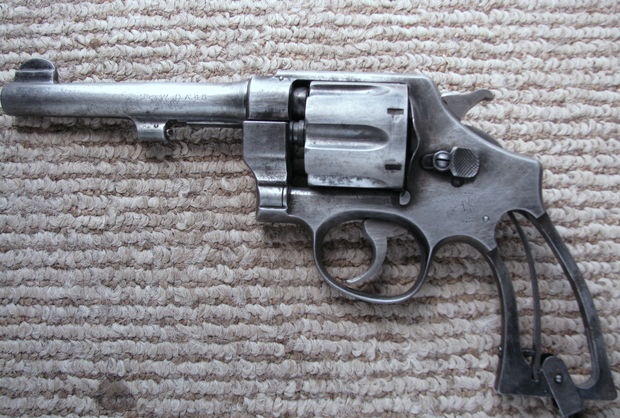
The last time you pick up the item being restored, you will notice that instead of rust, the item is coated with a black layer of chemical oxidation, such as soot. This stand needs to be removed. To remove, you need to use powder detergents such as “Komet” with a hard sponge. In principle, this plaque can be easily removed in a few minutes.
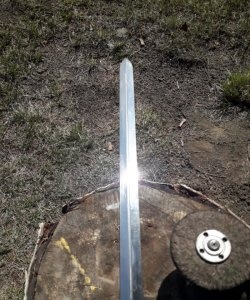
And voila, you have resurrected your item with a minimum of effort and money.
This is not magic - these are the miracles of electrolysis.


Original article in English