Do it yourself
Life hacks, master classes, useful tips, recipes.
home » Fascinating chemistry » Removing rust using baking soda
Removing Rust with Baking Soda

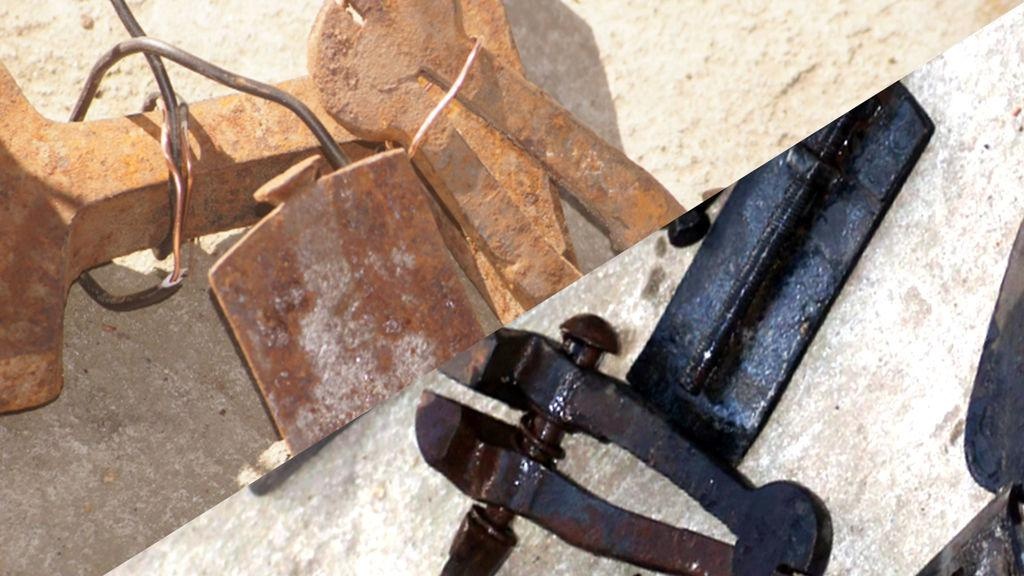
This is my favorite method for removing rust from heavily corroded metal products. The method is very simple and highly effective. With a little patience, you will get impressive results.
Use this method only outdoors as the process releases highly toxic gases.
Removing Rust with Baking Soda

Removing Rust with Baking Soda

What do we need


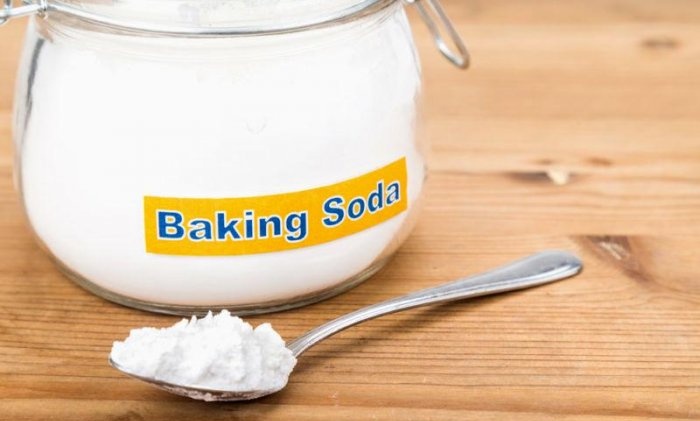
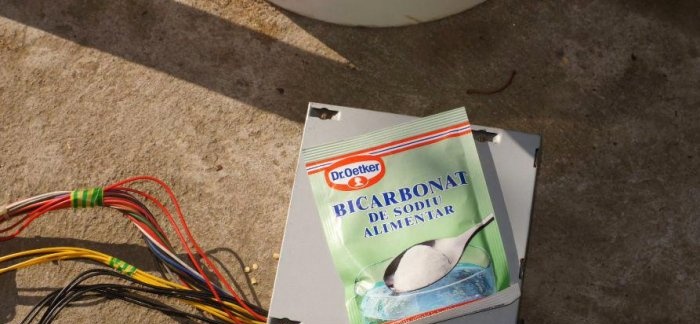
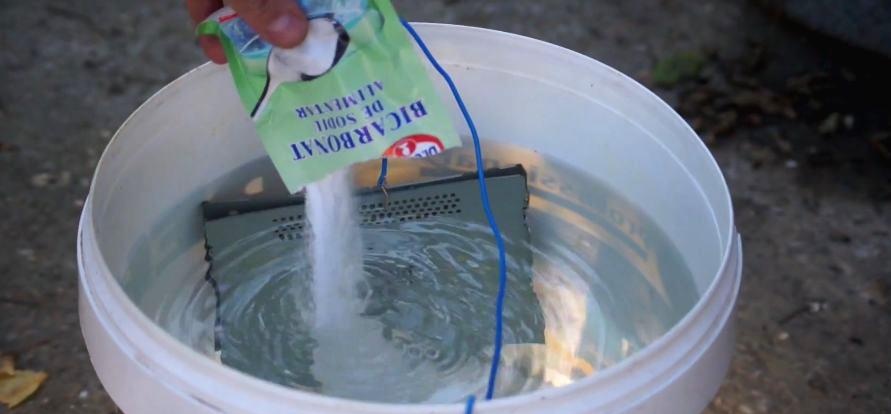
  • 1. Baking soda (I used 400 g per 10 liters of water, but you can try experimenting with the concentration).
    Removing Rust with Baking Soda

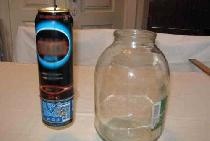
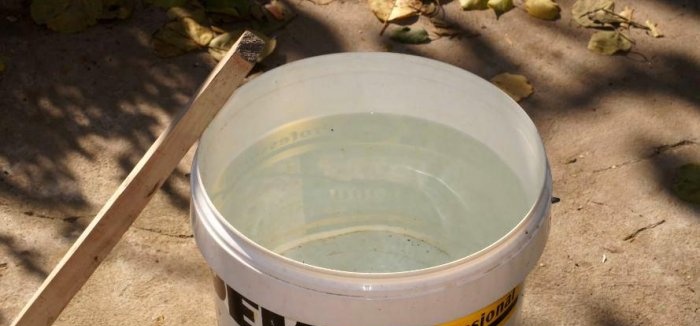
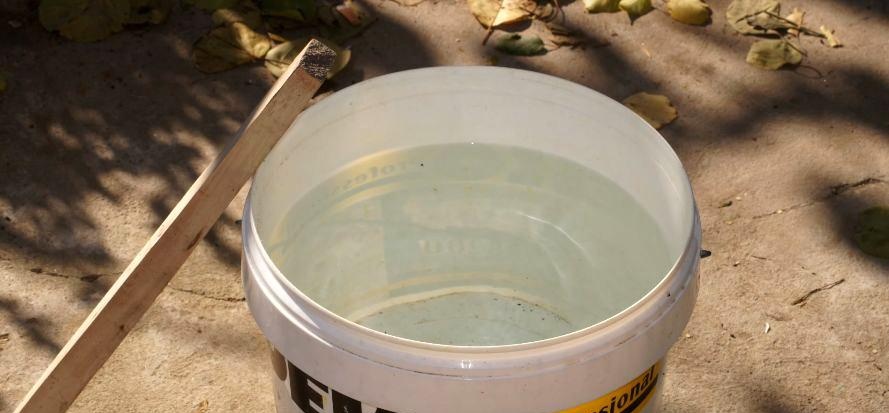
  • 2. Plastic bucket (must be plastic as a non-conductive material).
    Removing Rust with Baking Soda

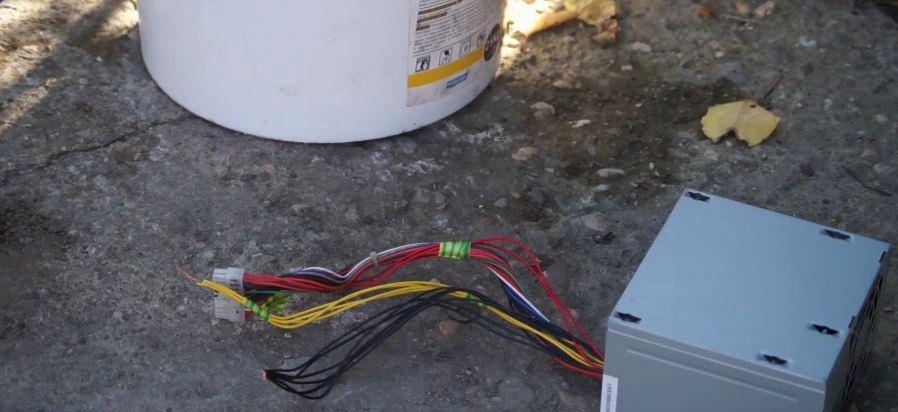
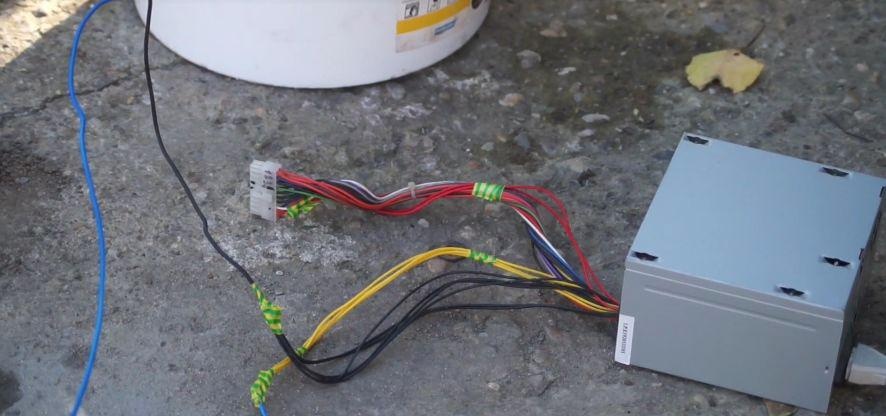
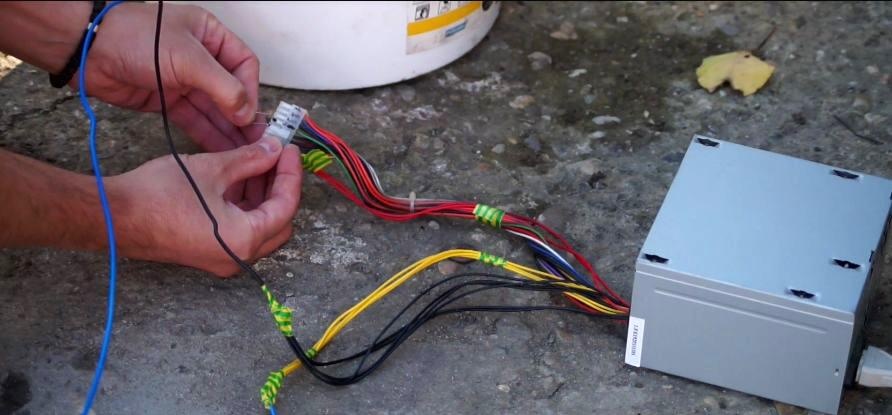
  • 3. DC 12V power supply.
    Removing Rust with Baking Soda

    Removing Rust with Baking Soda

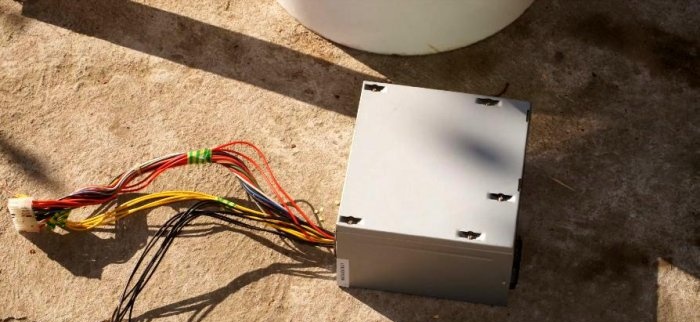
  • 4. Sacrificial metal to which rust will be transferred.
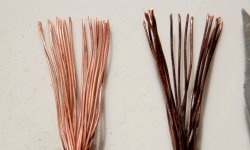
    Removing Rust with Baking Soda

  • 5. Copper wires.
  • 6. Water.


Preparation


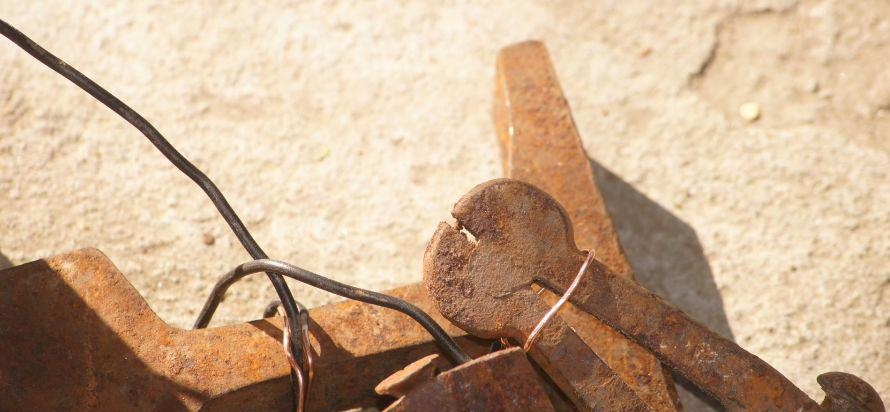
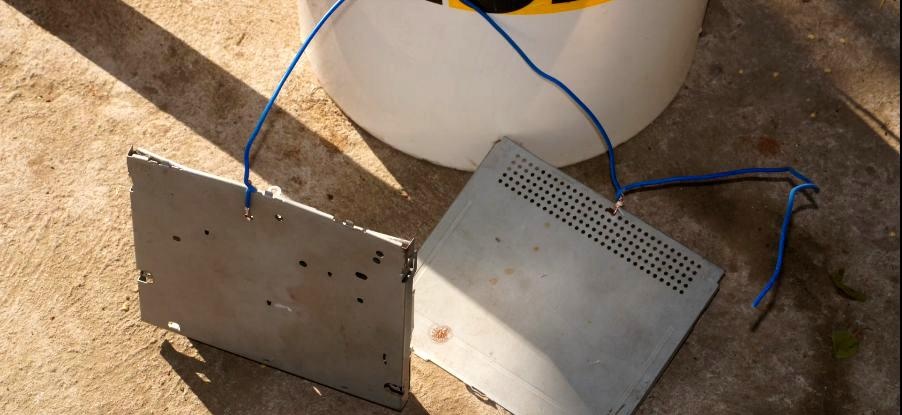
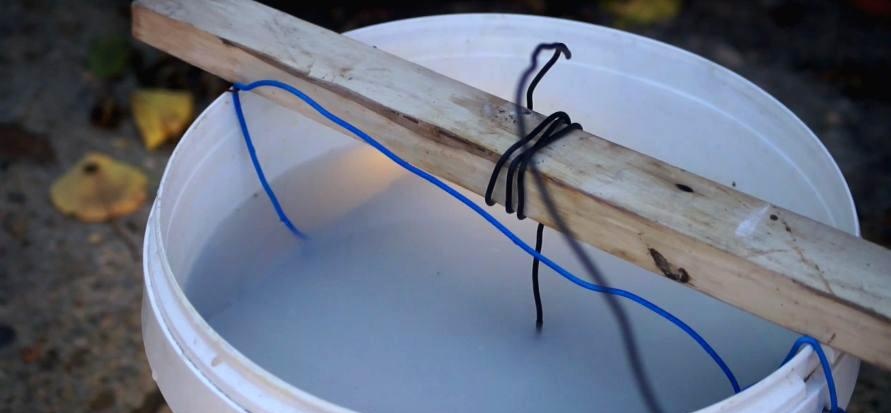
Connect the negative wires from the power source to the parts being restored.
Removing Rust with Baking Soda

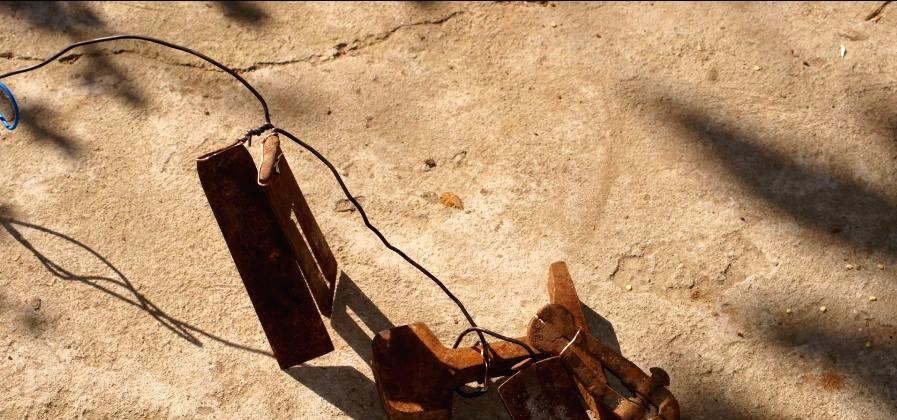
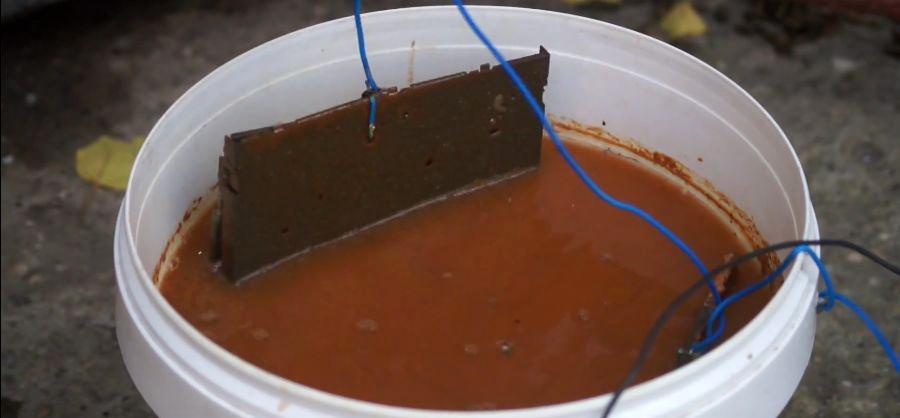
Using copper wires, attach the parts to be cleaned to the black contacts of the power supply, and the sacrificial metal to which the rust is transferred to the yellow contacts (+12 V).
Removing Rust with Baking Soda

Removing Rust with Baking Soda

Removing Rust with Baking Soda

Removing Rust with Baking Soda

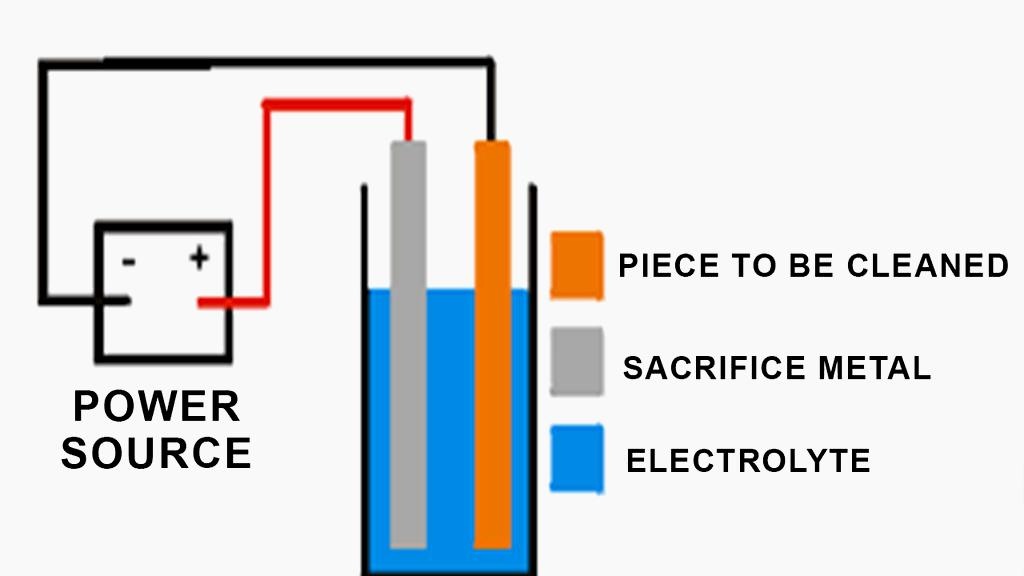
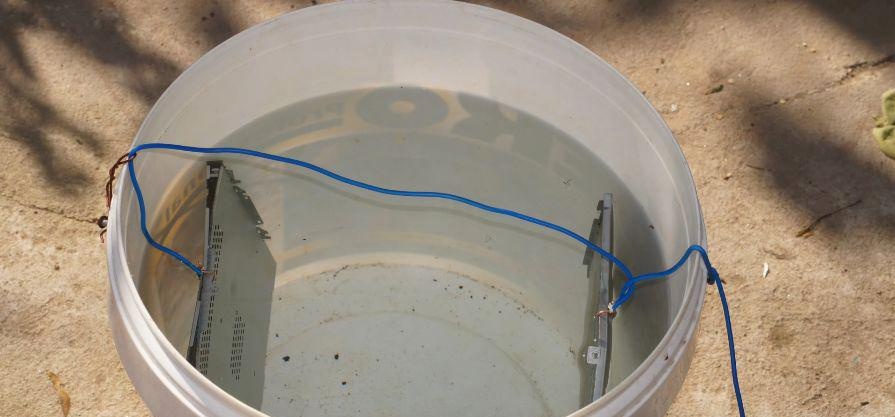
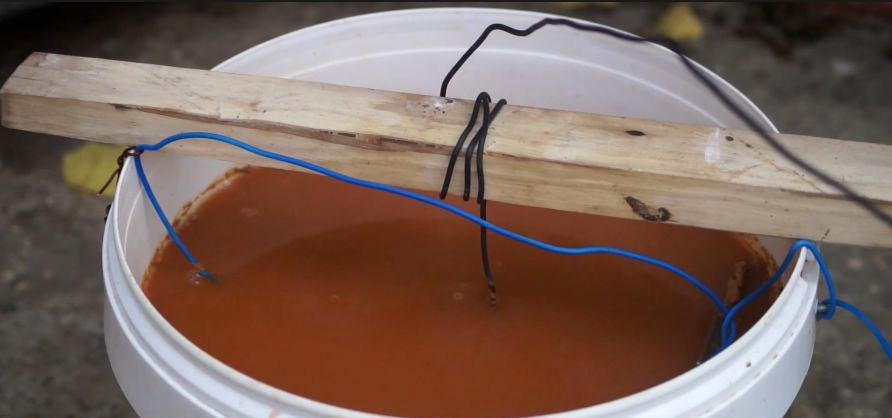
Fill a bucket with water and place metal in it to transfer the rust. Make sure that the fastenings are secure to avoid short circuits. Add baking soda and mix well.
Removing Rust with Baking Soda

Removing Rust with Baking Soda

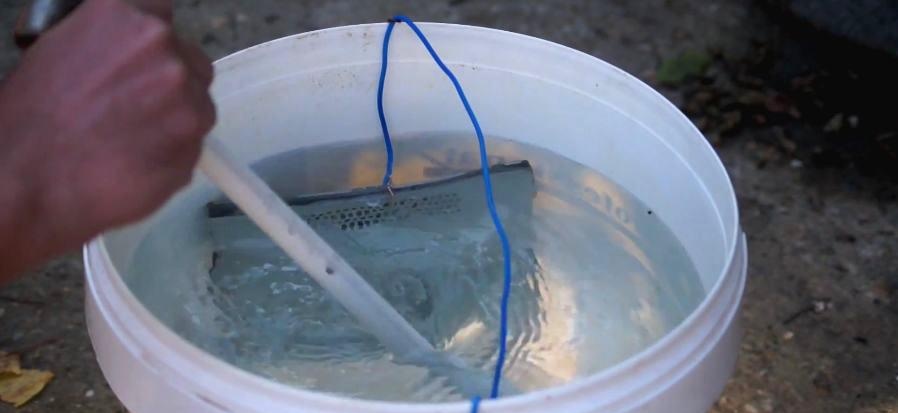
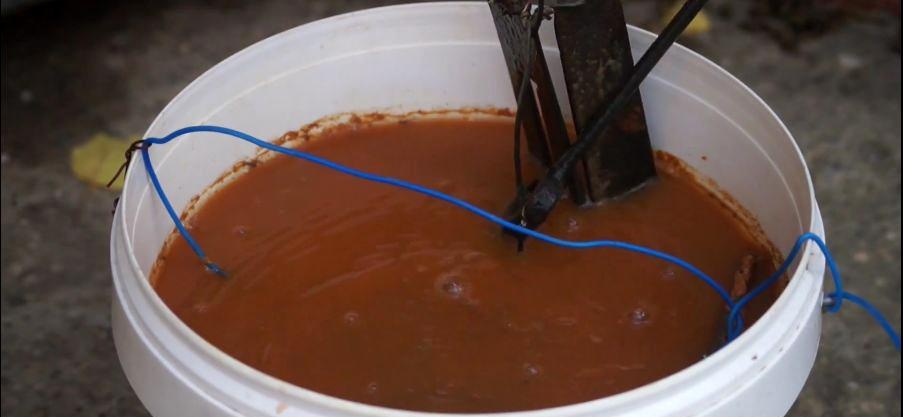
Then lower the parts to be cleaned, avoiding their contact with metal to avoid a short circuit. Double check that you have done everything correctly and start the power supply (see last image). If all steps are performed correctly, bubbles will appear on the surface after a while.
Removing Rust with Baking Soda

Removing Rust with Baking Soda

Electrolysis with soda


Removing Rust with Baking Soda

Removing Rust with Baking Soda

Removing Rust with Baking Soda

Purification occurs by electrolysis. A mixture of baking soda and water is an electrolyte that, using an electric current, produces a chemical reaction to separate materials at the electrodes.
The main components of the electrolysis process are:
An electrolyte is a substance that conducts electricity using ions.
DC power supply - provides the energy needed to create or discharge ions in the electrolyte. Electric current is carried by electrons in an external circuit.
Removing Rust with Baking Soda

The two electrodes are conductors that provide a physical connection between the power source and the electrolyte.

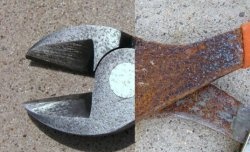
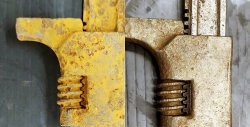
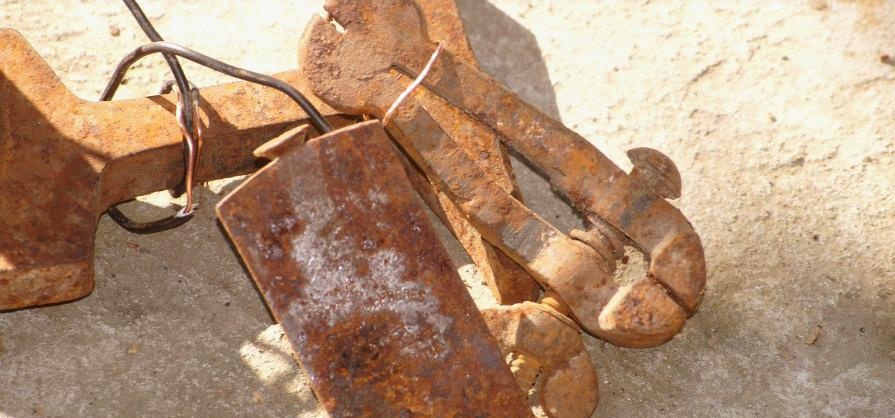
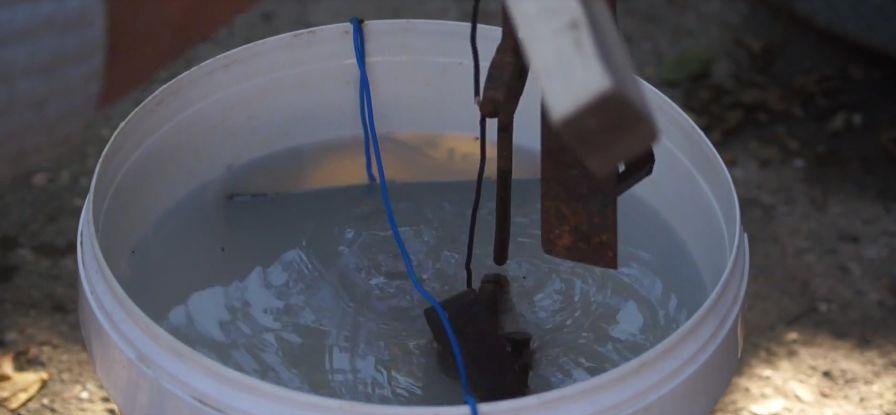
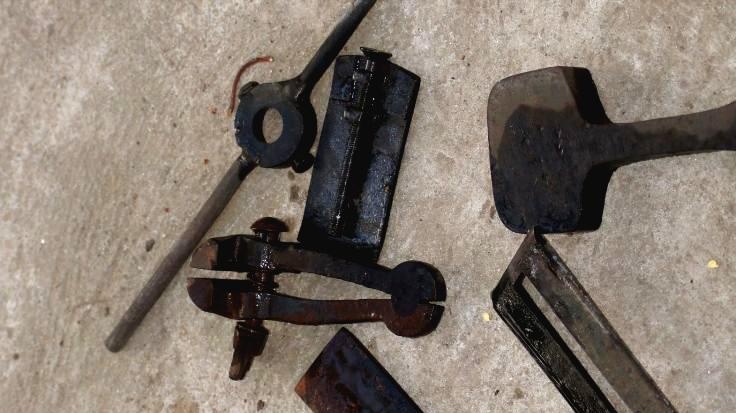
Result of rust removal


Removing Rust with Baking Soda

I ran the process for two hours, but it should take about six hours to get a good result.
The result depends on the duration of the process. If you are not satisfied with the result, you can repeat the process several times. You can also experiment with the concentration of soda and the current strength in the region of 10 amperes (the process will not start at a current strength of 5 amperes, and at a value of more than 15 amperes, the electrolyte will begin to boil).
After finishing the process, you can clean your products with water and a brush.

Watch the video


come back
Comment
  • bowtiesmilelaughingblushsmileyrelaxed relaxedsmirk
    heart_eyeskissing_heartkissing_closed_eyesflushedrelievedsatisfiedgrin
    winkstuck_out_tongue_winking_eyestuck_out_tongue_closed_eyesgrinningkissingstuck_out_tonguesleeping
    worriedfrowninganguishedopen_mouthgrimacingconfusedhushed
    expressionlessunamusedsweat_smilesweatdisappointed_relievedwearypassive
    disappointedconfoundedfearfulcold_sweatperseverecrysob
    joyastonishedscreamtired_faceangryragetriumph
    sleepyyummasksunglassesdizzy_faceimpsmiling_imp
    neutral_faceno_mouthinnocent
4 minus one =
Comments (7)
  1. Guest Vladimir
    #1 Guest Vladimir Guests August 13, 2018 09:13
    2
    Hello! From the video everything is clear except for some details, namely how you can increase the supplied current if you use direct current that comes from a computer power supply.
    1. amateur
      #2 amateur Guests 13 August 2018 21:30
      9
      the current depends on the distance between the plates and, of course, on the voltage and composition of the electrolyte, but the author of the article simply rewrote it (he ripped it off from someone without understanding the electrolysis process) and the current should be per square centimeter of the surface of the parts being processed. He also has problems with the polarity of the voltage source. Purely rewriting the text without understanding the topic.
    2. Victor Demchenko
      #3 Victor Demchenko Guests 15 August 2018 20:13
      1
      I believe that you can use a regular battery charger; it has excellent current regulation from 0 to 10 amperes.
  2. Oltaviro
    #4 Oltaviro Guests 14 August 2018 18:16
    8
    And what kind of bowl should I put a sheet measuring one meter by one and a half into?
  3. Guest Nikolay
    #5 Guest Nikolay Guests August 23, 2018 09:33
    0
    The power supply produces 5-6 volts, not 12
    1. udavst
      #6 udavst Guests 23 August 2018 19:05
      2
      It depends on which one, it gives out 3 and 5 and 12, he uses 12.
    2. Vitalich
      #7 Vitalich Guests August 26, 2018 07:33
      1
      Damn, okay? We have been running car stations from ATX for 20 years now, but it turns out there is no 12V there. Bgg)

Finishing a house with facing bricks | Do it yourself

Rocking picture | Do it yourself

Decoupage master classes with do-it-yourself photos

How to Make a Crispy Potato Hot Dog Without Flour

«Do it yourself - with your own hands» - a site of interesting homemade products made from scrap materials and items at home. Step-by-step master classes with photos and descriptions, technologies, life hacks - everything a real master or just a craftsman needs for needlework. Crafts of any complexity, a large selection of directions and ideas for creativity.

We recommend reading

Washing machine error codes