For work you will need these materials
1. A sheet of plywood measuring 40x60 cm.
2. Drill, drill, nail, hammer, pencil and ruler.
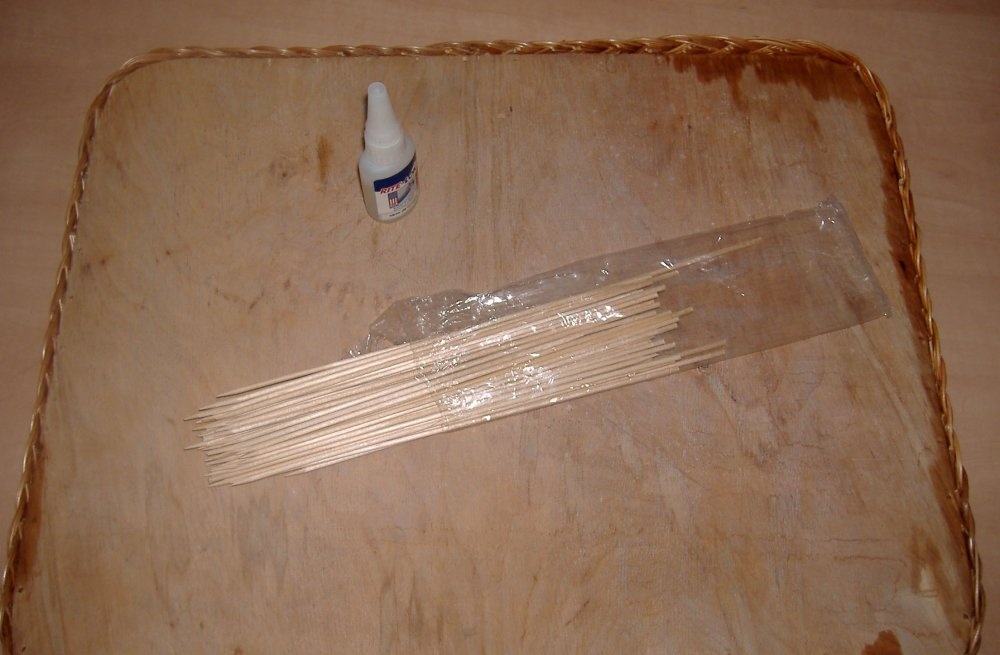
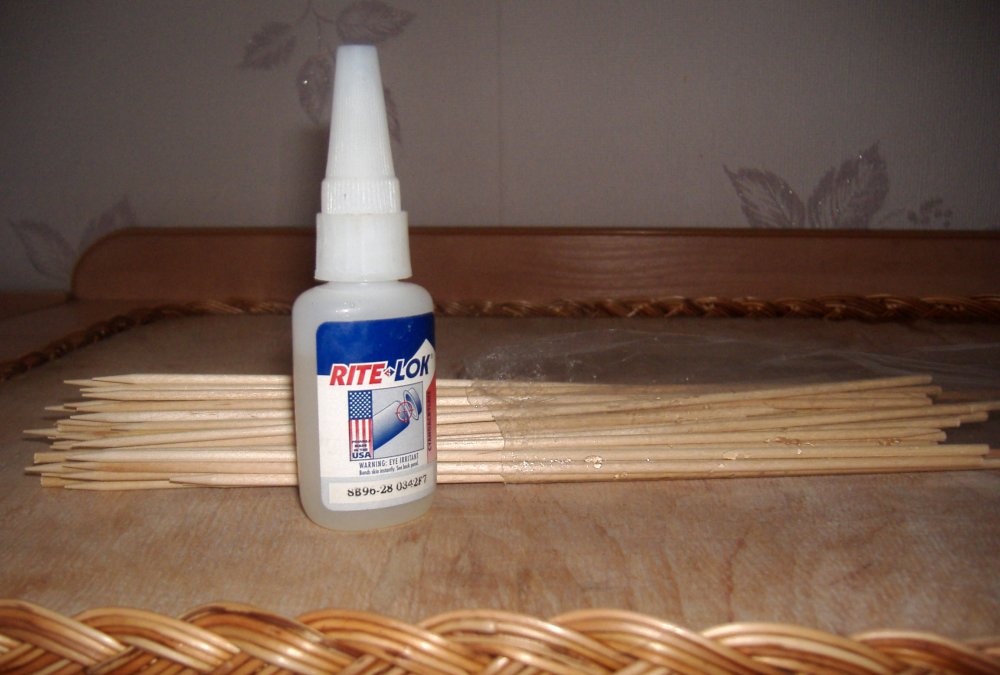
3. Bamboo sticks with a diameter of 4 mm and a height of 30-45 cm.
4. Wood glue or superglue.
5. Long twigs of weeping willow.
6. Bush willow twigs.
7. 3 m of decorative twisted sea grass rope. You can buy it in large construction supermarkets.
8. Water-based varnish for opening wooden products and a brush.
9. A piece of cotton fabric with a children's pattern measuring 1.5x1.5 m.
10. 2.15 m of lace and 1.5 m of elastic.
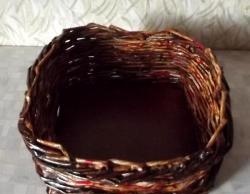
Let's start weaving a basket for toys
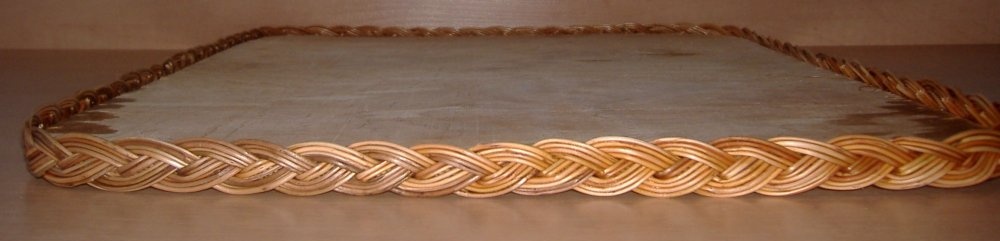
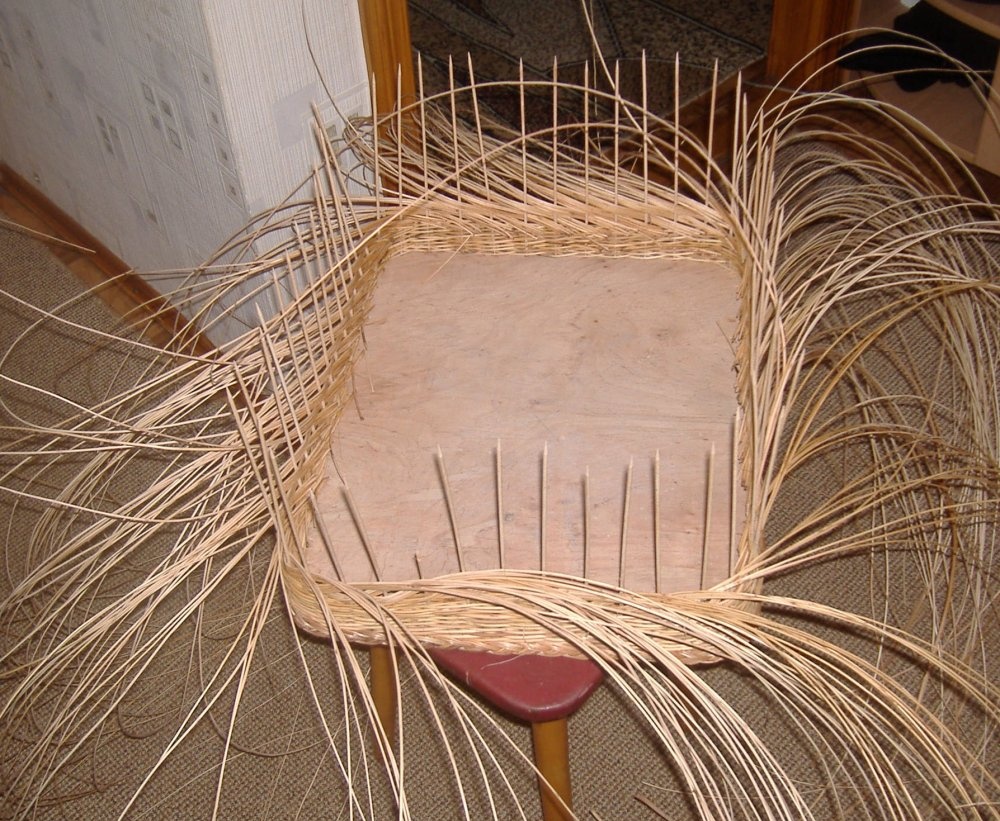
1. Take a sheet of plywood measuring 40x60 cm and 1 cm thick. Its corners should be rounded. Mark holes on the end of the plywood for the braids of vines that will decorate it. The holes should be spaced 2 cm apart and have a diameter of 3.5 mm. The braid bend will have 4 rods in the upper waves and 6 rods in the lower ones. In each hole you need to insert 2 twigs of a bush vine. Bending a “braid” begins with weaving with 4 twigs. Therefore, at the place where it begins, you need to mark 2 holes three times as close to each other as possible. These pairs of holes will be 2cm apart, just like the other single holes. Make a dent in each hole using a nail and hammer. This will make the process of drilling holes easier.
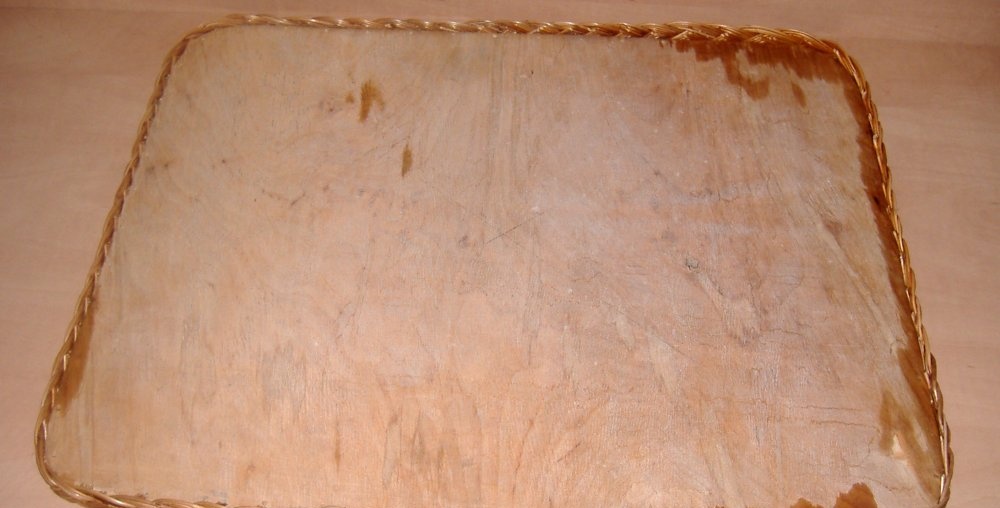

2. On the surface of the plywood bottom for the basket you also need to mark holes for the main posts. Their diameter will correspond to the diameter of the bamboo sticks, since they will serve as stands in the toy basket. Mark them with a pencil and ruler at a distance of 3 cm from each other.
3. Drill the intended holes. Their depth at the end of the plywood will be approximately 1-1.5 cm. It is better not to make holes on the surface of the plywood through, so that the bottom of the basket has a beautiful, smooth appearance.
4. Weave a braid bend at the end of the plywood bottom.
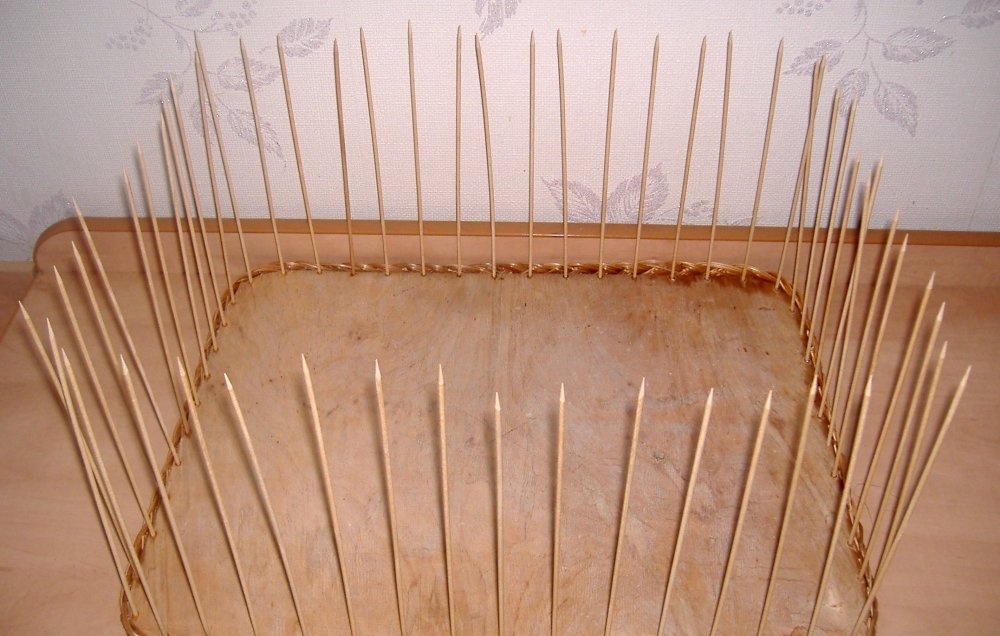
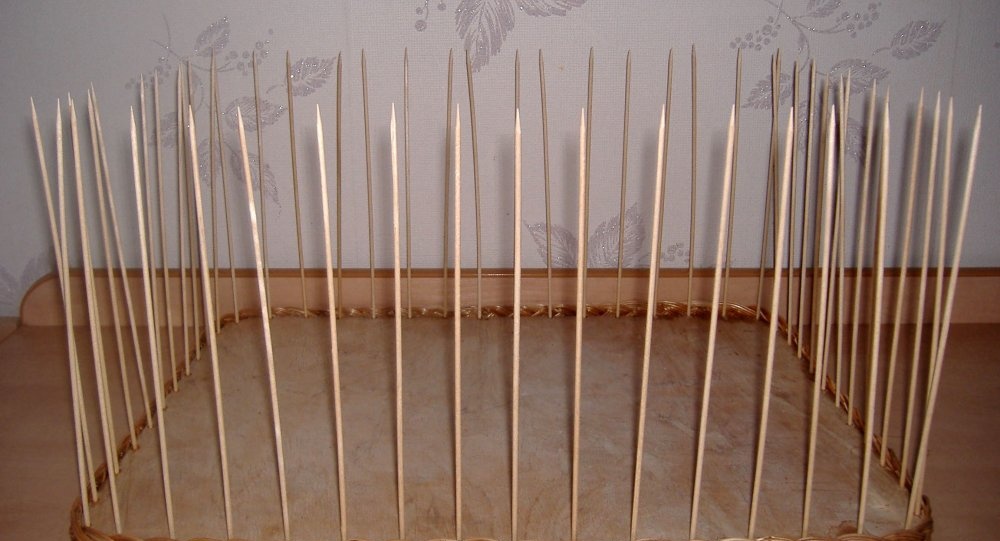
5. Take bamboo sticks and place them on the glue in the holes drilled on the surface of the plywood. Let the glue dry. We took bamboo sticks 30 cm long. This is not very convenient, since the basket will be higher and the bamboo stands will have to be extended during the weaving process. It’s good if you find similar sticks with a height of 40-45 cm on sale.
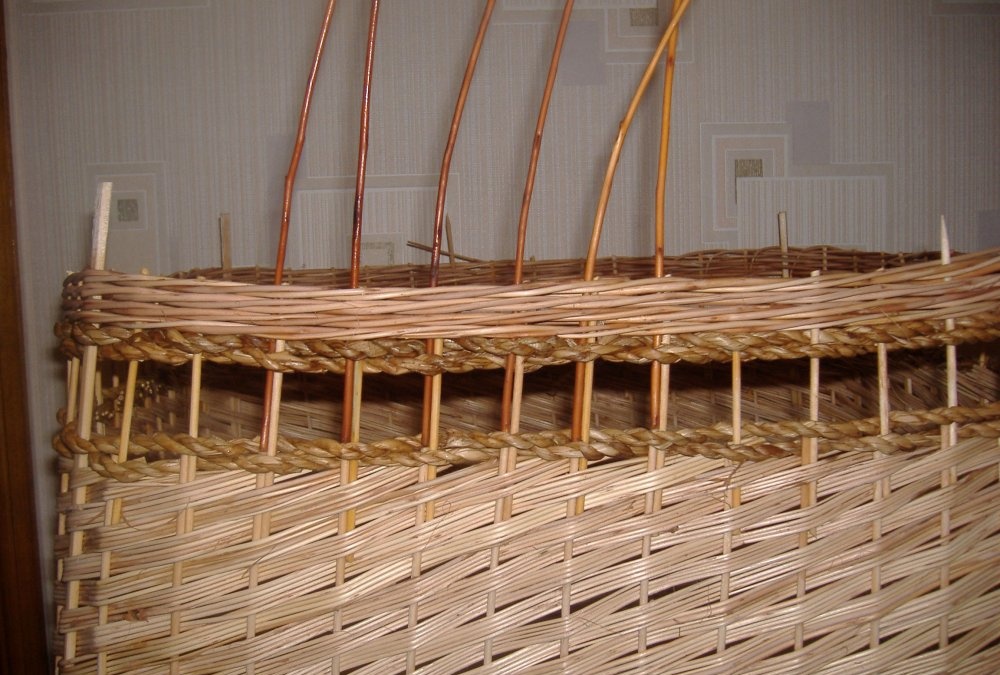
6. Take 3 long willow twigs and place one behind the three posts. Weave a rope of 3 rods around the bamboo posts.
7. When the height of the rope reaches 5 cm, proceed to layer-by-layer weaving of 5 rods. To do this, place 5 long willow twigs behind each post and weave 25 cm upward in layer-by-layer weaving. We used weeping willow twigs here so that there would be as little build-up of twigs as possible on the inside surface of the toy basket. Although you can get by with shorter twigs of shrubby willow.
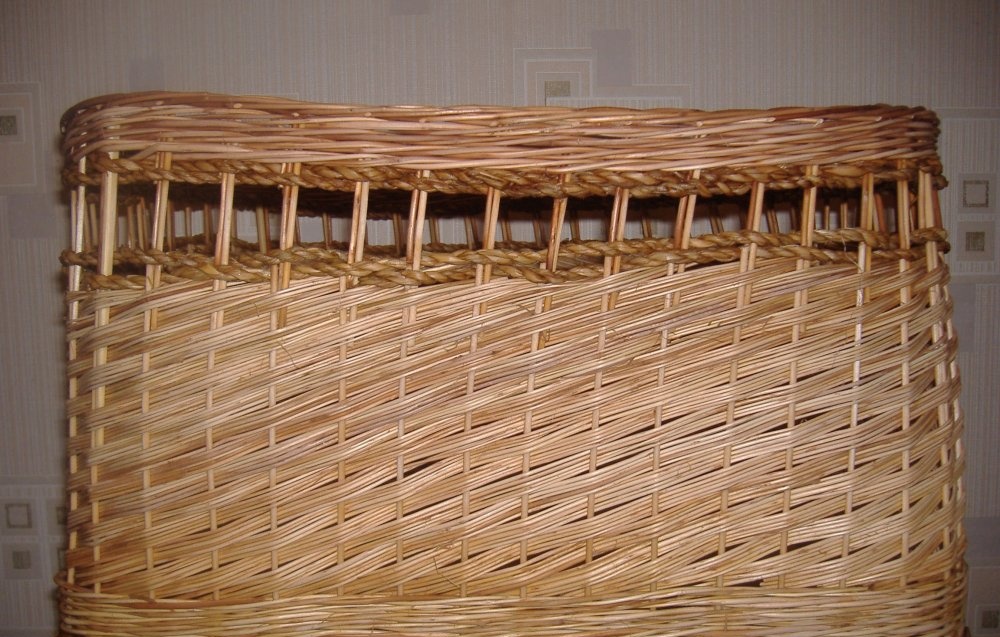
8. Having completed the layer-by-layer weaving of 5 rods, weave a couple of rows of simple weaving with sea grass rope.
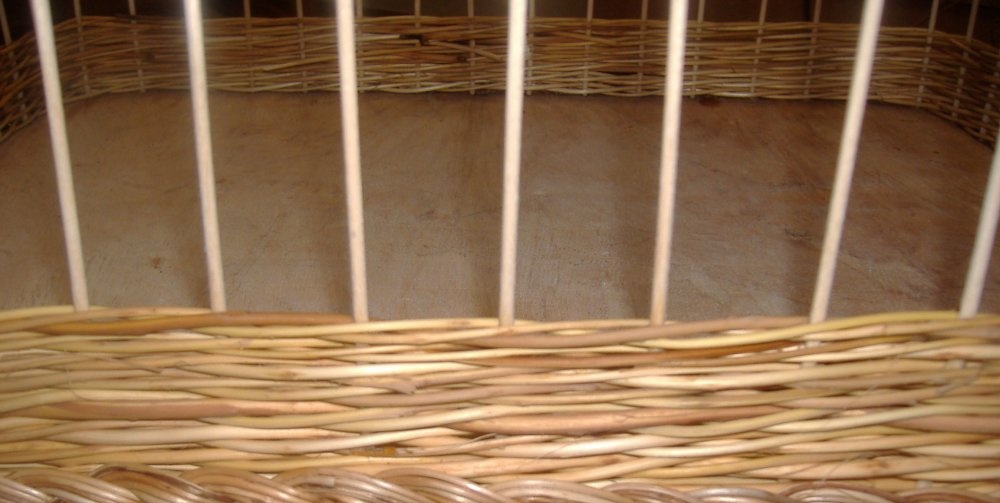
9. Now step back 4 cm and weave 2 rows again with the same rope. 4 cm of bare bamboo posts form peculiar squares, which will later serve as basket handles.
10. Weave 2 cm upwards with a rope of 3 rods.
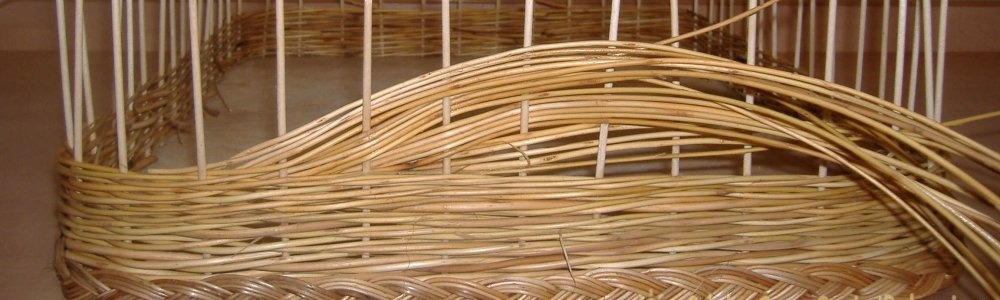
11. Tightly secure the ends of the rope and proceed to building up the stands for bending the “rod” of three pairs of rods. To do this, cut the bamboo posts and add one post each of willow twigs in front of them. The rods need to be inserted deeply. So that they reach right up to the bottom rows, woven from sea grass rope.
12. Weave a “rod” bend from three pairs of rods.
13. Weaving the basket is finished. Open it up with water-based varnish. It is not as toxic as solvent based varnish. Therefore, it is often used to open children's furniture.
14. While the varnish is drying, sew the lining for the basket. Fabric lining plays an important role in a toy basket. It covers the places where the twigs grew, and thereby protects children's fingers from unpleasant contact with them.The lining also prevents the basket itself from getting dirty. If necessary, the lining can be removed and washed at any time. Simply cut the fabric so that the pieces fit the inside of the basket and flare out slightly at the top. Leave a couple of centimeters for the seams. And also add 10 cm to the height of the lining. This is necessary so that it can bend outside the basket and be fixed to it with an elastic band.
15. Having sewn all the cut parts together, you will get a kind of bag. Fold and stitch its edges to create a hole for the elastic.
16. Tighten the elastic band into the bag.
17. Sew lace around the perimeter of the lining.
18. Sew a thick ribbon from the leftover fabric and tie it into a beautiful bow in the center of the basket.
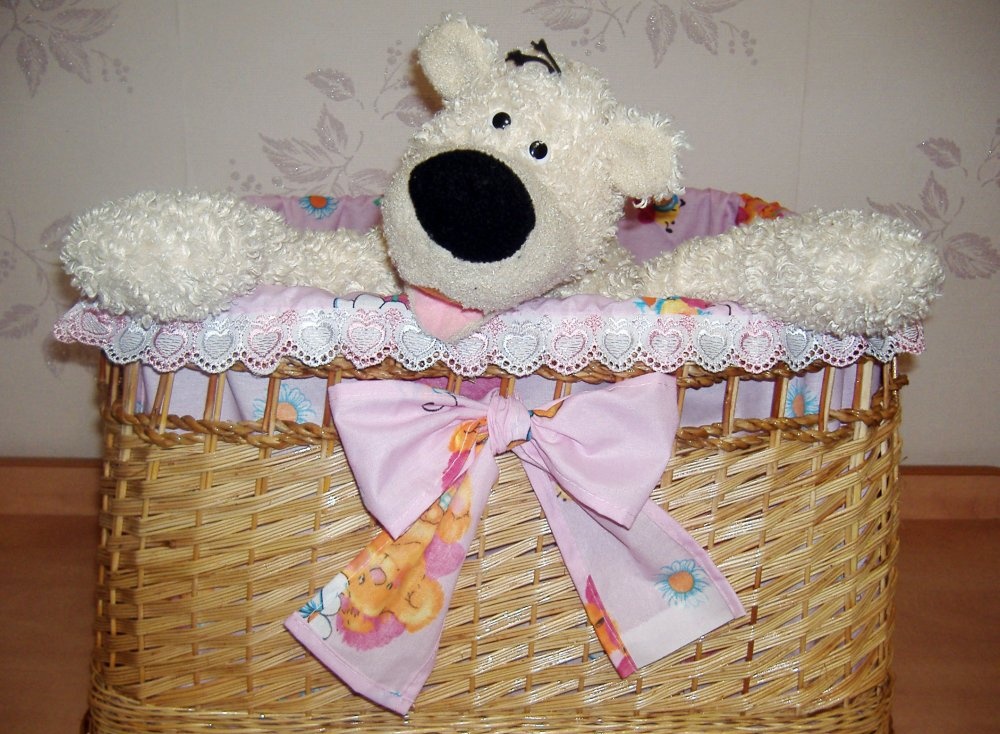
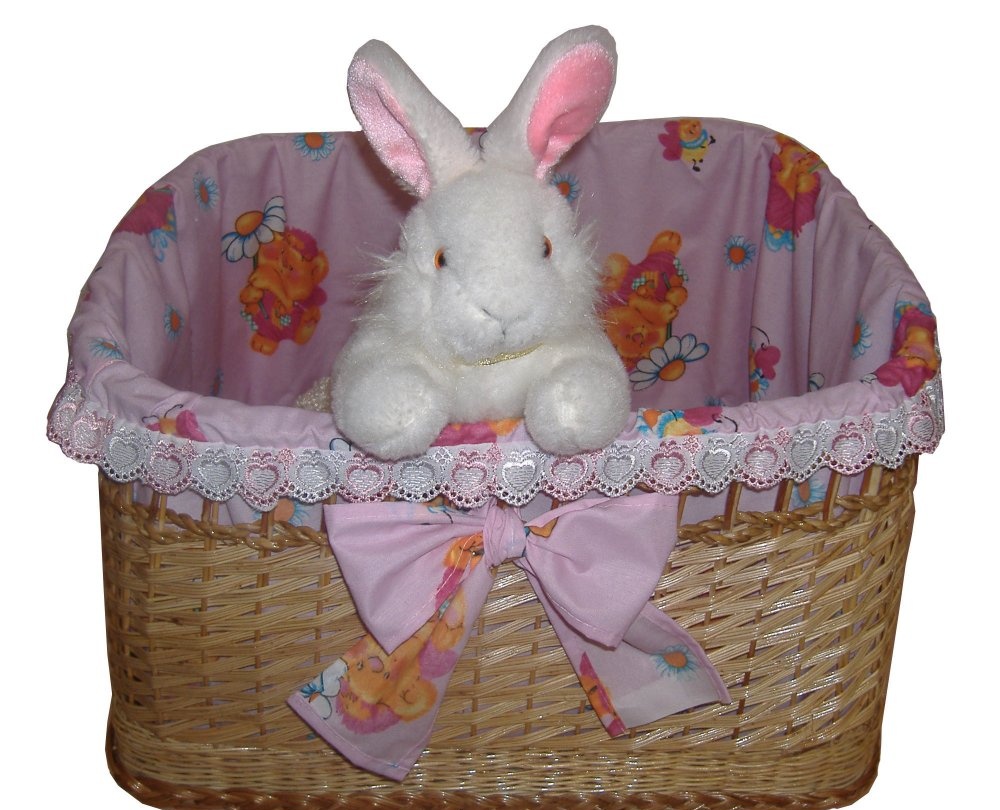
The wicker basket for toys is ready! Hurry to please your child!