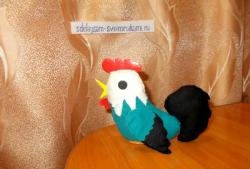
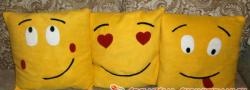
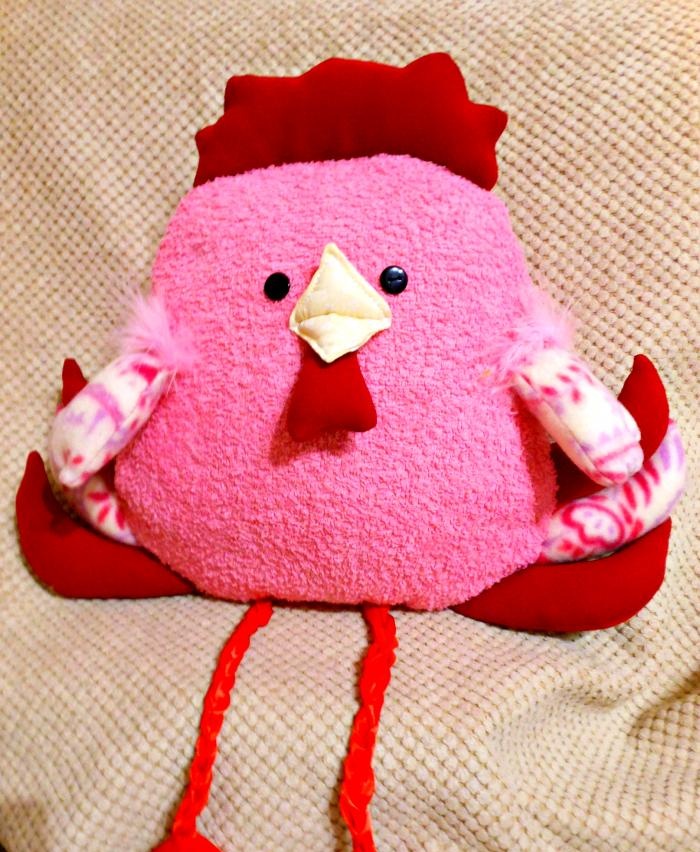
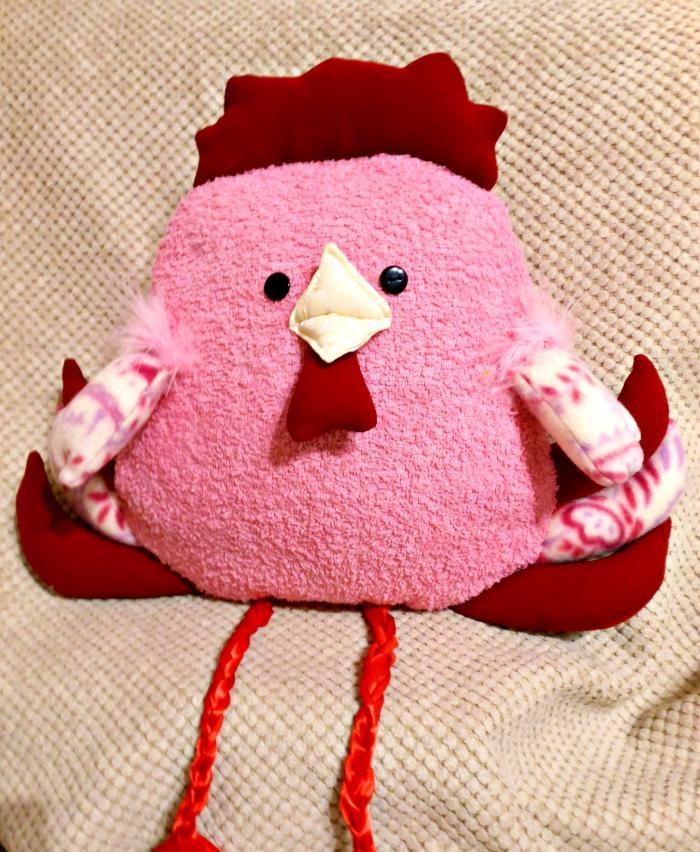
The Fire Rooster will reign for twelve months. The image of a bright bird can decorate any piece of furniture or clothing. Toys of various shapes look especially cute. A pillow - a toy “Cockerel” will be a wonderful gift, and it is very easy to make with your own hands.
Description of the pillow.
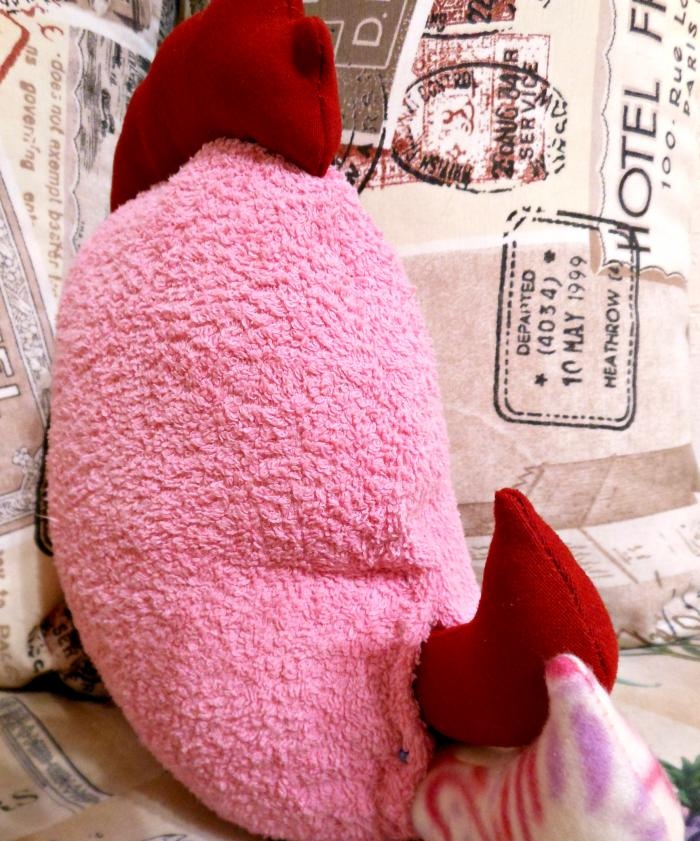
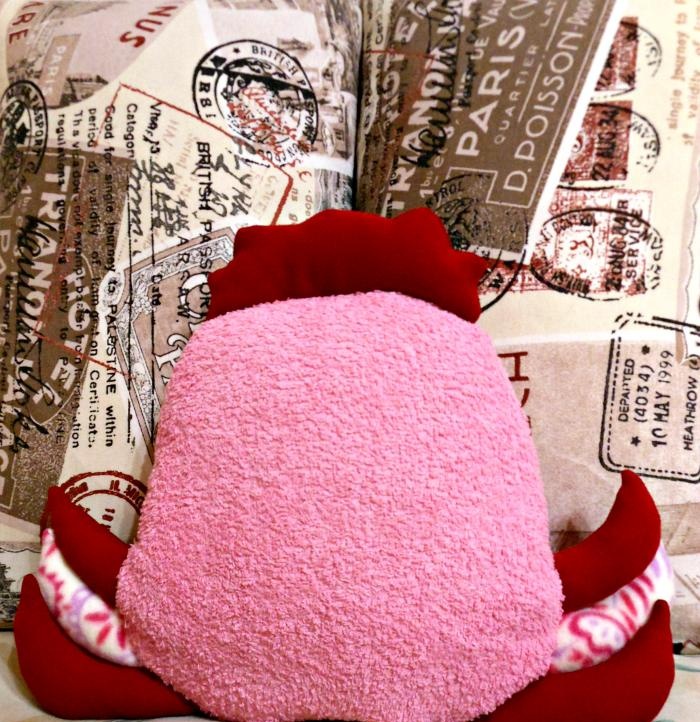
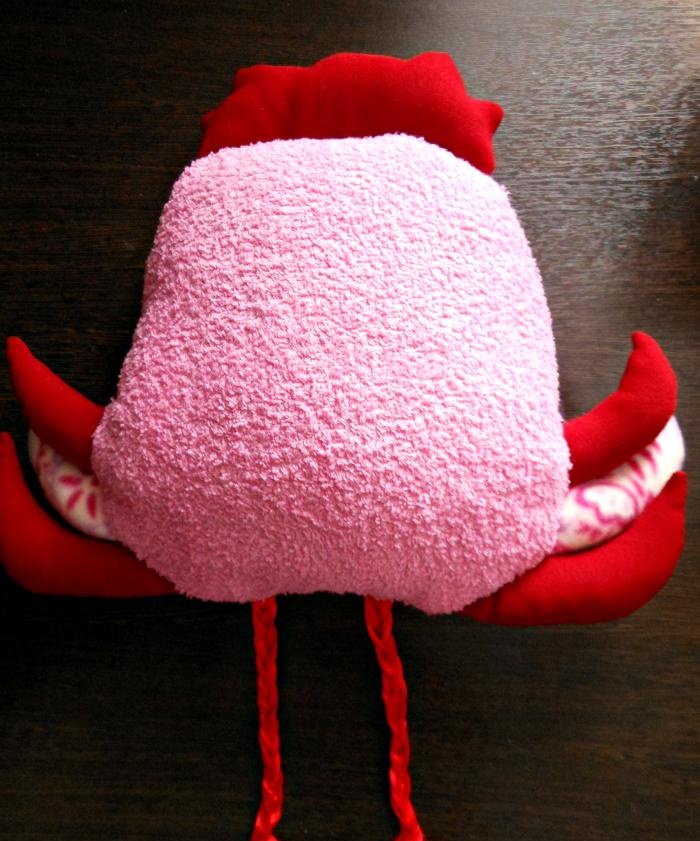
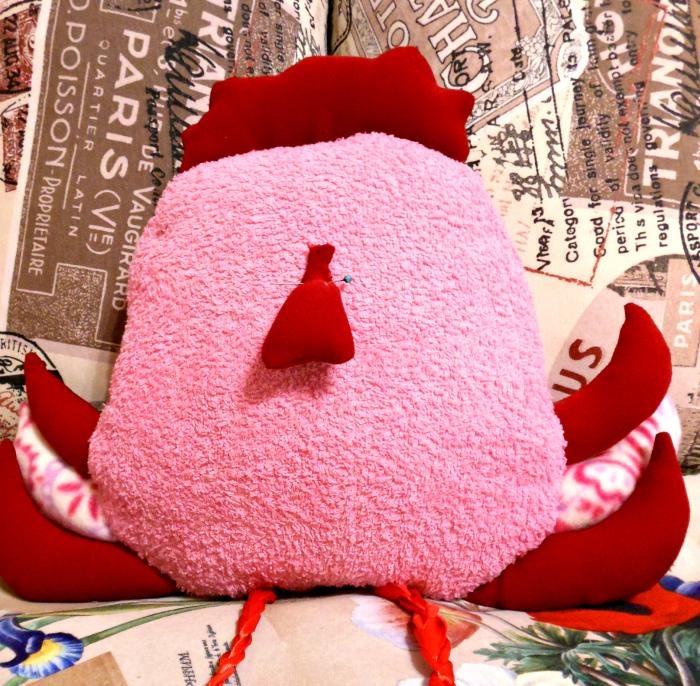
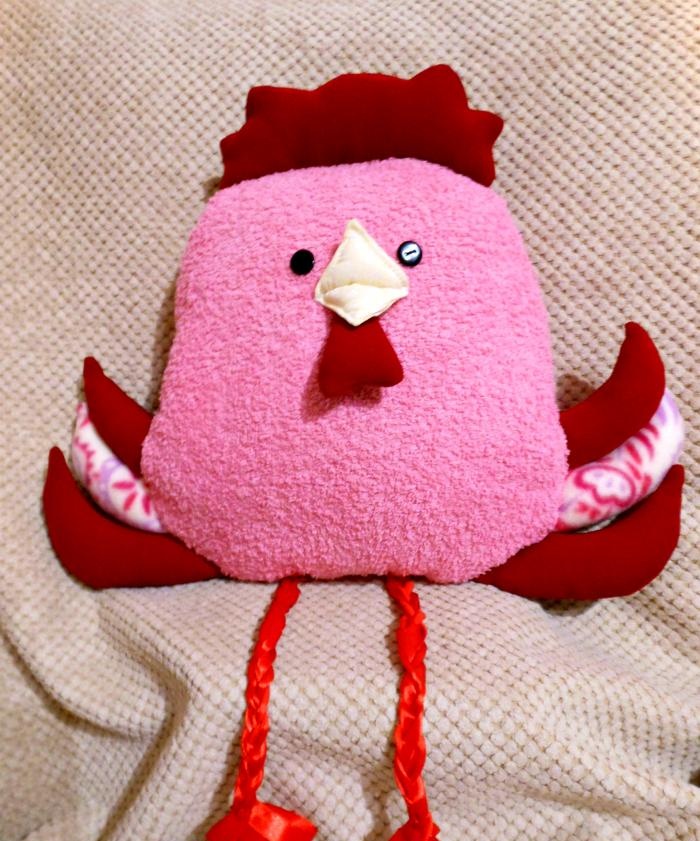
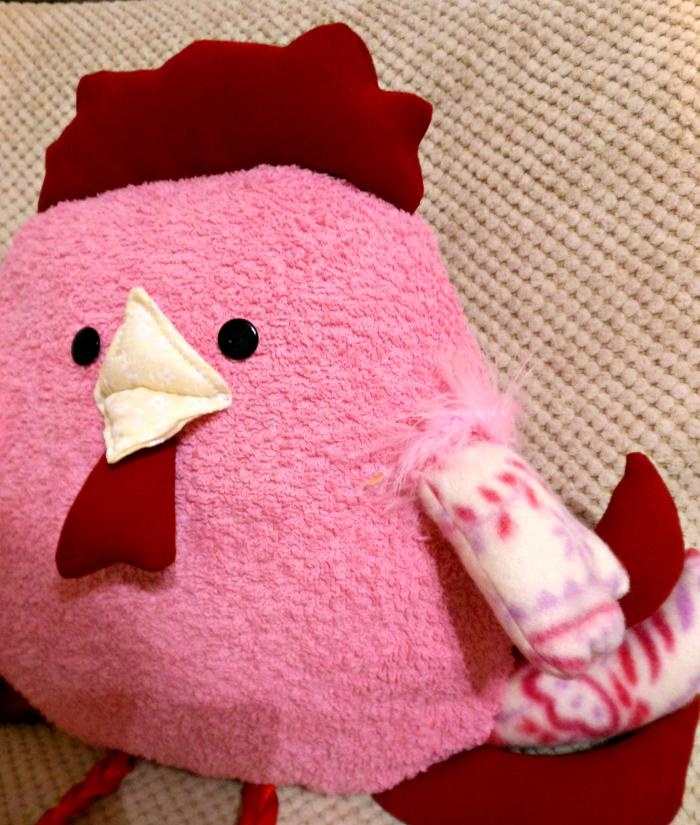
The “Cockerel” pillow is made of soft fabric, pleasant to the touch. Height – 27 cm, width – 24 cm. The pillow is stuffed with padding polyester, the legs hang freely, the eyes have buttons. A comb, feathered wings, and a bright tail decorate the pillow. The cockerel will fit perfectly into the interior, and children will be happy to play with it.
Recommended materials.
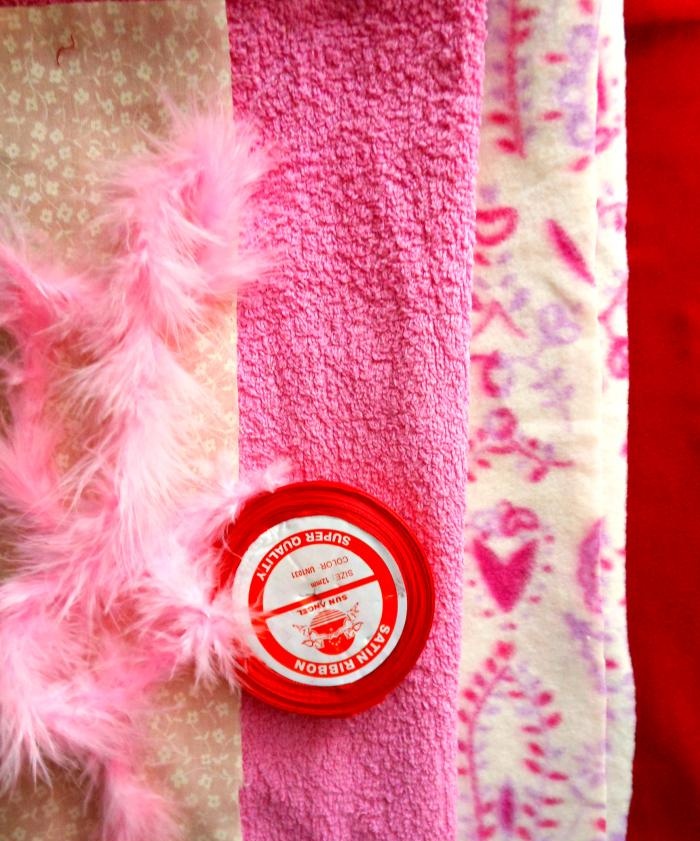
To make pillow-toys, it is recommended to use materials with a soft texture.For example, terry cloth (possibly a towel), plush fabric, faux fur. The Year of the Fire Rooster suggests bright active colors: red, pink, crimson.
List of materials:
- Terry fabric;
- Red fabric for the tail, comb, earrings (gabardine);
- Fleece fabric for tail and wings;
- Yellow fabric for the beak (chintz);
- Satin ribbon for legs;
- Buttons for eyes;
- Decorative feathers (optional).
Procedure.
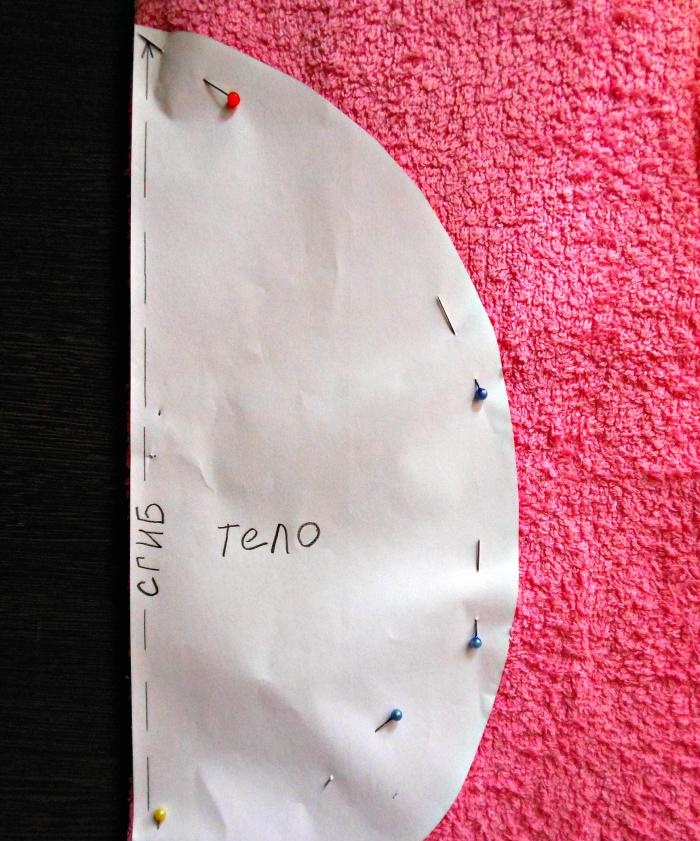
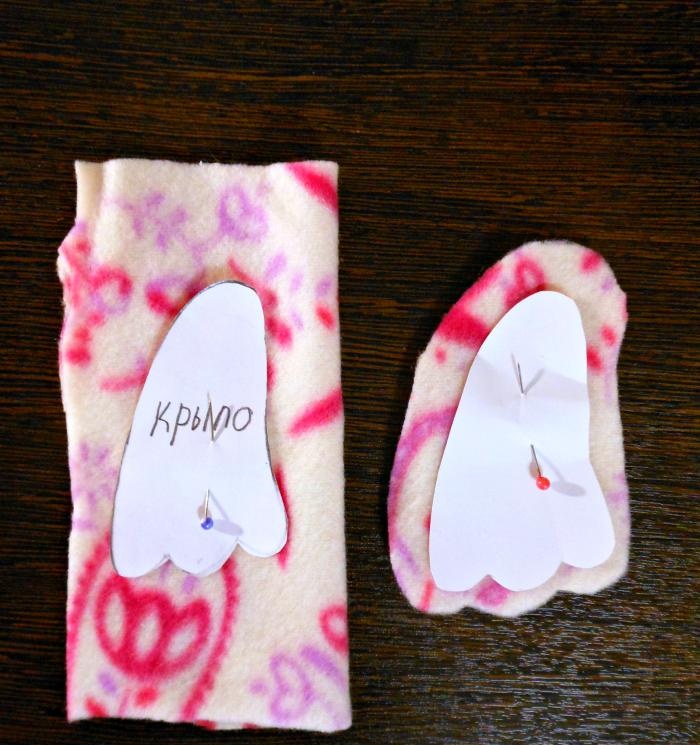
1.Print out a diagram of the parts and cut them out.
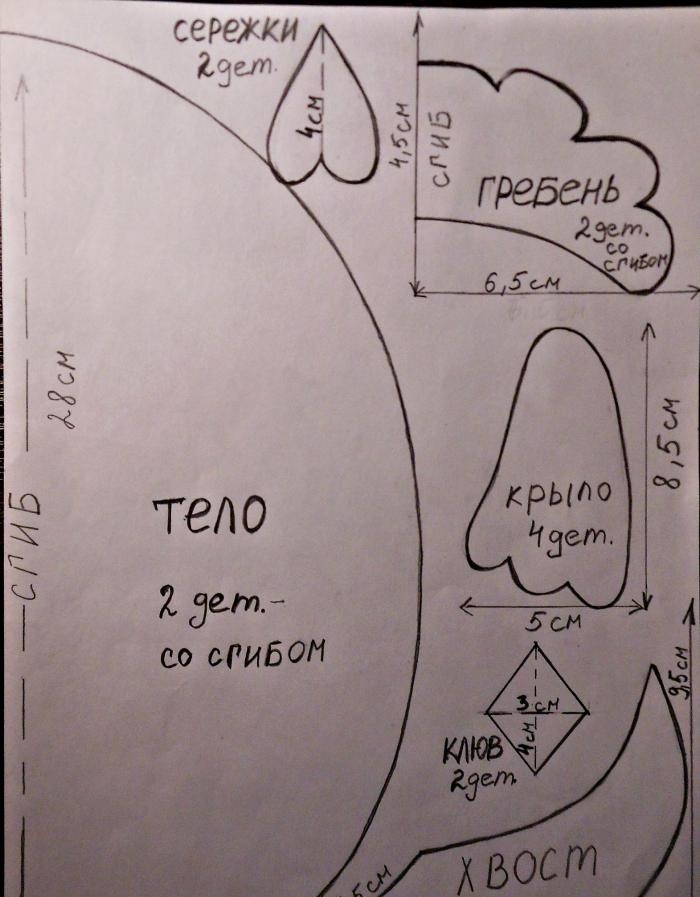
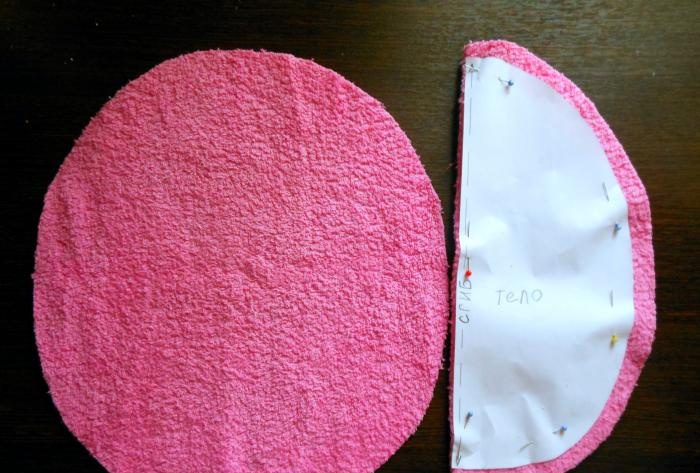
2.Cut out the body of the pillow. The fabric is folded in half, facing inward, and two pieces are cut out with a fold in the middle.
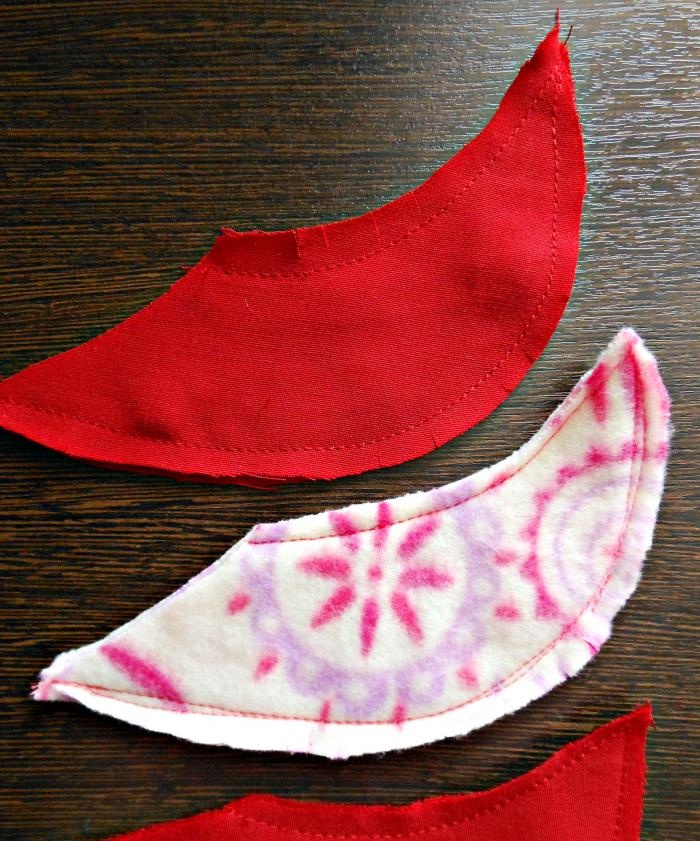
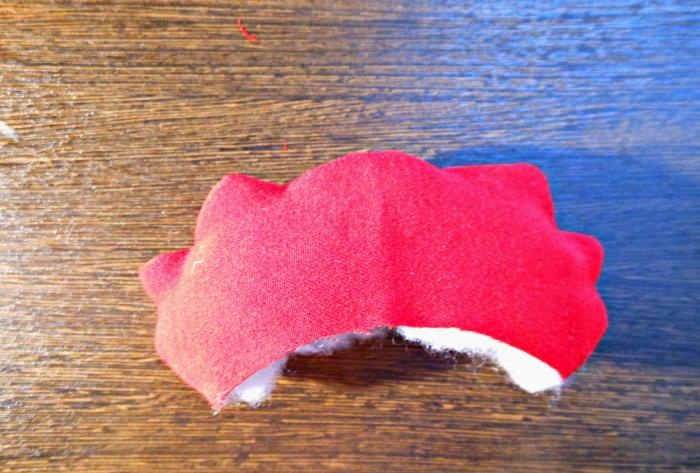
3.Make tail feathers. Six tail parts are cut out, three on each side of the pillow. The fabric is folded in half facing inward, the tail piece is applied, seam allowances are about 1 cm on all sides of the piece.

The parts are folded right sides inward, stitched on all sides except the base (the edge should be open for turning inside out). The parts are turned inside out, stuffed with padding polyester, and only after that the open edge is stitched manually or on a machine.

4.Make a cockerel comb. First, the details are cut out. The fabric is folded in half and the part is applied. A comb with allowances is cut out; in total, you should get two folded parts.
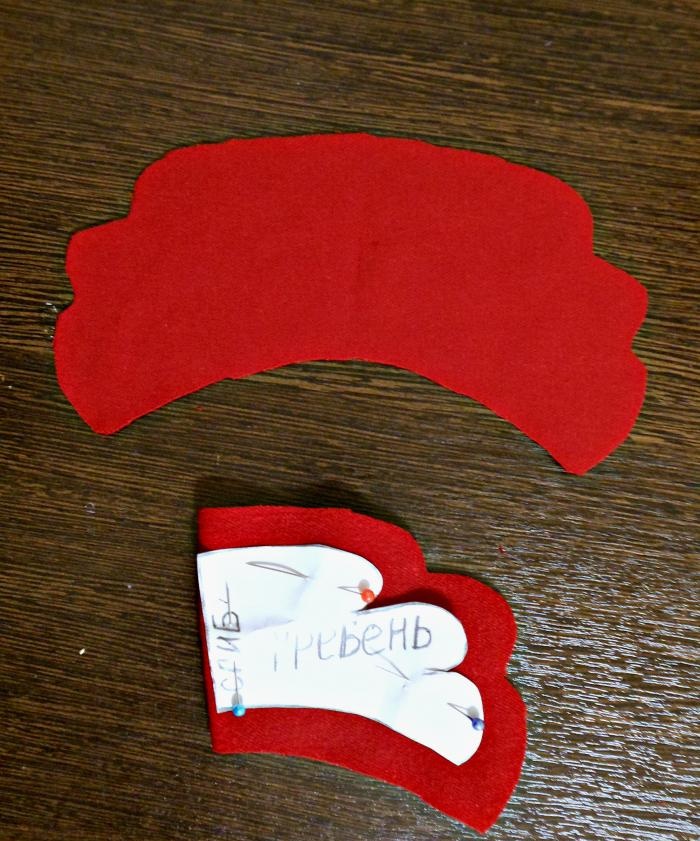
The comb can be almost flat or wavy, it all depends on personal wishes. The parts are folded right sides inward and stitched except for the bottom edge. The comb is turned inside out and stuffed with padding polyester.

The bottom of the ridge is then closed, this can be done by hand or with a machine stitch.
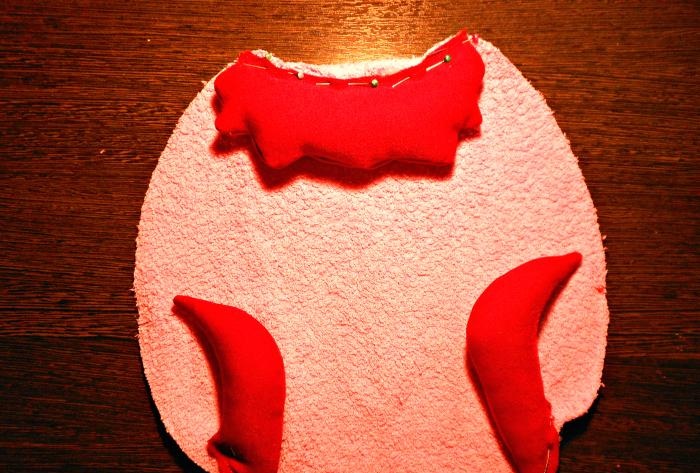
5.Attach the comb and tail parts to the body of the pillow. Take one body part and place it face up. The comb is applied with an open cut butt to the upper cut of the body.
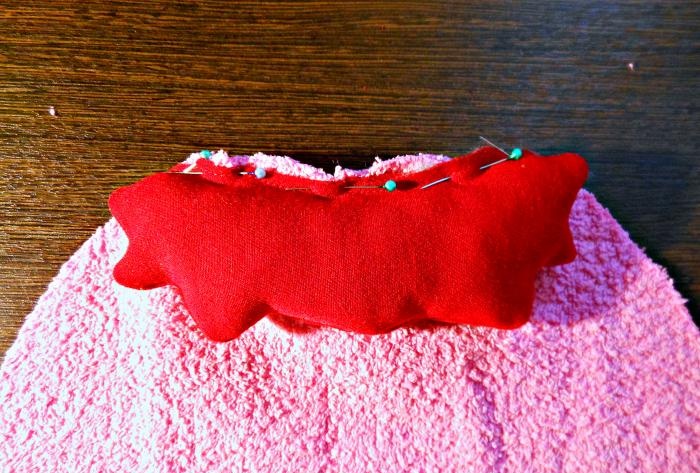
The tail feather is applied to the side of the lower body, one on each side.
The parts are secured with a pin.
It is necessary to place the remaining two feathers above the first one and mark the resulting distance.
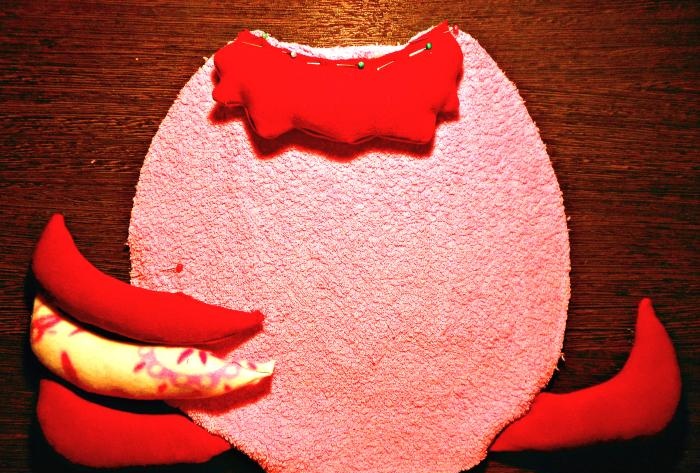
This space will be open, through which the body of the pillow will turn inside out.
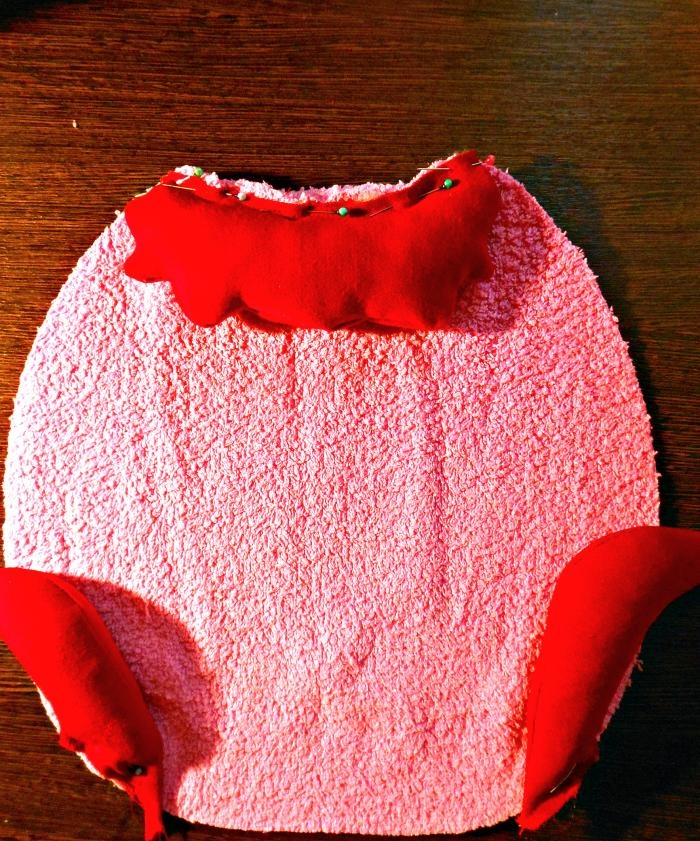
6. Connect the body parts. The second piece is placed on top of the first piece with the front side inward. In this case, the tail parts are bent so that they do not fall into the seam.
The body parts are basted by hand, starting from the top cut along the side seams to the mark, then in the area of the first feather and a short distance in the middle of the bottom.
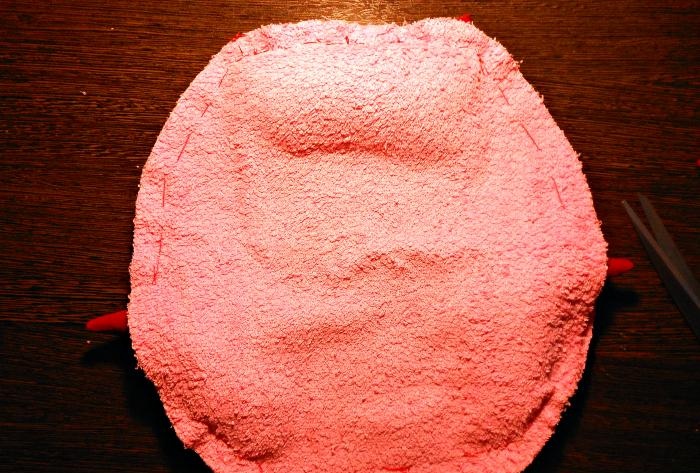
There should be a narrow space left at the bottom for the legs on both sides of the middle; these places are not stitched. Only after this the parts are sewn on a machine.
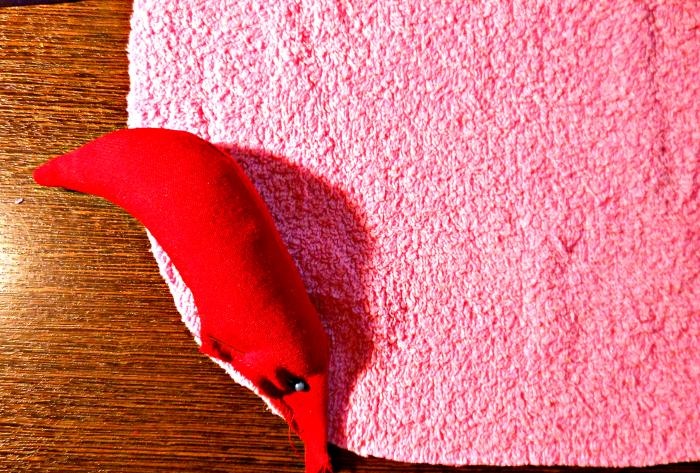
7.The body of the pillow is turned out through the distance from the first feather to the mark.
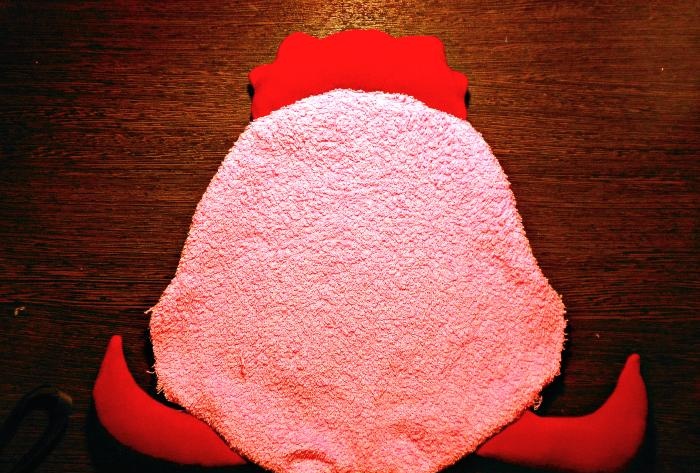
Then the body is stuffed with padding polyester.

8. The remaining feathers are inserted into the open slots on the side, two on each side. First they are secured with pins, then stitched with invisible hand stitches.

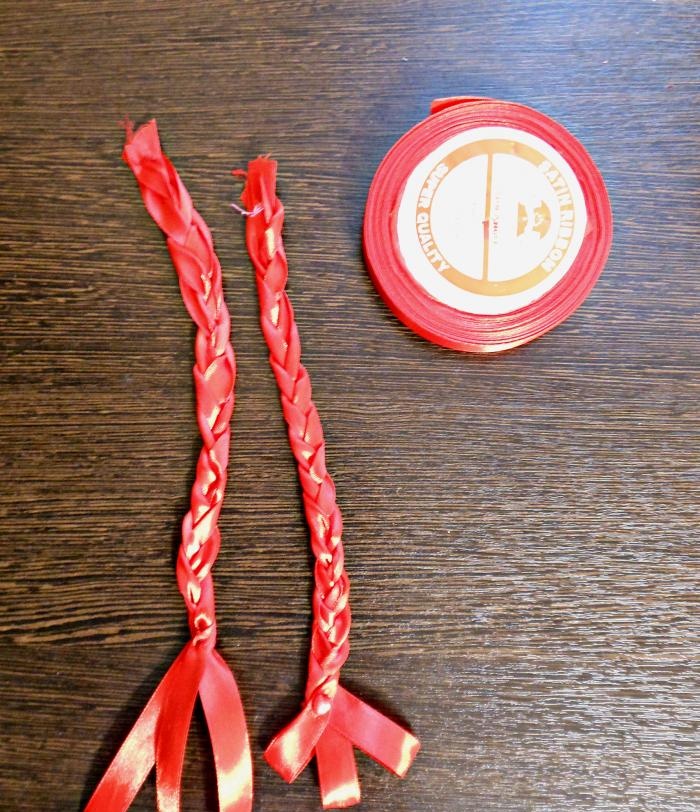
9. Make legs. You can use a cord or make legs from satin ribbon. To do this, three parts are cut off, the approximate length is 35 cm. The upper sections are fastened, the braid is braided not to the end of the tape. It is necessary to leave a distance of 7 cm, secure the parts of the tape so that the braid does not unravel. Then bend the remaining parts inward, you get something like a paw. The securing seam can be closed with a bead.
10. Attach the legs to the body. The legs are inserted into the remaining open sections of the bottom of the pillow, then the seam is closed with hand stitches.
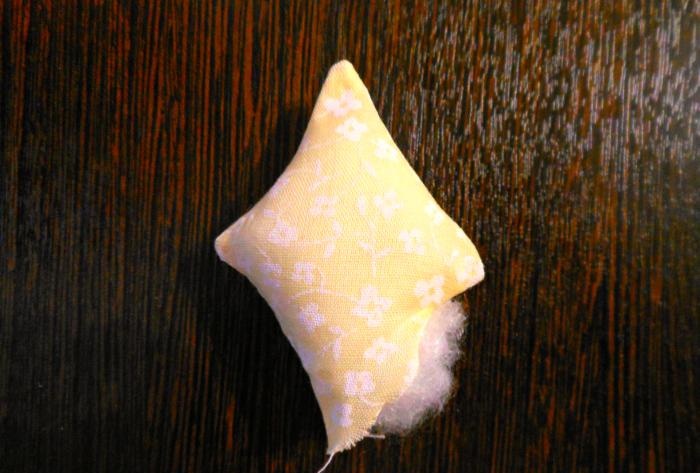
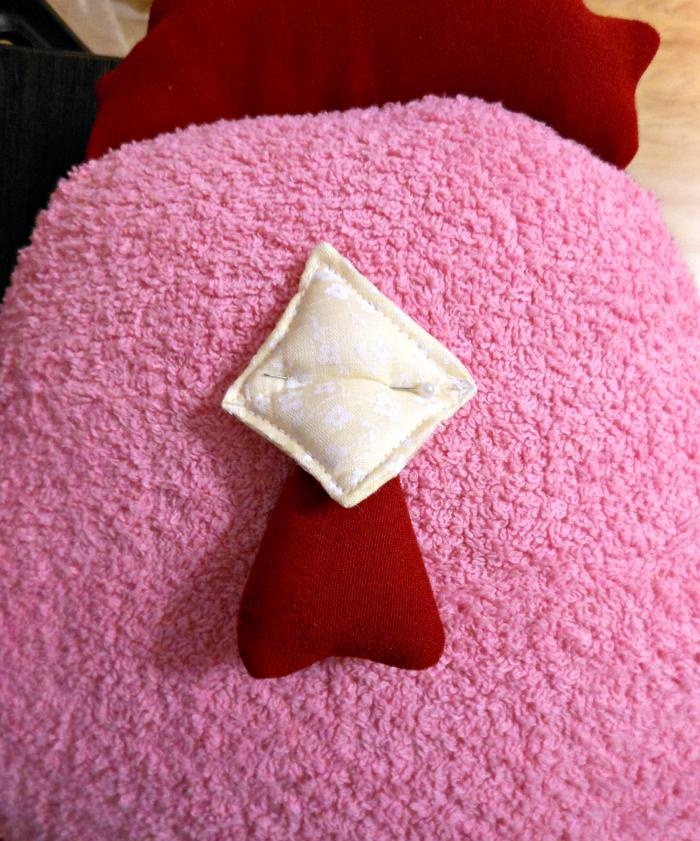
11. Make earrings and beak. It is necessary to cut out two parts of the earrings and the beak, the fabric is folded in half with the right side inward, and the parts are overlapped.The allowances can be left a little larger than usual, since the parts are too small, the extra space will not hurt. The cut out parts are stitched, except for one side. In earrings, the top cut and slightly side cuts are left completely open. The beak is not stitched on one side. Then the parts are turned inside out and stuffed with padding polyester.
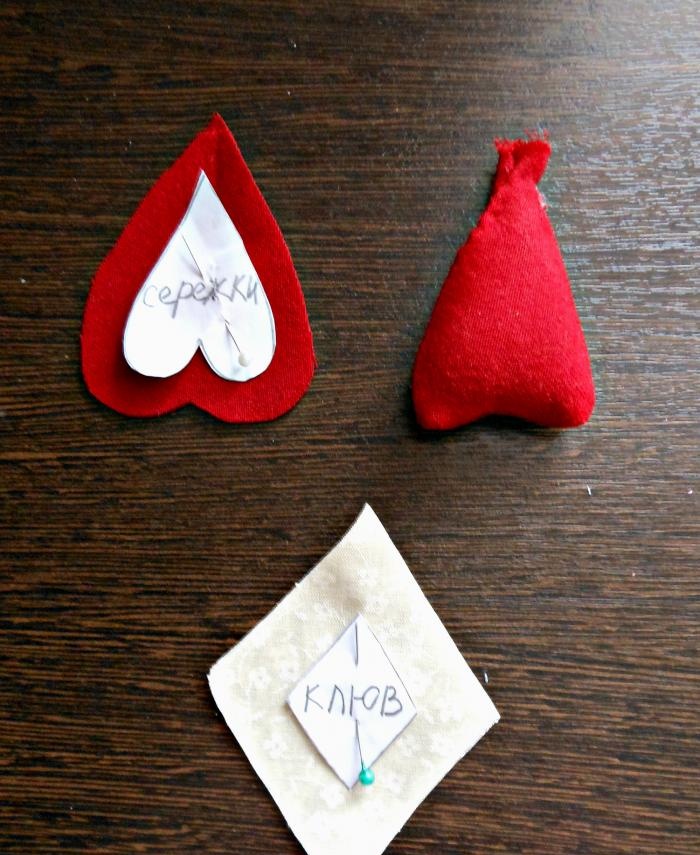
The open section of the beak is stitched, and it is also recommended to stitch the middle of the beak.

12. Decorate the face of the cockerel. The earrings are secured with a pin; the open edge must be folded inward and then sewn on by hand.
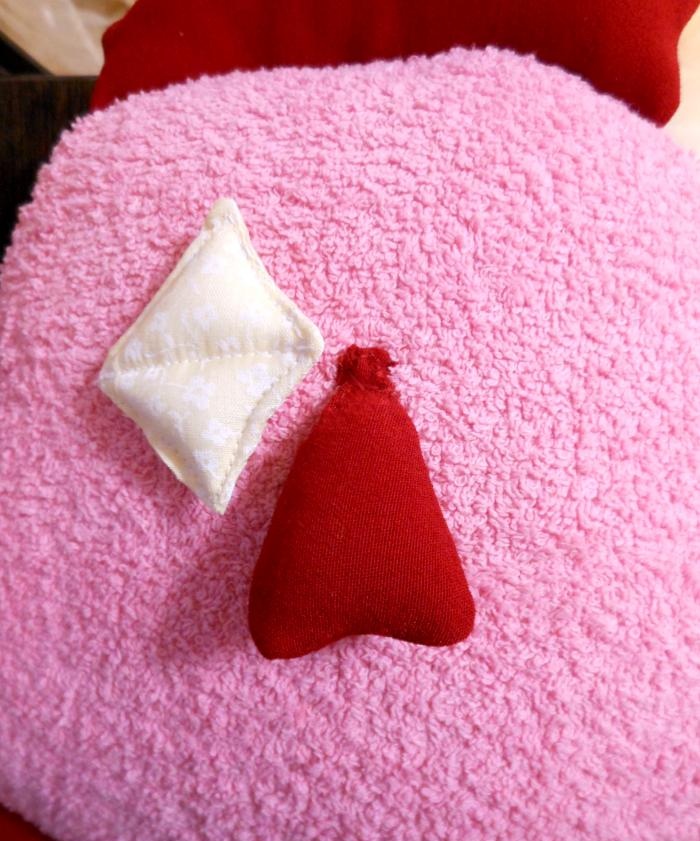
The beak is placed on top of the earrings, secured with a pin and sewn with hand stitches.
At the end, the eyes - buttons - are sewn on.
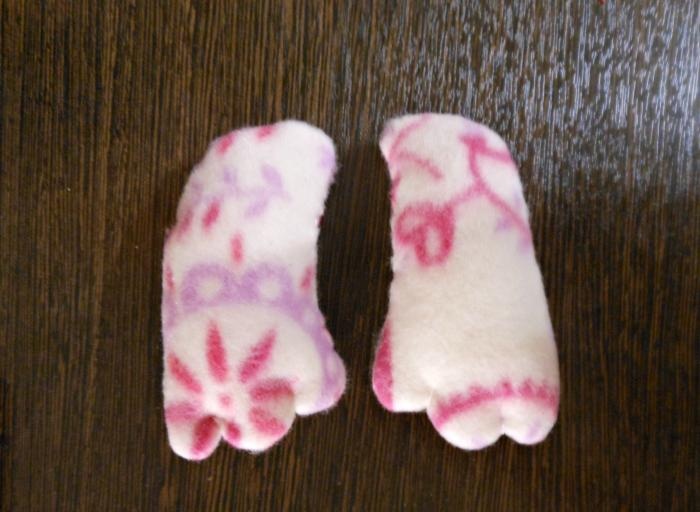
13. Make wings. The fabric is folded in half with the right side inward, and the parts are applied. There are four parts in total with allowances.
The details are stitched, except for one side. They are turned inside out through the left open cut and stuffed with padding polyester. The wavy edges of the wings are indicated by stitches.
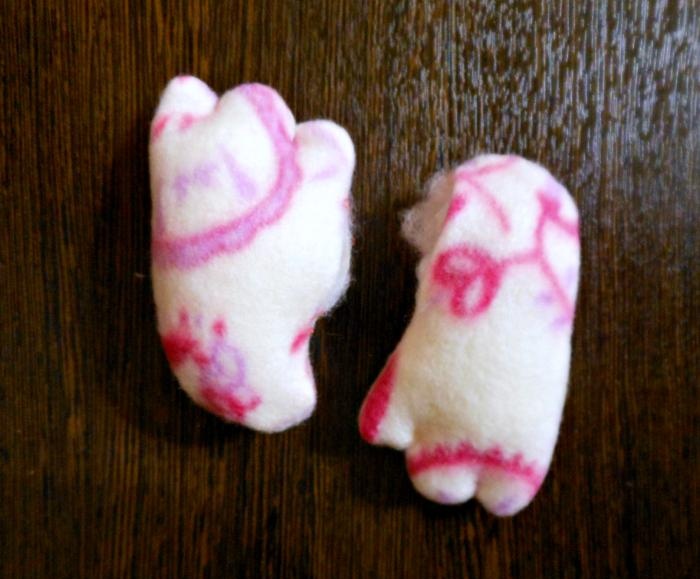
The open cut is sewn up with hand stitches.
14. Attaching the wings to the body of the pillow. The wings are sewn on with hand stitches. The upper edge can be decorated with a trim of decorative feathers.
If desired, decorative feathers can be used to decorate the tail.
A funny pillow - a toy in the shape of a cockerel is ready!