Do it yourself
Life hacks, master classes, useful tips, recipes.
home » Workshop "Reciprocating saw from a drill - it's possible!
Imagine that you need to saw off a block of wood, but you don’t have a hacksaw at hand. Your favorite jigsaw is on another site or has broken down altogether, but the work process cannot be delayed. The situation is familiar to many, isn’t it? Most craftsmen know how valuable a working tool is at the right time. The work is in full swing, there are no delays, everyone is happy. It’s worse when it’s gone, and there’s simply nothing to replace it with.
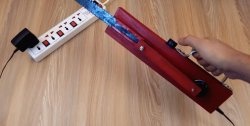
The homemade product we are considering today deserves attention, if only because it really helps solve the problem of sawing using a conventional drill or screwdriver. It is permissible to make it at home with your own hands. And this is not some disposable device. This is a full-fledged technical tool-attachment that expands the capabilities of the main electrical device, which, as we thought earlier, was intended only for drilling and tightening screws. With it, you can actually cut a block or even a board with a regular hacksaw blade and turn a regular drill into a reciprocating saw. Let's see how this can be done.
A reciprocating saw from a drill is possible

Operating principle of the saw


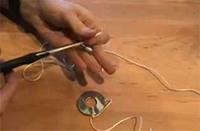
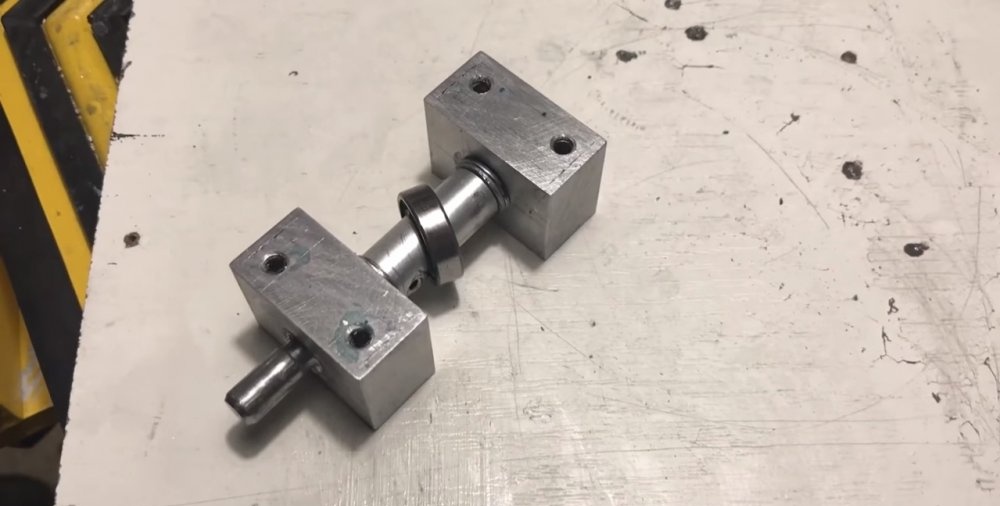
In fact, the torque of the drill does not go away.It is only transformed by a kind of friction transmission into reciprocating movements due to a crooked bearing. Its body slides between two small bearings mounted vertically on a small metal square. It is this element that sets in motion the canvas, which is tightened at its end into a special clamp. The nozzle is mounted on a shaft machined to a sufficient diameter for a drill or screwdriver chuck.

Making an attachment for sawing wood


Let’s make it clear right away that such a device cannot be assembled from improvised means. Most of it is quite accurately measured in size, machined on lathes and milling machines. However, if you doubt the capabilities of your workshop, they can always be made to order.
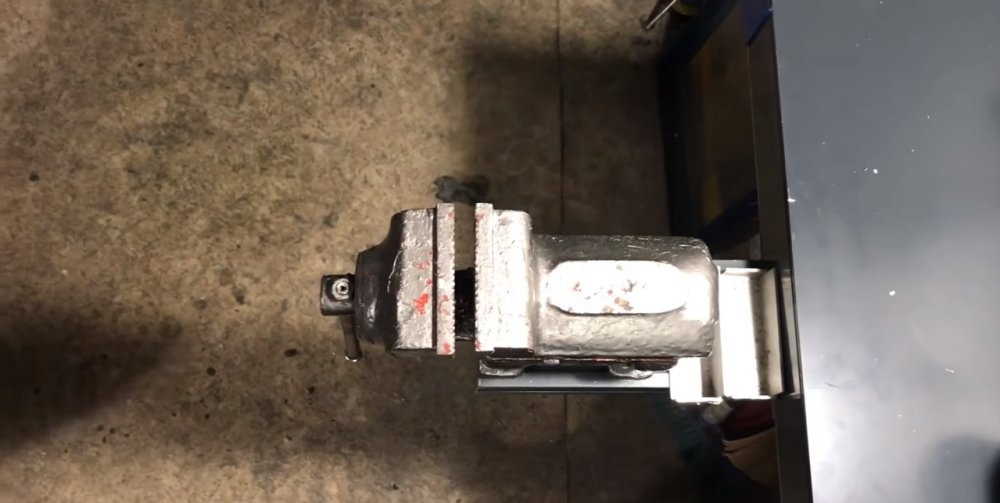
Before starting work, it is worth making a drawing of this assembly, calculating the dimensions of each element and adjusting them proportionally. Our device is made entirely of metal, and therefore a vice is a must-have tool this time.
A reciprocating saw from a drill is possible

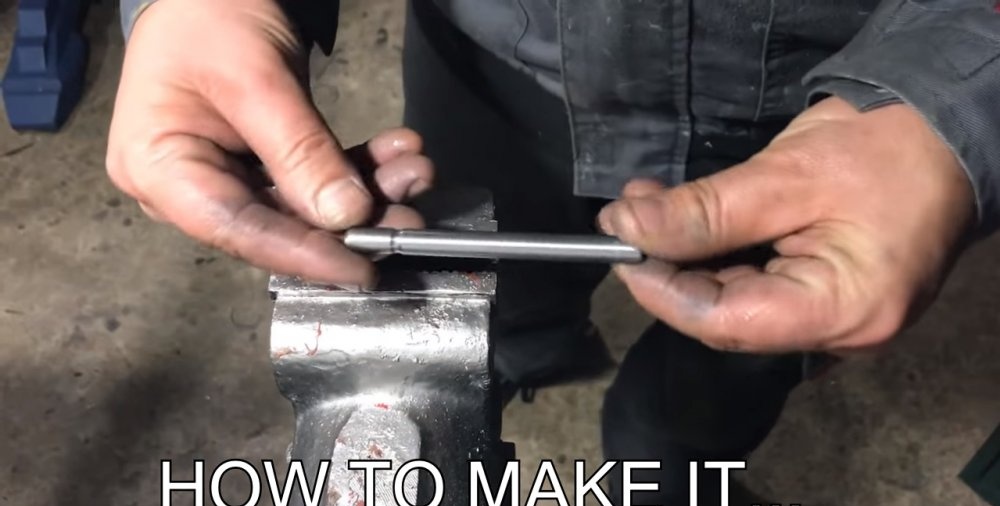
Making a shaft with a bearing


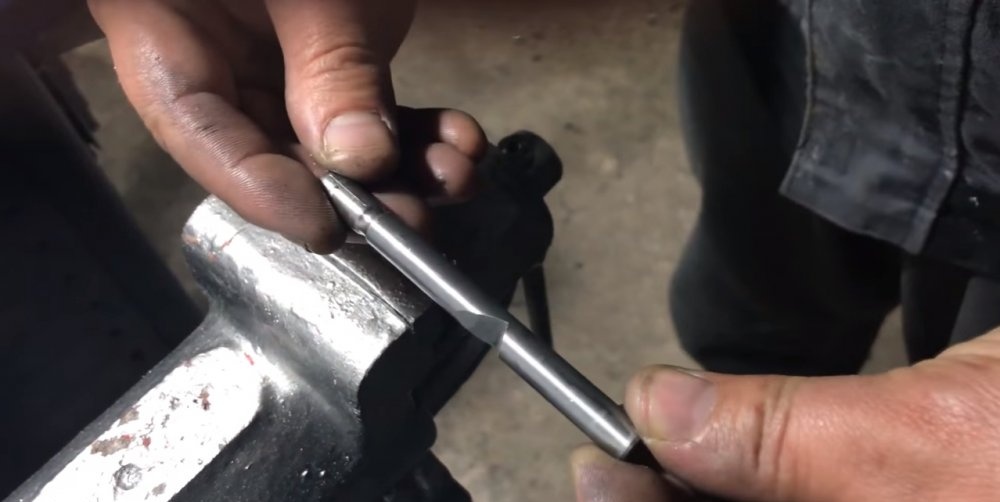
This element requires a metal rod. Its cross-section should be the same if possible, so it is best if it is turned on a lathe.
A reciprocating saw from a drill is possible

We clamp it in a vice, and approximately in the middle we grind off an oblique groove with a file as in the photo.
A reciprocating saw from a drill is possible

A reciprocating saw from a drill is possible

A reciprocating saw from a drill is possible

A reciprocating saw from a drill is possible

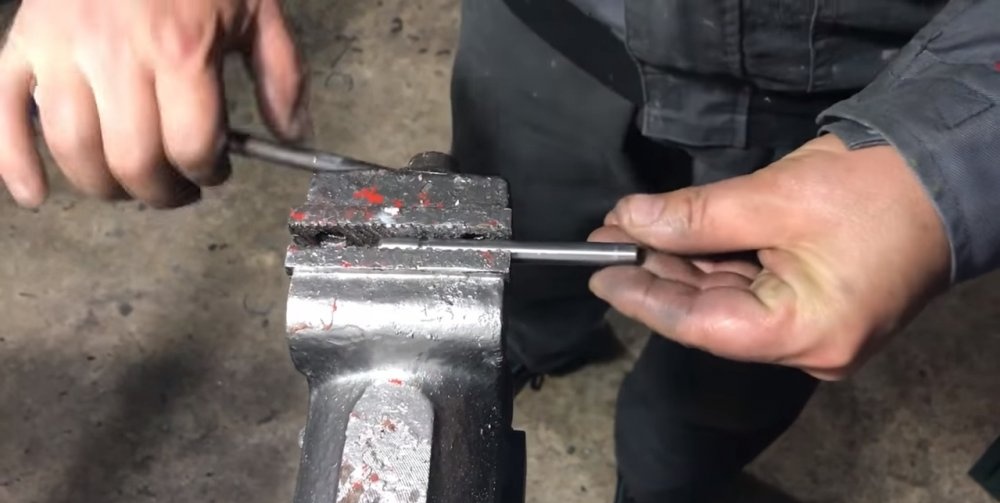
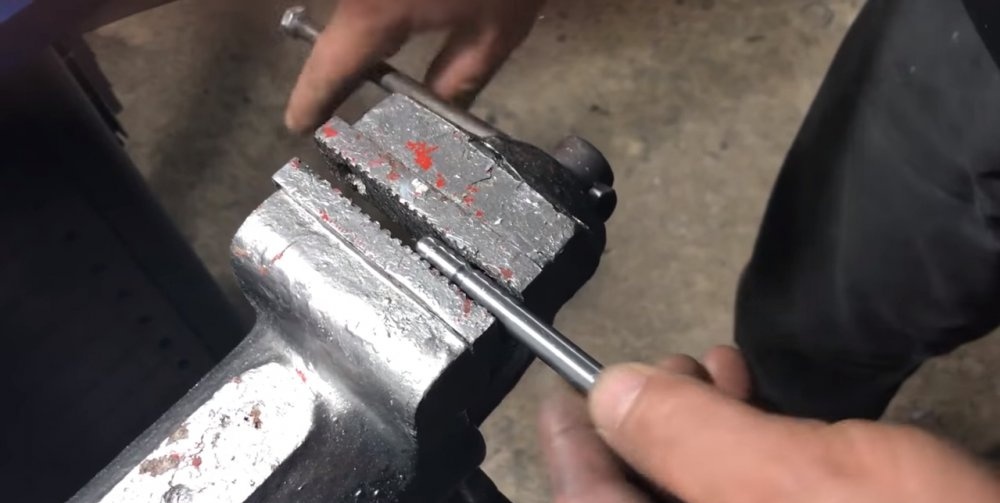
We turn the rod over to the opposite side and make a mirror groove, leaving a thickness of only 2-3mm to accommodate the bearing.
A reciprocating saw from a drill is possible

A reciprocating saw from a drill is possible

A reciprocating saw from a drill is possible

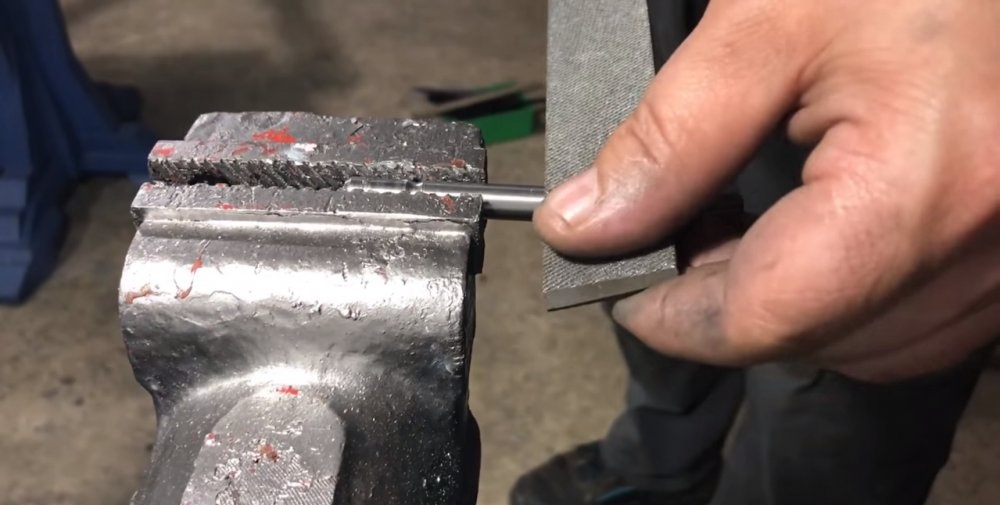
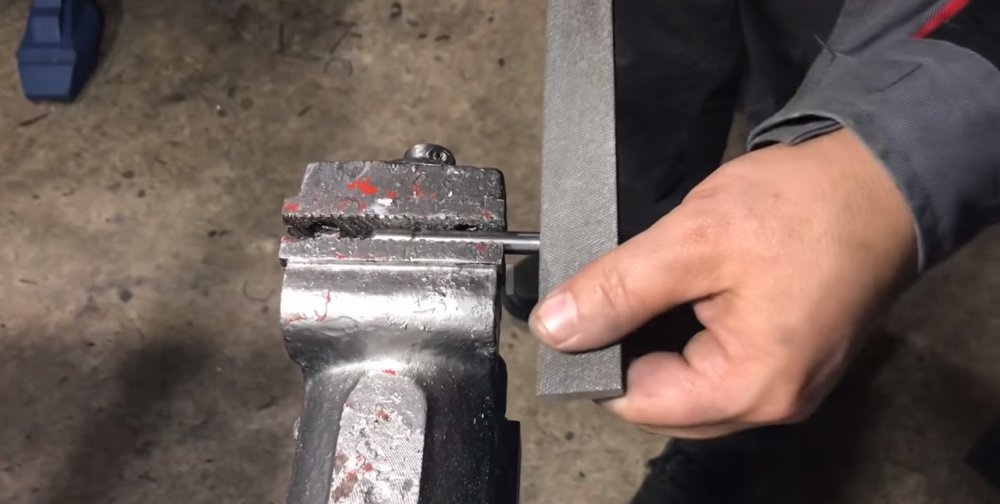
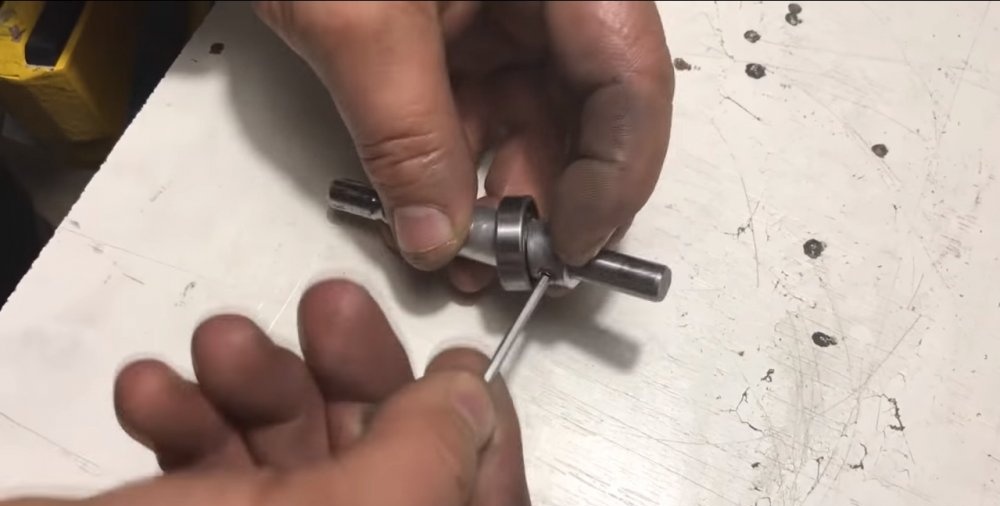
We place the bearing on the shaft seat, bored out with a file. We will need the most ordinary bearing - ball, single-row, open type. The mounting hole, as well as the diameter of the outer ring, will have to be selected experimentally.
A reciprocating saw from a drill is possible

A reciprocating saw from a drill is possible

A reciprocating saw from a drill is possible

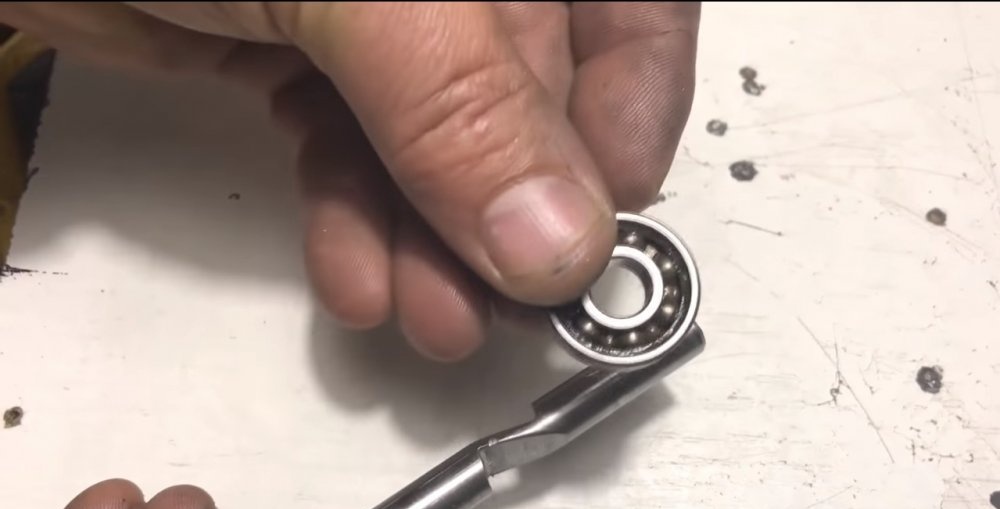
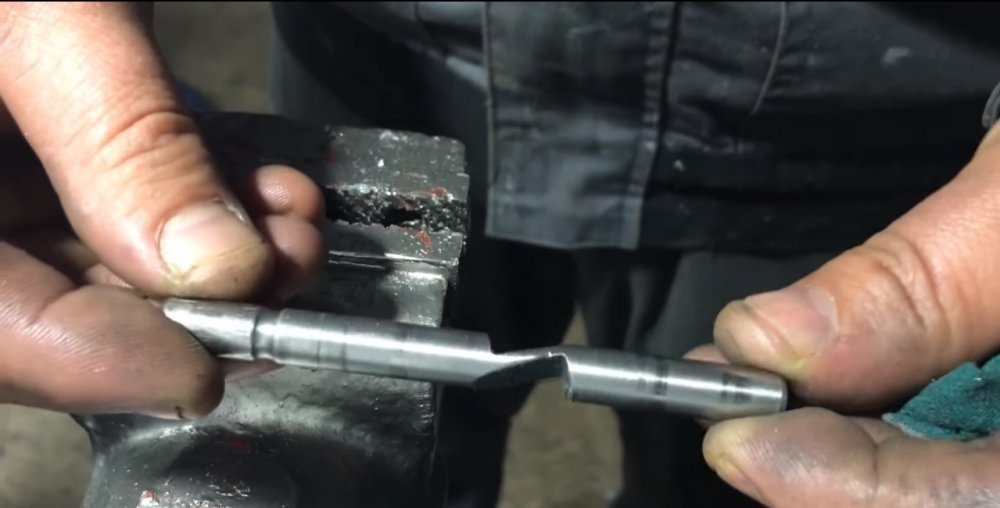
Special clamps will help secure the bearing to the shaft.We make them from pieces of tube tightly fitted onto the shaft. These sections must be cut exactly to the angle of inclination of the bearing. To clamp onto the shaft, these tubes must be equipped with a hole with a screw for a small hexagon, similar to a stop for drills.
A reciprocating saw from a drill is possible

A reciprocating saw from a drill is possible

A reciprocating saw from a drill is possible

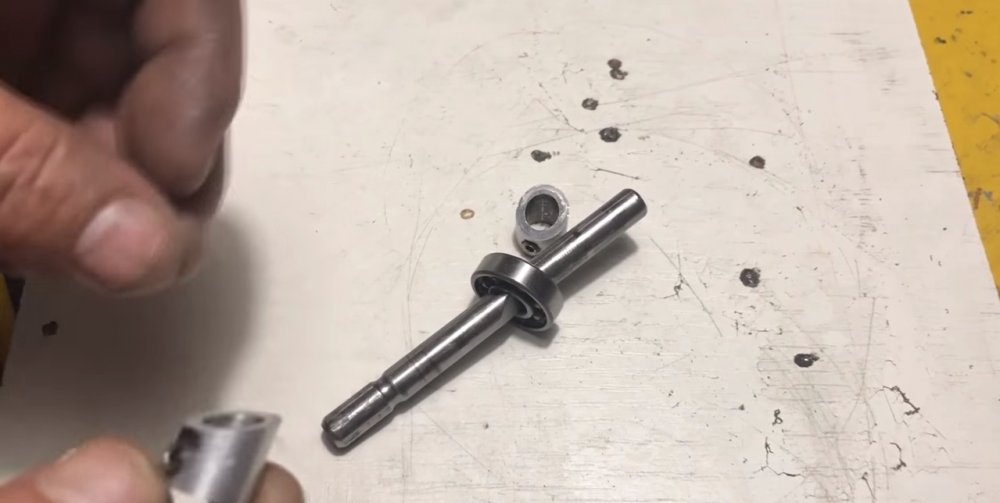
We fix these clamps by pressing them tightly against the bearing housing so that their walls only touch the inner ring.
A reciprocating saw from a drill is possible

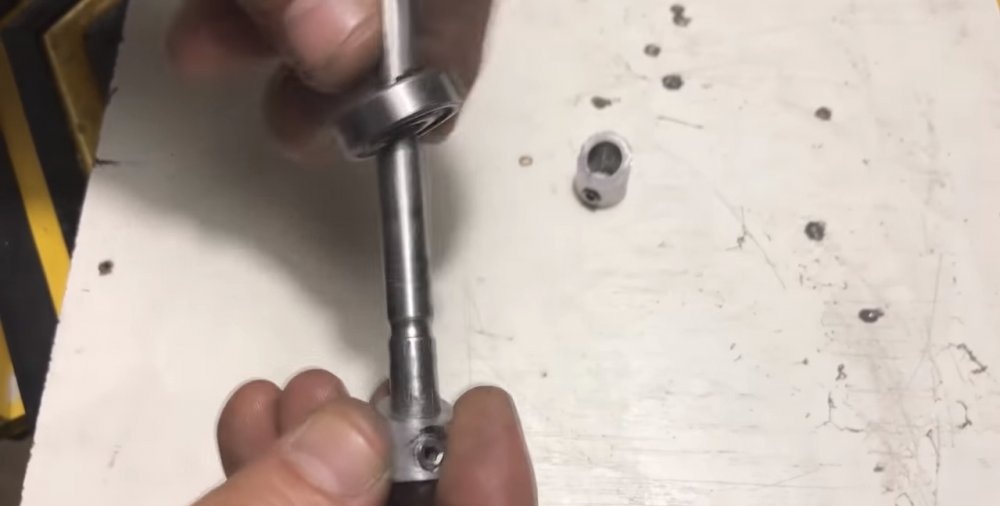
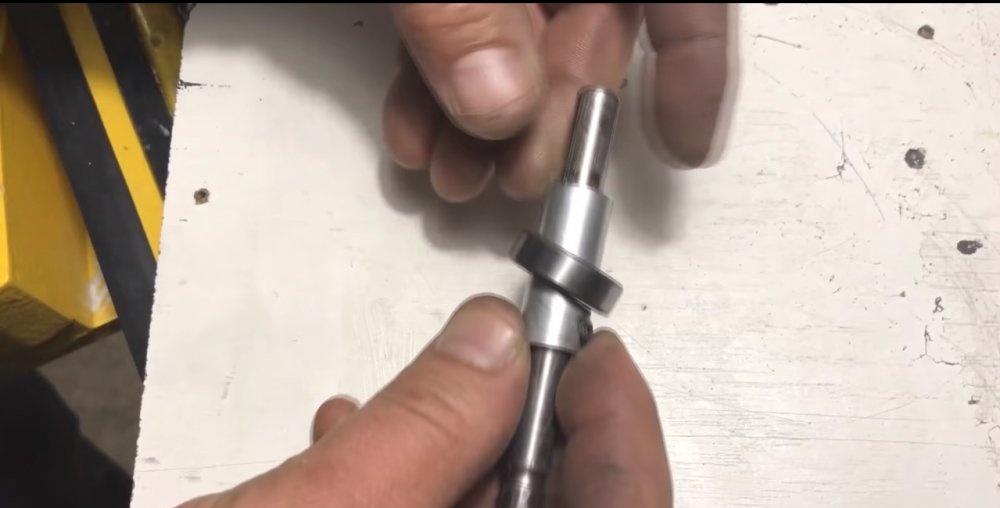
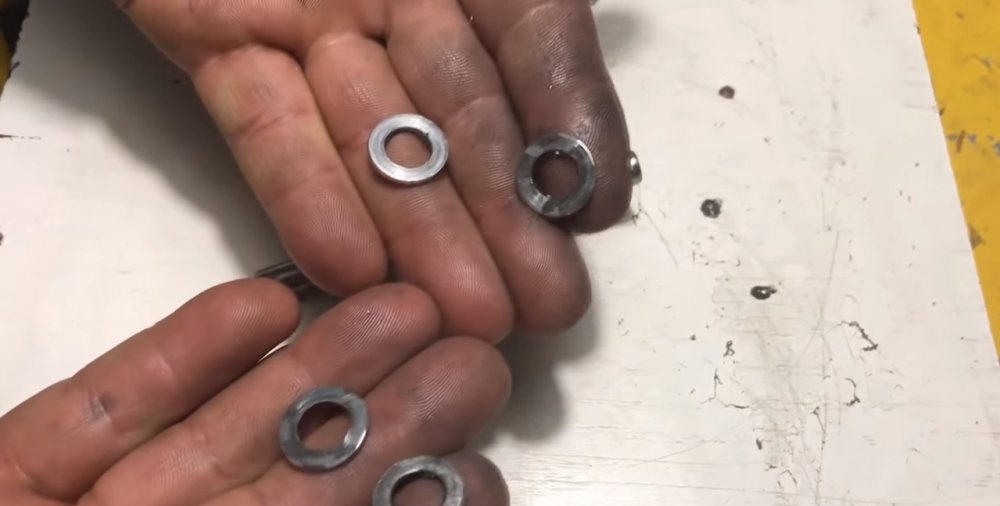
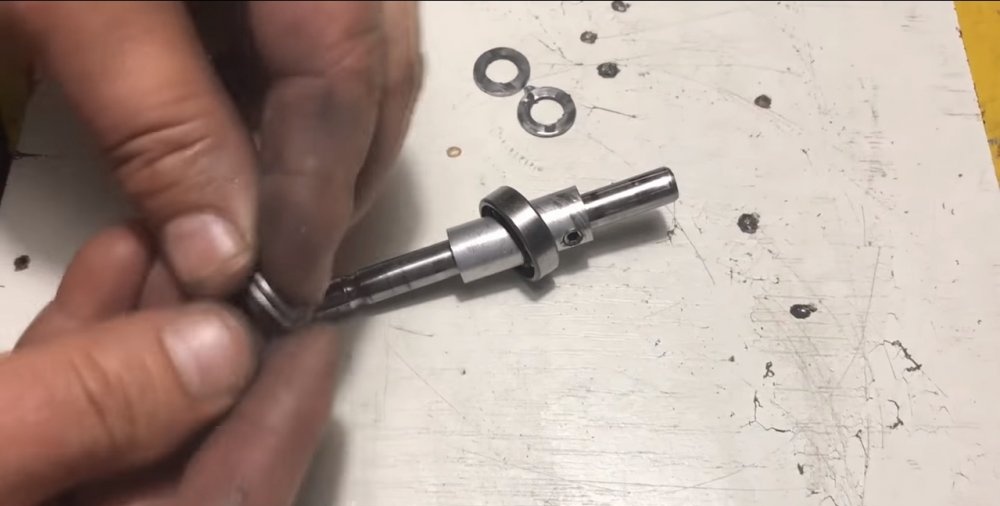
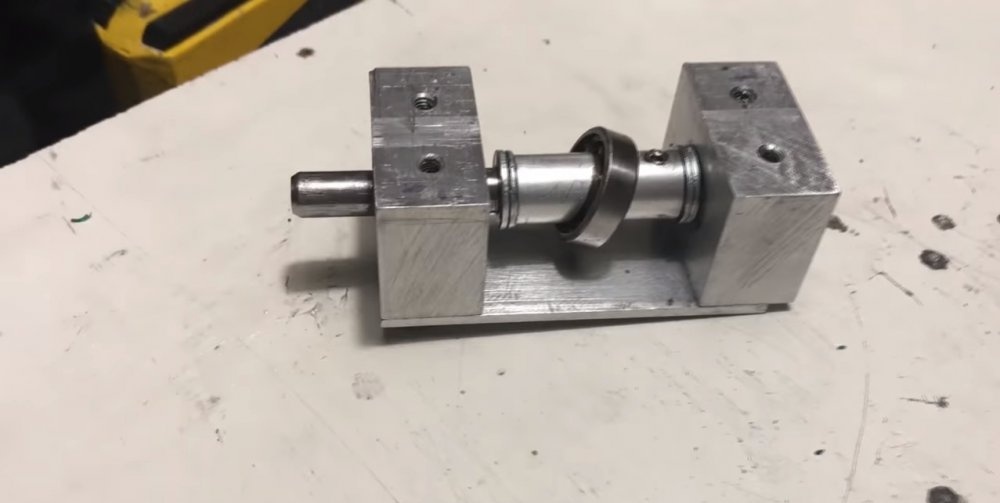
We take four washers of a suitable diameter and place them in pairs on each side of the shaft. This will help reduce the friction of the shaft clamps on the side supports of our attachment during operation. The shaft and bearing are ready!
A reciprocating saw from a drill is possible

A reciprocating saw from a drill is possible

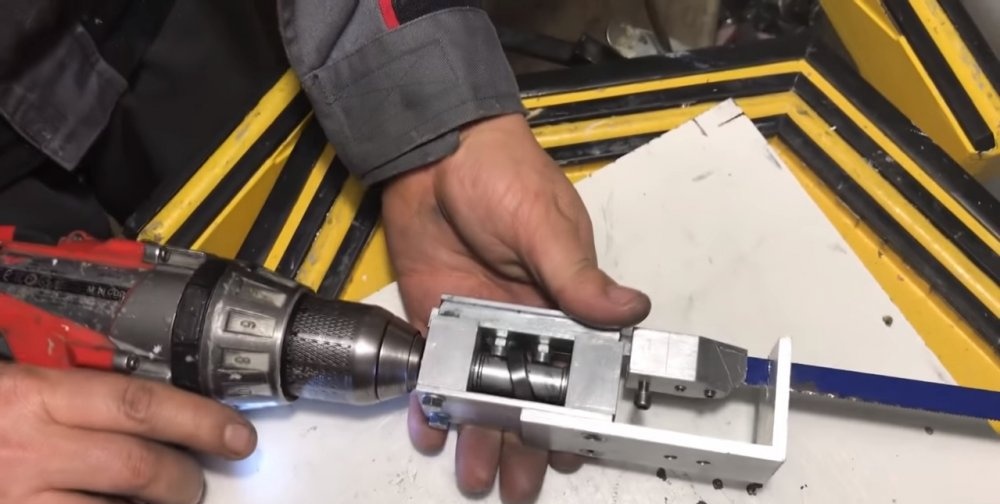
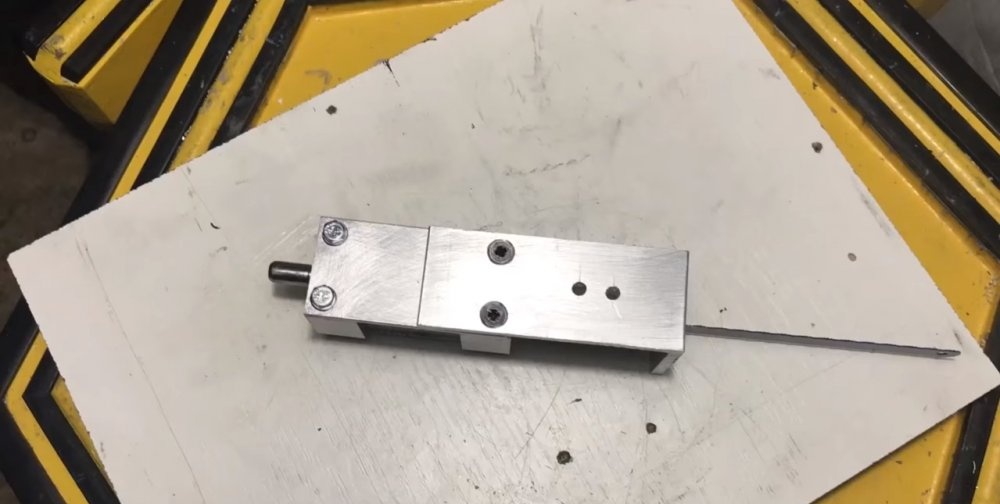
We equip the body of our device


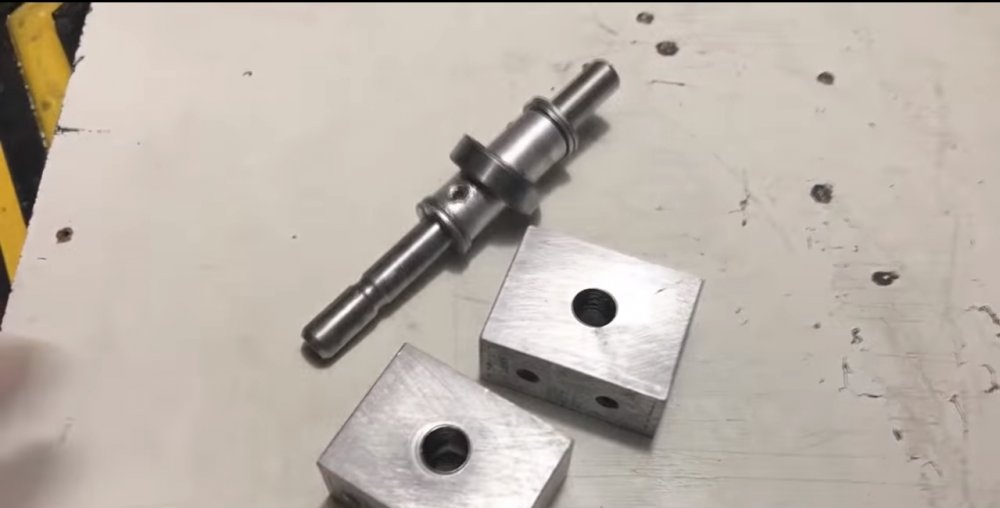
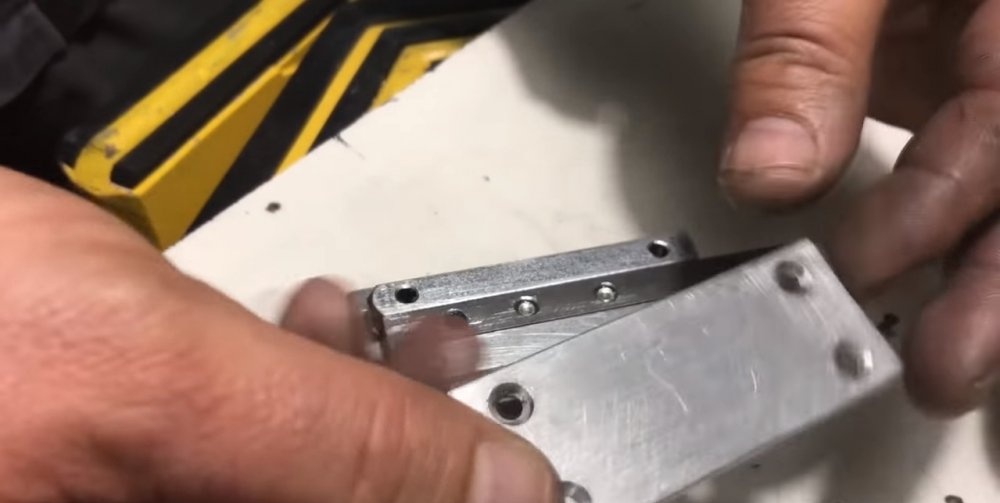
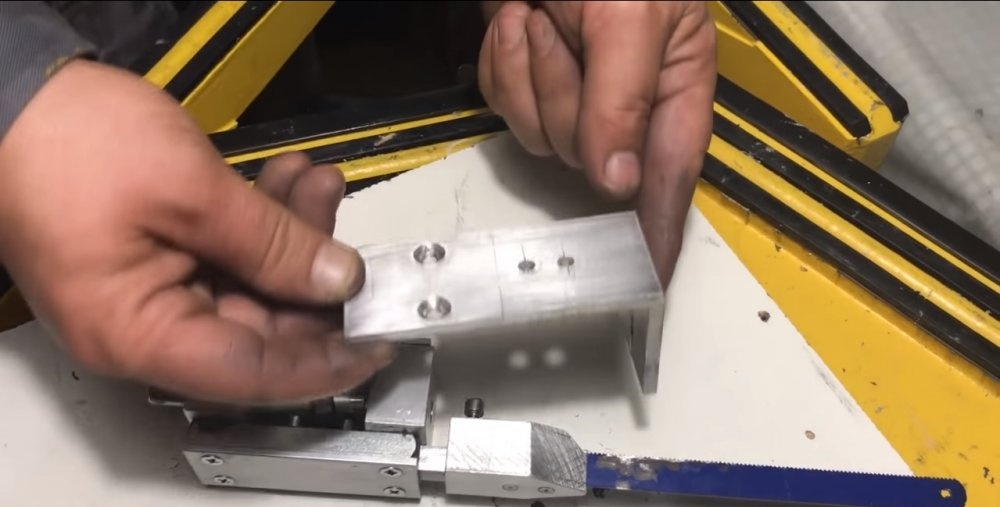
Surely everyone understands that the shaft itself will not work separately. It requires supports on which it will rest and relative to which it will move. They should be like in the photo - two squares with holes for the free movement of the shaft on the side of the planes, and fastening holes with threads for bolts on the side of the ribs. This structure is assembled like this (photo).
A reciprocating saw from a drill is possible

A reciprocating saw from a drill is possible

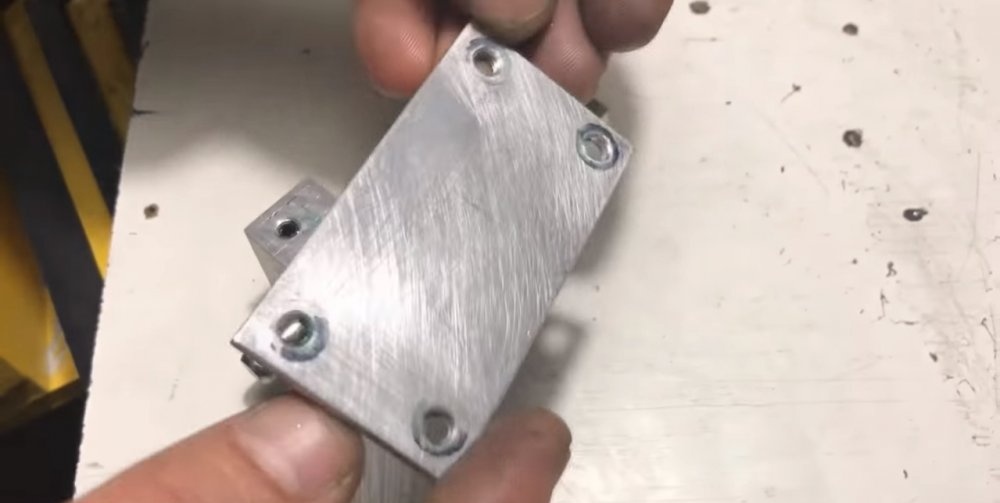
We cover the structure with a small plate with four through holes along the edges and secure it with bolts. This will be the first case cover.
A reciprocating saw from a drill is possible

A reciprocating saw from a drill is possible

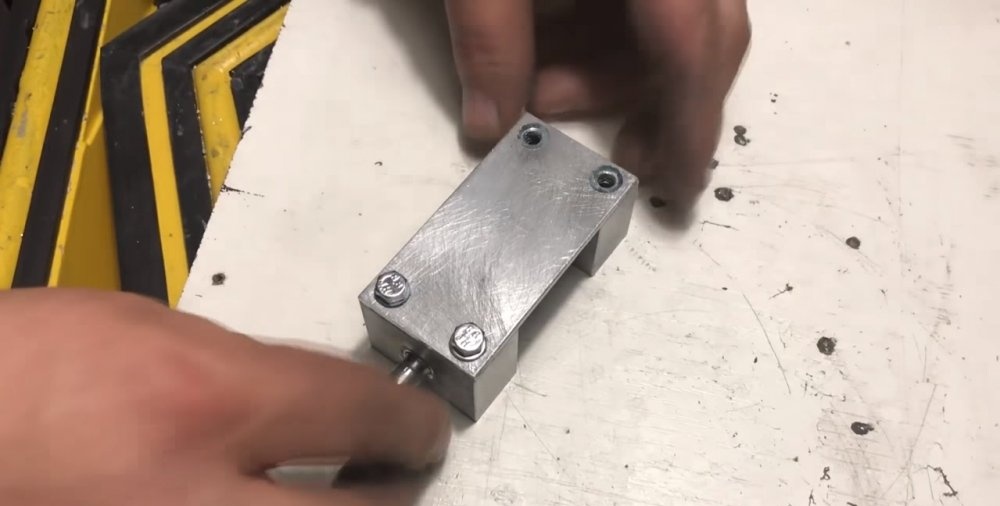
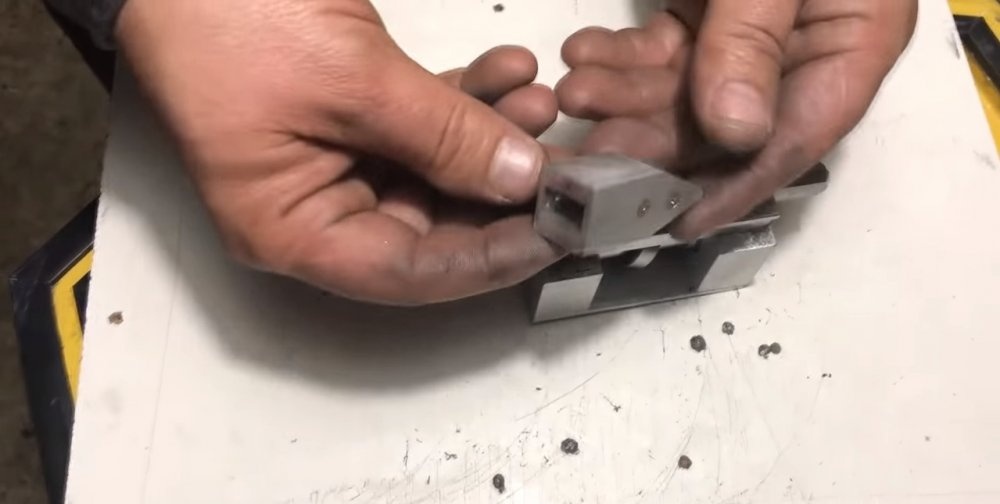
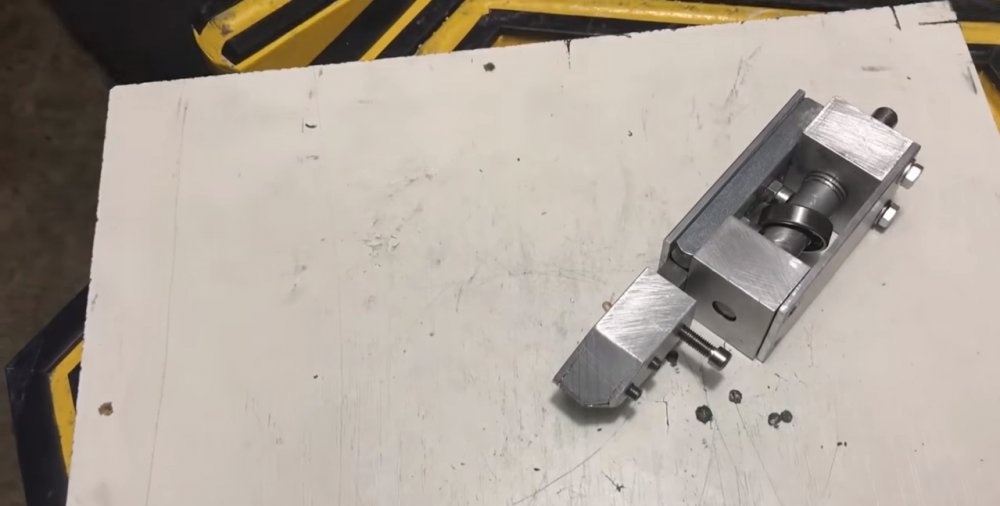
At this stage, our nozzle should look like this (photo)
A reciprocating saw from a drill is possible

A reciprocating saw from a drill is possible

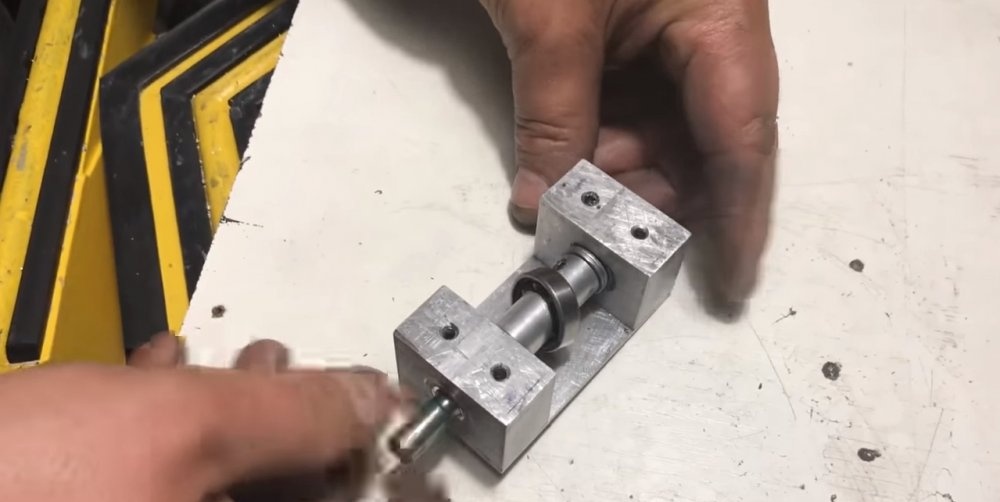
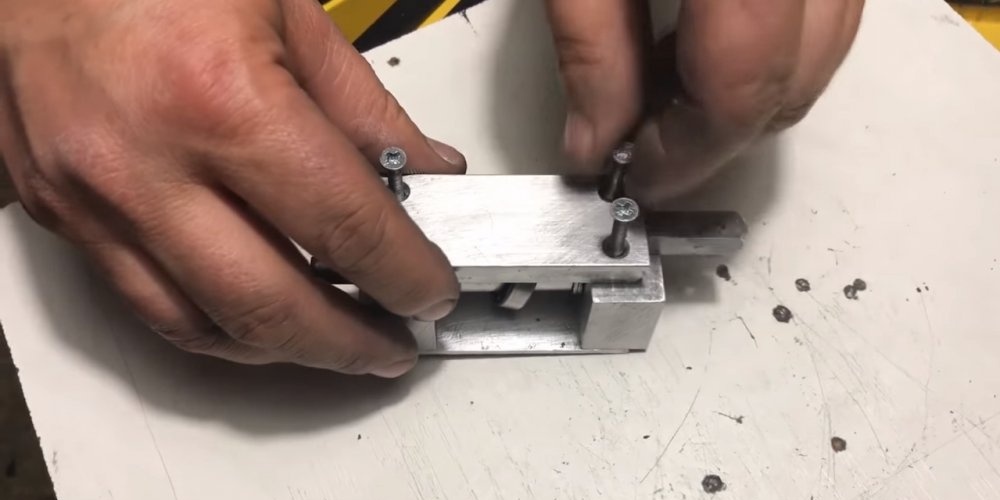
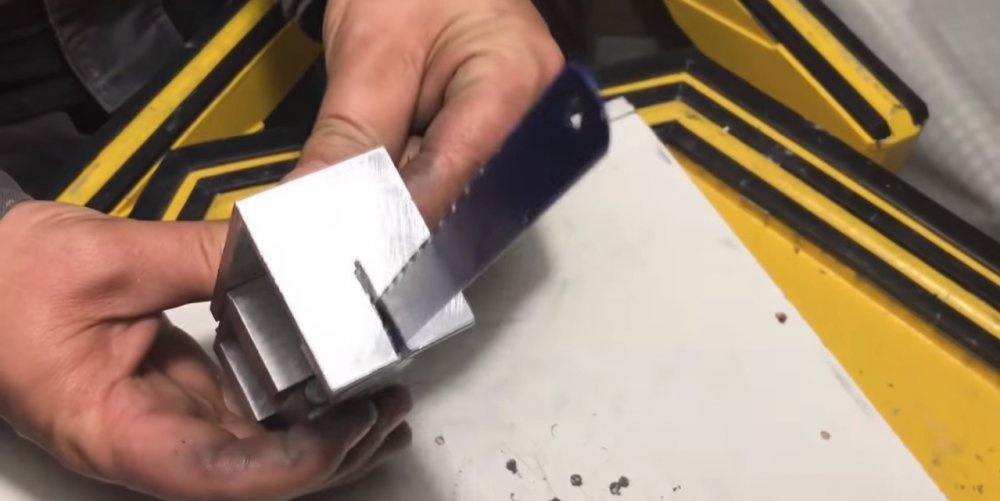
On the opposite side we place two squares with mounting holes for bolts. They must be of such a size that the third square, which will be placed between them, can move freely relative to them.
A reciprocating saw from a drill is possible

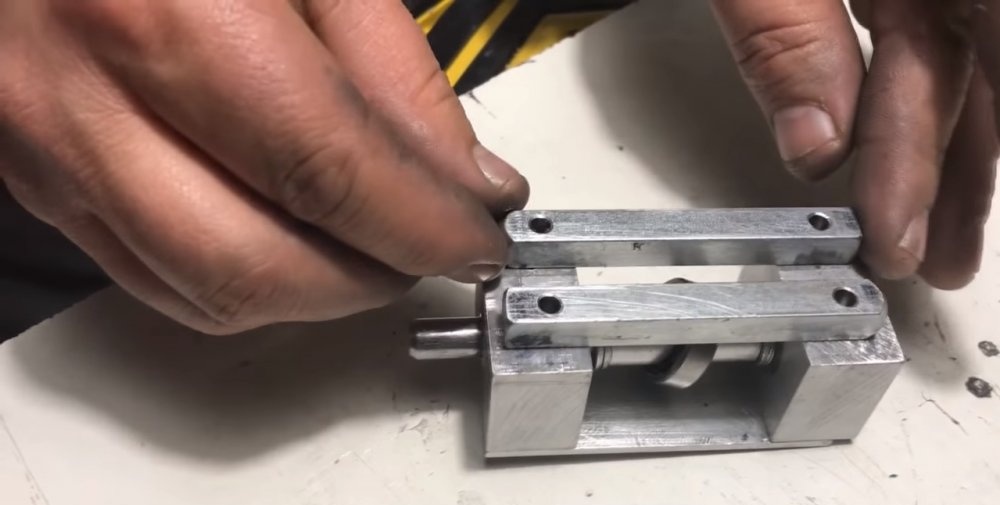
The middle square needs to be prepared. We place two small bearings on it with screws. They will slide on the main large bearing mounted on the shaft.
A reciprocating saw from a drill is possible

A reciprocating saw from a drill is possible

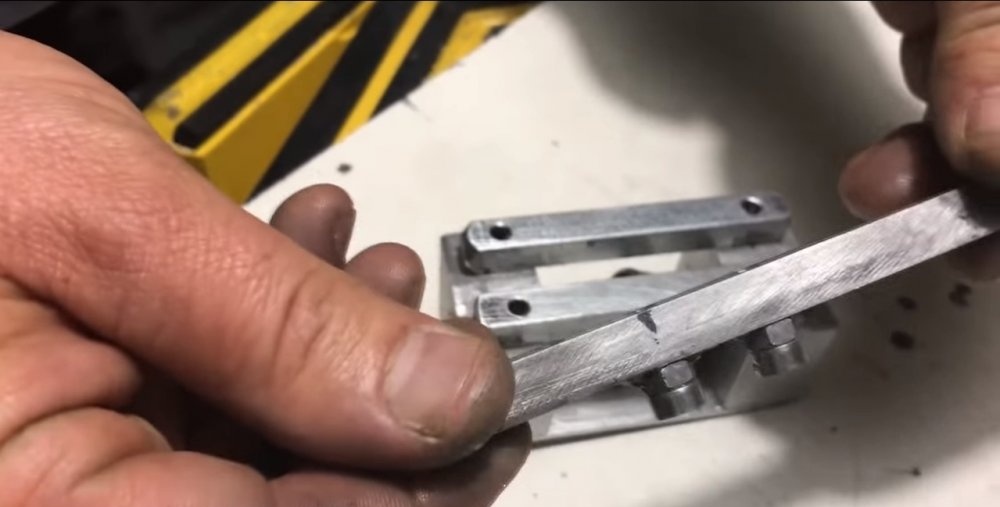
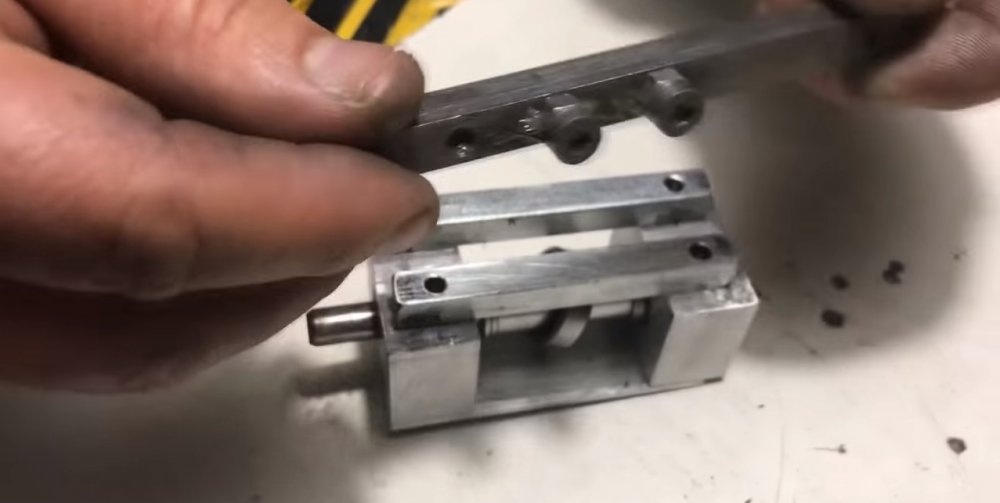
We cover the squares with a lid similar to the first one and tighten it with screws. The nozzle is almost ready.You can see how the shaft and bearing move by pulling the middle square back and forth.
A reciprocating saw from a drill is possible

A reciprocating saw from a drill is possible

A reciprocating saw from a drill is possible

A reciprocating saw from a drill is possible

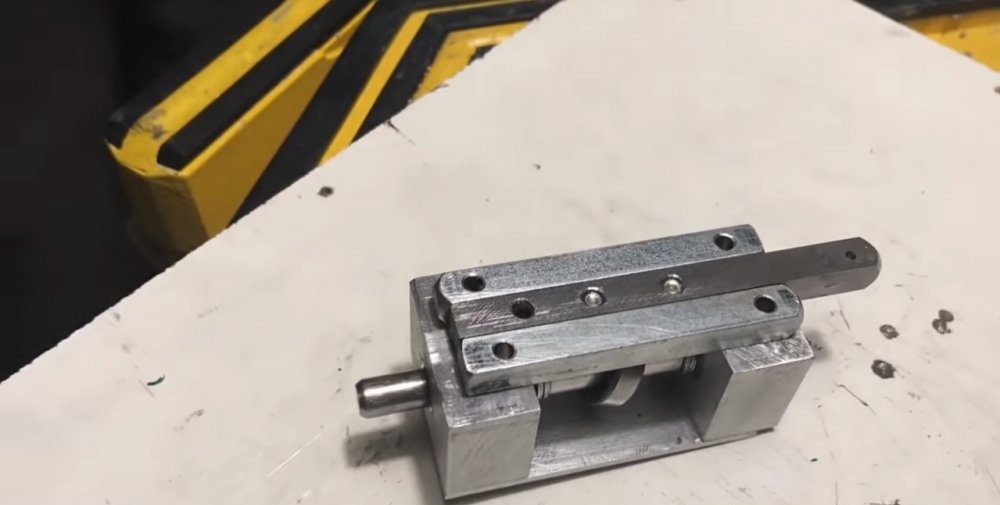
Making a tip for a reciprocating saw


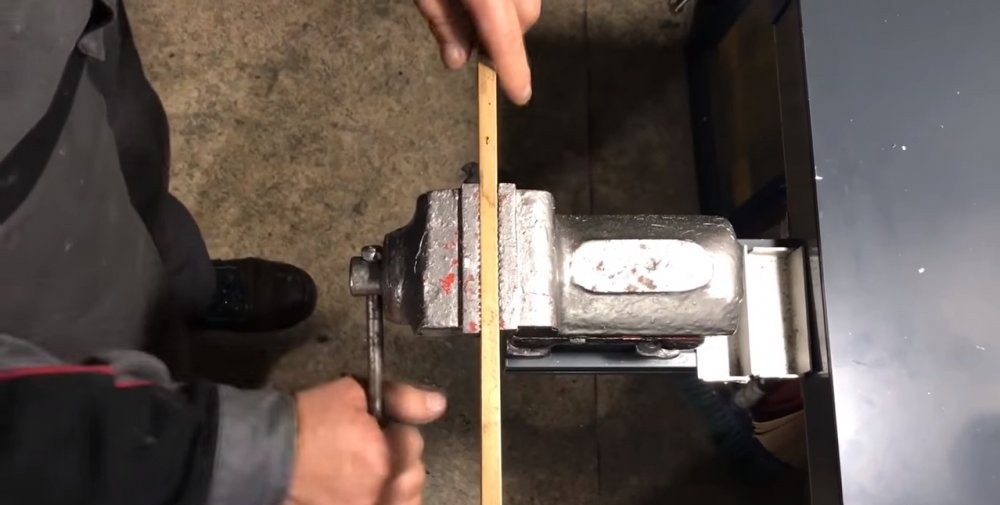
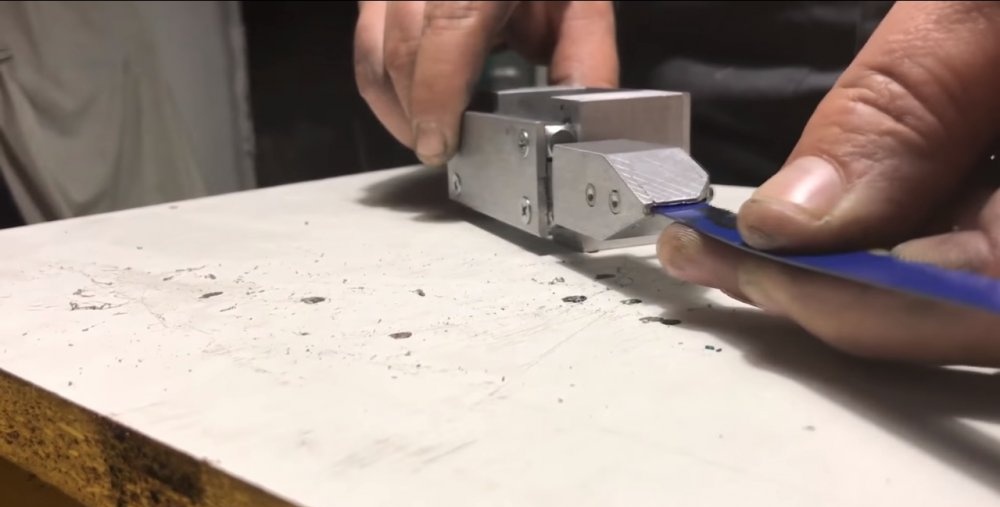
In order to secure the hacksaw blade, an adapter-clamp is required. The tip proposed by the author has a square end groove. On the side of the planes there are clamping bolts for a hex key. When clamped tightly, they are recessed flush with the plane of the tip.
A reciprocating saw from a drill is possible

A reciprocating saw from a drill is possible

A reciprocating saw from a drill is possible

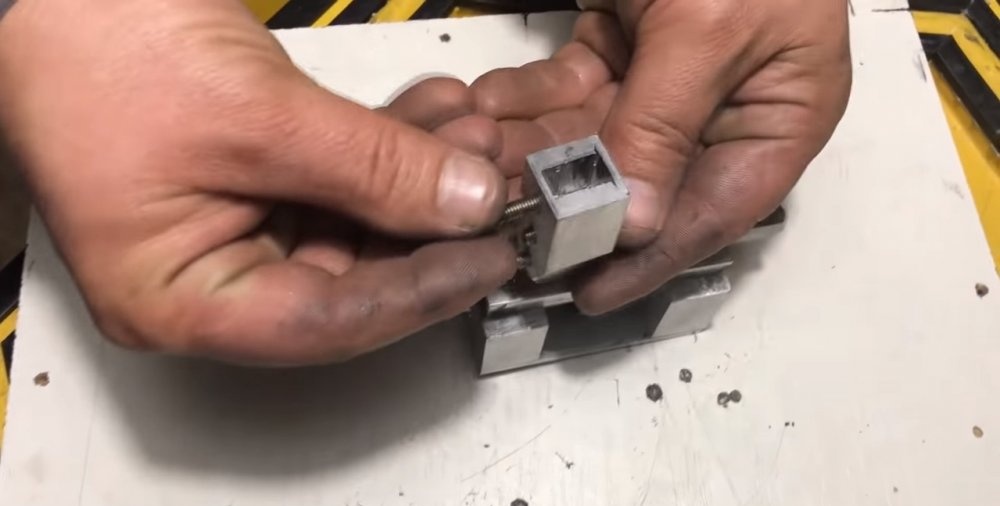
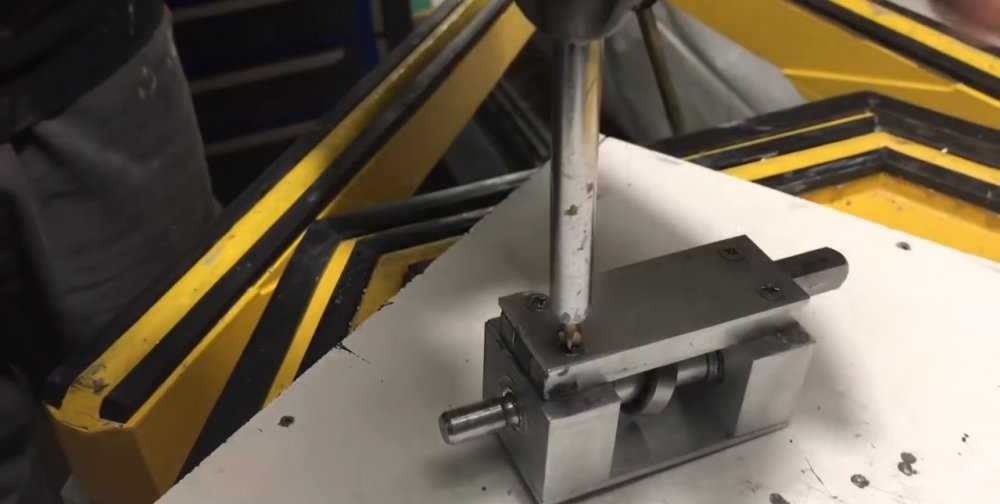
We place the clamp tip on the middle square and secure its position with a clamping bolt.
A reciprocating saw from a drill is possible

A reciprocating saw from a drill is possible

A reciprocating saw from a drill is possible

A reciprocating saw from a drill is possible

A reciprocating saw from a drill is possible

A reciprocating saw from a drill is possible

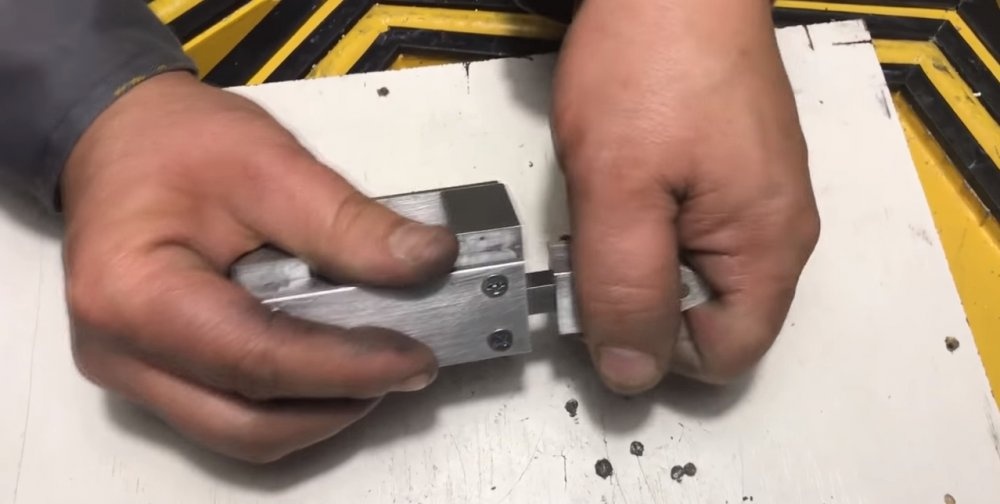
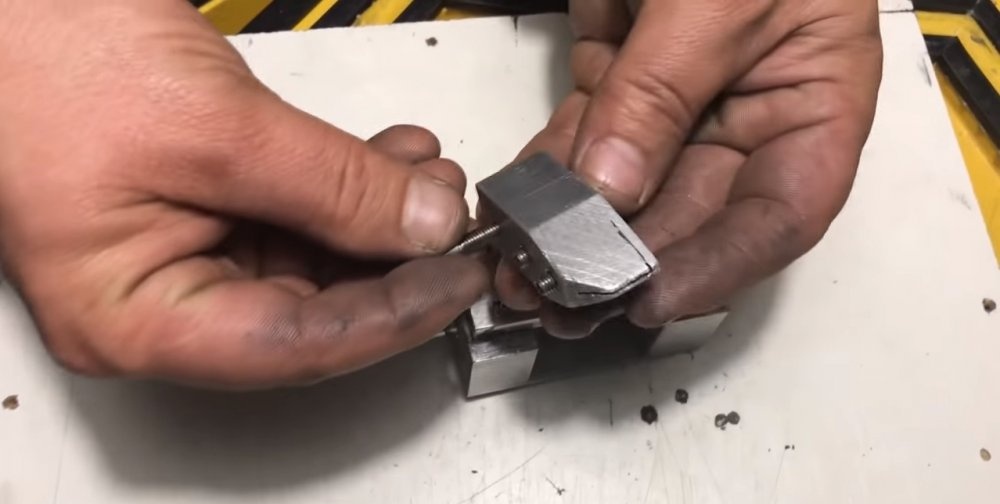
Now we insert the hacksaw blade into the tip and secure it with the next two clamping bolts.
A reciprocating saw from a drill is possible

A reciprocating saw from a drill is possible

A reciprocating saw from a drill is possible

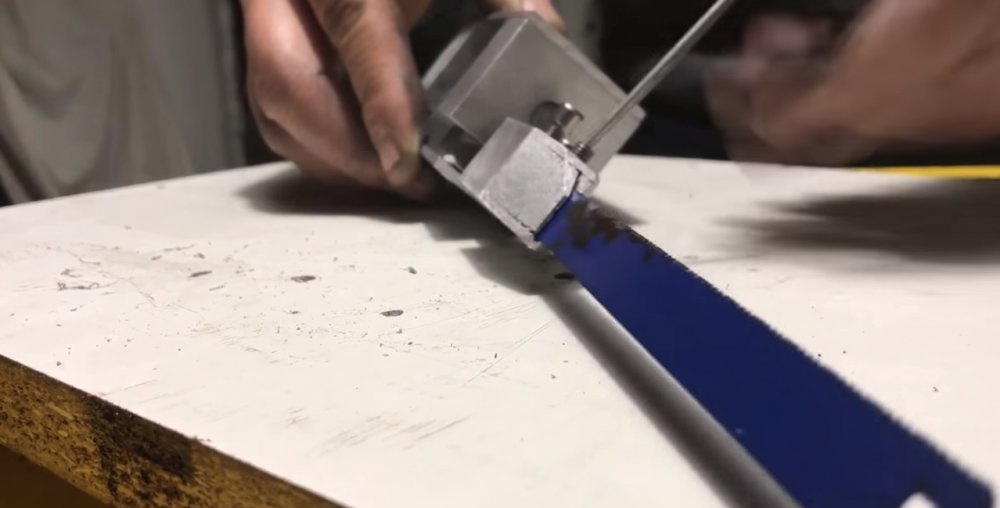
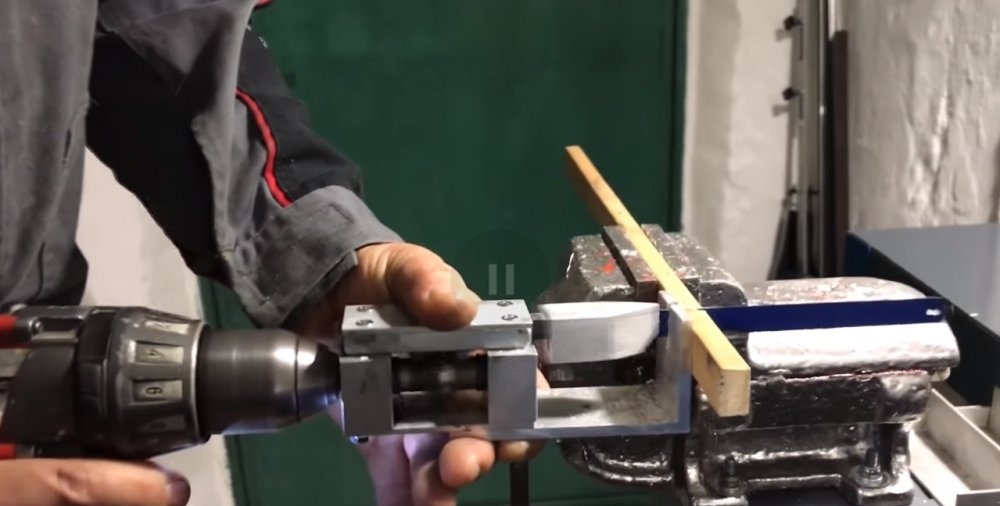
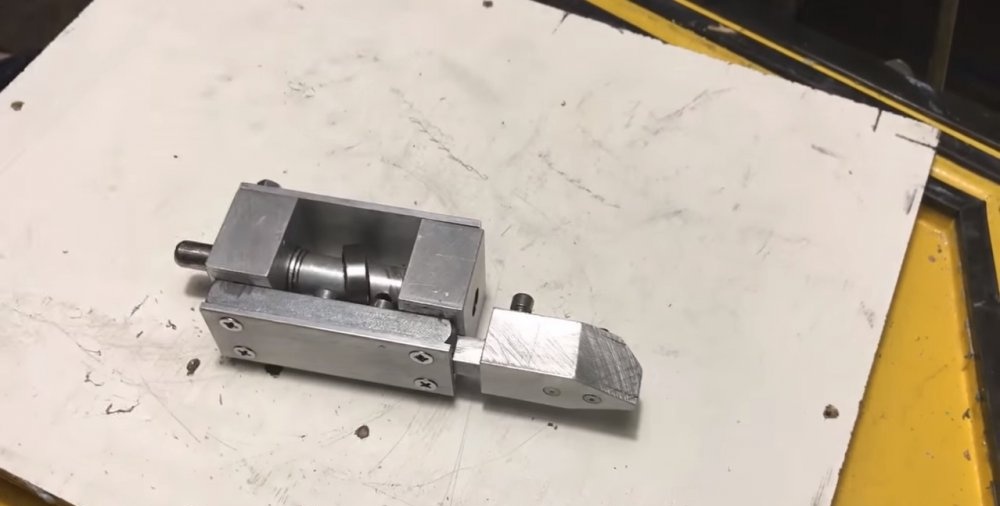
To stabilize the work of the movable square with the blade when sawing, we add a stop angle (photo).
A reciprocating saw from a drill is possible

A reciprocating saw from a drill is possible

A reciprocating saw from a drill is possible

We fix it with two screws and center the groove on its edge relative to the blade.
A reciprocating saw from a drill is possible

A reciprocating saw from a drill is possible

A reciprocating saw from a drill is possible

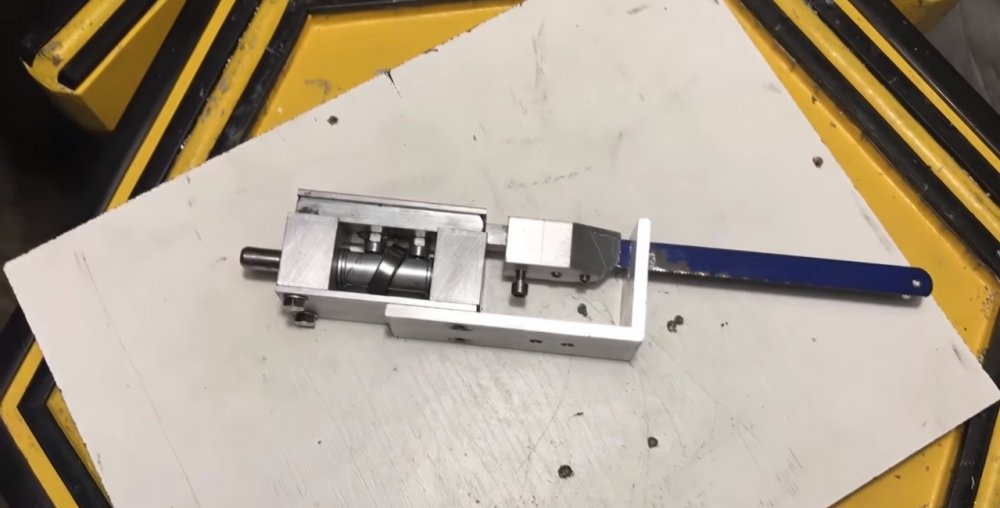
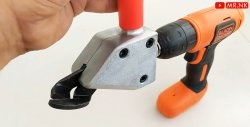
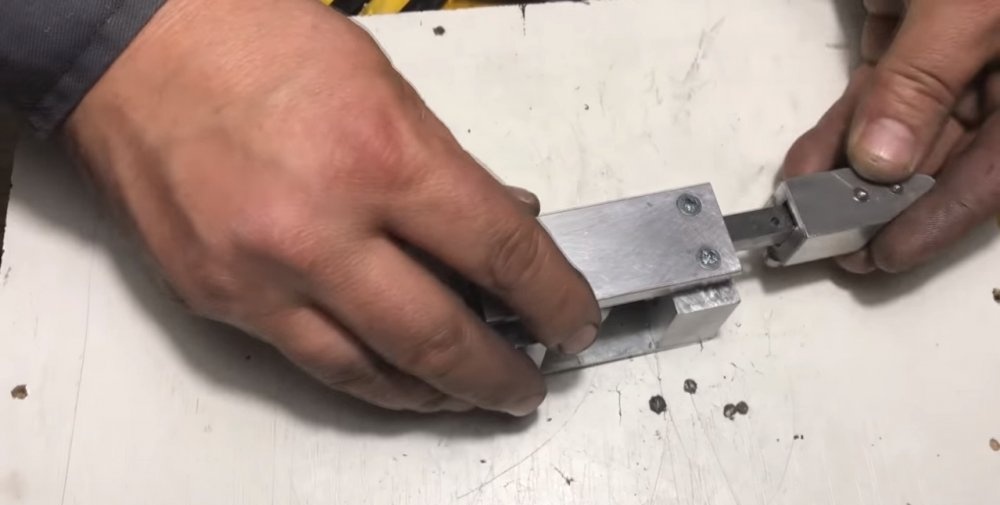
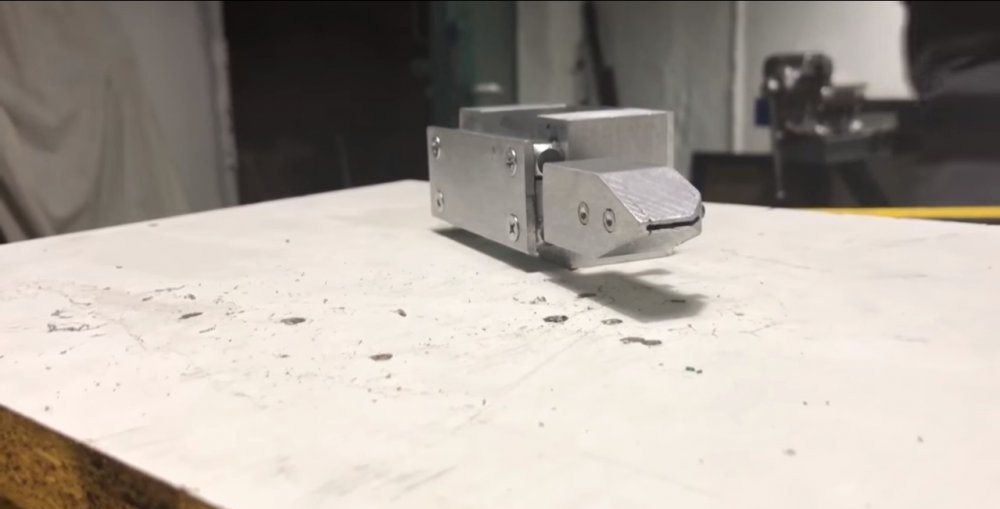
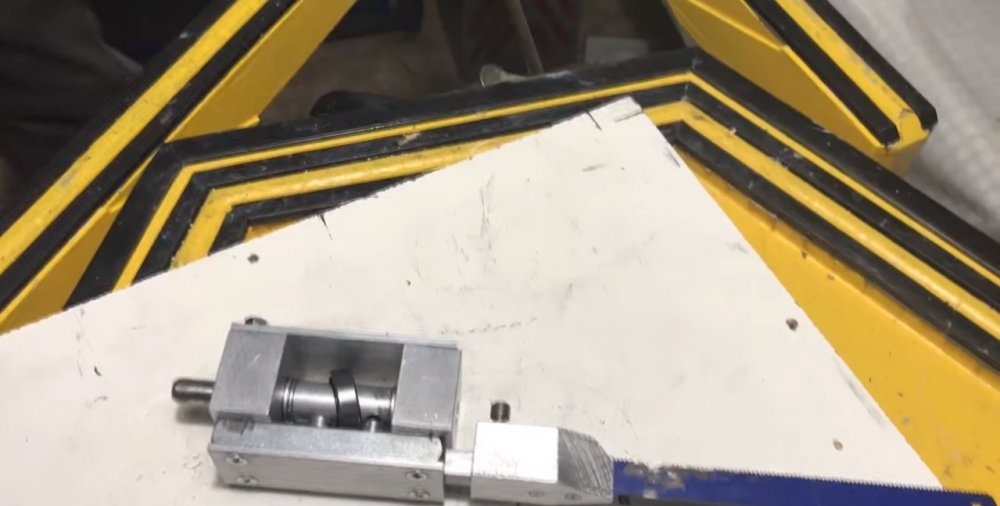
The “reciprocating saw” attachment for the drill is ready. It is comfortable and safe to hold in your hands, and it takes up very little space. It’s really worth making such a tool for your workshop, since it can help out at the right time when sawing wood. All that remains is to try it in action and make sure of the wide capabilities of your instrument!
A reciprocating saw from a drill is possible

A reciprocating saw from a drill is possible

Watch the video


come back
Comment
  • bowtiesmilelaughingblushsmileyrelaxed relaxedsmirk
    heart_eyeskissing_heartkissing_closed_eyesflushedrelievedsatisfiedgrin
    winkstuck_out_tongue_winking_eyestuck_out_tongue_closed_eyesgrinningkissingstuck_out_tonguesleeping
    worriedfrowninganguishedopen_mouthgrimacingconfusedhushed
    expressionlessunamusedsweat_smilesweatdisappointed_relievedwearypassive
    disappointedconfoundedfearfulcold_sweatperseverecrysob
    joyastonishedscreamtired_faceangryragetriumph
    sleepyyummasksunglassesdizzy_faceimpsmiling_imp
    neutral_faceno_mouthinnocent
3+three=
Comments (5)
  1. Boris
    #1 Boris Guests February 21, 2018 09:54
    0
    Disposable item. Once you show off, show off your ingenuity and throw this device on the farthest shelf.
    Such toys cannot replace a full-fledged instrument.
    But for self-affirmation and the development of creative thinking it is quite suitable...
  2. Konstantinov70RUS
    #2 Konstantinov70RUS Guests February 23, 2018 06:00
    2
    This is no longer funny. “You urgently needed to saw off a block”......and it takes a week to make an adjustment. Wouldn’t it be quicker to run to the store for a hacksaw? And it would be cheaper.
  3. Guest Igor
    #3 Guest Igor Guests 10 August 2018 17:44
    1
    In truth, our hands are not for boredom. I took 1 thousand rubles from the nightstand and went to the nearest store and bought a simple jigsaw. Well, if there is no money, but you need to cut it off, then every normal guy has a hacksaw in his pantry. I sawed it off and forgot about it.
  4. Georgiy
    #4 Georgiy Guests 19 November 2018 05:16
    1
    What kind of mechanic do you have to be to make this attachment?
    ..and really buy and replace the canvas!
  5. matoka
    #5 matoka Guests 30 December 2018 20:26
    5
    The article is very interesting in terms of DIYers. And it is for those whose hands grow from where they need to be. Sarcasm is inherent in people who are far from this. Respect to the author (that is, the craftsman). Alexander.

Electronics | Page 20 | Do it yourself

Various | Page 93 | Do it yourself

The simplest electric motor | Do it yourself

How to make a riveter with your own hands

«Do it yourself - with your own hands» - a site of interesting homemade products made from scrap materials and items at home. Step-by-step master classes with photos and descriptions, technologies, life hacks - everything a real master or just a craftsman needs for needlework. Crafts of any complexity, a large selection of directions and ideas for creativity.

We recommend reading

Washing machine error codes