Do it yourself
Life hacks, master classes, useful tips, recipes.
home » Different » Crafts » Wood crafts » How to repair a broken screw hole
How to repair a broken screw hole in chipboard

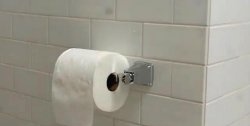
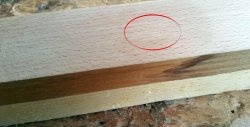
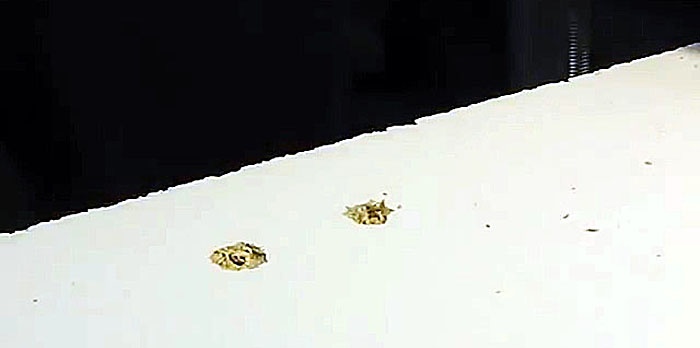
This problem occurs very, very often in everyday life. For example, you might accidentally be a little overzealous when opening the door of, say, a cabinet, and the screw will immediately pull out of the wood. It is definitely not possible to screw it back in, since the hole is completely broken. The chipboard crumbled and a small crater formed after the screw was pulled out. Of course, there is a way out of this situation and it is not at all difficult.
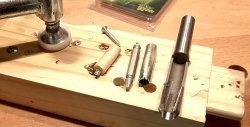
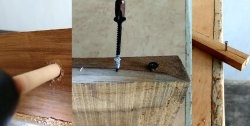
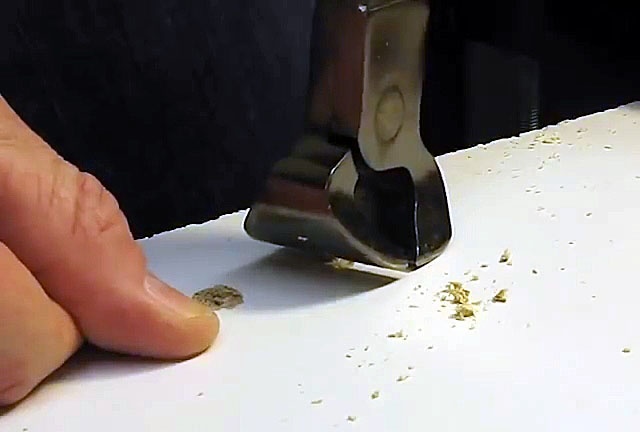
For repairs we will need: wooden chop or stand. It is made in five minutes from a wooden lath. If it is round, we simply cut it off, and if it is square, we cut off the edges with a penknife, giving it a cylindrical shape.

Restoring the hole


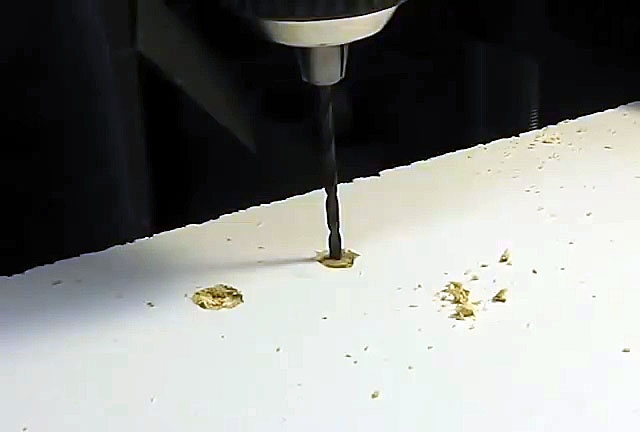
First of all, we measure the thickness of the chipboard. Next, take a wood drill and set either a limiter or a mark on it to make a hole of a certain depth. If your material thickness is, say, 9 mm, then you need to drill to a depth of no more than 7 mm. The thickness of the drill is also selected individually, everything depends on the diameter of the screw being screwed in and the nature of the damage. I took a 5 mm drill.
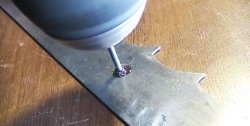
Carefully drill a blind hole.
How to repair a broken screw hole in chipboard

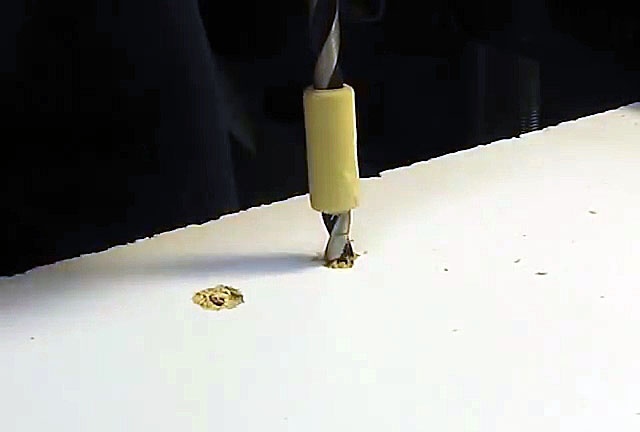
There is no need to rush, because if you accidentally drill the front side, it will not be pleasant.
How to repair a broken screw hole in chipboard

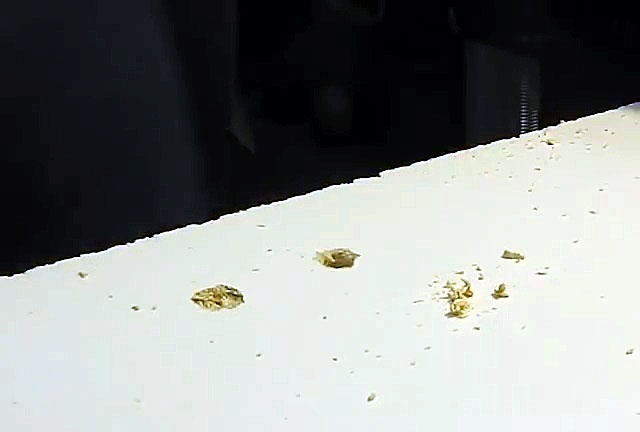
Pour wood glue around the edges. You can use the classic one - PVA or any other.
How to repair a broken screw hole in chipboard

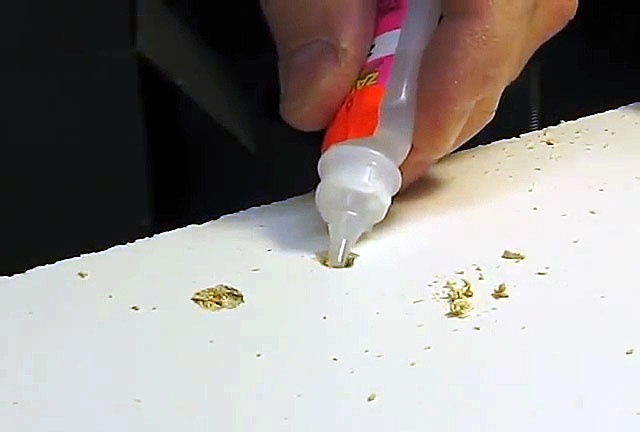
Naturally, the chopik must be pre-fitted to this hole in diameter and length. Carefully drive it into the hole.
How to repair a broken screw hole in chipboard

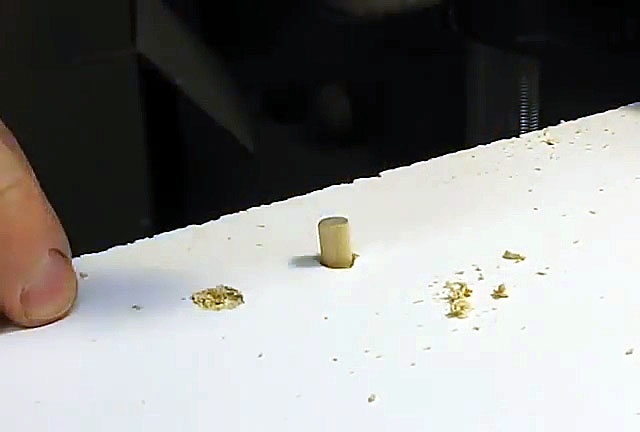
We are waiting for the glue to dry. Next, we drill a hole under the screw so that when screwing there is less internal stress, since the chop is made of a single piece of wood and with excessive pressure it will easily burst or crack.
How to repair a broken screw hole in chipboard

That's all! The hole has been restored.
How to repair a broken screw hole in chipboard

You can screw the screw into place.
How to repair a broken screw hole in chipboard

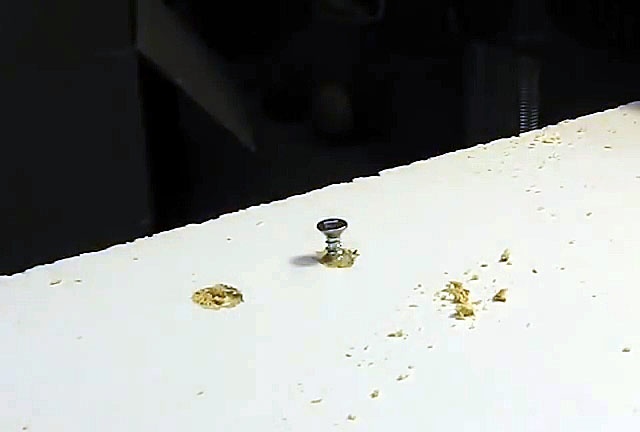
The connection is very strong. Most likely even stronger than it was, since the insert adds additional density.
How to repair a broken screw hole in chipboard

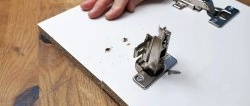
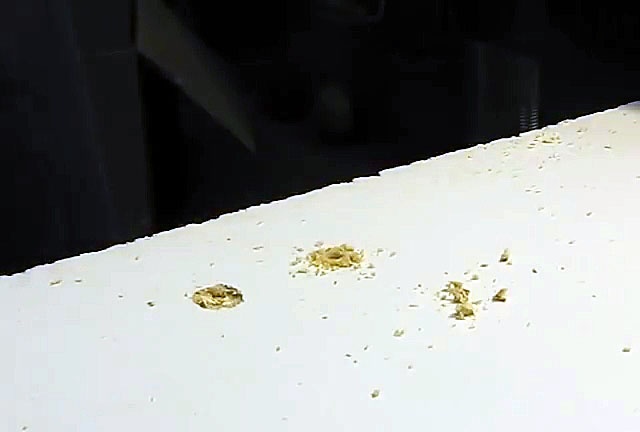
We repair all the necessary holes for the hinges.
Using this simple method, you can repair and restore a hole not only in chipboard, but also in other, absolutely any wood.

Watch the video


come back
Comment
  • bowtiesmilelaughingblushsmileyrelaxed relaxedsmirk
    heart_eyeskissing_heartkissing_closed_eyesflushedrelievedsatisfiedgrin
    winkstuck_out_tongue_winking_eyestuck_out_tongue_closed_eyesgrinningkissingstuck_out_tonguesleeping
    worriedfrowninganguishedopen_mouthgrimacingconfusedhushed
    expressionlessunamusedsweat_smilesweatdisappointed_relievedwearypassive
    disappointedconfoundedfearfulcold_sweatperseverecrysob
    joyastonishedscreamtired_faceangryragetriumph
    sleepyyummasksunglassesdizzy_faceimpsmiling_imp
    neutral_faceno_mouthinnocent
5+two=
Comments (3)
  1. Sector
    #1 Sector Guests 25 January 2019 18:57
    0
    I always planted caps on epoxy resin, which is much more reliable than PVA.
  2. Modest
    #2 Modest Guests 25 January 2019 22:58
    0
    Who is a "cap"? from the word "cheap"? or "chepurashka"? There is the word “chopik”, probably the author had it in mind, but the consequences of the Unified State Exam are taking their toll.

    It is possible to plant a chopik on PVA, but it is safer to plant it on epoxy, especially when repairing a fiberboard board. Anyway, the article is useful and may be useful to someone.
  3. Lek
    #3 Lek Guests March 30, 2019 07:09
    1
    Mix the epoxy resin thoroughly with sawdust until it reaches the consistency of a thick paste. Use wide mounting tape to seal the defect and cut a hole in the tape through which we will fill the defect. Using a nail or a thin awl, apply a small amount of clean resin to the walls and bottom of the defect. Wait a little for the resin to begin to absorb. Then, using a spatula, with good pressure, rub epoxy resin and sawdust into the defect. Remove excess with a spatula or blade. After the resin has hardened, if necessary, the restoration area can be sanded and then the mounting tape can be removed. Then you can drill for the screw or just screw it in (it screws in and holds in place with a bang).

Cooking | Page 20 | Do it yourself

How to check a car's clutch without disassembling it

Master class on making a dispenser for cotton pads | Do it yourself

How to find and eliminate current leakage in a car with your own hands

«Do it yourself - with your own hands» - a site of interesting homemade products made from scrap materials and items at home. Step-by-step master classes with photos and descriptions, technologies, life hacks - everything a real master or just a craftsman needs for needlework. Crafts of any complexity, a large selection of directions and ideas for creativity.

We recommend reading

Washing machine error codes