The device, hereinafter referred to as a backpack, is designed for movement on ordinary skis on a flat surface that does not have thick, fluffy snow cover.
Frozen river floodplains and well-worn roads with a slight slope are best suited.
In addition, the backpack, with minor modifications, can be used as a propulsion device on an inflatable boat. Of course, the boat will not go against the current on a mountain river - it is not strong enough, but on a calm river, or with a small current, the “elastic band” goes very well.
Now, about creation. I used exclusively available materials: an old folding bed, scraps of conveyor belt, 1.5 mm fishing line, scraps of 2 mm strips, fasteners - M5-M6 screws and nuts.
You will need:

- The Ural chainsaw, or rather the motor from it.
- Aluminum pipe with a diameter of 20 mm.
- Met. strip or sheet 1.5-2mm.
- Screws of different lengths M5, M6 and washers with nuts.
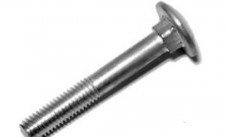
- 4 furniture bolts M8x65 with washers and nuts.
- Conveyor belt 20x20cm.
- fishing line 1.5 mm.
- Dry pine board with a minimum of knots 80x10x2.5cm for the propeller.
- Drill.
- Hacksaw for metal.
- Screwdriver, keys, pliers, file, etc.
So.Without claiming to be the ultimate truth.
Manufacturing
The saw motor itself does not require practically any special modifications. Unless, perhaps, remove the studs securing the fan cover and replace them, after drilling the through holes, with long (70mm) M6 bolts.

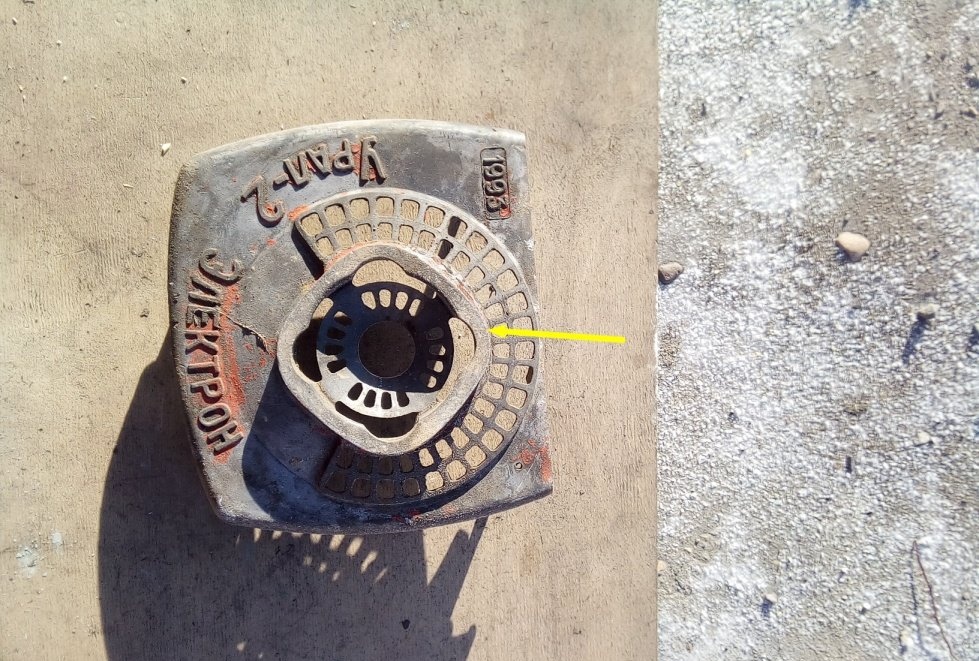
And also, we disassemble the drive disk of the centrifugal clutch (remove the weights with springs).
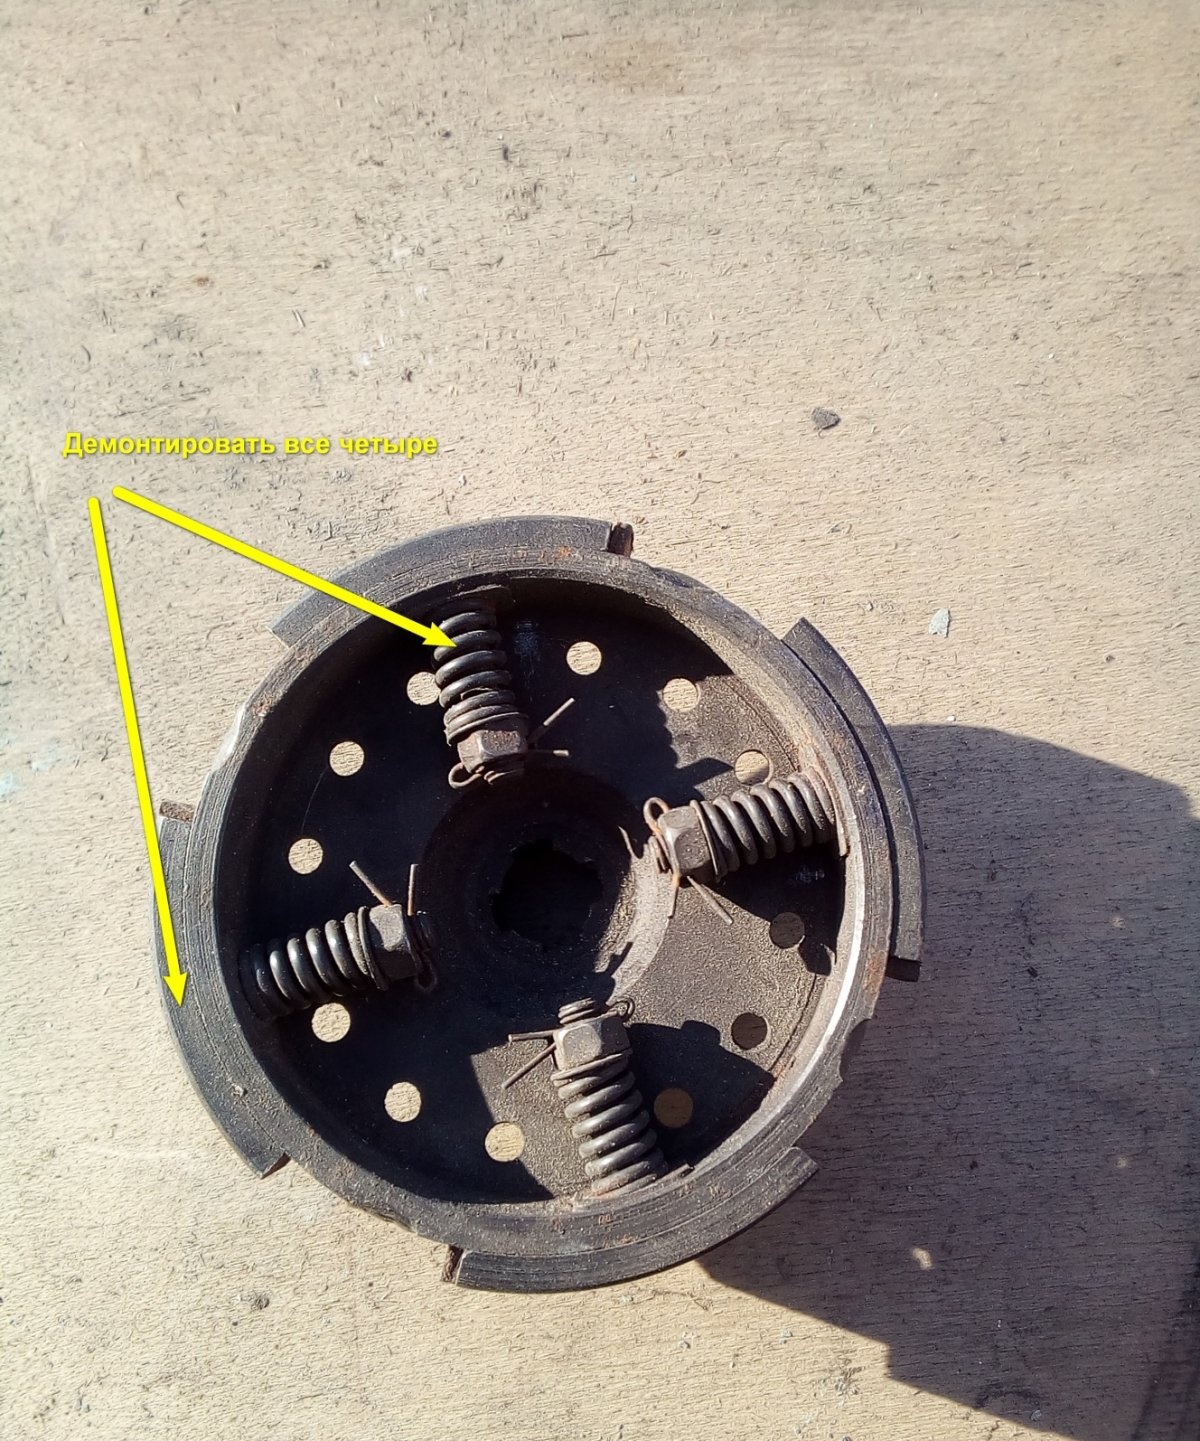
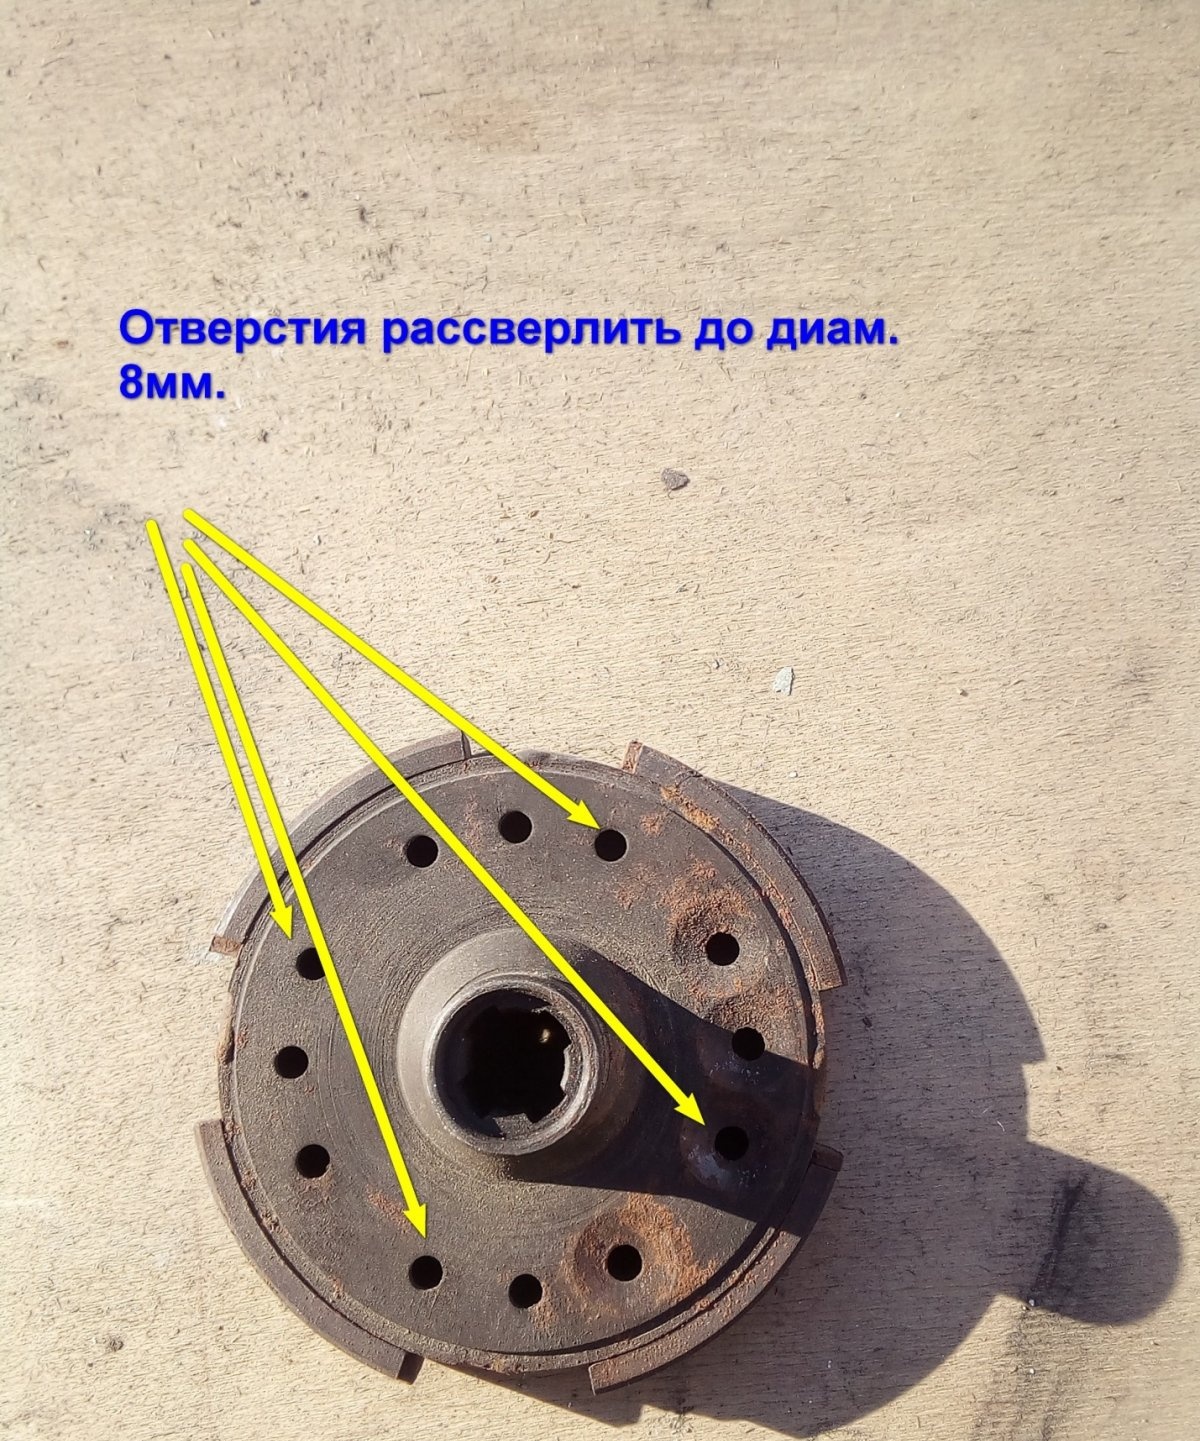
And use a file to drill it into a square so that the furniture bolts can fit tightly into them.
Pre-grind the semicircular bolt heads to a thickness of 3 mm. Otherwise, they will catch on the studs of the crankshaft oil seal cover.
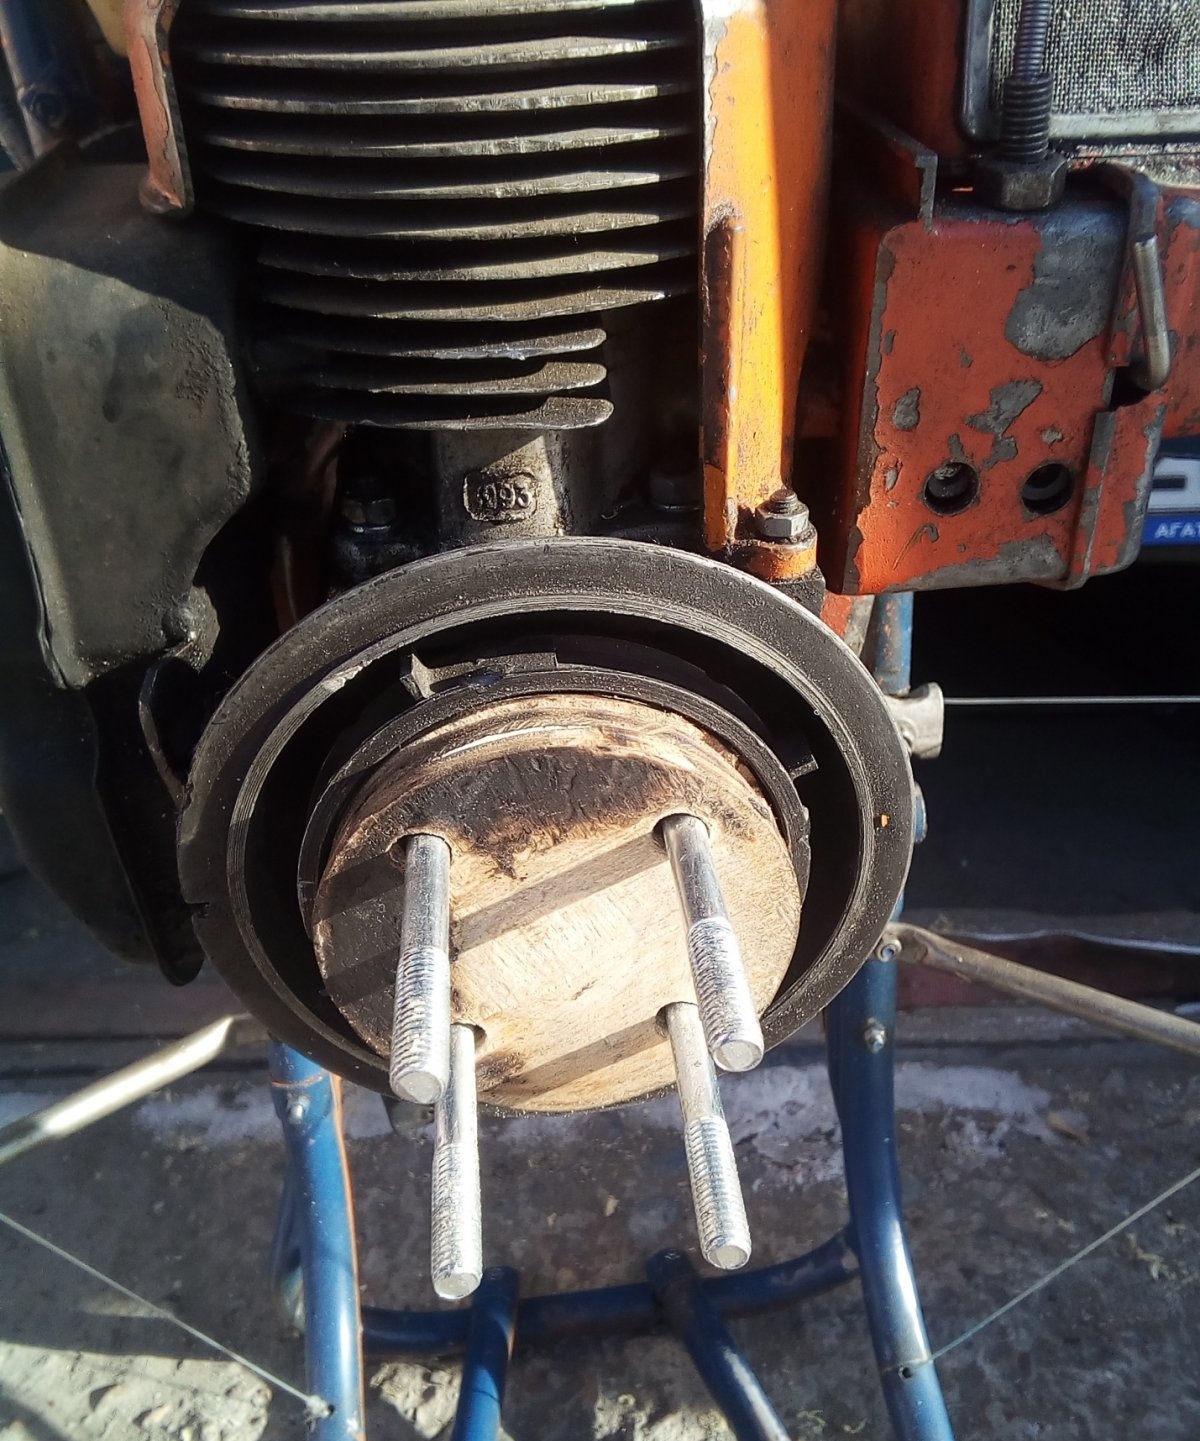
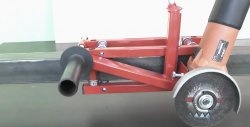
It should turn out like this. Nothing more is required for now. Next we build a motor mount with a guard for the motor and propeller.
It looks like this:
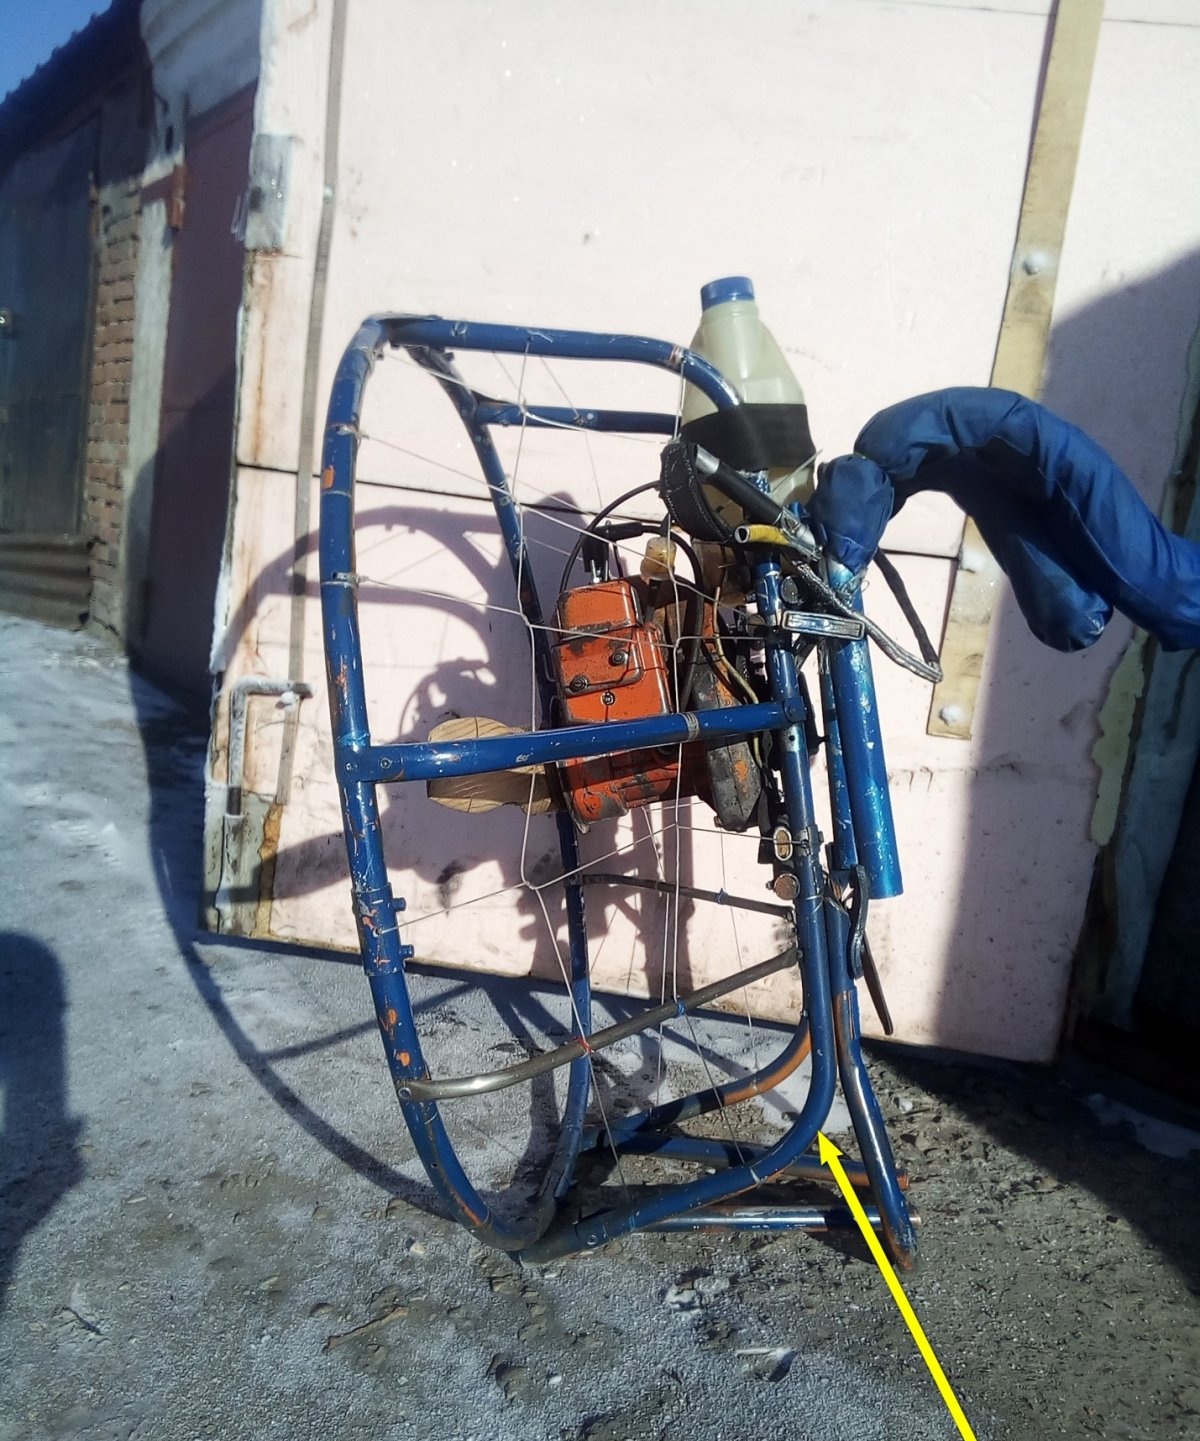
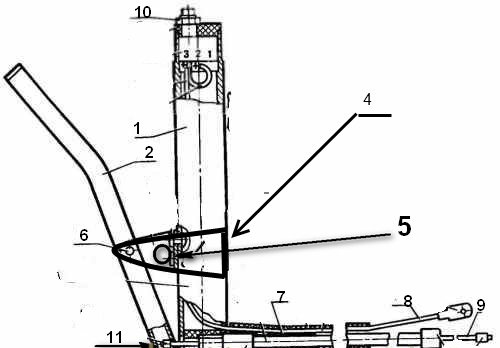
Since I made it from an old folding bed, there were no particular difficulties with bending the tubes. First, two identical vertical posts are made (Fig. 1). Then, the motor mount tubes are attached to them (Fig. 2) with M6 screws, (Fig. 3) using washers and self-locking nuts or with locknuts.
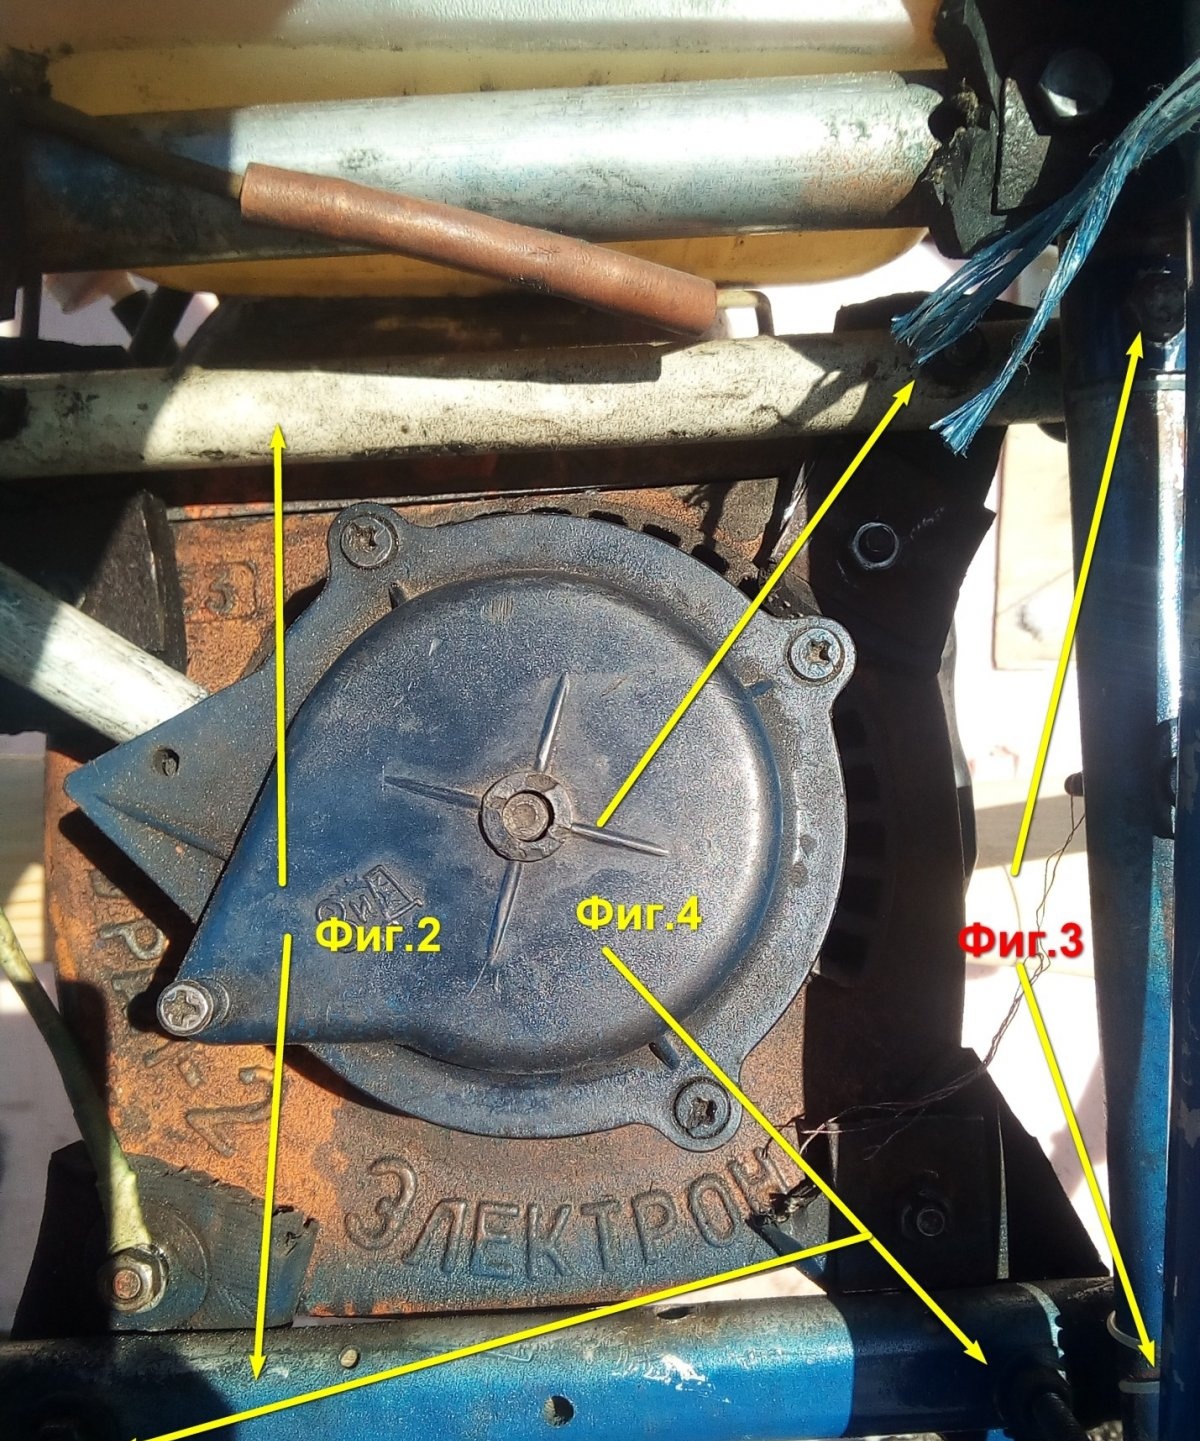
Engine mounting should also not raise any questions. To reduce vibration, it is mounted on strips of conveyor belt, exactly on those long bolts that replaced the fan cover studs.
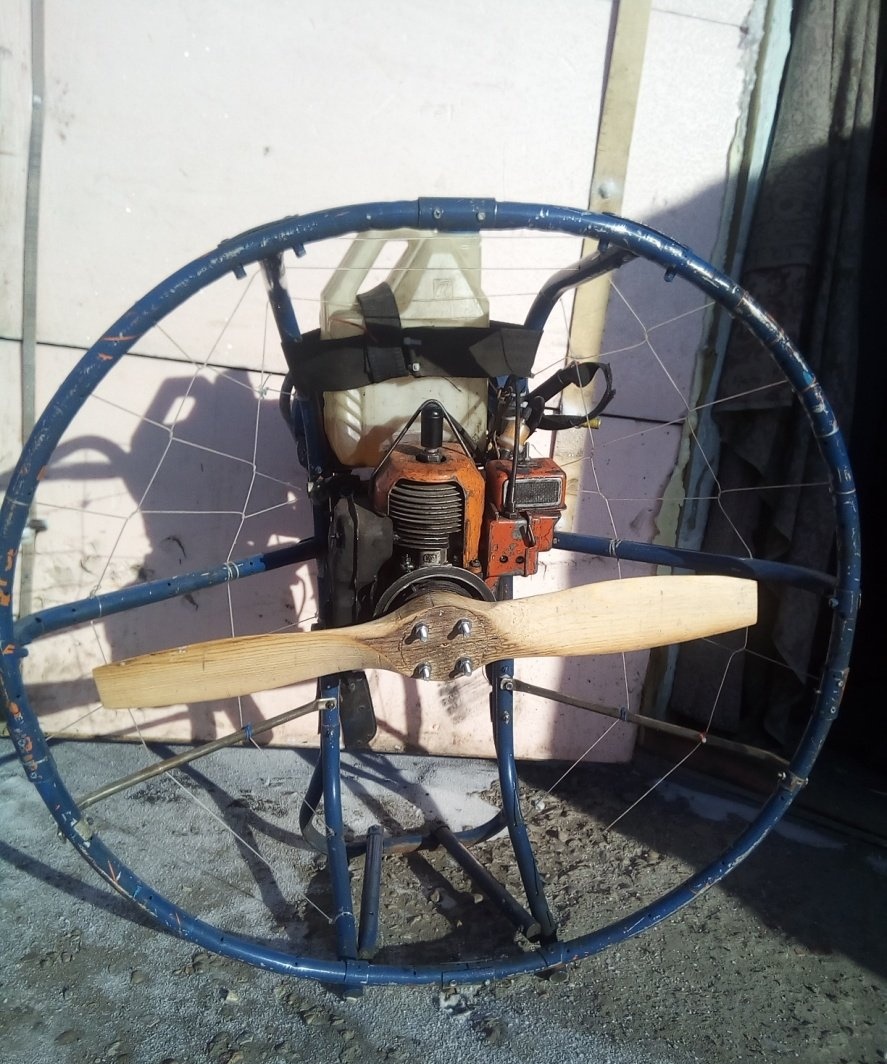
To make a propeller guard ring, an aluminum hula hoop would be best suited. I had to tinker a lot with the tubes from the same folding bed. They are very strong in bending, and in addition they are short, which did not make it easier to give the desired radius.
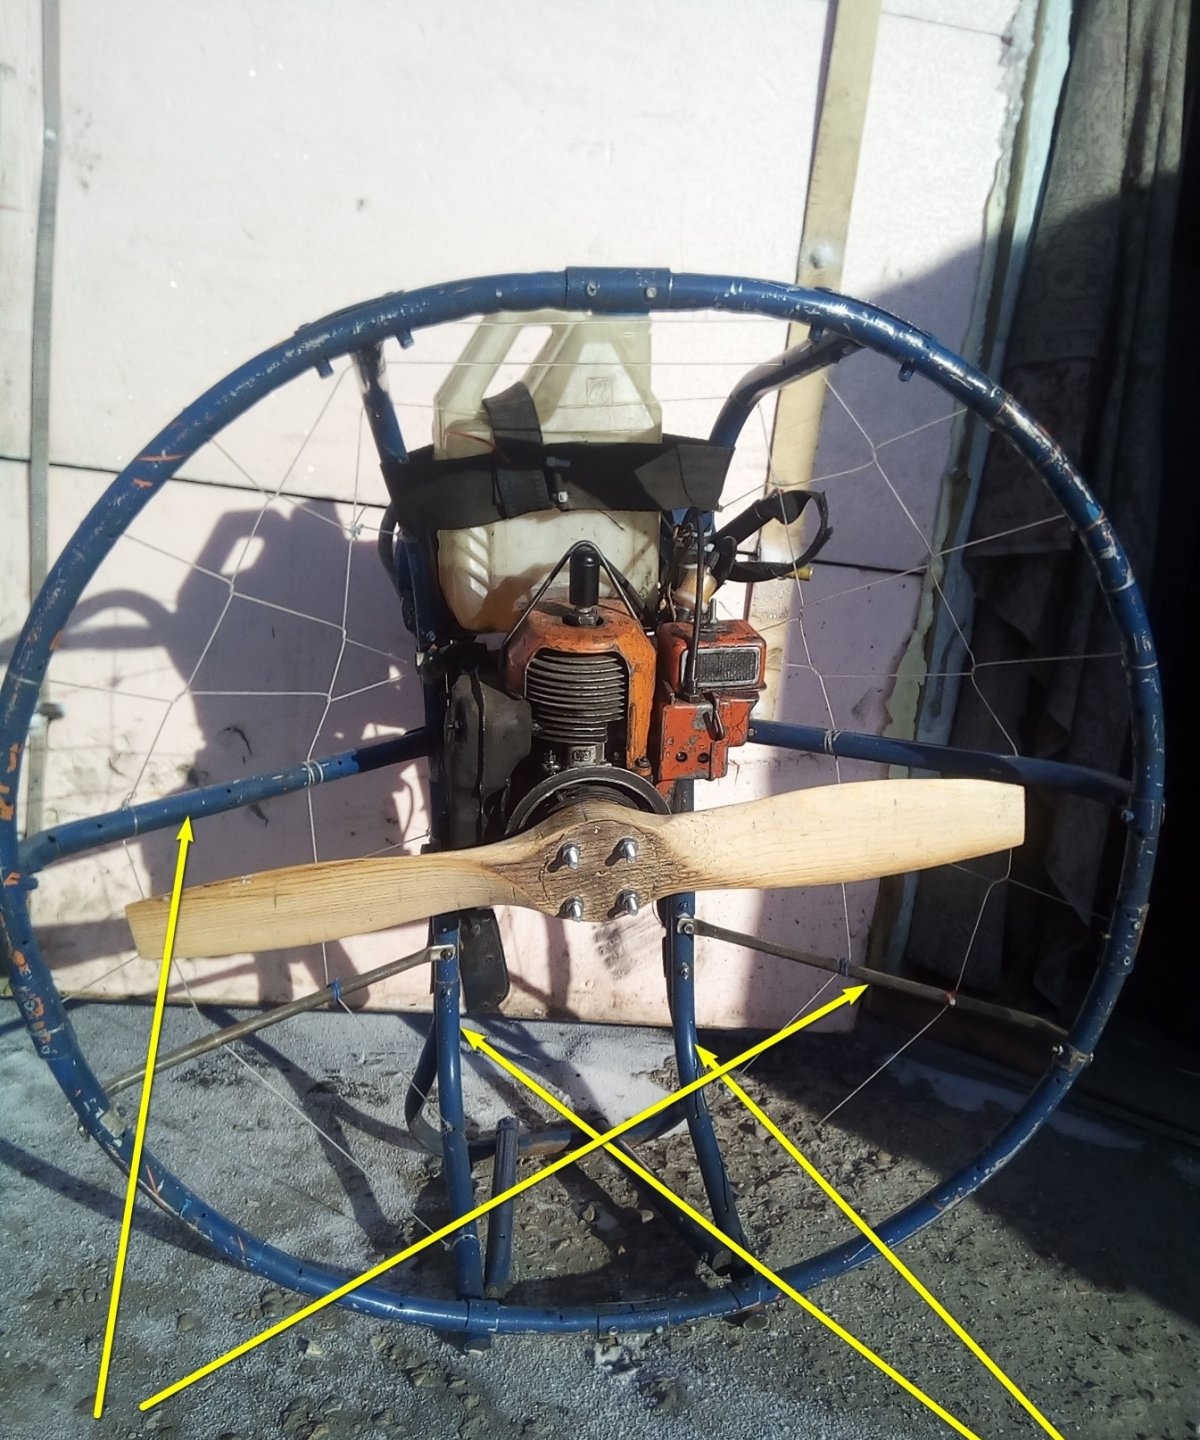
Let's move on to the horizontal parts of the fence (Fig. 5). The upper ones are made of aluminum, the lower ones are made of stainless steel (there was not enough folding bed).
They are attached like this: a metal U-shaped strip and M5 screws. To vert. racks - the same.
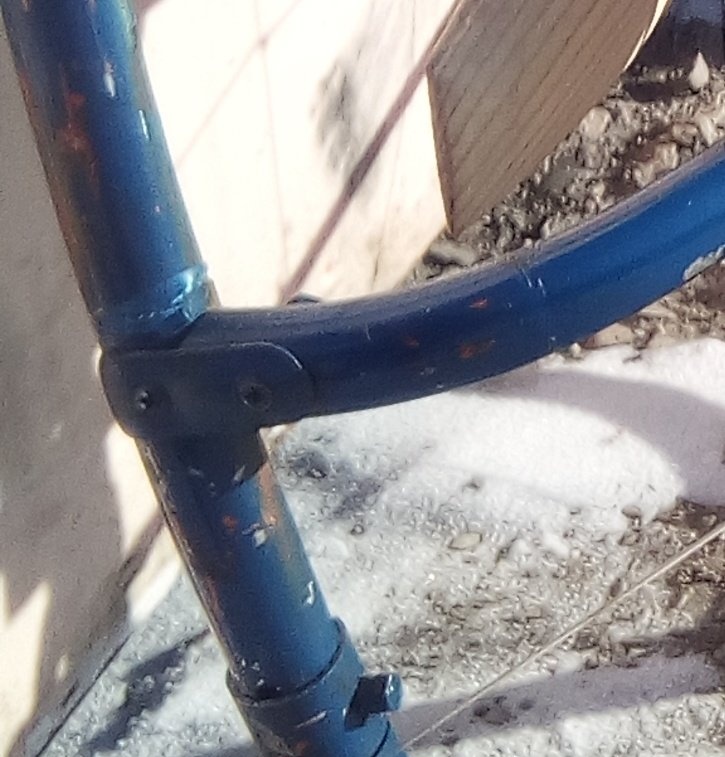
In the upper and lower parts, the ring is attached to the vertical posts with rounded triangular plates made of metal 1.5 mm thick. For ease of launching, a stop is attached to the vertical posts at the bottom. You can make it however you like and from whatever you like. But it’s better to make the straps to hold the backpack on your back exactly like mine. From a pipe, flattened where it goes around the shoulders, followed by wrapping it with foam rubber and putting on a fabric cover. The straps are also attached to a conveyor belt to the motor mount tubes, or to an additional tube horizontally attached to the vertical posts. Why on a transporter? The vibration is less and it is easier to put the backpack on your back. Tested for myself.
About fixing the starter.
In the place indicated by the arrow, or opposite, (top or bottom), a hole is drilled for an M5 thread. After installing the starter on the motor, tighten the M5 screw with the locknut. As an option - a self-tapping screw. This will prevent the starter from disconnecting from the engine.
RUD. (motor control handle)
To control the throttle valve, I used a throttle cable from a motorcycle, which, together with the engine stop wire, is placed in a metal hose, which is also a “minus”, since it is secured with a clamp or plastic ties to the vertical post and, accordingly, has a connection with the motor housing.
But the handle itself was made as follows.
A piece of tube 135 mm long was taken, around which a strip of aluminum 20X100 mm and 2 mm thick was wrapped.
- Handle tube.
- Control lever for another damper.
- A wooden or plastic plug drilled transversely along with the tube.
- U-shaped clamp for securing the lever.
- Hole for mounting screw U-shaped. clamp
- Lever mounting screw hole.
- Throttle cable sheath.
- Engine stop wire.
- Throttle cable.
- Stop button.
- Hole for the throttle cable boss.
This is what the throttle looks like.
The “Stop” button (in my case, a key) located on the throttle lever is connected with one wire to the standard “jammer” of the engine, the role of the second wire is played by a metal hose. The original engine stop button is removed.
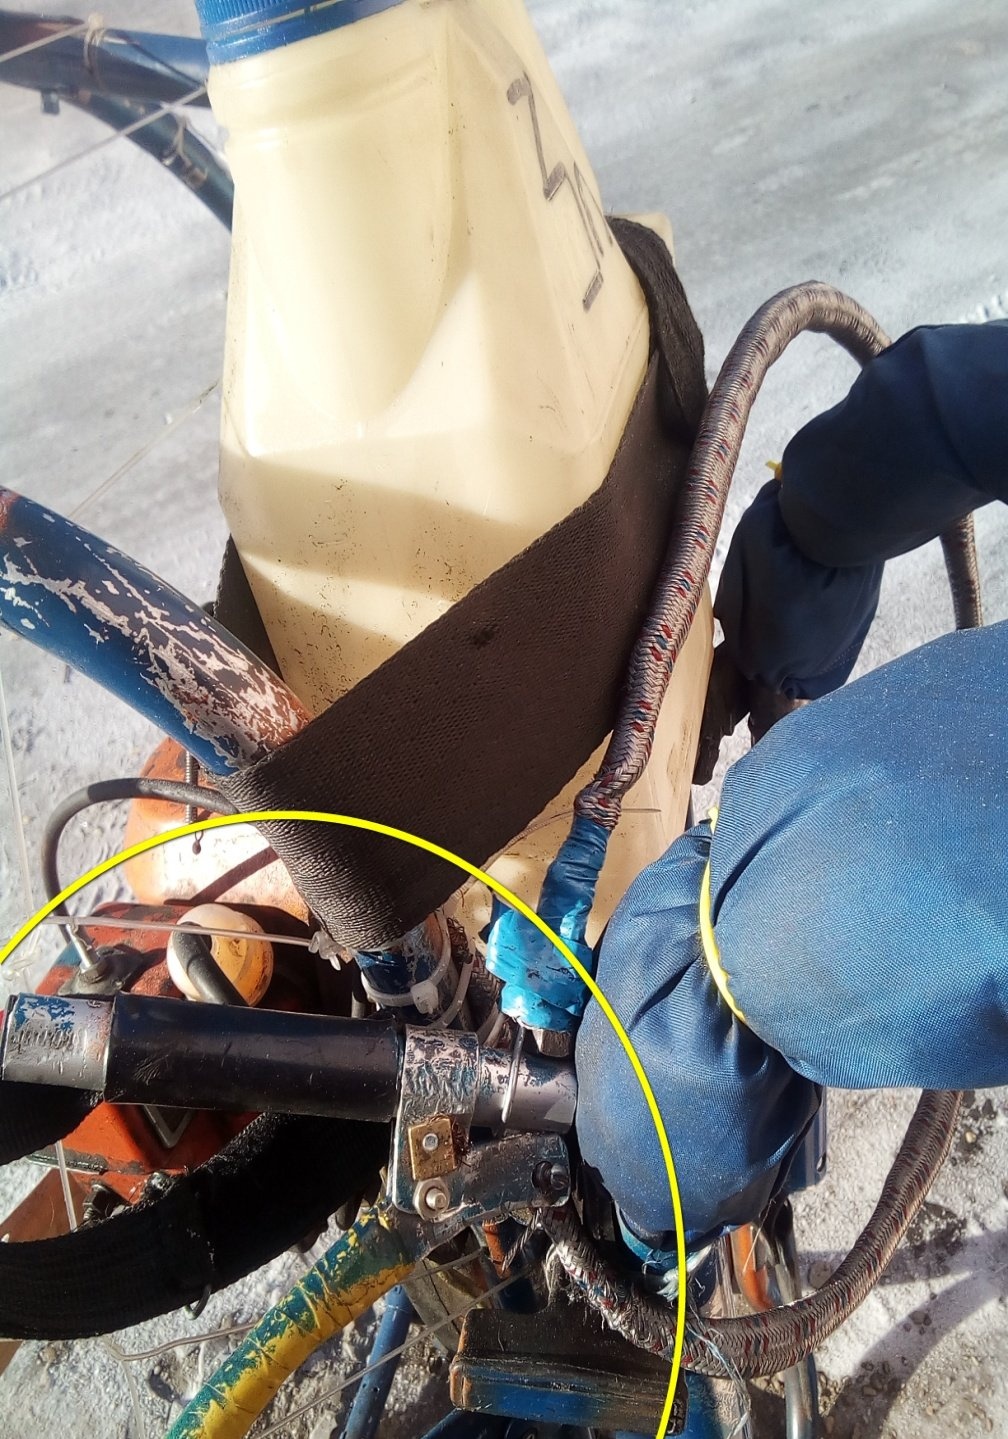
The fuel tank is a 3-liter canister, with a fuel tap built into it from the same Ural. You can also get by with a “primer” from imported chainsaws by installing it on the fuel tank cap.
One indispensable condition is that the tank must be HIGHER than the carburetor. There is no fuel pump on the Ural, and is only needed for a stable supply of gasoline at very strong tilts of the saw.
I abandoned my original gas tank due to the inability to control the level in it.
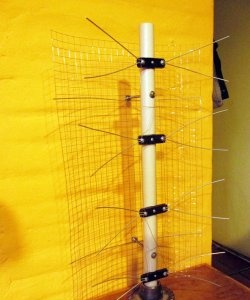
To prevent foreign objects (parts of clothing, hands, finally) from getting into the propeller, it is EXTREMELY necessary to make a protection braided from thick (1.5 mm) fishing line.
Another option: use a ready-made, large-mesh network. I didn’t have one, so I made handicrafts from fishing line.
ATTENTION!!! I don’t recommend even trying to test a backpack with an installed propeller (although I really want to) without an installed mesh fence! Firstly, there is a possibility of accidentally getting your hand into the “invisible” rotating screw on the motor side. (This HAS HAPPENED!).
Secondly, it can attract foreign “volatile” objects. For example, in my case, the device, already put on my shoulders, turned the half of my jacket into evenly cut ribbons in a split second. At 6000 rpm. The pine screw works like a razor.
Well, that’s probably all for the backpack.
Now about the propeller, the propeller.
Making it, in general, also does not cause any particular difficulties.
There are a lot of video materials on the Internet. Here is the link -
Detailed description of creation.
- The second option is to order on Aliexpress. Price about 2.5 thousand rubles.
- Diameter – 65 cm
- The screw pitch is 21 cm.
- Of all the other options tested, this one turned out to be the most productive.
- The thrust, with the carburetor adjusted, was slightly less than 20 kg.
- This is not enough for paragliding, even “in the horizon”, but on skis: on crusty ground, on the road - 40 km/h, on shallow “powder” - 20 km/h, and on a broken track - 30 km/h. According to the GPS navigator.
- Consumption is the same as in the Ural when sawing: 0.8 l/h.
Feel? Not transferable! The unusual thing is that you are not pulled forward, but pushed in the back. It's unusual, but you get used to it quickly.
Video of my tests
GOOD LUCK!