Do it yourself
Life hacks, master classes, useful tips, recipes.
home » Homemade cars » Casting a cable boss with your own hands
Casting a cable boss with your own hands

This problem often occurs - the boss at the end of the cable, fixing it to the gas handle, has come off. Usually the problem is solved by replacing the cable assembly, but you can try to restore the clamp, which I gladly did.
Casting a cable boss with your own hands

Required tools and materials
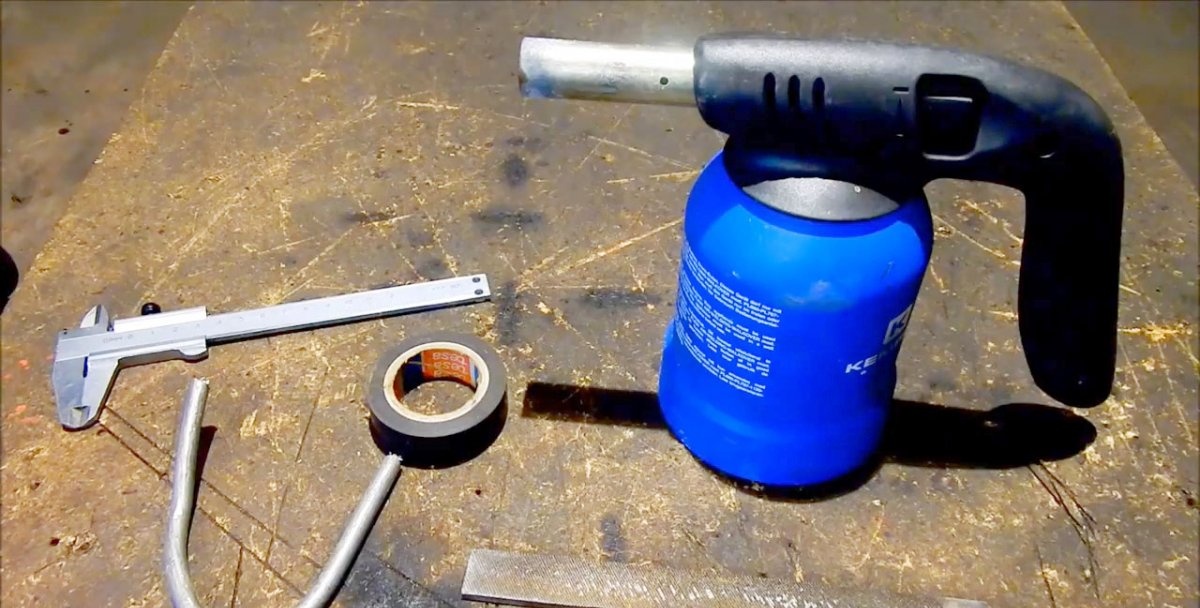

  • Gas-burner;
  • Angle grinder with cutting disc;
  • Drill (drilling machine) and a set of drills for metal;
  • Pliers;
  • File, knife;
  • Calipers;
  • Tin;
  • Dielectric tape;
  • A bolt 3-5 cm long and a piece of metal rod with a diameter of 6 mm (the length should be 2-3 cm longer);

Casting a cable boss with your own hands

Preparatory work


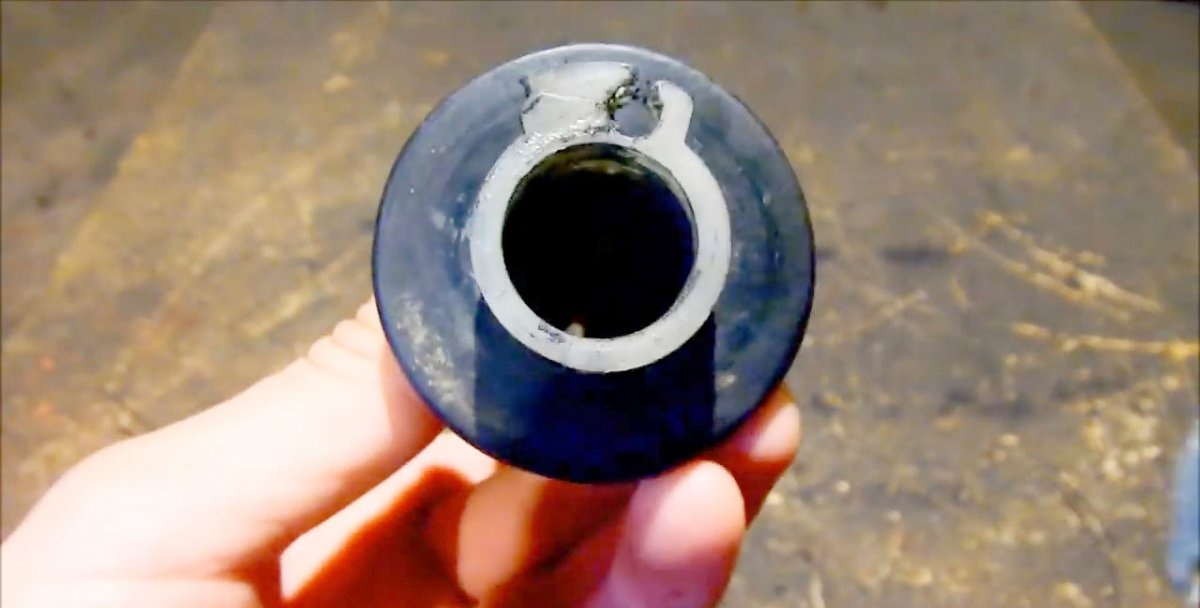
First of all, we measure the diameter of the hole (where the cable boss is inserted) on the gas handle using a caliper. It is 6 mm, so we need to take a metal drill of the same size. We clamp the bolt in a vice, setting it vertically, and drill a through hole in the center.
Casting a cable boss with your own hands

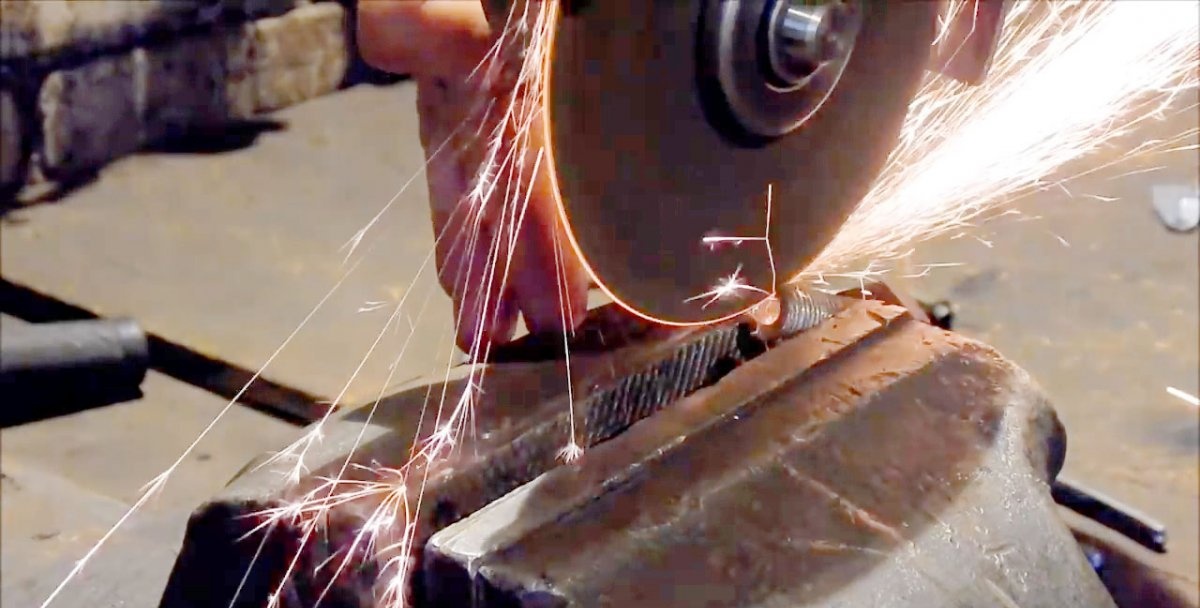
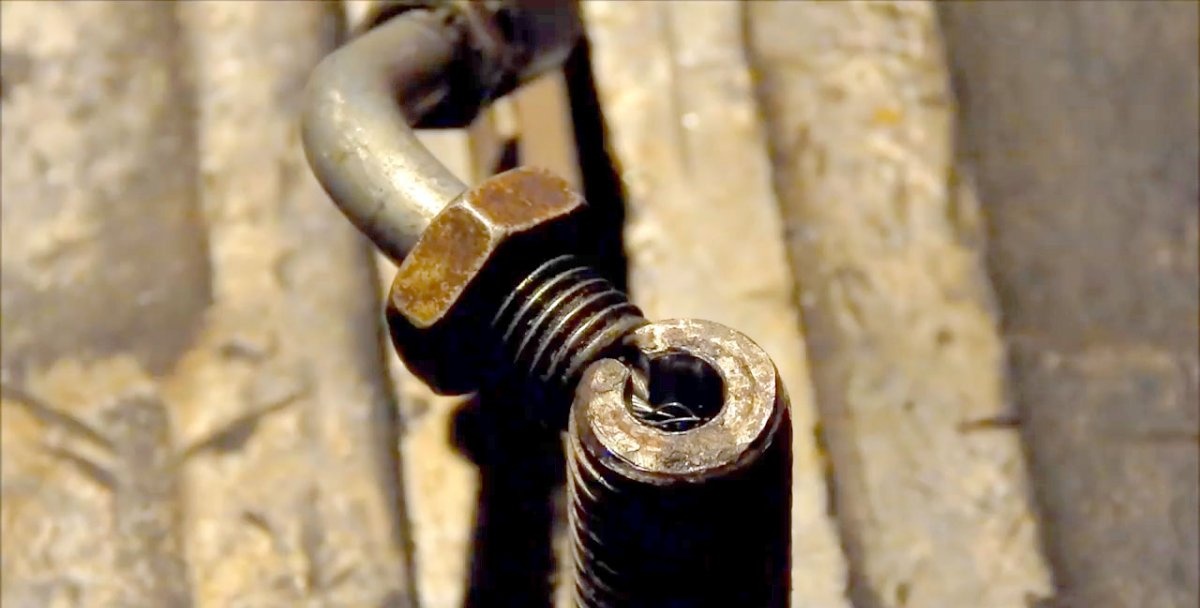
Next, you need to make a side slot parallel to the length of the bolt up to 10 mm. We do this using a grinder, holding the bolt at an angle for convenience.
Casting a cable boss with your own hands

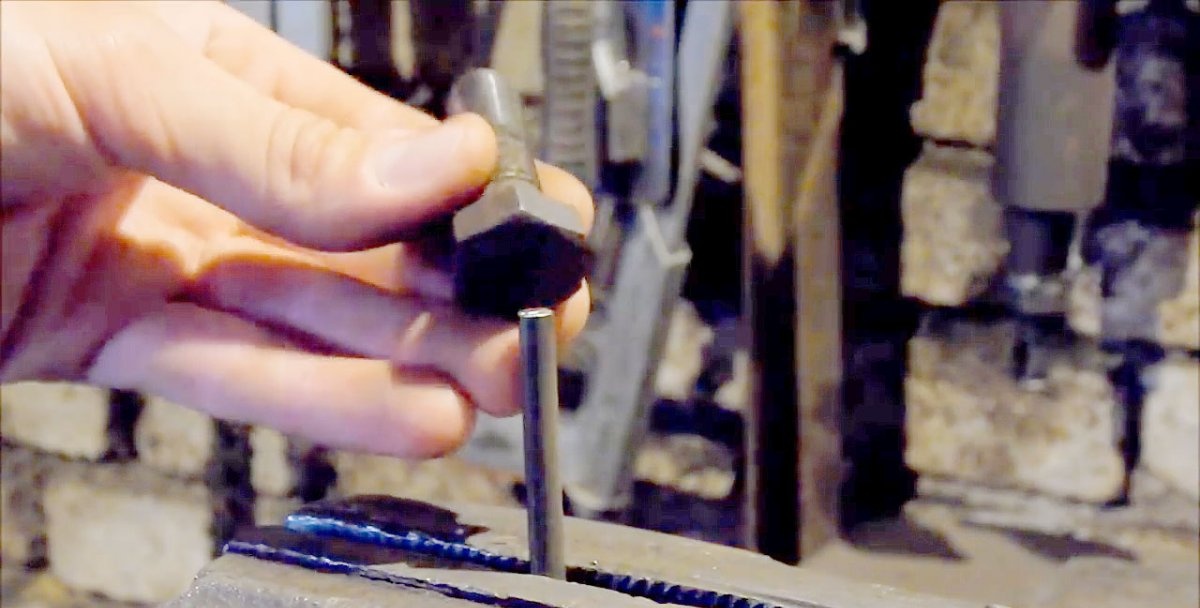
Next, install the pin in a vice and put on the prepared bolt with the cut facing up.The resulting recess should correspond to the thickness of the seat on the gas handle.
Casting a cable boss with your own hands

Casting a cable boss with your own hands

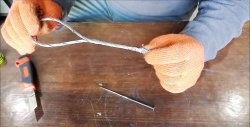
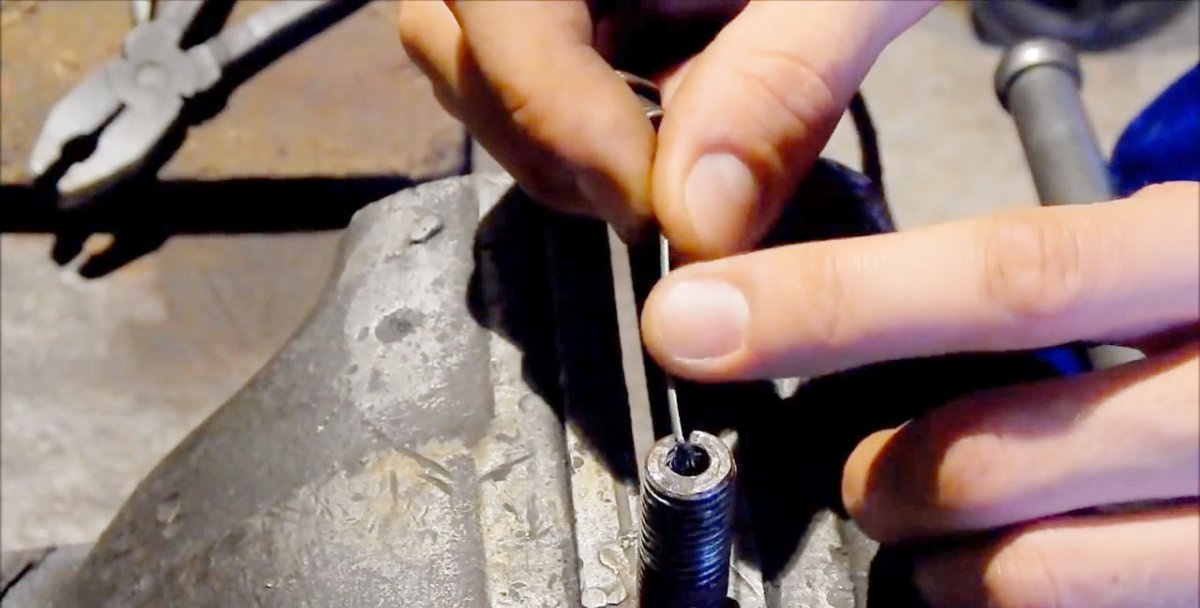
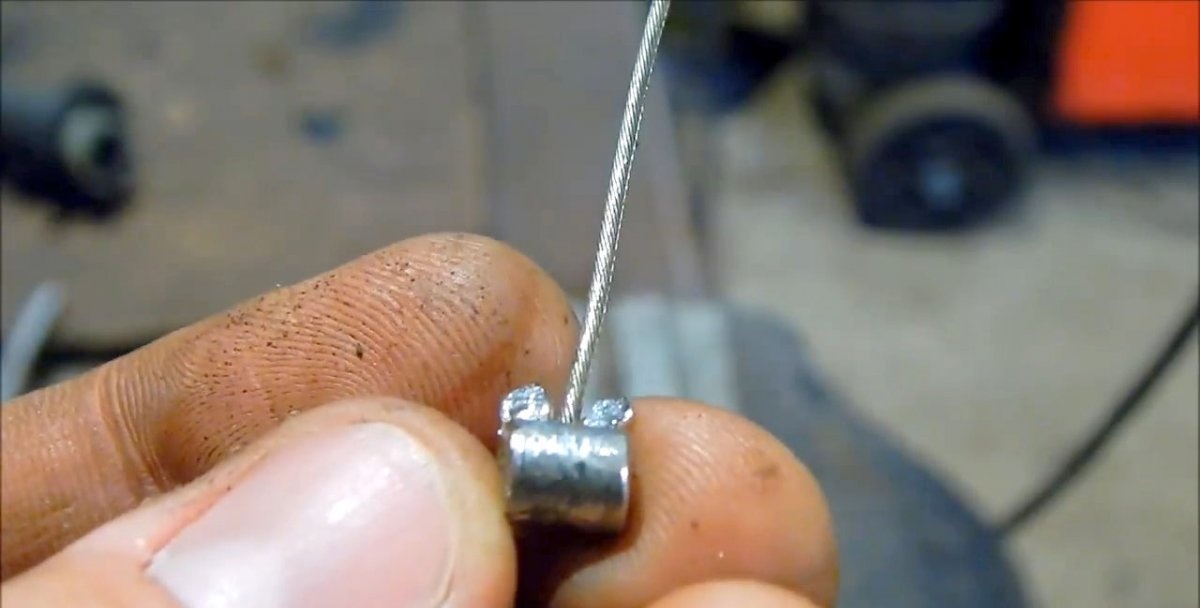
Next, we trim the torn end of the cable evenly. To do this, wrap it with electrical tape (one layer is enough) and make a neat cut with an angle grinder.
Casting a cable boss with your own hands

Casting a cable boss with your own hands

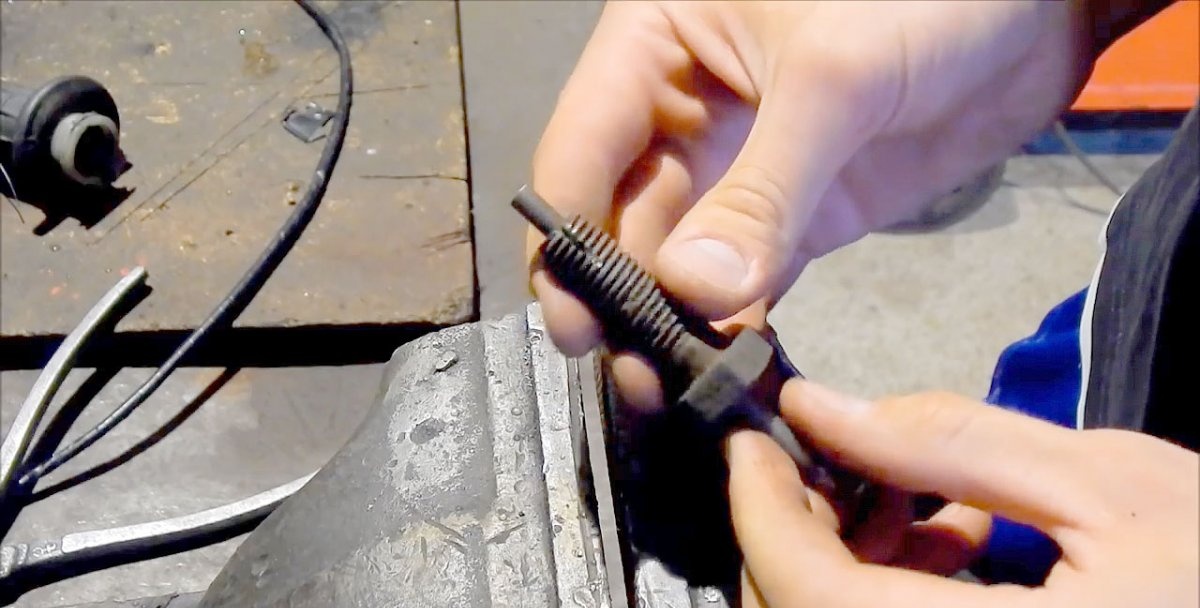
The smooth edge needs to be fluffed up a little. To do this, we clamp it in pliers and bend the cable fibers to the sides with any metal tool. The end of the cable prepared in this way should be no more than 2-3 mm and fit into the bolt hole.
Casting a cable boss with your own hands

Boss casting


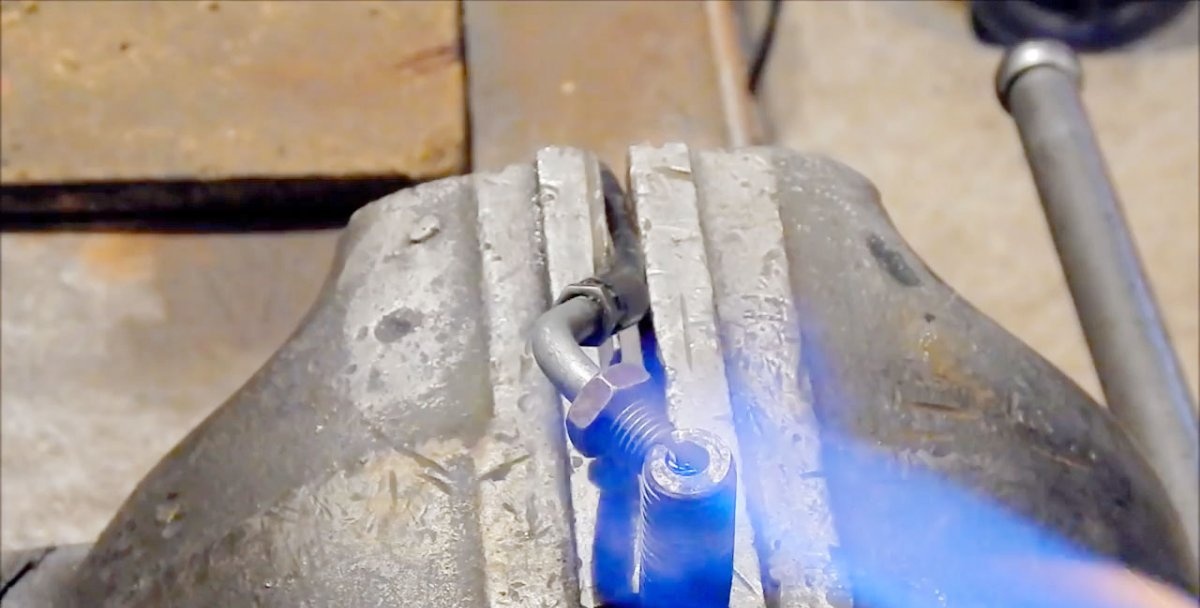
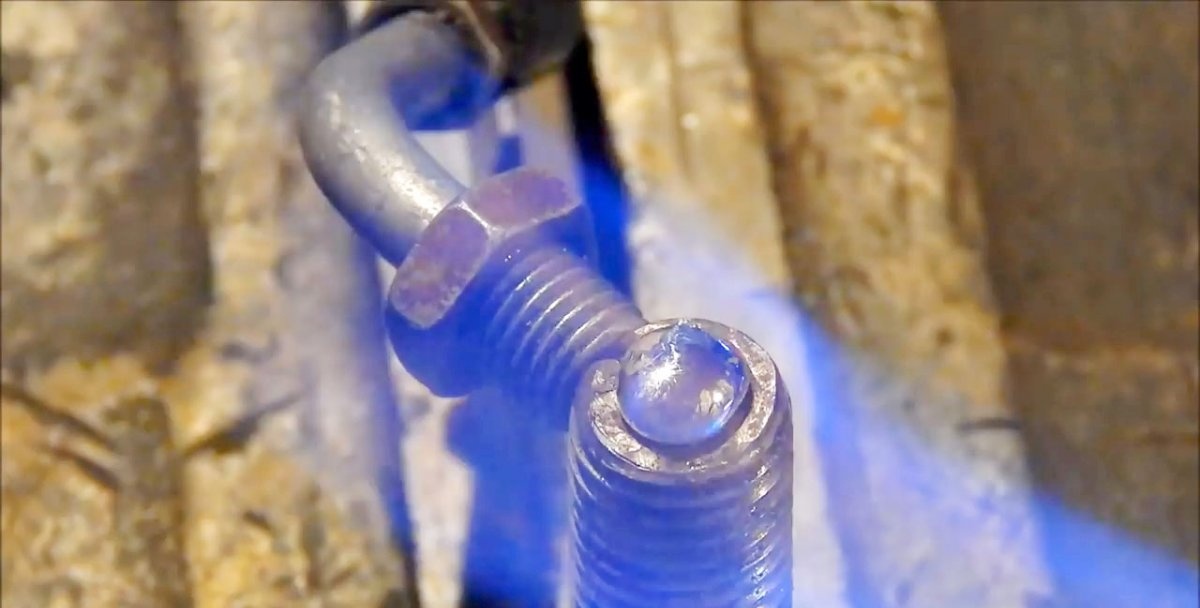
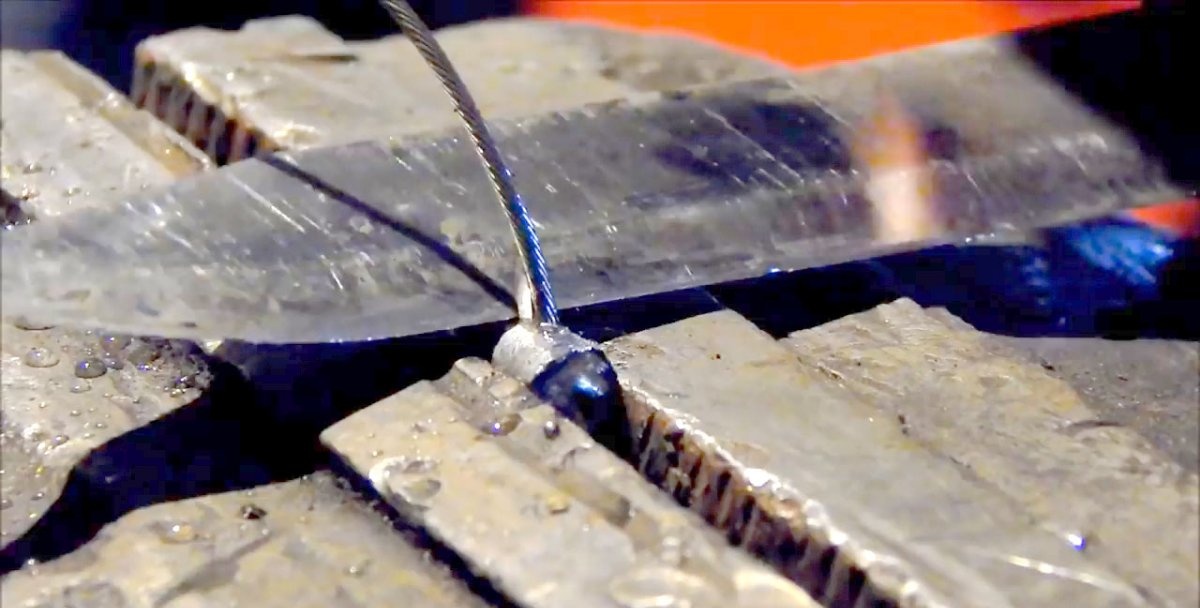
Through the slot we insert the fluffed edge of the cable into an improvised casting mold.
Casting a cable boss with your own hands

Casting a cable boss with your own hands

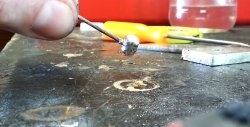
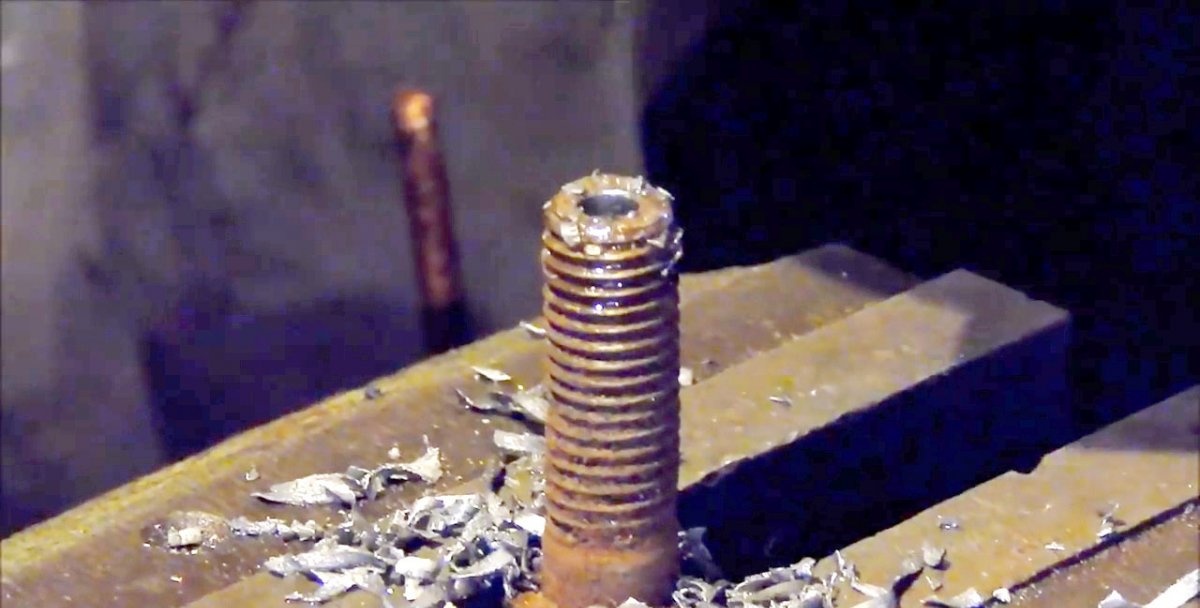
Using a gas torch, melt the tin so that it fills the void inside the bolt.
Casting a cable boss with your own hands

Casting a cable boss with your own hands

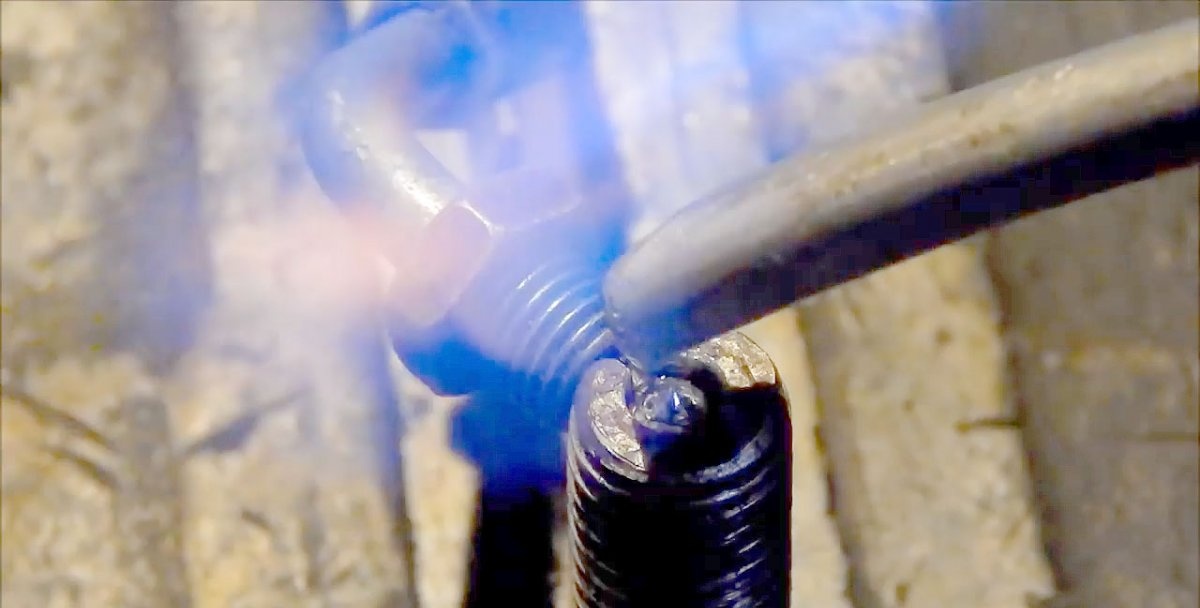
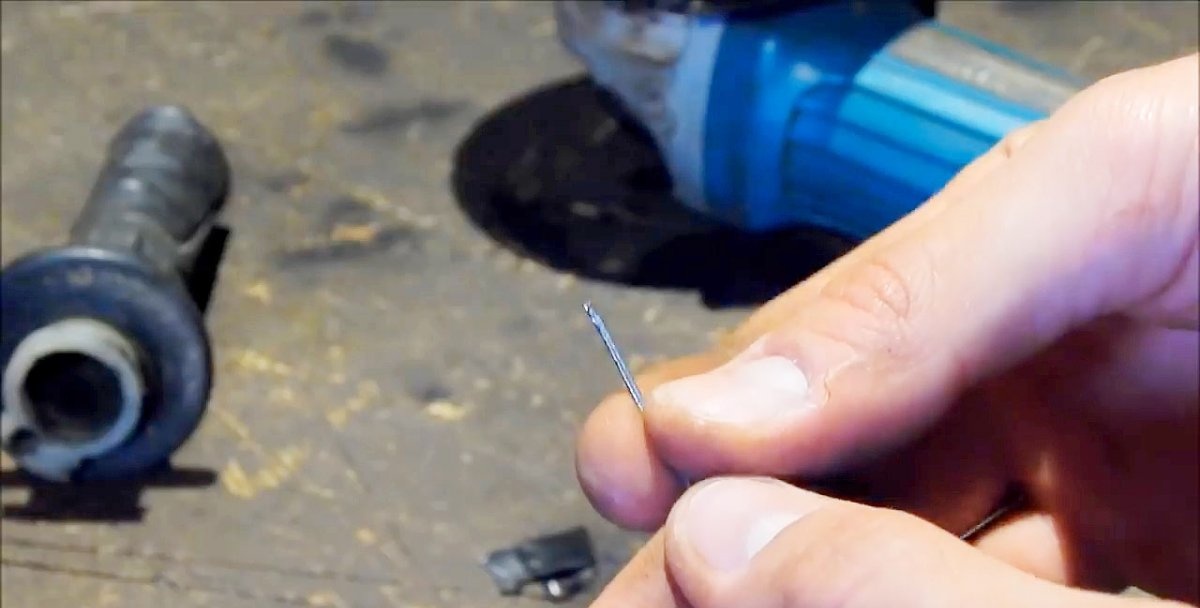
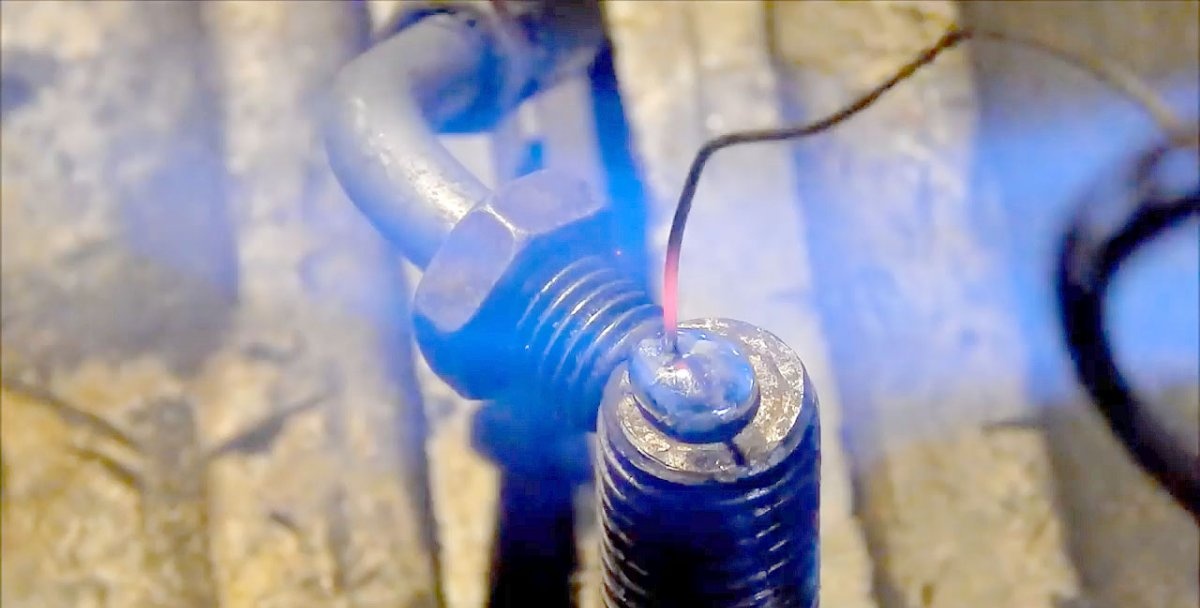
Next, we heat the upper part of the bolt and use a piece of steel wire to check for voids.
Casting a cable boss with your own hands

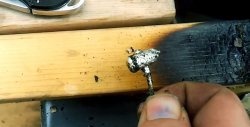
In case of excess melt on top, simply brush it off with a metal object before the tin hardens, after which we allow the entire structure to cool.
Casting a cable boss with your own hands

Casting a cable boss with your own hands

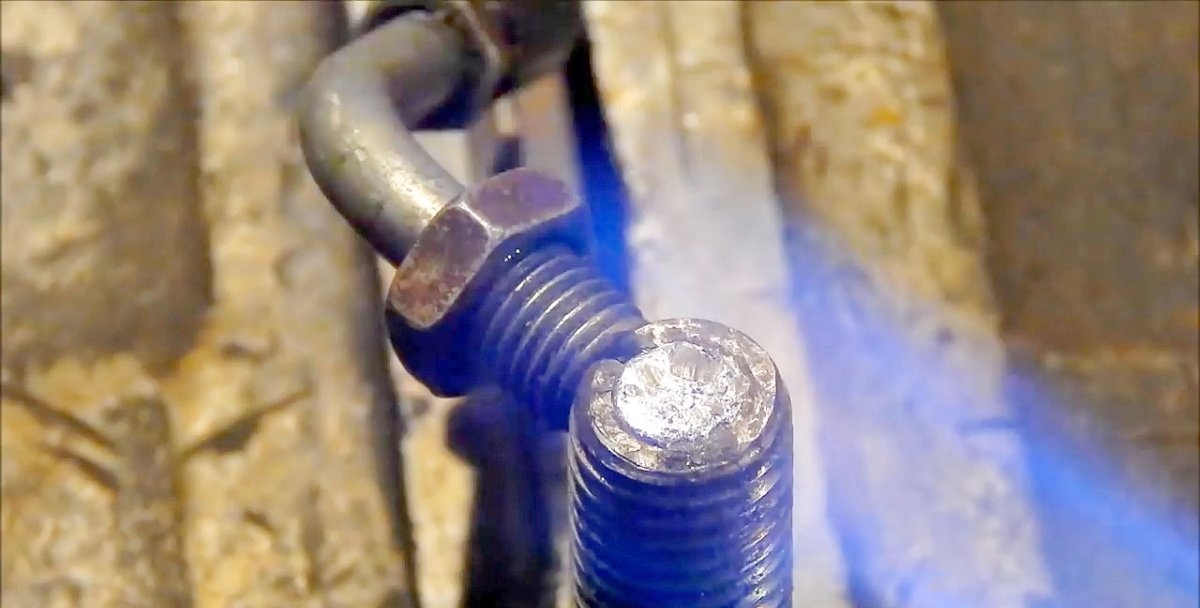
Next, you should reinstall the pin in the vice, pulling it up 1 cm. Gently tapping the head of the bolt, we push it deeper onto the metal rod, which thus pushes out our casting.
Casting a cable boss with your own hands

Casting a cable boss with your own hands

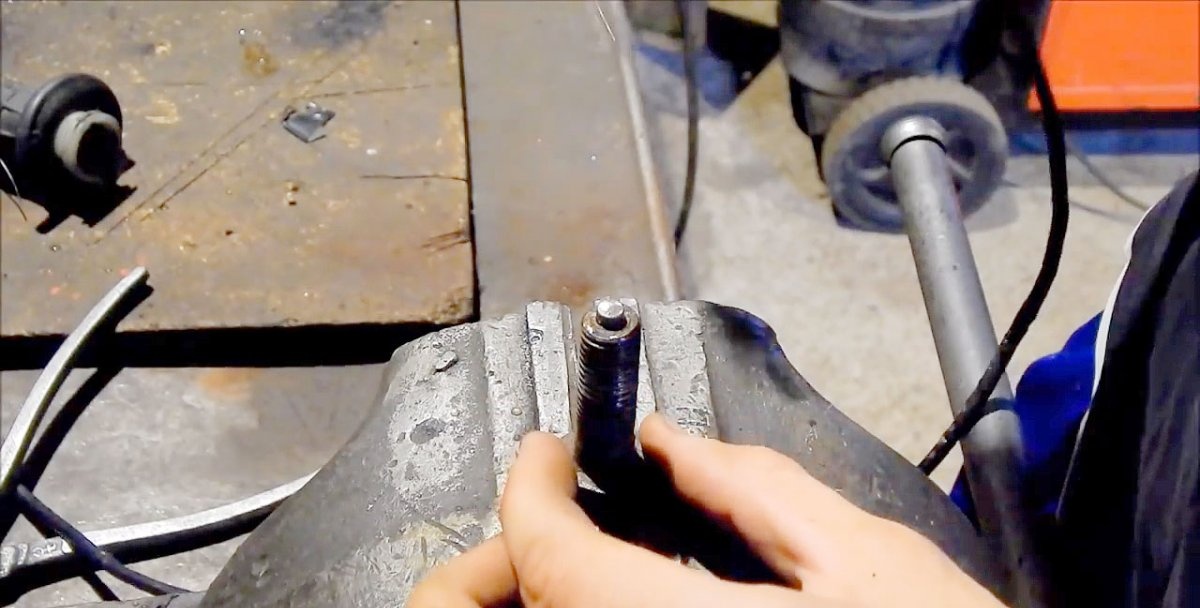
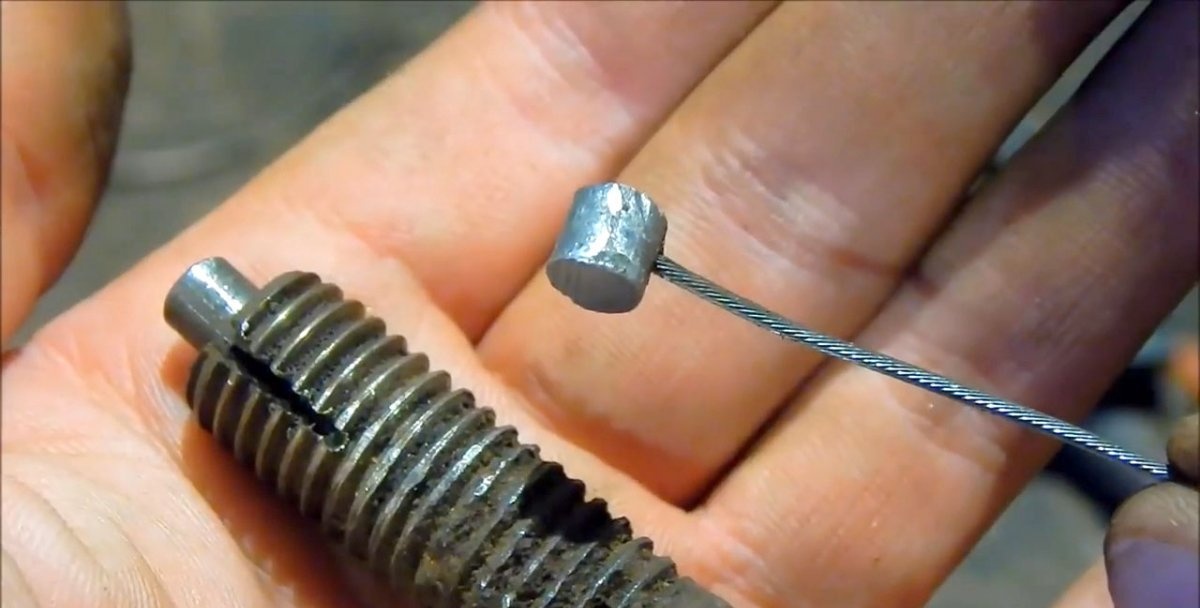
We remove the excess tin (where the slot was) with a knife and lightly process the edges of the boss with a file.
Casting a cable boss with your own hands

After this, you can install the cable on the gas handle by inserting the restored clamp into the seat. Please note that there is no play in the boss - this will have a positive effect on the service life of the restored connection.
Casting a cable boss with your own hands

Safety precautions


Carrying out the above actions requires compliance with a number of safety rules that are provided for working with power tools.When using an open flame of a burner, first make sure that there are no flammable or explosive objects nearby. Also, never neglect personal respiratory protection (respirator or mask) to protect yourself from molten metal fumes.
After the work done, you will have the casting mold, and you can always help your friends if they have the same breakdown. In this case, recovery will take much less time.
Casting a cable boss with your own hands

Watch the video of the process


come back
Comment
  • bowtiesmilelaughingblushsmileyrelaxed relaxedsmirk
    heart_eyeskissing_heartkissing_closed_eyesflushedrelievedsatisfiedgrin
    winkstuck_out_tongue_winking_eyestuck_out_tongue_closed_eyesgrinningkissingstuck_out_tonguesleeping
    worriedfrowninganguishedopen_mouthgrimacingconfusedhushed
    expressionlessunamusedsweat_smilesweatdisappointed_relievedwearypassive
    disappointedconfoundedfearfulcold_sweatperseverecrysob
    joyastonishedscreamtired_faceangryragetriumph
    sleepyyummasksunglassesdizzy_faceimpsmiling_imp
    neutral_faceno_mouthinnocent
5+two=
Comments (19)
  1. Guest Sergey
    #1 Guest Sergey Guests March 25, 2019 11:09
    18
    well, why such ordeals, a bunch of accessories tools when you can take a regular M6 nut, insert the end of the torn cable into it and, with hammer blows, deform the nut so that it clamps the end of the cable inserted into it, I assure you the cable continues to run perfectly
    1. Vyacheslav
      #2 Vyacheslav Guests 25 March 2019 17:18
      2
      remove threads before flattening.
    2. Guest Sergey
      #3 Guest Sergey Guests March 26, 2019 08:57
      13
      You can do it so-so, you can do it well, or you can do it beautifully. So, flattening the nut is so-so, but what’s here is beautiful! Well done guy
    3. gdv1969
      #4 gdv1969 Guests March 26, 2019 10:40
      5
      Look at the diameter of the boss in the throttle grip. What the heck is an M6 nut?!
  2. Guest Alexander
    #5 Guest Alexander Guests March 25, 2019 12:04
    15
    the M5 nut was flattened before and that’s it
  3. Guest Vlad
    #6 Guest Vlad Guests 25 March 2019 14:54
    3
    The cable folds together and is pulled into the hole - it will never pop out
  4. Guest Vlad
    #7 Guest Vlad Guests 25 March 2019 14:58
    3
    Fold the end of the cable in half and tighten it into the countersunk hole. It will never pop out.
  5. disabled person
    #8 disabled person Guests 25 March 2019 21:54
    2
    and at work I used an electric iron with a powerful 150-200 watt
  6. Ali Ushaher
    #9 Ali Ushaher Guests 25 March 2019 23:53
    7
    what is this all for? Just tie the cable in a knot at the end and tighten it with pliers! Cut off the protruding wires with a Dremel. Deforming the M6 ​​nut is not enough - it may slip out, but the knot will never
    1. Guest Mikhail
      #10 Guest Mikhail Guests March 29, 2019 00:18
      5
      the deformed nut holds the cable very securely. but it won’t last long because when working with the lever or throttle, the cable will break near the nut due to constant deformation of the cable during its operation. That's why they came up with a boss that can slide in a round hole
  7. Guest Sergey
    #11 Guest Sergey Guests 26 March 2019 14:28
    3
    Good article! Everything turns out beautifully, not a collective farm!
  8. Guest Sergey
    #12 Guest Sergey Guests 26 March 2019 21:47
    4
    made of tin, this garbage doesn’t last long and you forgot, you can’t solder tin to metal without acid
  9. Guest Mikhail
    #13 Guest Mikhail Guests March 29, 2019 00:12
    3
    A complete freebie. You should also take plasticine instead of tin. Empirically, I came to the conclusion that the boss should be made from a rod of steel or brass of suitable diameter.You drill the diameter of the cable with a drill, then on one side you drill a hole 2-2.5 times larger. drive the cable into the hole from the side of the smaller hole and fluff its end. Next, carefully tin the frayed end of the cable and the hole in the boss. After this, having warmed up the boss and the cable, we partially pull out the cable so that the fluffed part of it moves into the drilled part of the boss. grind off the excess
    1. Guest Gosh
      #14 Guest Gosh Guests March 29, 2019 10:16
      0
      ....at the end it is better not to solder but to carefully weld with electric welding the place where the tip of the cable looks out of the hole in the boss (a piece of rod)
  10. Guest Vlad
    #15 Guest Vlad Guests March 29, 2019 09:33
    4
    Great!!! nuts and knots are complete nonsense; only restoration like this gives full function, especially since there is nothing complicated

Handicraft techniques | Page 40 | Do it yourself

Rooster decoration | Do it yourself

8 lifehacks for shoes

Sewing for Beginners | Page 4 | Do it yourself

«Do it yourself - with your own hands» - a site of interesting homemade products made from scrap materials and items at home. Step-by-step master classes with photos and descriptions, technologies, life hacks - everything a real master or just a craftsman needs for needlework. Crafts of any complexity, a large selection of directions and ideas for creativity.

We recommend reading

Washing machine error codes