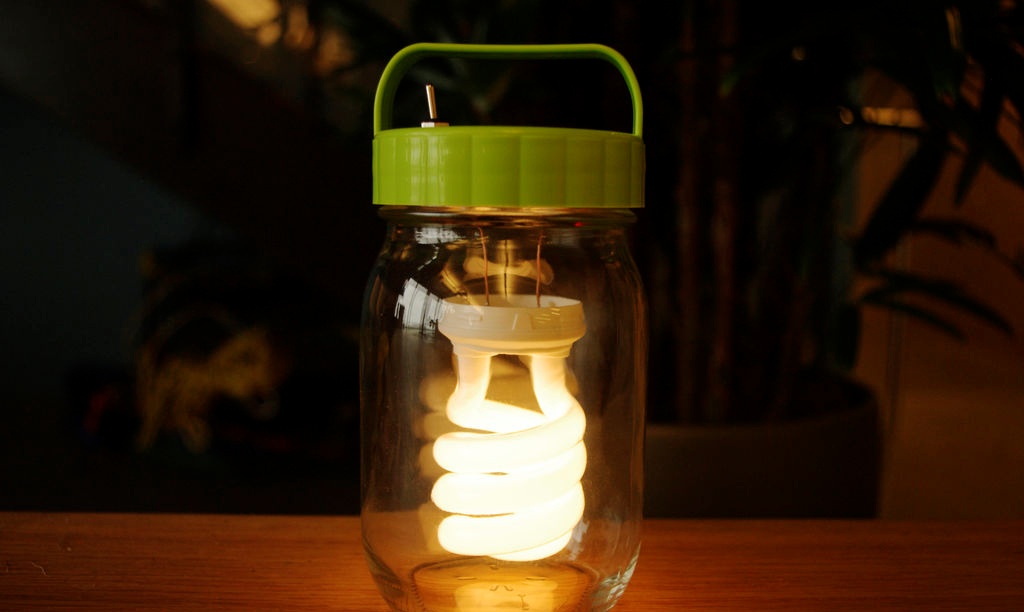
Inspired by the look of traditional gas lanterns with a fluctuating flame, I decided to implement my idea in the form of a jar in which a lit light bulb swings (as if floating).

Below I provide a step-by-step description of the work I completed.
We select the necessary components
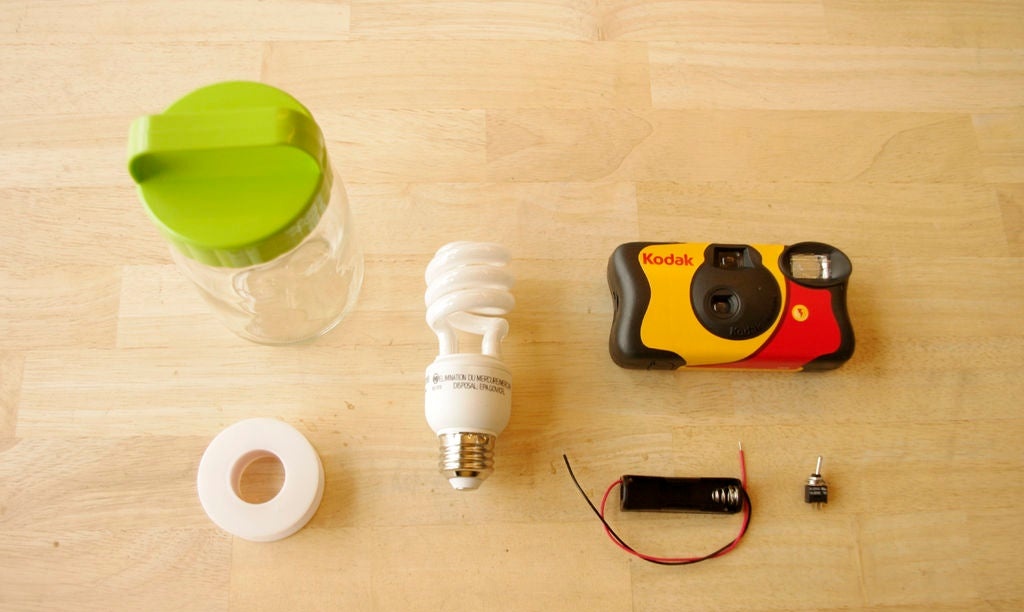
We will need:
- jar;
- energy-saving gas-discharge lamp with a spiral-shaped tube;
- disposable film camera with built-in flash;
- AA battery holder;
- toggle switch (miniature switch);
- copper enamel wire (I used a wire with a diameter of about 1 mm).
All listed components can be purchased on the trading platform AliExpress.
Making a flashlight in a jar
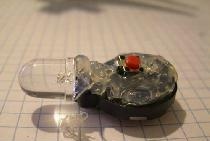
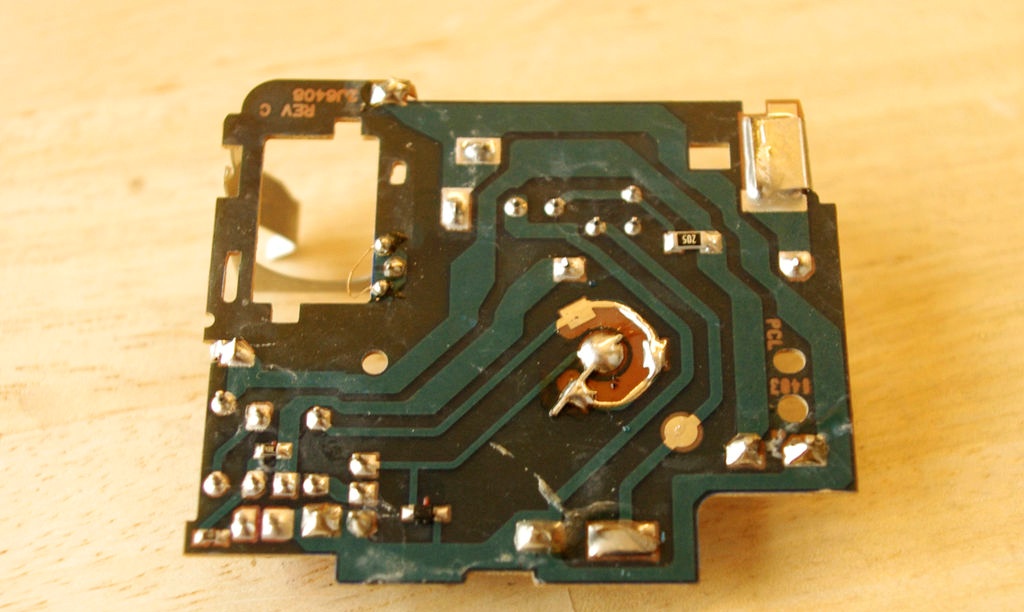
Use a thin screwdriver to open the camera housing.Be careful with a large capacitor. It can retain an electrical charge.
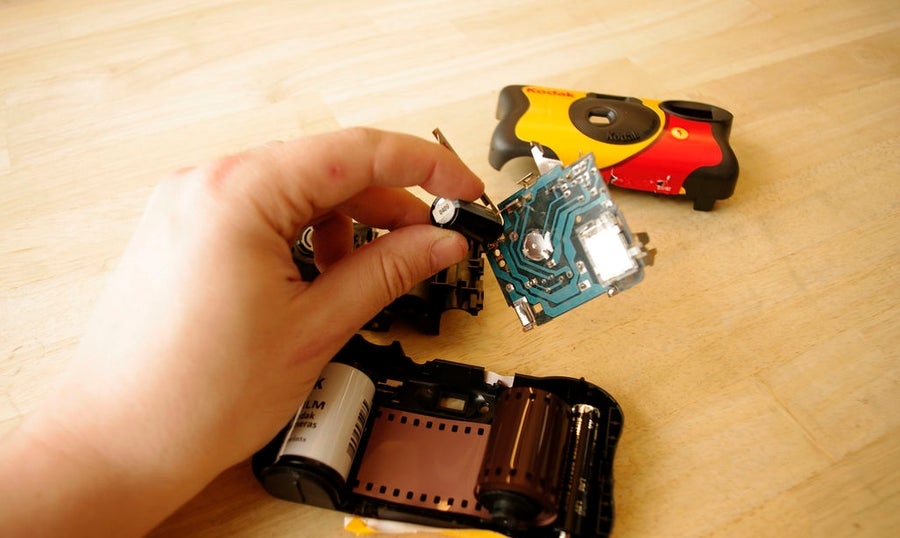
Remove the charge from the capacitor by shorting its terminals with a screwdriver with an insulating handle. After this, separate it from the board by cutting off the leads with pliers. Also, bite off the flash lamp from the board.

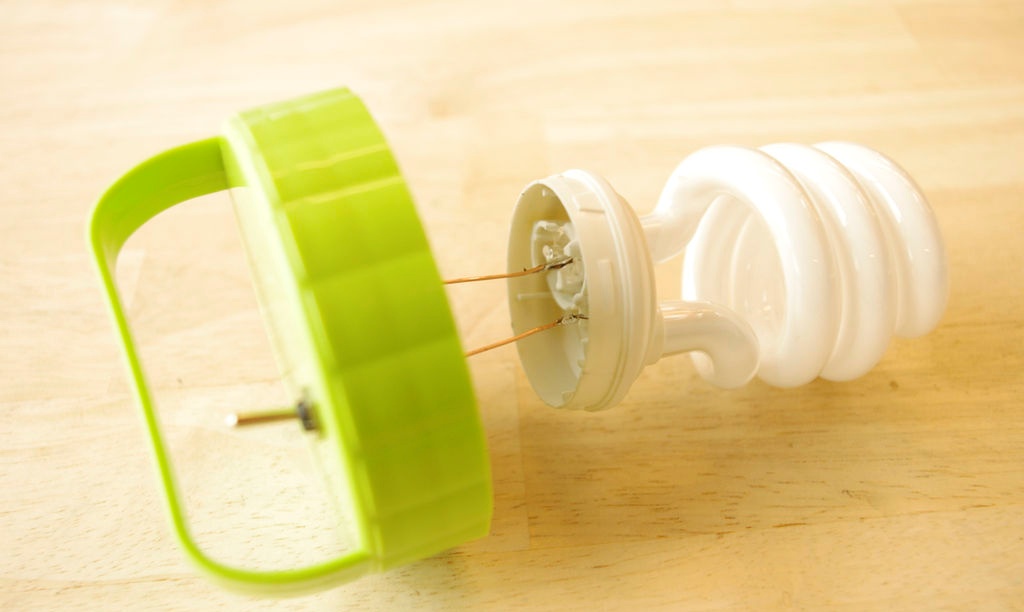
Let's look at energy saving. Using wire cutters, make a hole in the plastic lamp housing. By inserting a screwdriver into the hole, carefully separate the body from the glass tube.
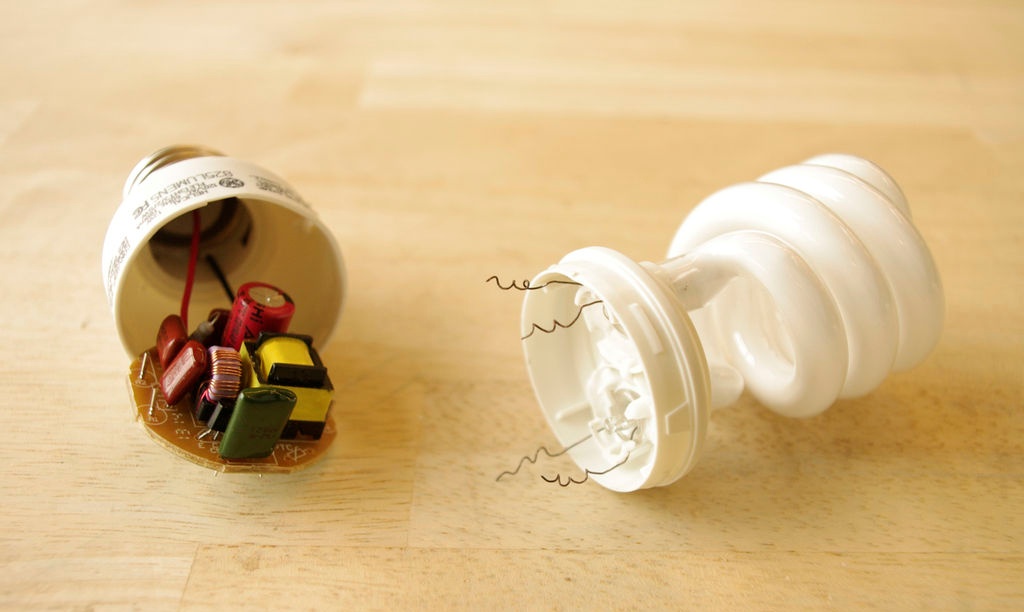
Disconnect the tube wires from the terminals on the board in the lamp base.
We connect the switch contacts. Remove the latch on the flash charging switch. Solder the switch contacts together.
We prepare the tube of the energy-saving lamp. Scrape the varnish off the tube wires with a razor blade or sharp knife. Twist them in pairs and solder them with tin solder.

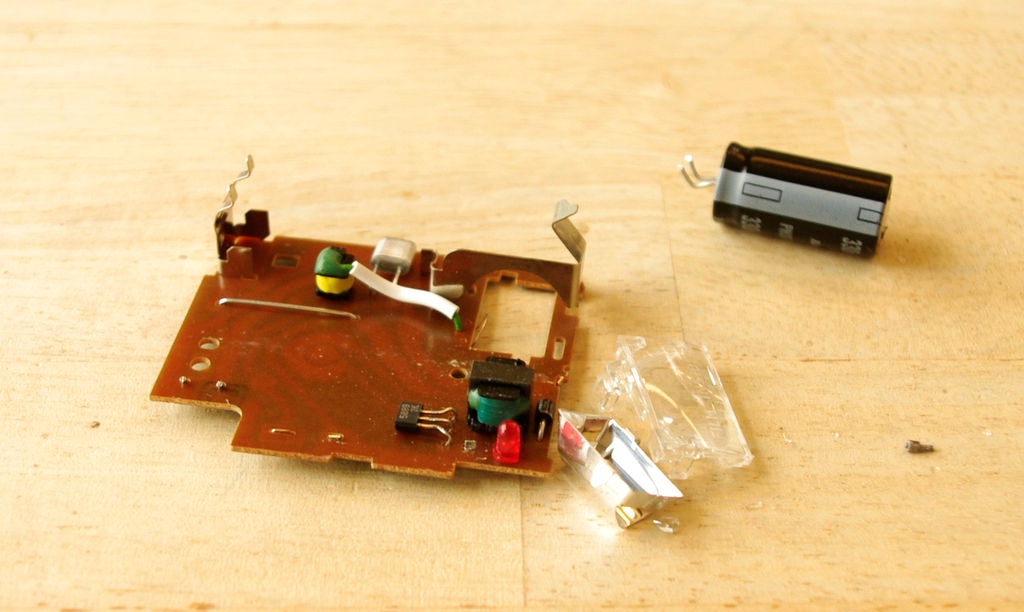
We remove unnecessary details. Remove the battery mounting terminals from the camera board, remembering (or better yet, sketching) which contacts on the board they were attached to, as this will be needed in the future.
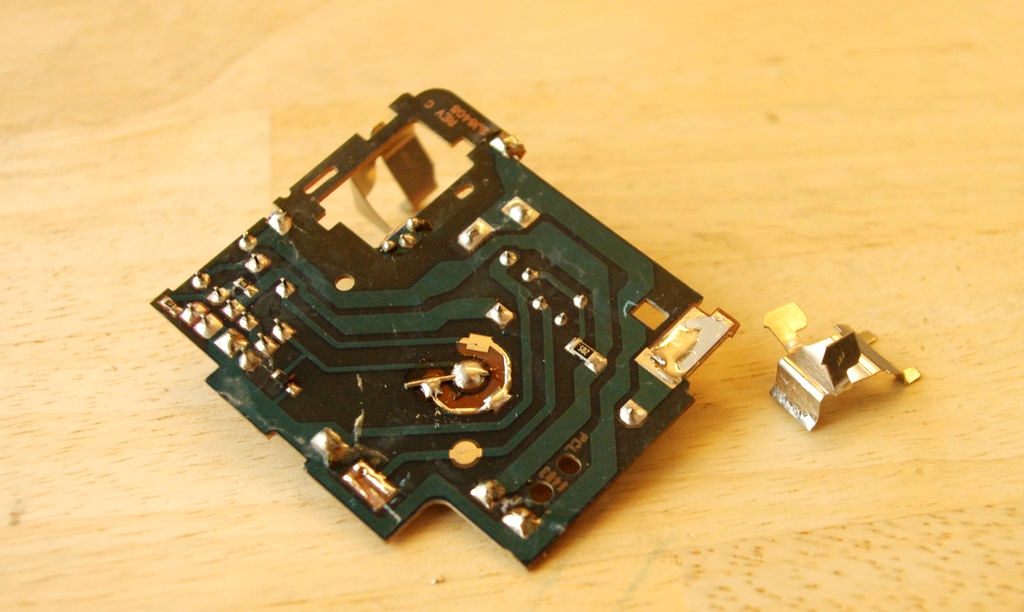
I also removed the wire connecting the pulse transformer to the flash lamp.
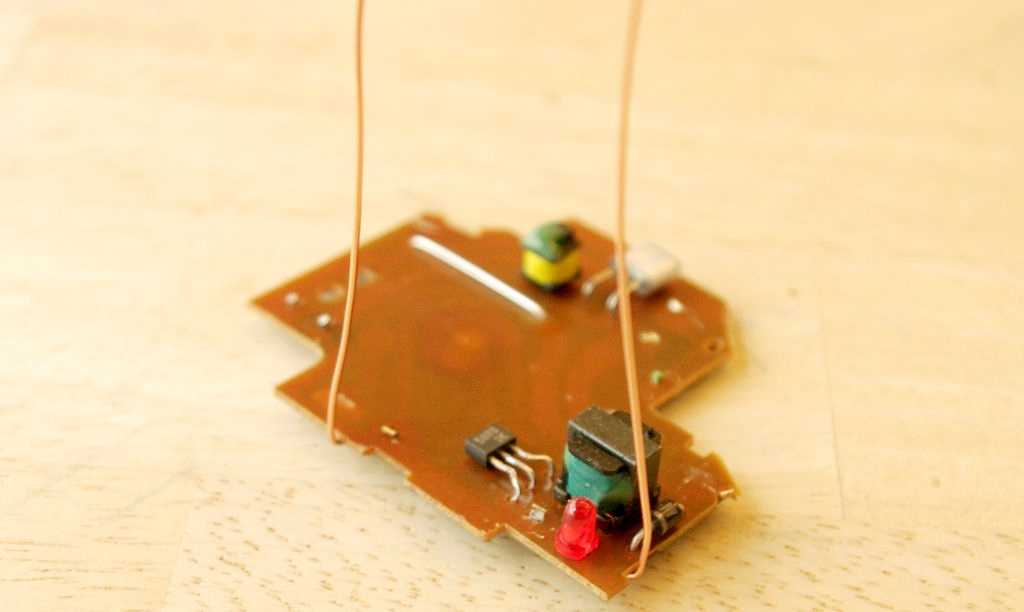
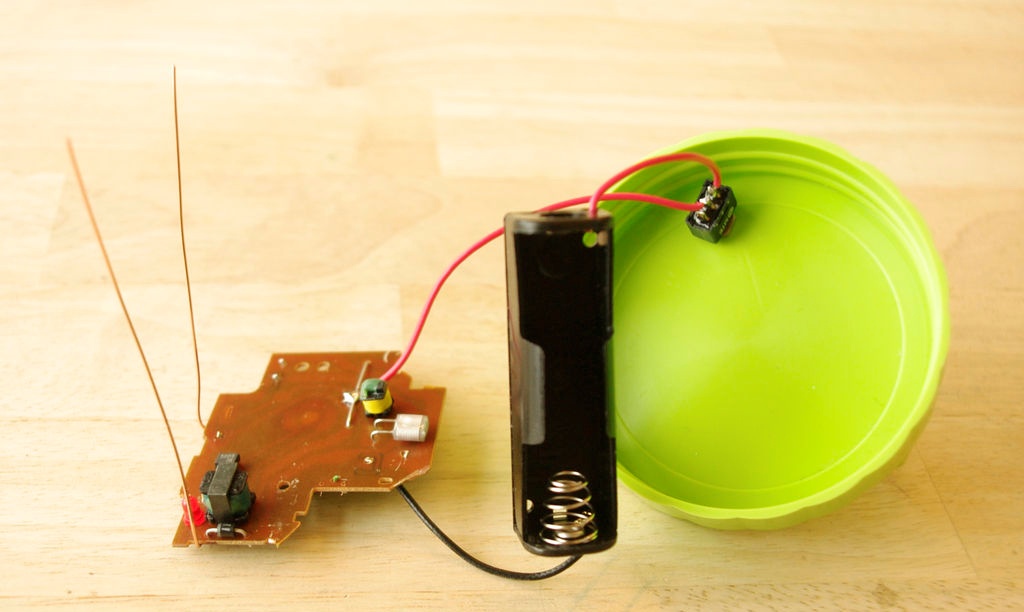
Cut off the circuit board. Trim the corners of the board along with the unused contact tracks so that the board fits into the lid of our jar.
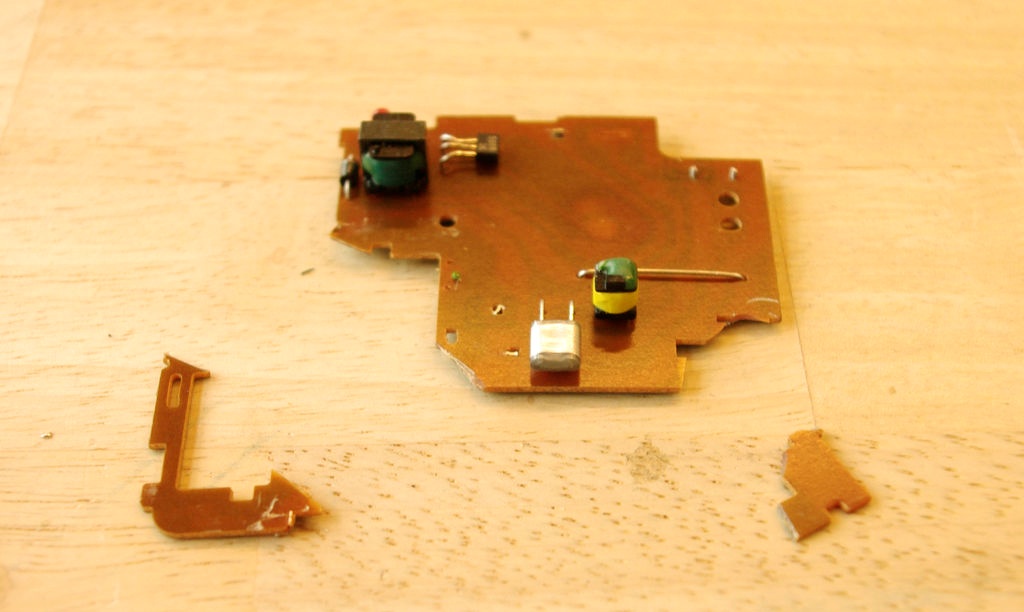
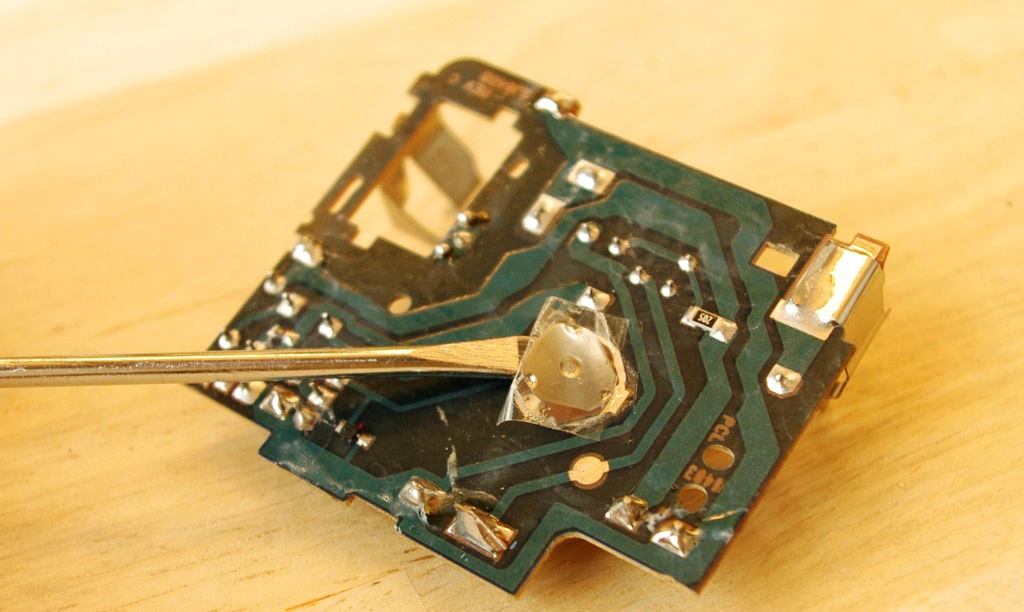
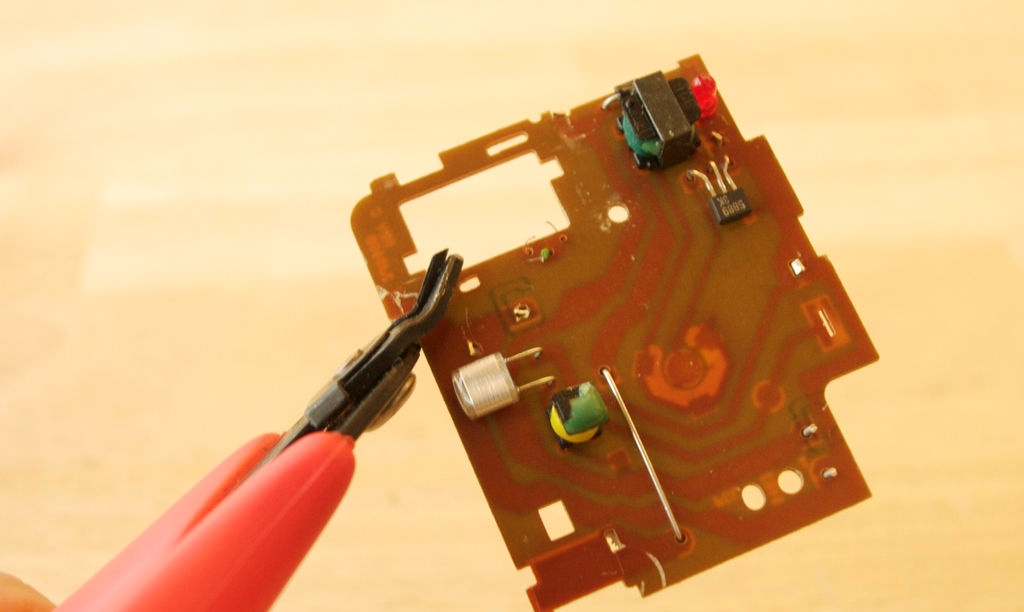
We prepare the wires. Take two pieces of our millimeter wire, each 3 inches long. Using a sharp knife or razor, scrape off one-half inch of insulating layer (varnish or plastic) from each end of both wires. It's time to connect our wires to the board, which will serve as a power source for the lamp.
Solder one of the wires to the contact connected to the minus. The second wire must be soldered to the terminal of the pulse transformer connected to the diode.

If you are at a loss, do the following.Using two wires with alligator clips, connect the battery or accumulator to the board. Do not forget that after this the board is under voltage (the inverter converts the battery voltage into high-voltage pulses that can cause a noticeable electric shock). Connect the third wire to one of the lamp terminals with ground. Connect the fourth one to the second terminal of the lamp, and with its second end briefly touch one by one the contact pads on the board. If the lamp lights up, you have found the correct connection location.
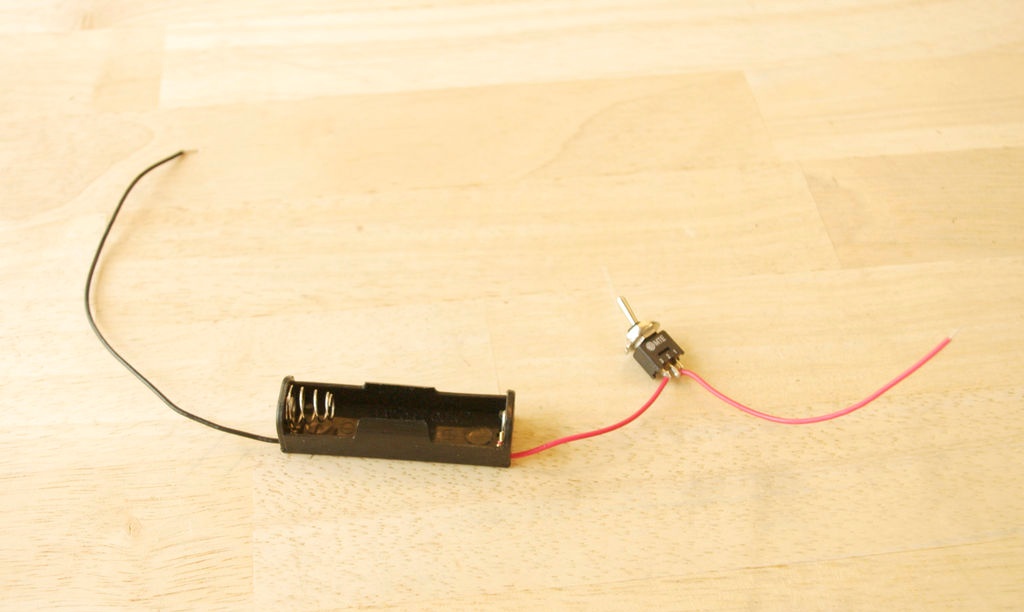
We connect the toggle switch. Cut the red battery holder wire in the middle. Solder the cut ends to the center terminals of the toggle switch. That is, the contacts of the toggle switch must be connected against the red wire.
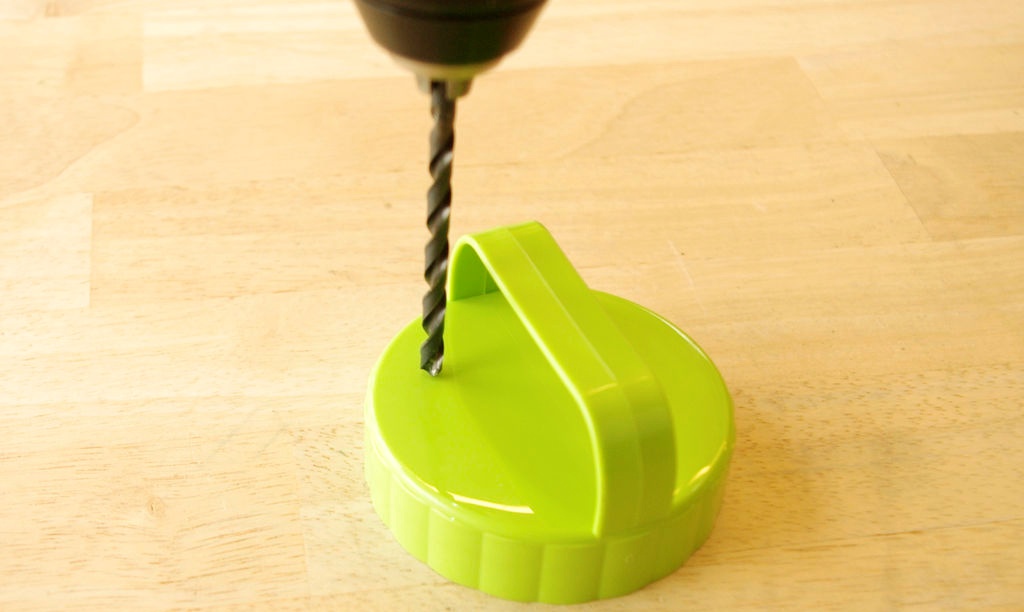
Take a jar with a lid and drill the lid. Closer to the edge of the cover, drill a hole of such a diameter that the threaded part of the toggle switch fits into it with a minimum gap.
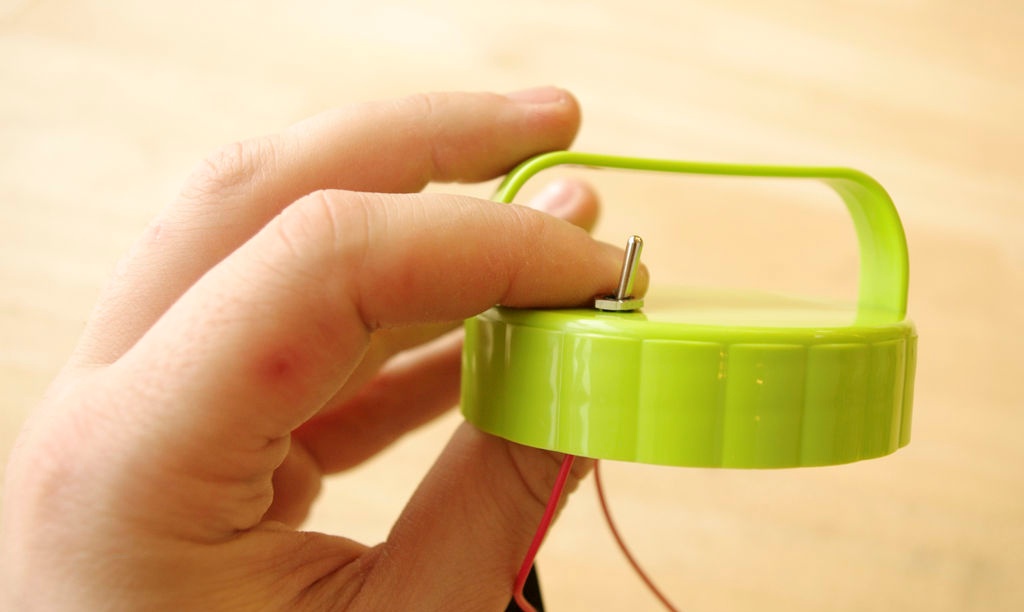
Insert the toggle switch into the hole and secure it from the outside with the fastening nut.
We connect the power circuit. Solder the red wire coming from the toggle switch installed in the lid to the board contact that was connected to the battery positive. Connect the black wire from the battery holder to ground.
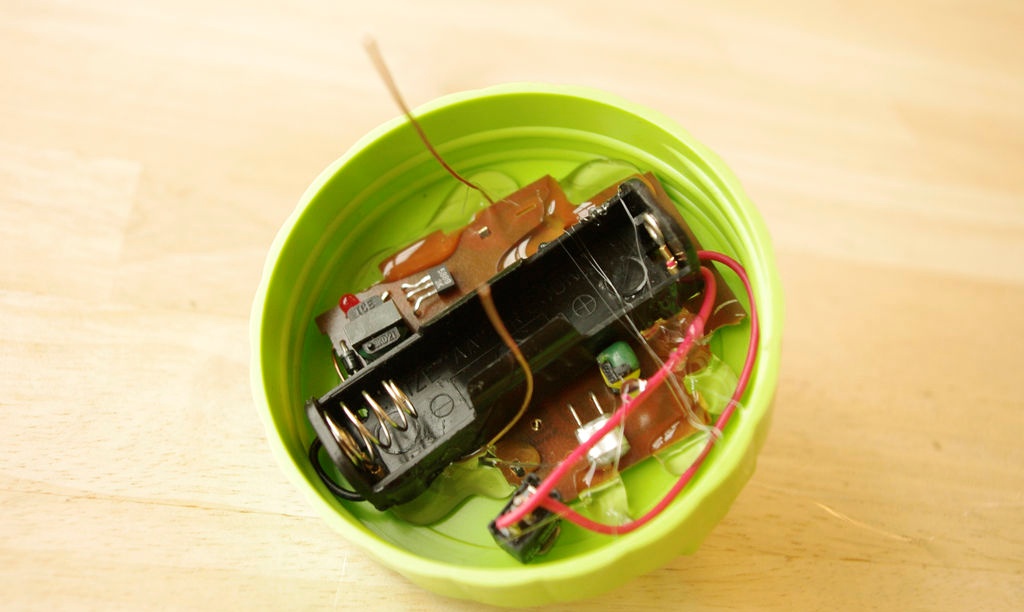
Fix the board with hot glue. Glue the circuit board and battery holder to the inside of the cover. Try to orient the board in the middle of the cover. There is no need to spare glue, but you should avoid getting it on the threaded part of the lid.
Solder the wires coming from the board to the lamp terminals.
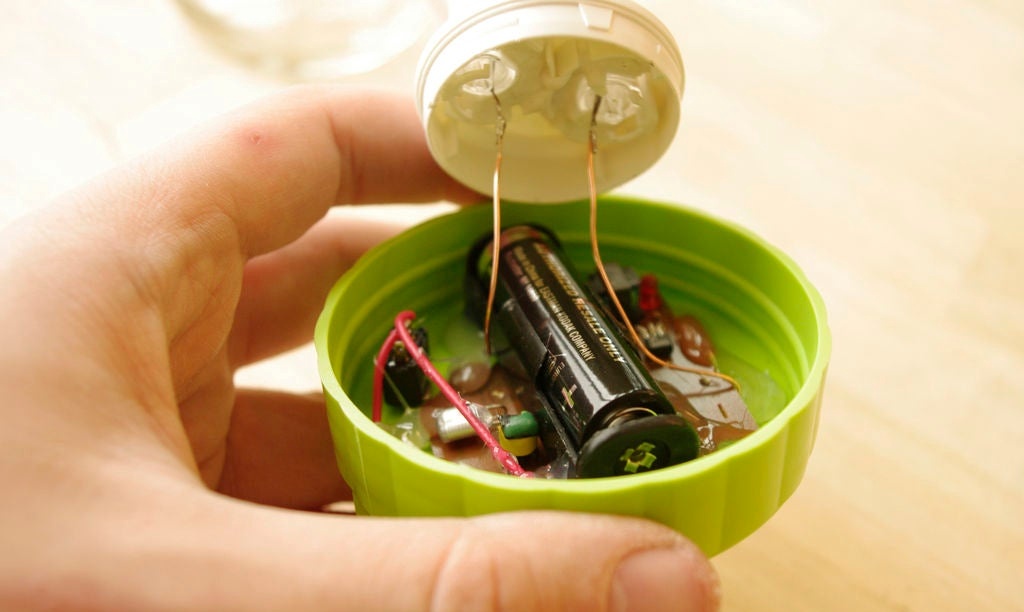
Insert a battery or AA battery into the battery holder.
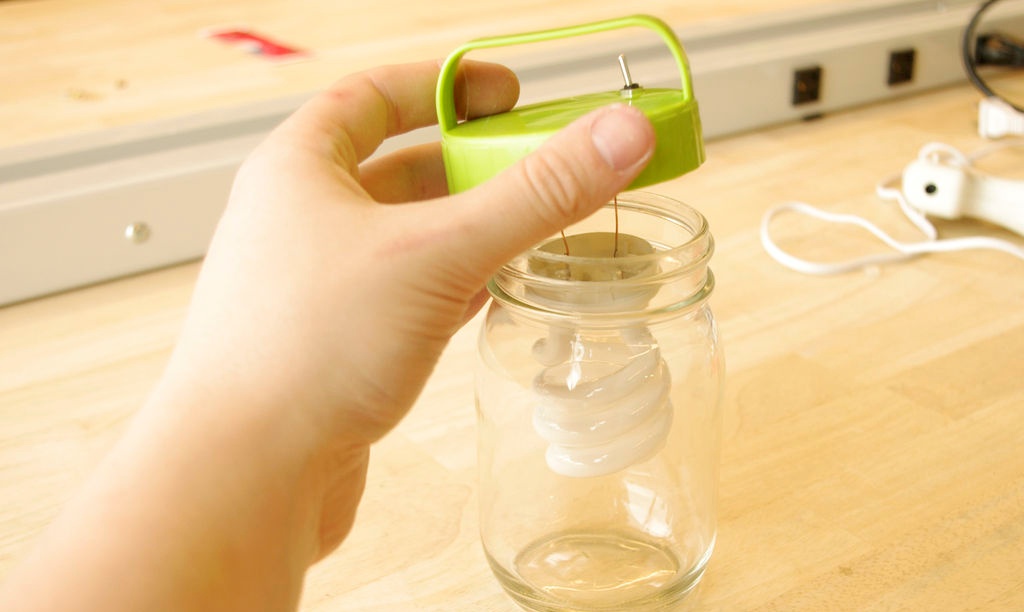
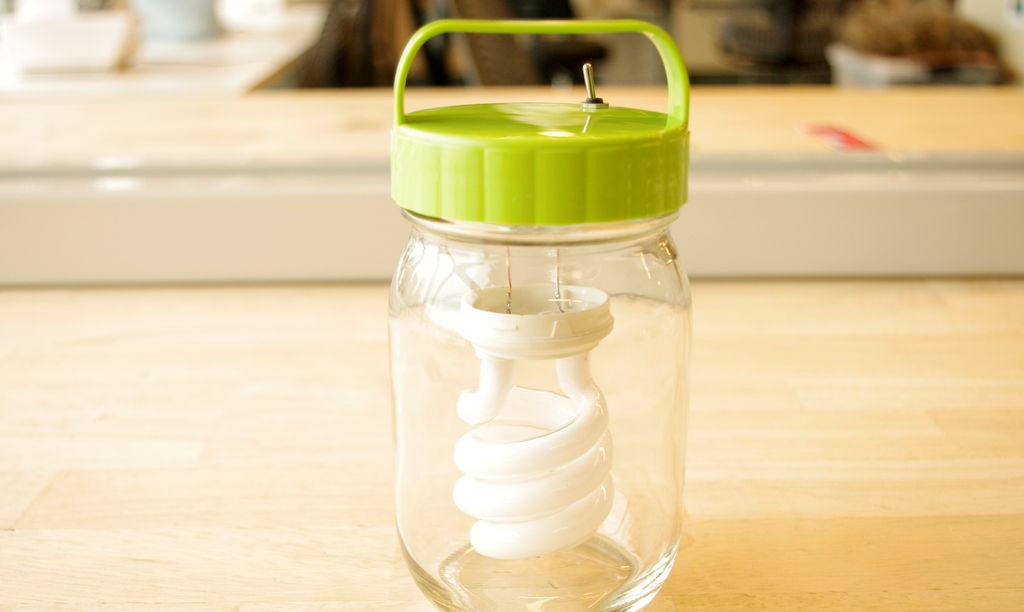
Screw on the lid of the jar.
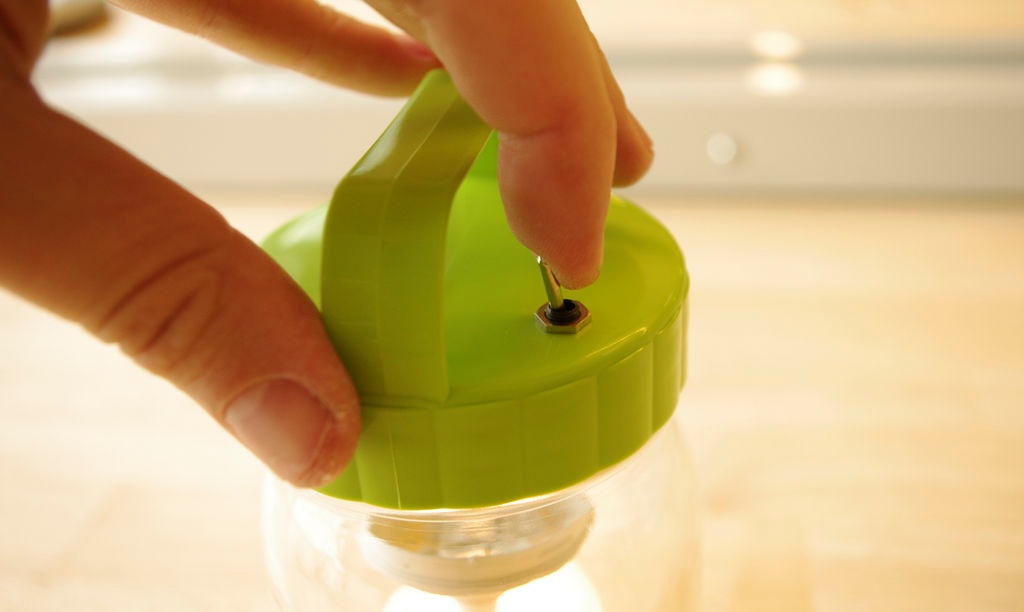
Move the toggle switch to the “on” position.
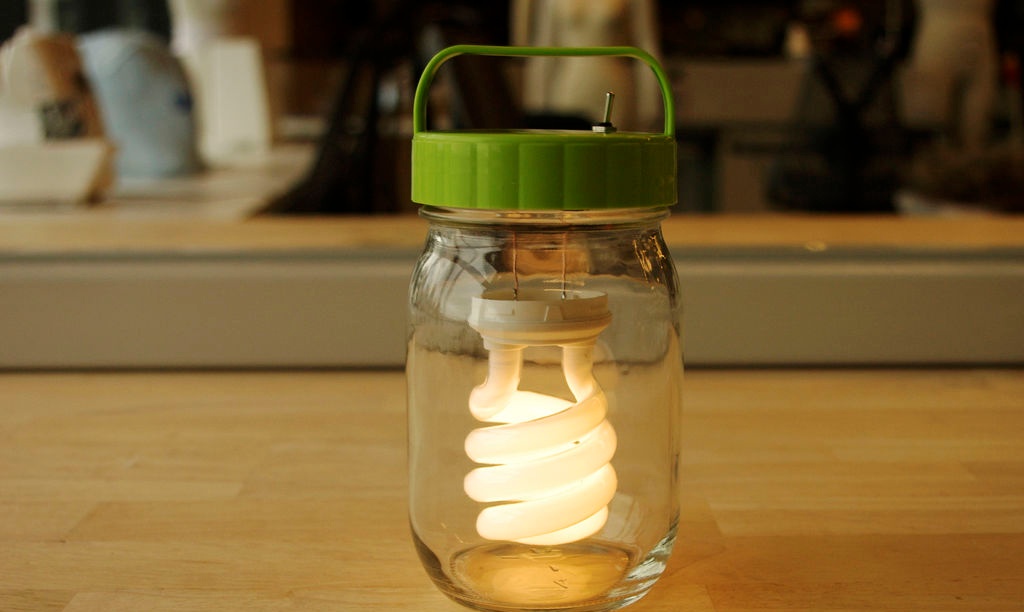
Enjoy using your new flashlight.
Original article in English