Do it yourself
Life hacks, master classes, useful tips, recipes.
home » Electronics » A simple LED flasher based on an optocoupler
Optocoupler PC817 is a very common galvanic isolation element. It is available in almost every switching power supply, be it a phone charger or a computer unit. So it won't be difficult to get it. Based on this transistor optocoupler, you can assemble a very simple LED flasher with a stroboscopic effect.
LED flasher on optocoupler

Will need


  • 3.7V lithium battery (fully charged 4.2V).
  • Light-emitting diode any color.
  • Two resistors of 1 kOhm and 5.6 kOhm.
  • Transistor optocoupler PC817.
  • Capacitor 220 uF 10 V.

Making a flasher using an optocoupler


First, let's take a look at the optocoupler itself. It consists of two elements united by optical communication. That is, if you apply voltage to Light-emitting diode, the transistor inside will open.
LED flasher on optocoupler

Note that the dot represents the first contact for reference. The element itself has 4 contacts. 1, 2 - this is the input for connecting internal LED. 3, 4 - output from the transistor.

Simple flasher circuit


On the basis of this simple radio element, a simple multivibrator is built - a generator of repeating pulses.
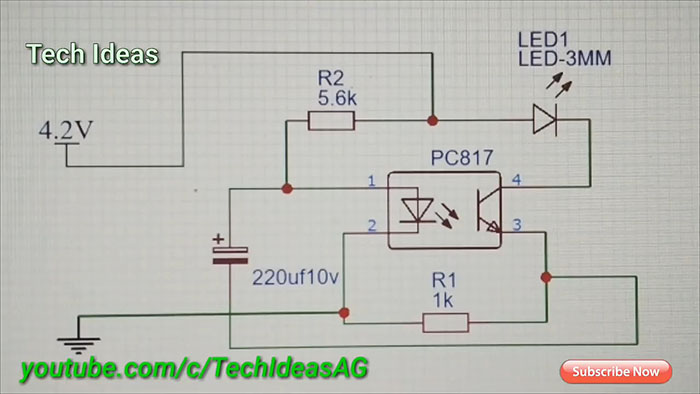
LED flasher on optocoupler

The circuit does not require adjustment and, with fully functional elements, starts working immediately.
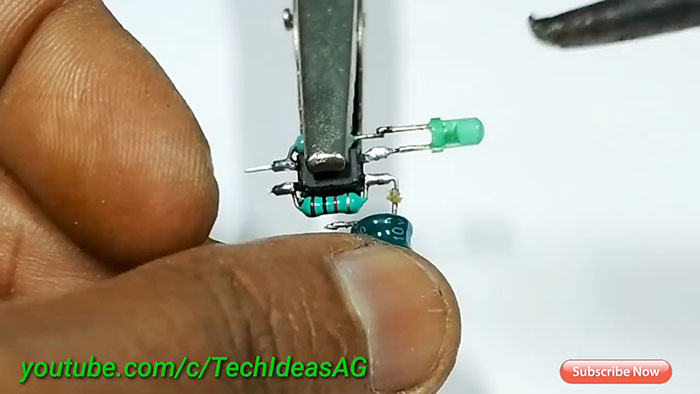
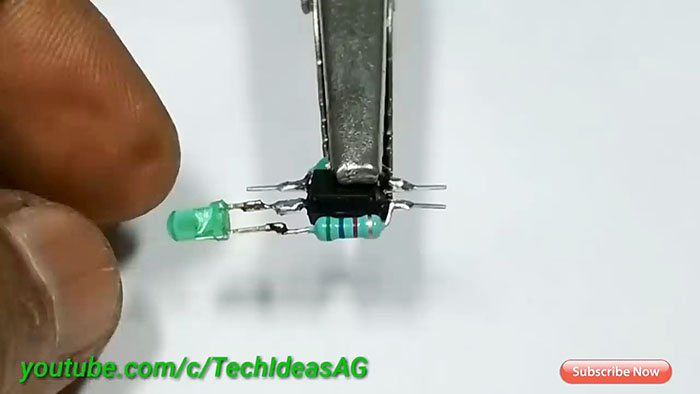
Assembly is carried out by hanging installation without a board.We clamp the optocoupler in the clamp and solder two resistors according to the diagram.
LED flasher on optocoupler

Next we solder Light-emitting diode. Pay attention to the polarity of its inclusion.
LED flasher on optocoupler

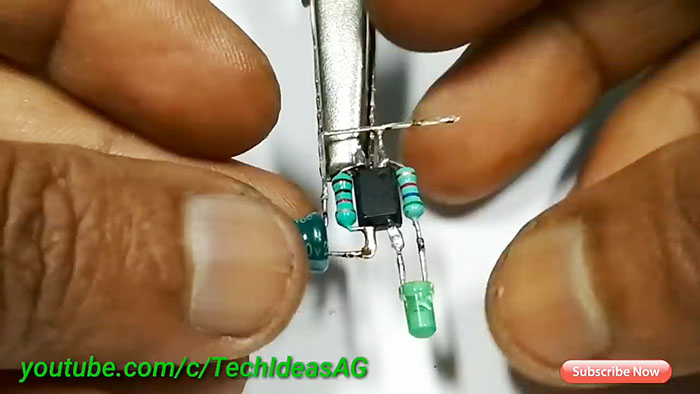
Next we solder the capacitor.
LED flasher on optocoupler

The connecting tracks are made from tinned wire.
LED flasher on optocoupler

We bring the scheme to the end.

Examination


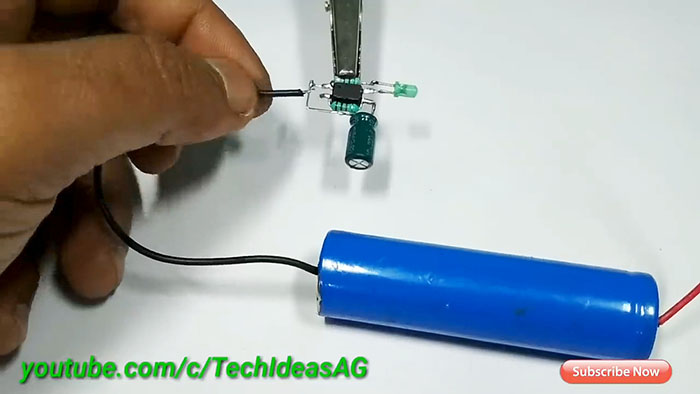
Solder the battery contacts.
LED flasher on optocoupler

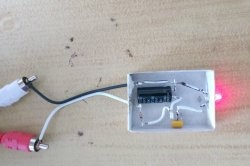
The flasher starts flashing. It's simple.
LED flasher on optocoupler

The blinking frequency can be adjusted by the capacitor capacitance.
If suddenly something does not start, check the polarity of all elements except resistors.
I think you can easily find a use for this simple scheme.

Watch the video


You can evaluate the operation of the flasher in the video.
come back
Comment
  • bowtiesmilelaughingblushsmileyrelaxed relaxedsmirk
    heart_eyeskissing_heartkissing_closed_eyesflushedrelievedsatisfiedgrin
    winkstuck_out_tongue_winking_eyestuck_out_tongue_closed_eyesgrinningkissingstuck_out_tonguesleeping
    worriedfrowninganguishedopen_mouthgrimacingconfusedhushed
    expressionlessunamusedsweat_smilesweatdisappointed_relievedwearypassive
    disappointedconfoundedfearfulcold_sweatperseverecrysob
    joyastonishedscreamtired_faceangryragetriumph
    sleepyyummasksunglassesdizzy_faceimpsmiling_imp
    neutral_faceno_mouthinnocent
4 minus one =
Comments (6)
  1. Guest Andrey
    #1 Guest Andrey Guests 5 September 2019 19:54
    1
    The capacitor is incorrectly indicated on the circuit diagram. The correct value would be 220mf10v.
    1. Guest Andrey
      #2 Guest Andrey Guests 7 September 2019 14:51
      2
      In the diagram everything is indicated correctly, the letter u stands for micro, and m for miles.
      1. guest
        #3 guest Guests October 25, 2019 12:17
        0
        There should not be a letter u, but a letter mu. I'm sorry, but I can't write it quickly
  2. Guest Yuri
    #4 Guest Yuri Guests 12 September 2019 19:18
    1
    Why fence a garden? There are ready-made flashing ones LEDs.
  3. Guest Andrey
    #5 Guest Andrey Guests 11 October 2019 14:59
    4
    Instead of an optocoupler, you can use a regular NPN transistor; why bother and spoil more expensive components.
    1. Sergey K
      #6 Sergey K Visitors 19 October 2019 19:08
      2
      This circuit, if you install a block, can be used to check the serviceability of optocouplers.

Cooking | Page 30 | Do it yourself

Savings book for newlyweds | Do it yourself

Basket made from a jar of sour cream and satin ribbons | Do it yourself

5 sure and quick ways to get rid of a hangover

«Do it yourself - with your own hands» - a site of interesting homemade products made from scrap materials and items at home. Step-by-step master classes with photos and descriptions, technologies, life hacks - everything a real master or just a craftsman needs for needlework. Crafts of any complexity, a large selection of directions and ideas for creativity.

We recommend reading

Washing machine error codes