Many lovers of active recreation, as well as various survivalists, with the onset of cold weather, are not going to give up hiking, walks in the forest, and similar activities. In such cases, people choose equipment and clothing especially carefully. And yet, despite the enhanced insulation, there are times when your hands and fingers begin to freeze. For example, you need to perform any actions that require removing gloves or mittens.
Restoring the previous, comfortable temperature of the palms and fingers is then extremely difficult, difficult and time-consuming. Of course, you can always make a fire and warm yourself up. But it will not be easy to start a fire with stiff and unruly fingers. Therefore, in today’s master class, I propose to build a device that can greatly help out in such a situation. It is ignited with one strike of a lighter, match, or even flint! This is the so-called pocket stove, or hand warmer; as anyone pleases. You can assemble this thing at home in literally half an hour, with a minimal set of tools that everyone has on their household.And the material itself for manufacturing is the simplest and most affordable.
Will need
Material:
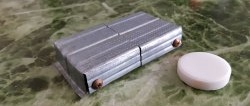
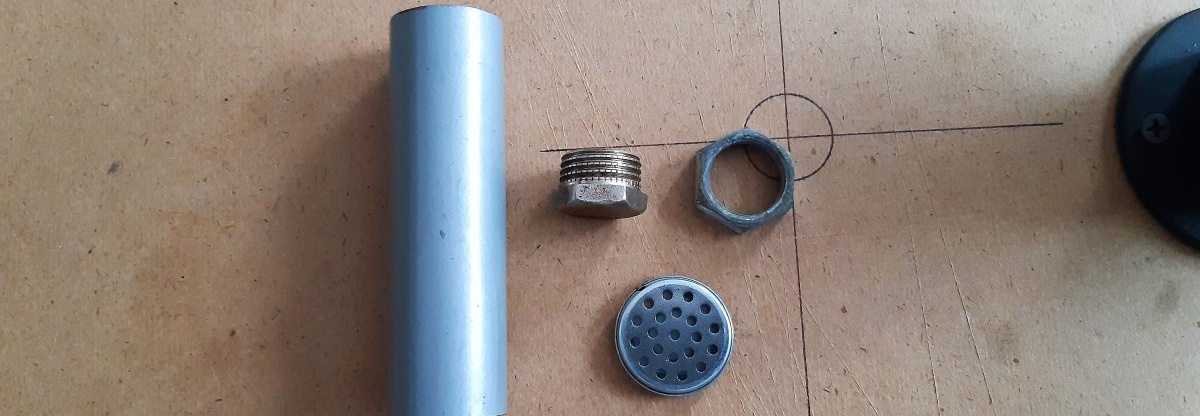
- A piece of thin-walled (no more than a millimeter!) metal tube, 100 mm long and 25 mm in diameter.
- Plumbing lock nut 15 mm.
- Plumbing plug 15 mm, with external thread.
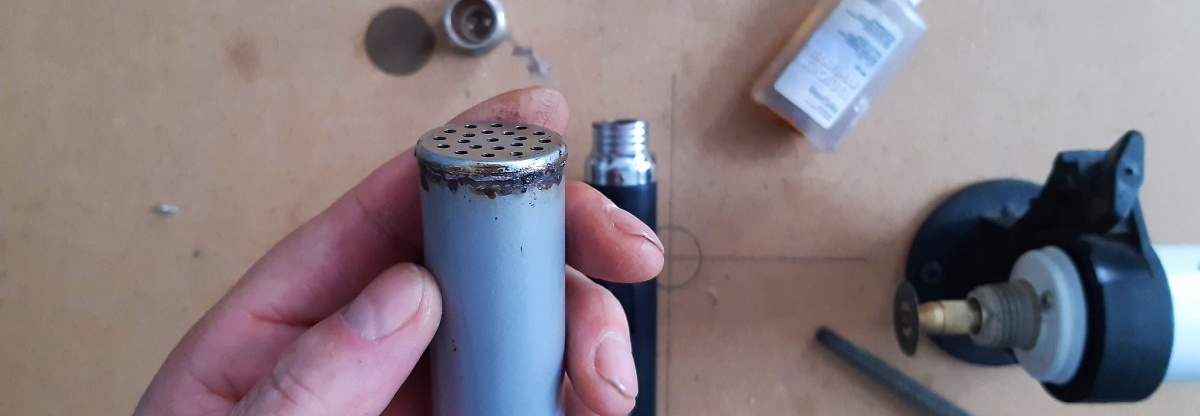
- Headphone speaker, with a protective grille (preferably the same diameter as the tube).
Tool:
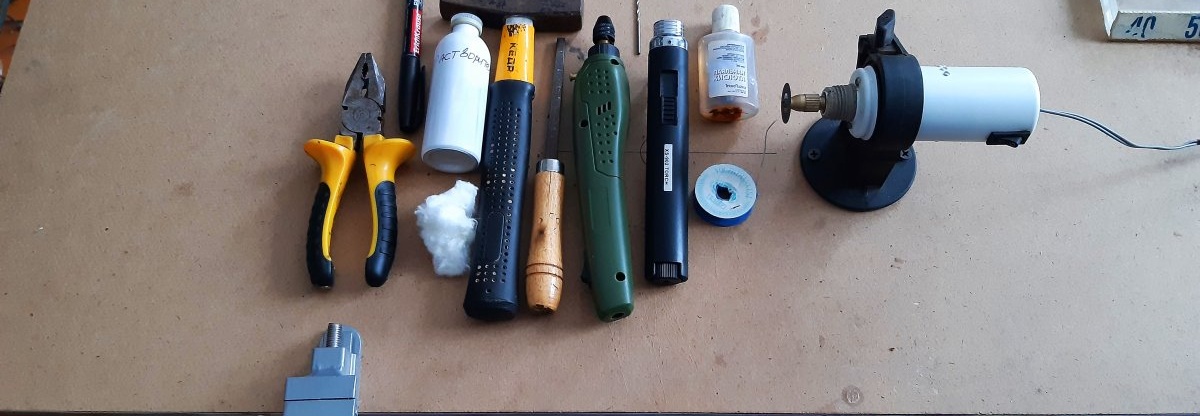
File; pliers; drill and drill bit 2 - 2.5 mm; soldering iron, tin and flux; marker; small hammer; solvent and a piece of cotton wool.
Making a pocket stove
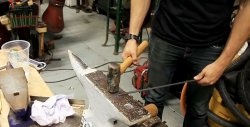
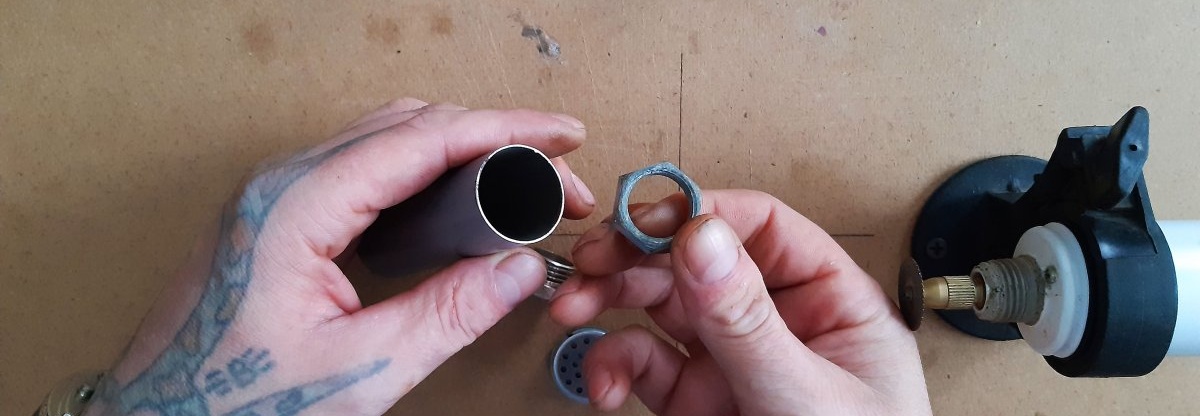
The frame from an old bed lying in the barn was ideal for the body of the product. Having cut off a piece 100-120 mm long, use a file to remove the burrs from the edges in order to avoid cuts and scratches in the future. Now you need to install an internal thread on one of the ends of the tube, which will be a 15 mm lock nut.
The edges should be ground off at a slight angle. Like this:
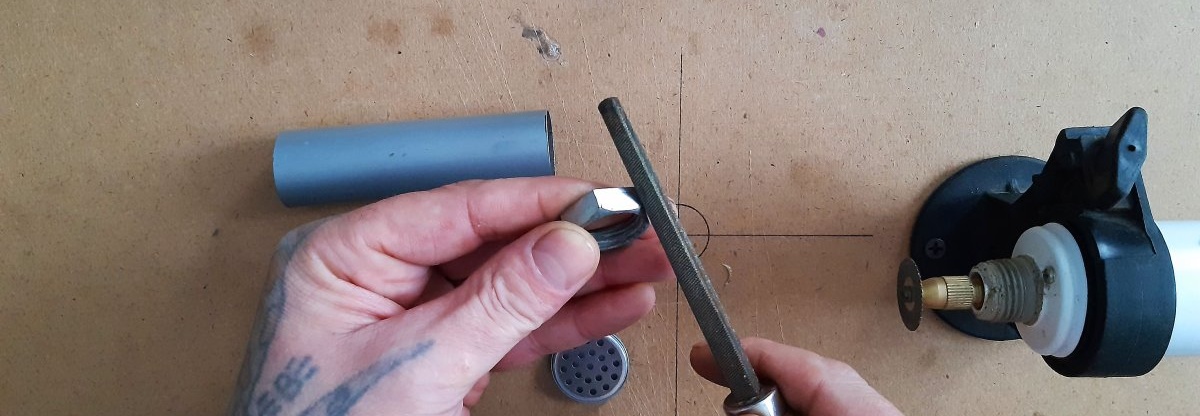

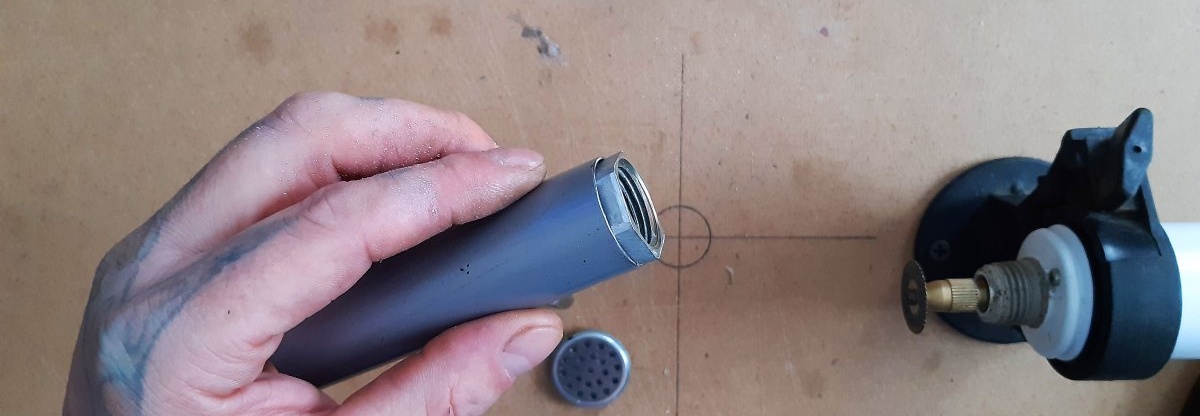
Next, you need to insert the locknut into the pipe, with the side where the edges are ground at an angle, and carefully drive it in with a hammer.
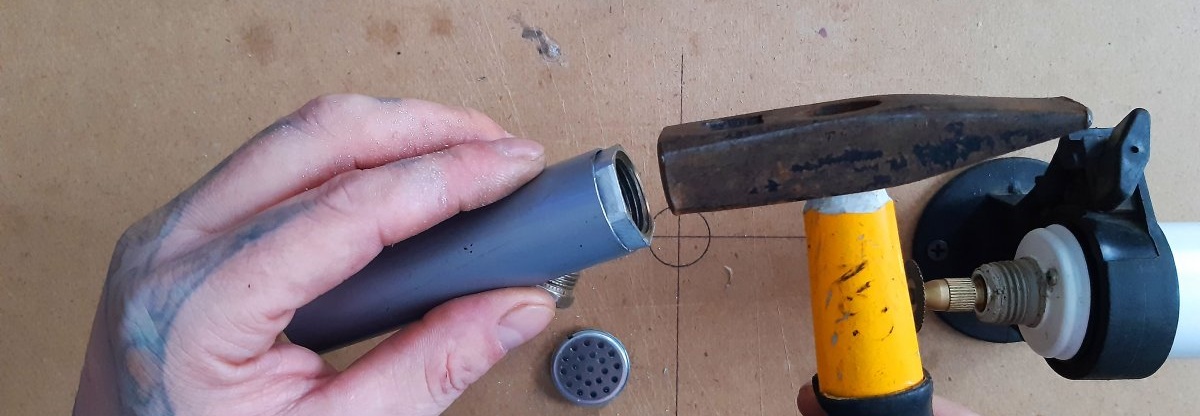
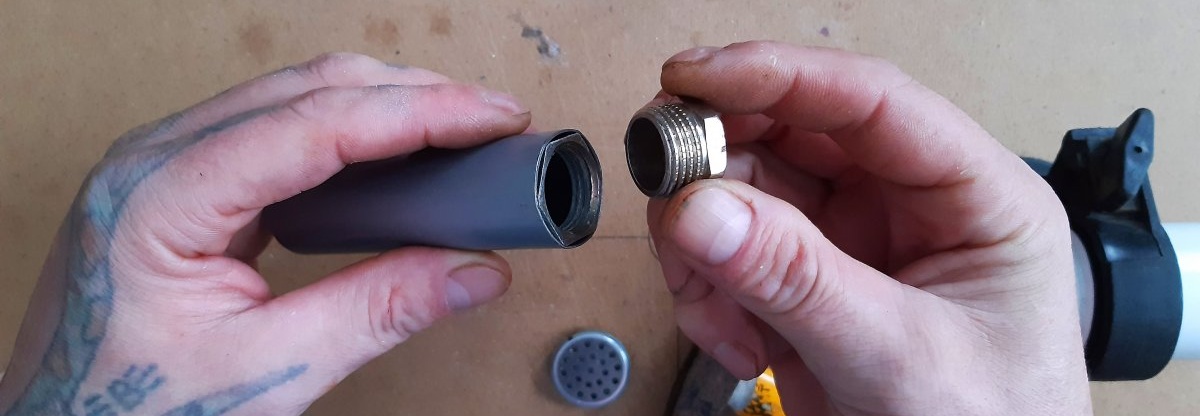
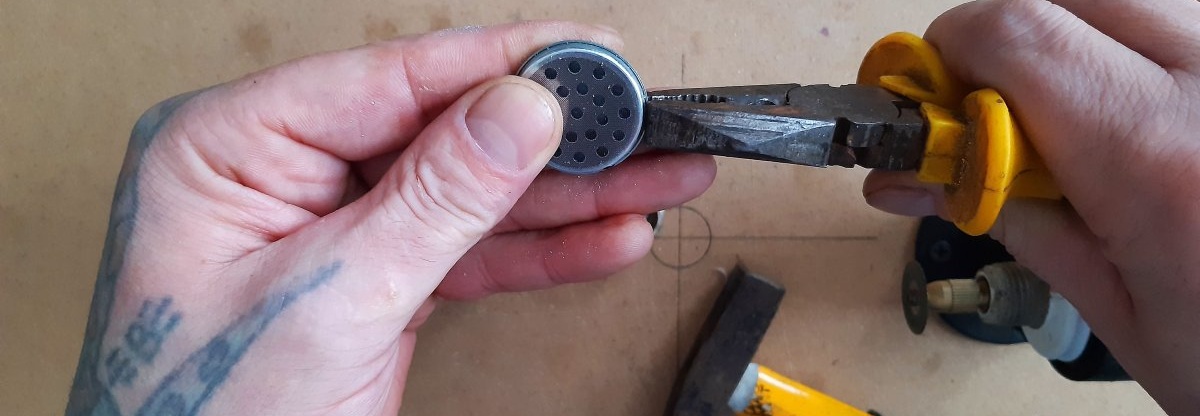
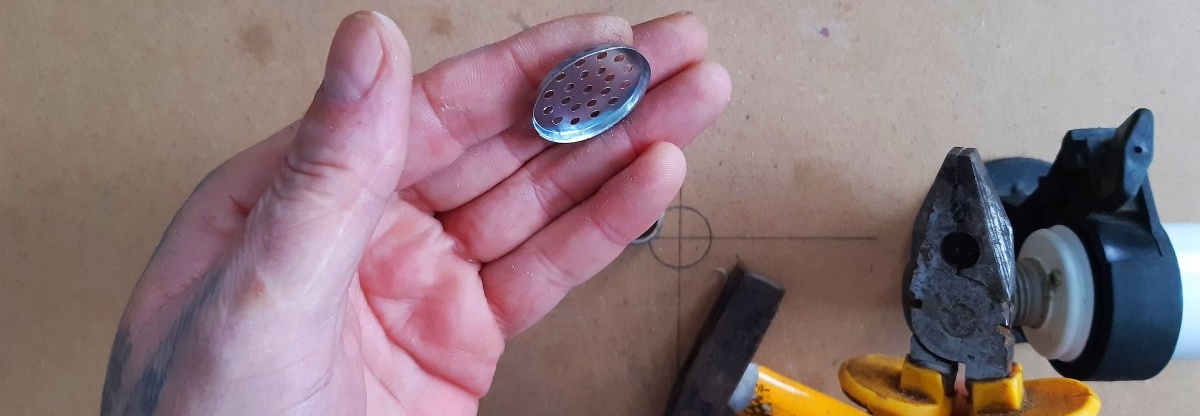
Let's try on the plug. If everything is fine, then let's work on the second end of the tube. We will seal it with a speaker grill. I selected the speaker to match the diameter of the tube. Let's disassemble the speaker. Remove the metal protective grille from it.
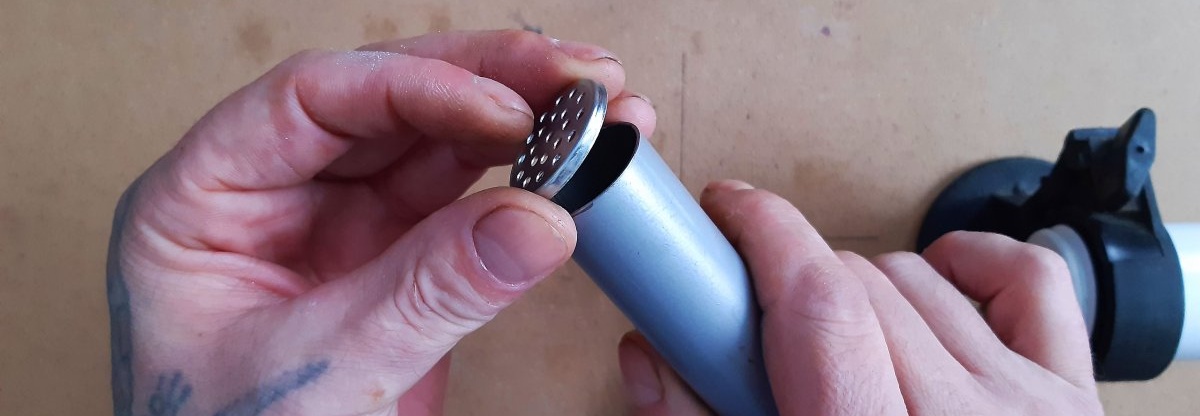
If you don’t find a suitable speaker, you can cut a round plate of thin metal to fit the diameter of the tube and drill holes in it. Next, we clean the edges of the pipe with a file, coat the edges of the grate and tube with flux, and solder the grate to the pipe. Like this:
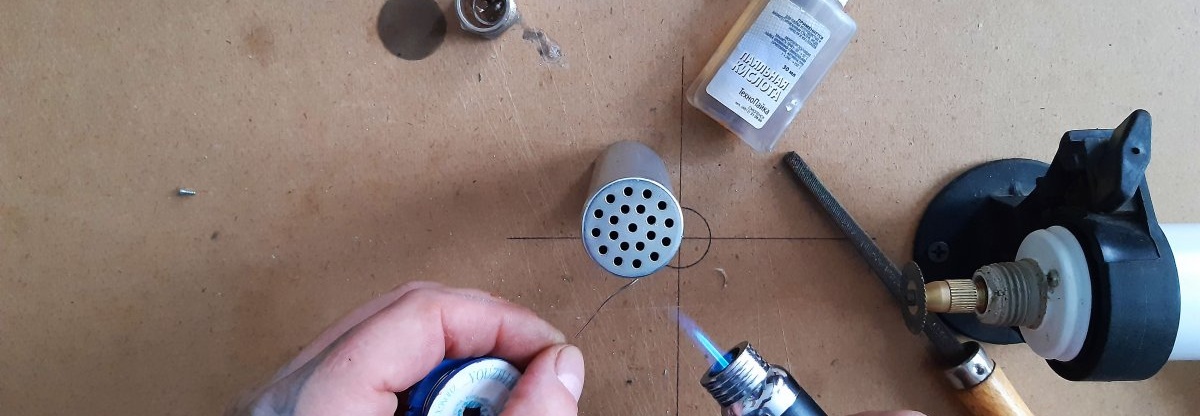
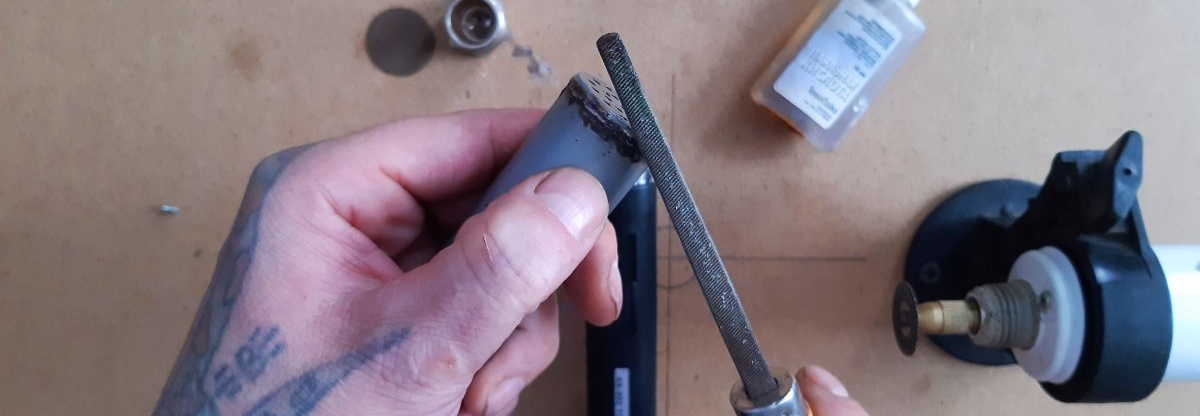
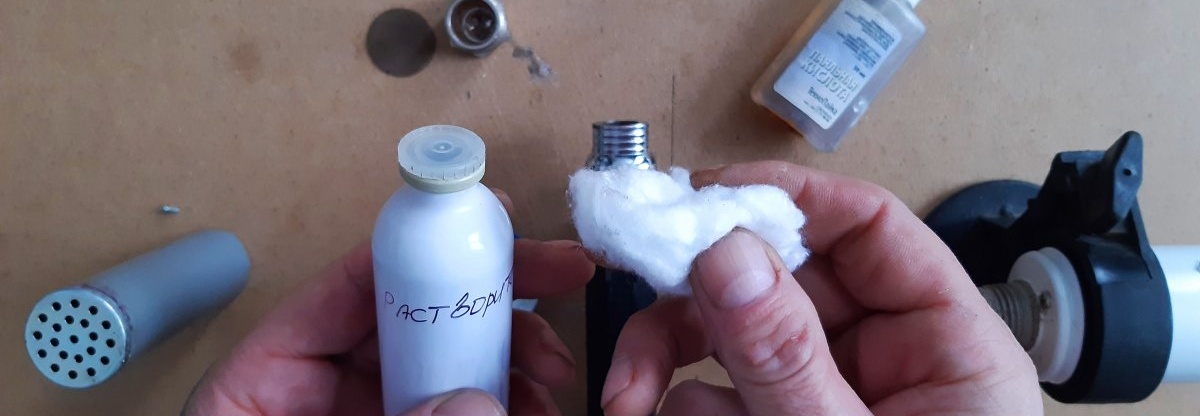
Now we remove the remaining tin with a file, and with a cotton swab soaked in solvent, wipe off the remaining acid from the workpiece.
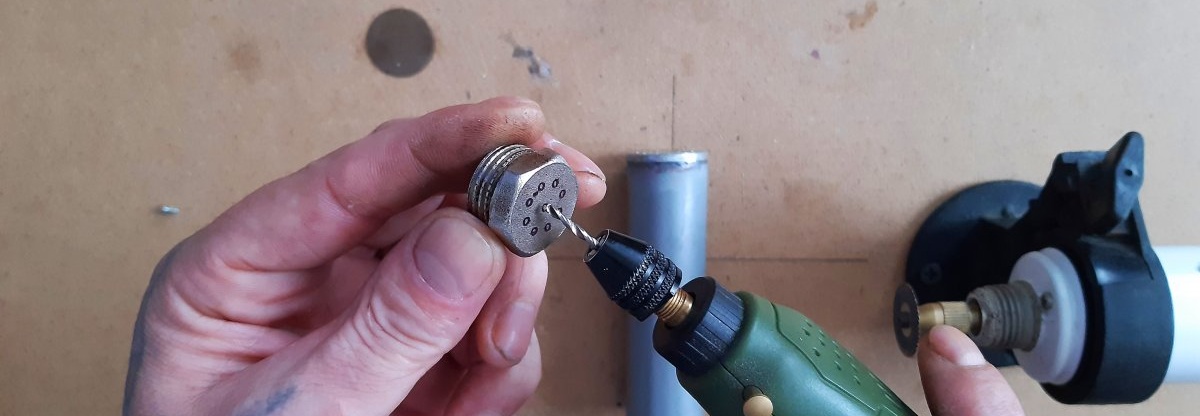
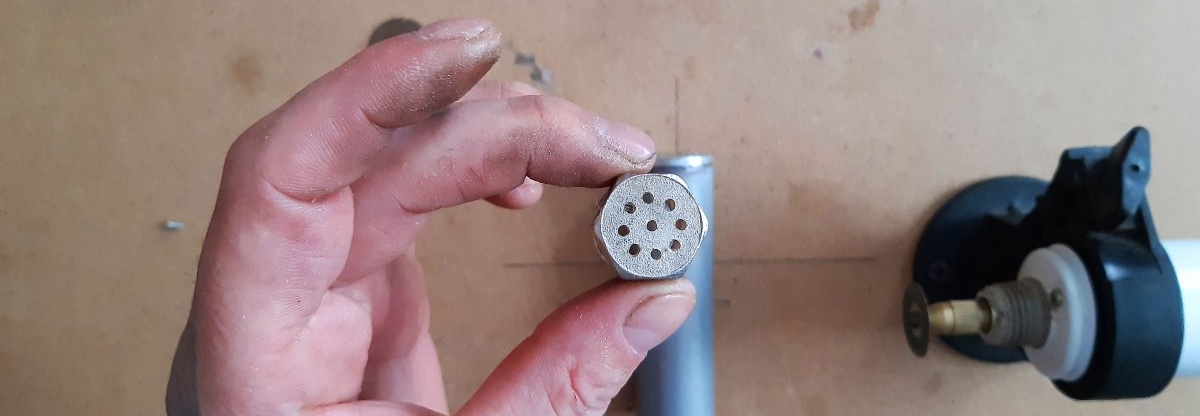
It's time to do the stub.It is necessary to drill more holes in it for better traction. To make it look nice, I disassembled the second speaker and, using its template, made marks for the holes on the plug with a marker.
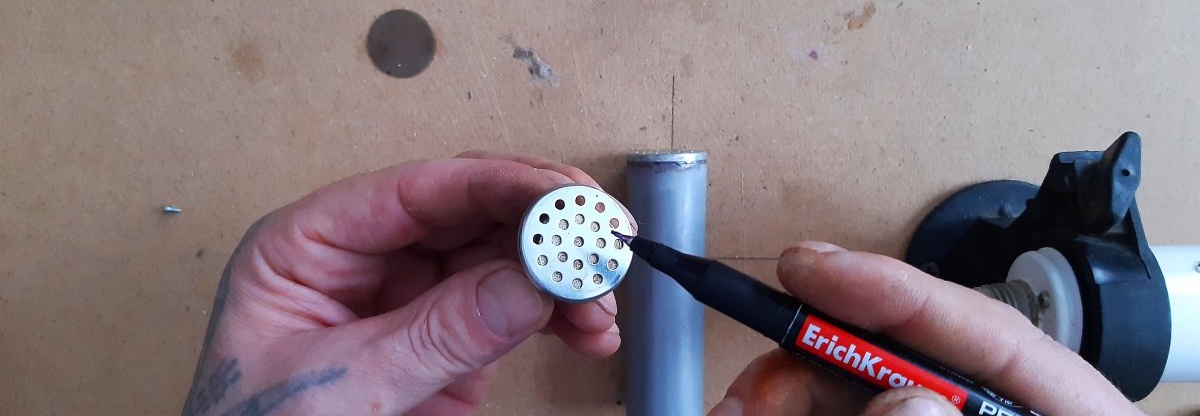
Use a 2.5 mm drill to drill holes. The more holes there are, the better the traction will be.
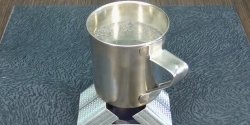
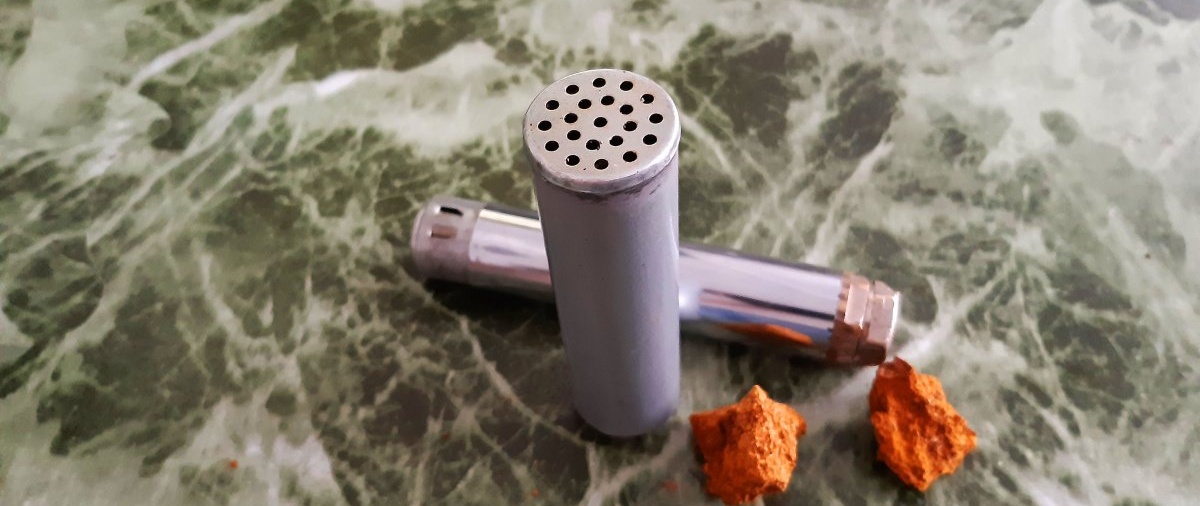
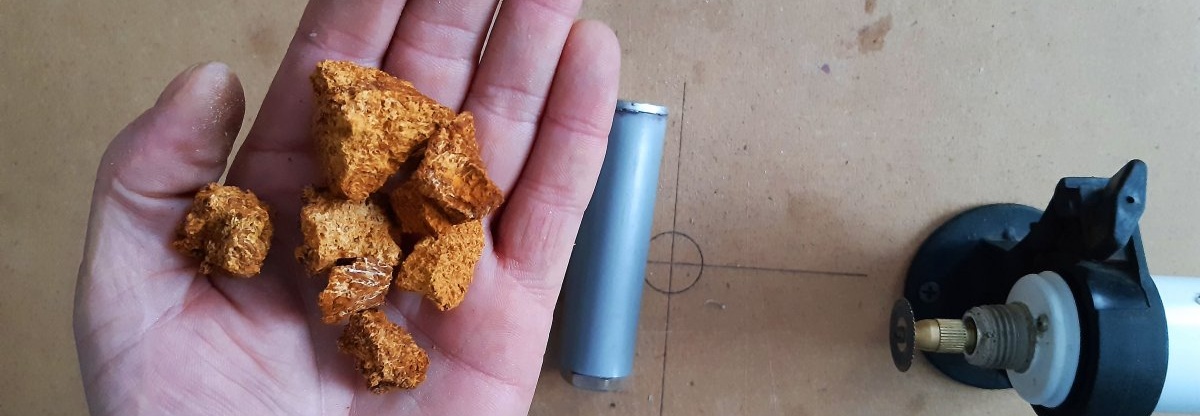
Well, the oven is ready. All that's left is to load the fuel. I use birch chaga as fuel. It smolders beautifully. In addition, I stocked up quite a lot of it in the summer and fall.

Although, as fuel you can also use charcoal for barbecue, tinder fungus, medical cotton wool, cotton fabric wound into a loose roll... In general, anything that can smolder! But chaga, in my opinion, is more effective; it smolders long and hot. So, we chop the fuel into small pieces and load it into the oven.
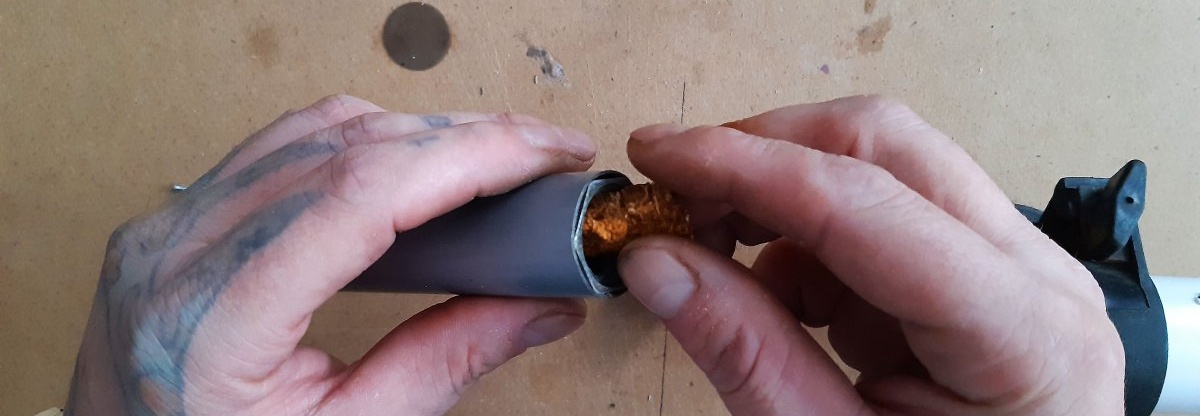
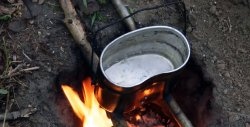
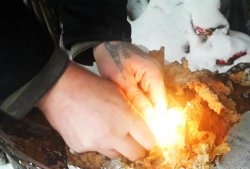
As you probably already guessed, this device can only be used outdoors. And why is it needed in a warm room? Unscrew the plug and ignite the fuel.
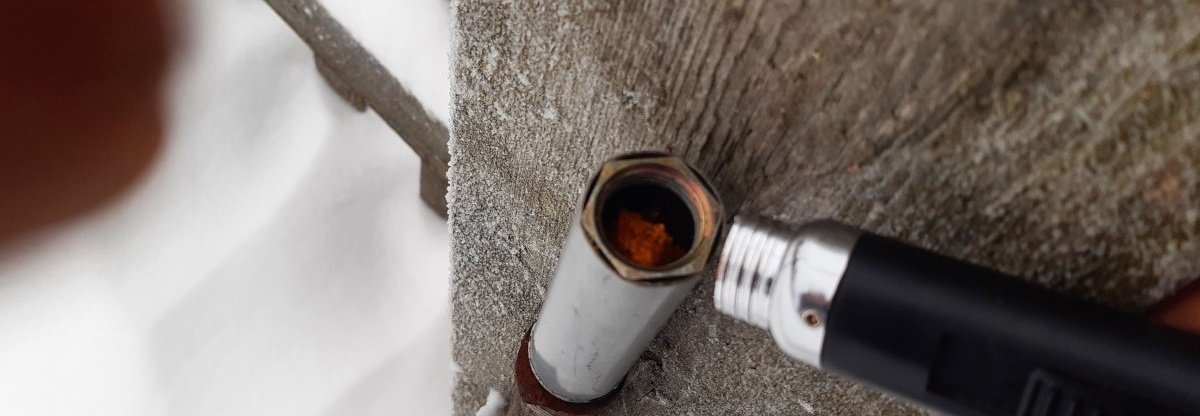
One spark is enough for the chaga to take over. I started this furnace even with the help of a flint, for the sake of experiment; the red-hot scale of the spark falls on a piece of chaga - and the process begins! We tighten the plug. You can immediately observe how whitish smoke begins to come out of the upper part.
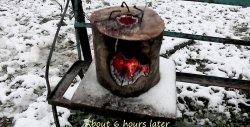
And literally after 8-10 seconds the tube begins to heat up. It reaches a temperature sufficient to warm your hands, but not enough to melt the tin of solder that holds the top grill cover. There are even moments (when ALL the chaga in the pipe flares up and smolders) when the skin of the palm does not tolerate heat. In this case, you can warm your hands directly through the gloves. The combustion continues for about an hour. Depending on the fuel loading density. I pushed the pieces into the tube that fit through the threads. Quite large.They smoldered inside the pipe for exactly an hour. At the end of that hour, when I shook the ashes out of the pipe, there were a few small, smoldering embers left. This can be seen in the video when testing is carried out after the manufacturing process. Some critics may say that it would be easier to buy a ready-made long barrel with threaded ends at a plumbing store, and a couple of plugs for it.
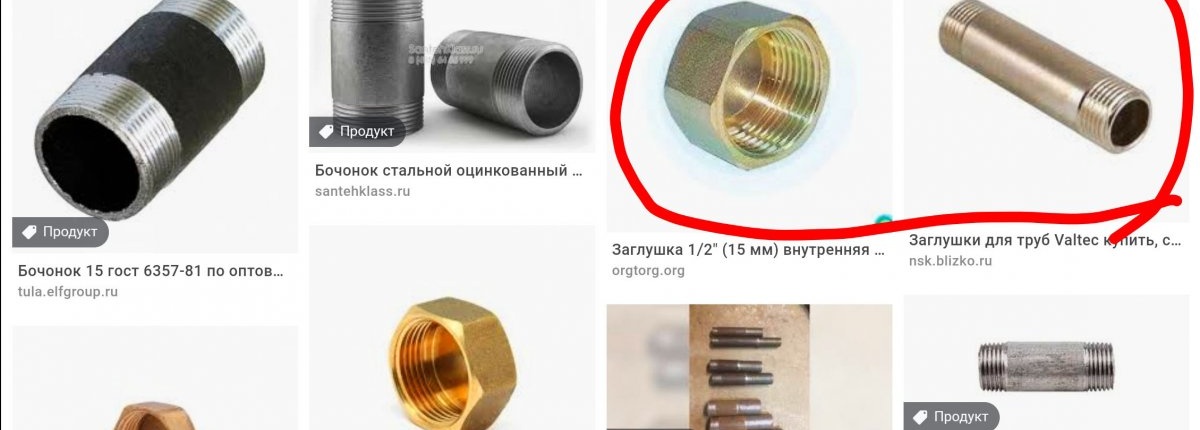
All that remains is to drill holes in the plugs... But I will say right away that this is not a very good idea; Such barrels, as a rule, are now made of brass; they weigh quite decently. Plus there are brass plugs at both ends... The weight of the product will not be small! You can, of course, find iron barrels and plugs, but they are all thick-walled. Firstly; the weight of such components will be slightly less than brass, secondly; The resulting product will take a very long time to warm up. If it even warms up in the cold... So it’s better not to be lazy and make a body from a thin-walled tube yourself. It's not long and it's not difficult.
This simple thing can help in a difficult and dangerous situation. No matter how well-equipped and self-confident we are, it never hurts to be extra cautious and thrifty. Especially in the winter season. As they say; It’s better to have and not need than to need and not have!
By the way, this thing can also be used in the summer, as a repeller for mosquitoes, midges and ticks that cannot tolerate the smoke of smoldering chaga or tinder fungus.