But today we guarantee that after reading this article, you will forget about these problems. We present to you a simple device for assembling molded products, be it frame baguettes, plinths or profiles for photo frames, at an angle of 90 degrees. This tool practically eliminates the possibility of fitting prefabricated corners “by eye”, and allows you to quickly and effortlessly secure them with clamps and tighten them with screws, staples, nails or dowels.
Will need
To make the device we will need:
- Small wooden platform 20x20 cm;
- Two aluminum corners 30x30 or 40x40 mm, length - 10-12 cm;
- Wooden blocks for clamps, 40x30x60 mm – 2 pcs; 40x30x25 mm – 2 pcs;
- Pin for the clamp screw – diameter 8-10 mm, length – 20 cm;
- Bearings with an internal diameter for a stud;
- Wood glue or PVA;
- Epoxy resin (ER) for gluing bearings to wood.
Self-tapping screws for wood.
Tools:
Drilling machine or drill; Screwdriver or screwdriver; Construction square, pencil.
Making a corner clamp step by step
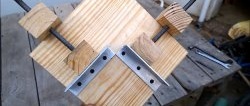
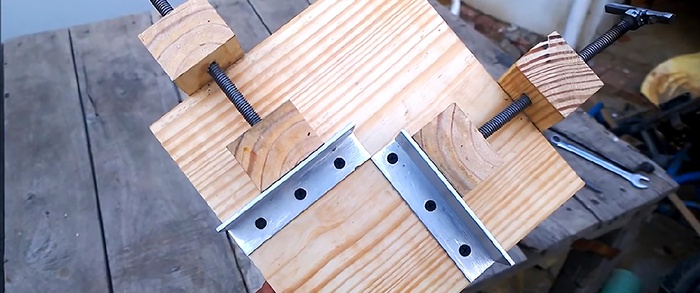
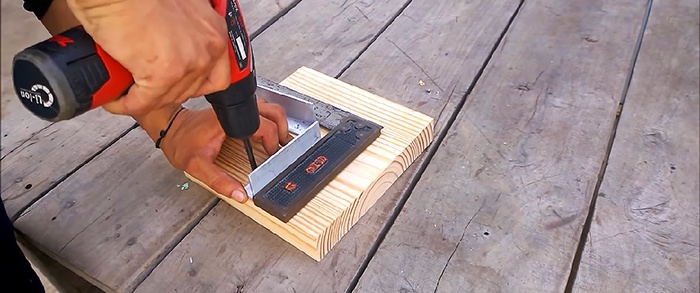
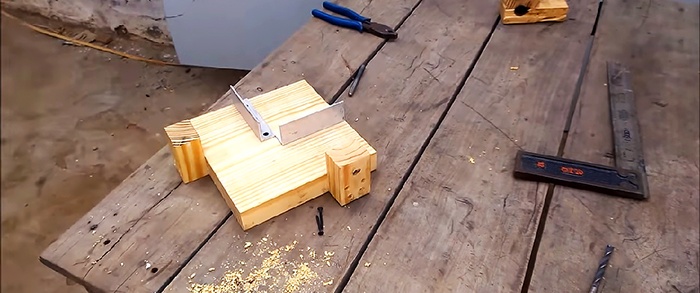
On a wooden base platform we place both aluminum corners perpendicularly. They will act as stops for the cut moldings.
To secure them, we drill small holes for screws. For self-tapping screws with a countersunk head, expand the hole with a wide drill.

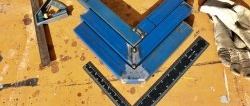
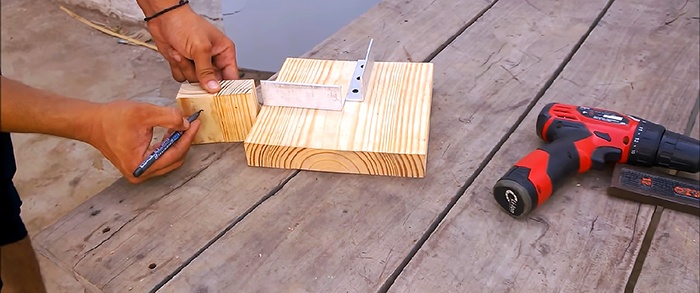
An ordinary construction square will help to calibrate the position of the corners on the frame. Using it, we position them, and then fasten the screws with a screwdriver or screwdriver.
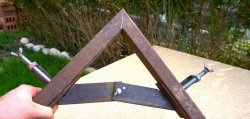
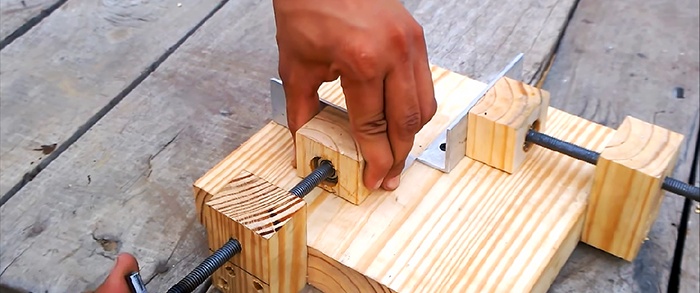
Now it's the turn of the clamping mechanisms. Let's make them from wooden blocks. We select large-sized bars, and mark the middle of the free part remaining after gluing to the frame.
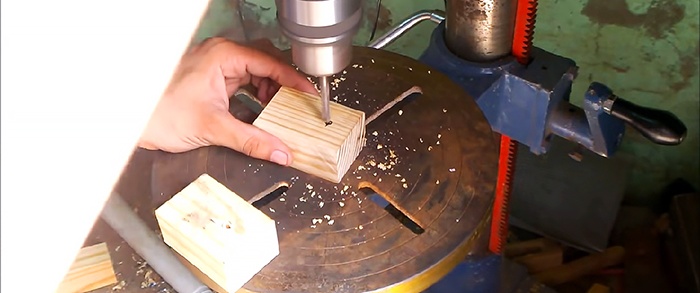
We drill a hole for the stud using a drill or a drill. We weld it at one end with a transverse rod so that you can work with pressure by hand.
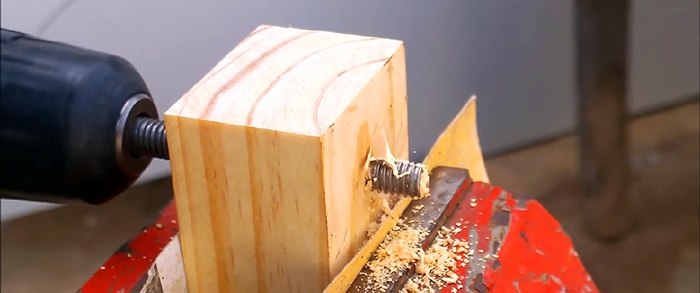
We lightly grind the working part of the pin with sandpaper, and, holding it in a screwdriver, twist it into a block so that it makes grooves in the wood with its threads, along which it will move.
For fixing the block of screws, we make secret holes and attach them to the edge of the frame, having previously lubricated the surfaces with wood glue or PVA.


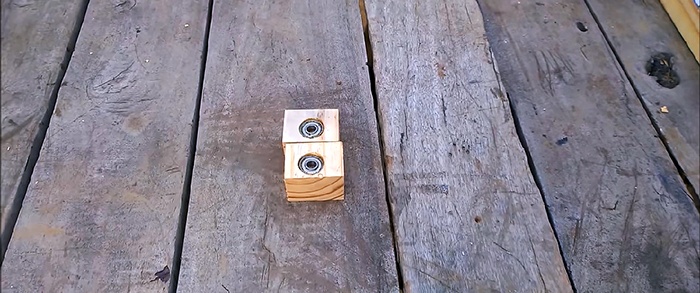
We drill the counter bars, which will be the clamping ones, in the middle, shallowly under the nose of the stud, and use a feather drill to make grooves for the bearings.
They should fit tightly. Free space is only needed for a small amount of glue, with which we fix them.

The first clamping of the clamps to the stops will allow you to press in the bearings and secure the ends of the studs to the bars.
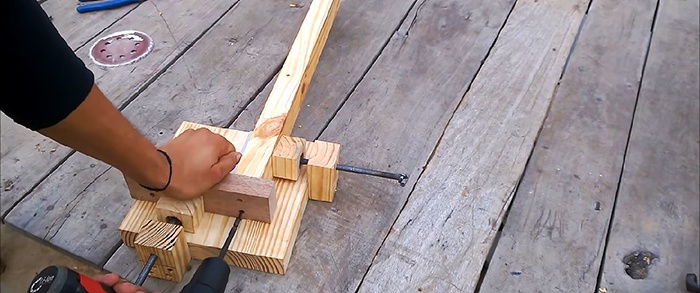
The device is ready and now you can test it in action. We clamp several bars in clamps so that their ends do not stick out relative to each other, forming a right angle. We drill them into the screws and fasten them together.
Excellent work, and most importantly, quickly and without unnecessary effort when adjusting the right angle!

Practical advice
If you slightly modernize this device, you can easily get a miter box not only for assembly, but also for cutting moldings at an angle of 45 degrees.
Wood for the platform can be replaced with chipboard, MDF, OSB or plywood. If there is insufficient thickness in the places where parts of the clamps are fastened, an extension can be made from suitable bars set with glue.