Do it yourself
Life hacks, master classes, useful tips, recipes.
home » Construction and repair » Construction » A simple device for laying blocks that will save your time and effort
Any mason knows how important the accuracy and precision of brickwork is, especially from modern materials such as foam concrete or aerated concrete. The blocks of these materials are quite smooth, and the thickness of the seam is measured in a few millimeters. Needless to say, you can’t use an ordinary trowel to work with them. We suggest you make a simple and reliable device for applying the mortar, and evaluate the masonry method with it. With its help you will definitely save time, effort, and ensure high-quality masonry.
A simple device for laying blocks that will save your time and effort

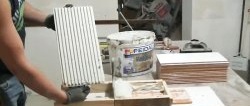
Assembling a simple device


Materials for it can be found at any construction site or workshop. Plywood or board 20-30 mm thick, 10-15 cm wide, and a standard plastering trowel-comb are suitable. To hold the entire structure together you only need a handful of screws or even nails.
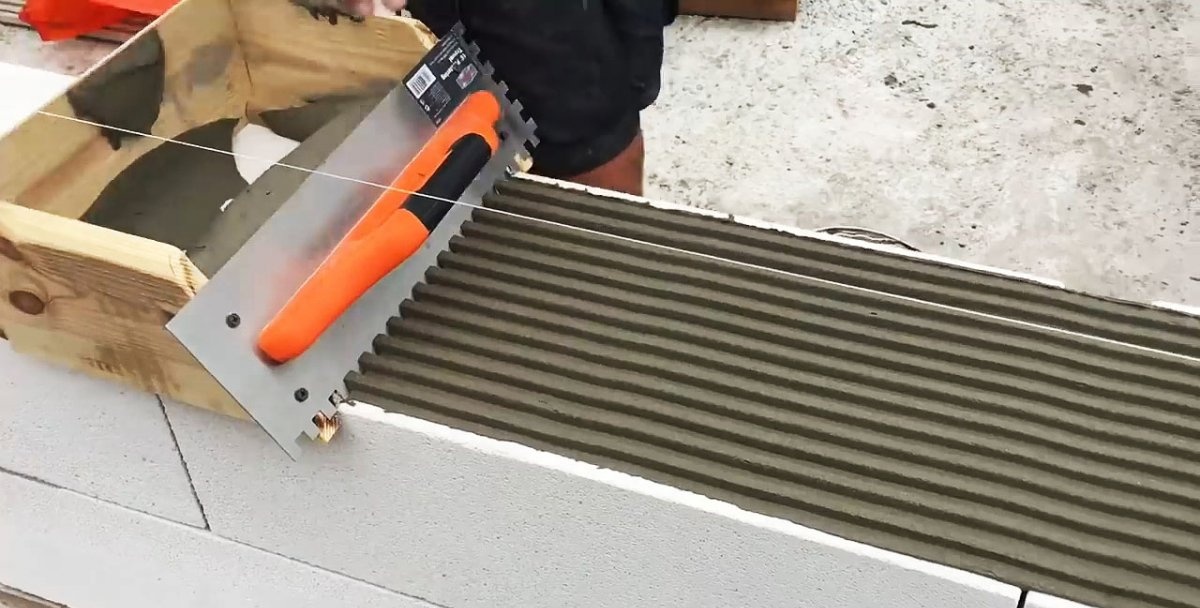
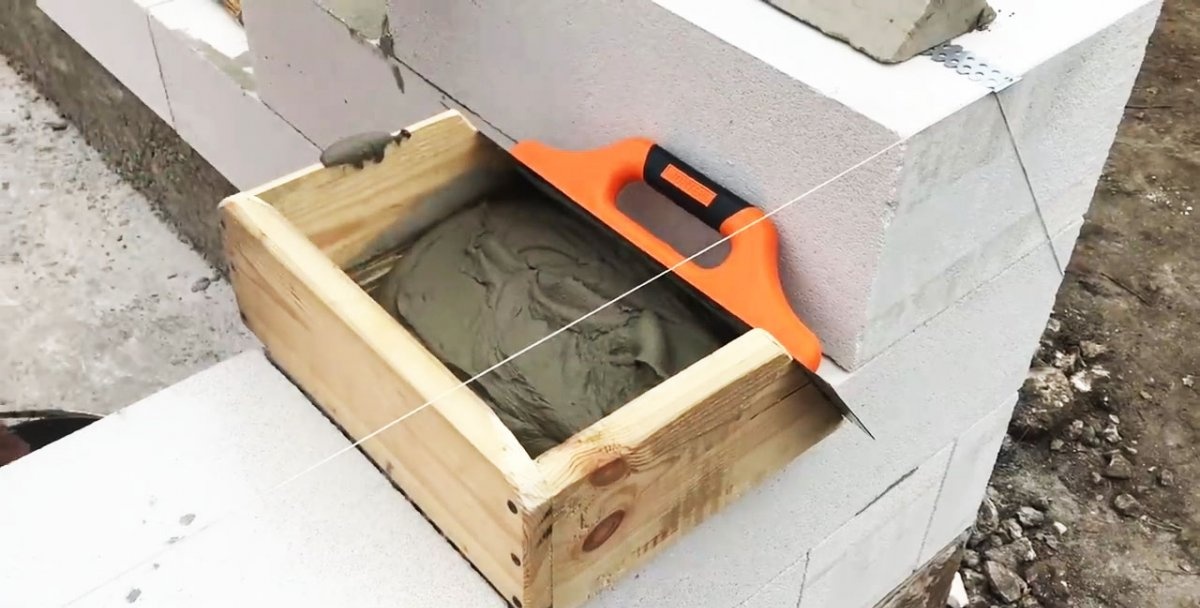
This device is a box without a bottom, in which a trowel is fixed in place of one of the edges. The side walls of this container are slightly lower than the transverse ones by several centimeters.Thus, they act as guides for the movement of the box itself along the already completed row of masonry.
A simple device for laying blocks that will save your time and effort

The trowel must be fixed at an angle of 15-25 degrees so that the comb does not tear the line of the applied solution. It is most convenient to secure the trowel with self-tapping screws, so that you can dismantle it after work and wash the tool.
The width of the box must correspond to the width of the stacked blocks. It is most practical to assemble such a simple structure using self-tapping screws, so that it can be adjusted to fit different widths of bricks if necessary.
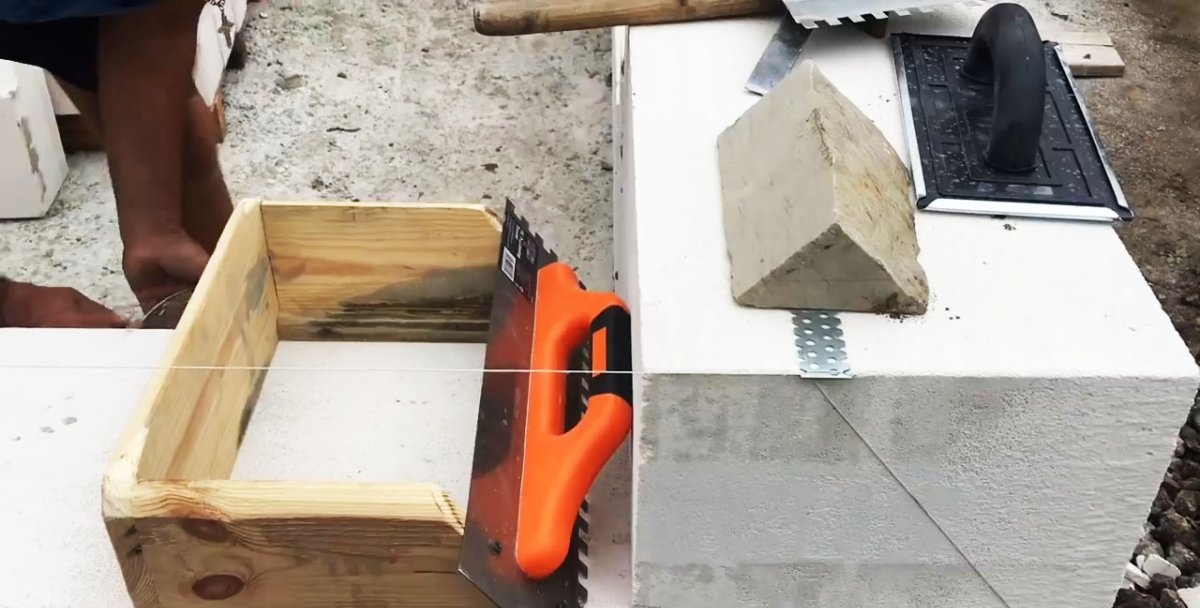
Important! From the inside of the box along the side walls it is necessary to build up small wooden blocks. Thus, during work, the brickwork will be reliably protected from contact with cement mortar.

Laying foam blocks using the device step by step


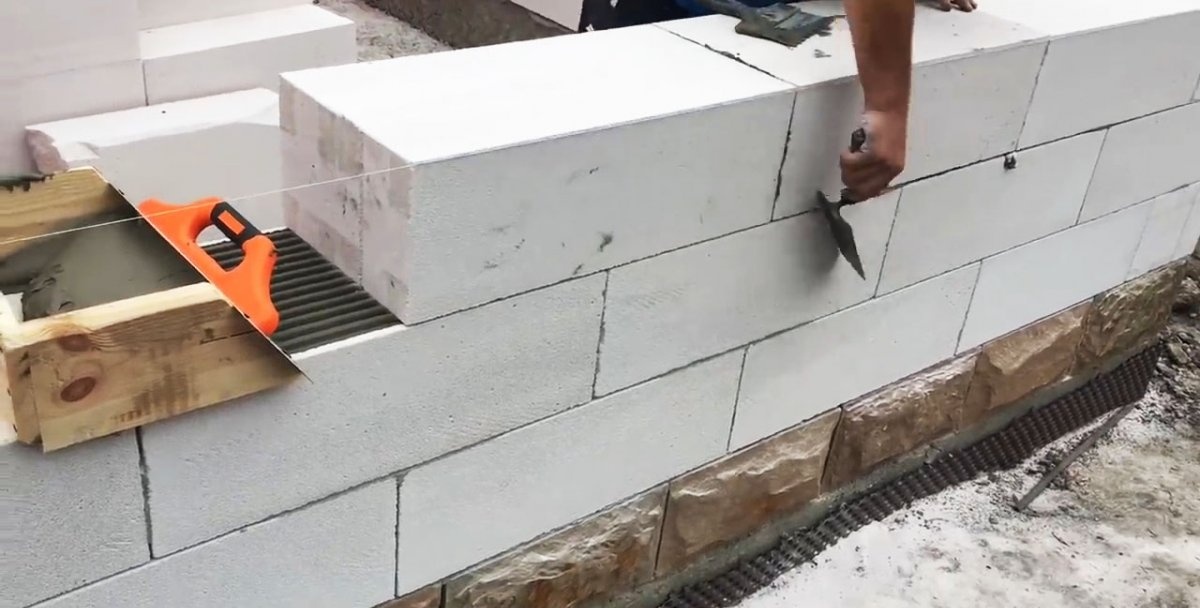
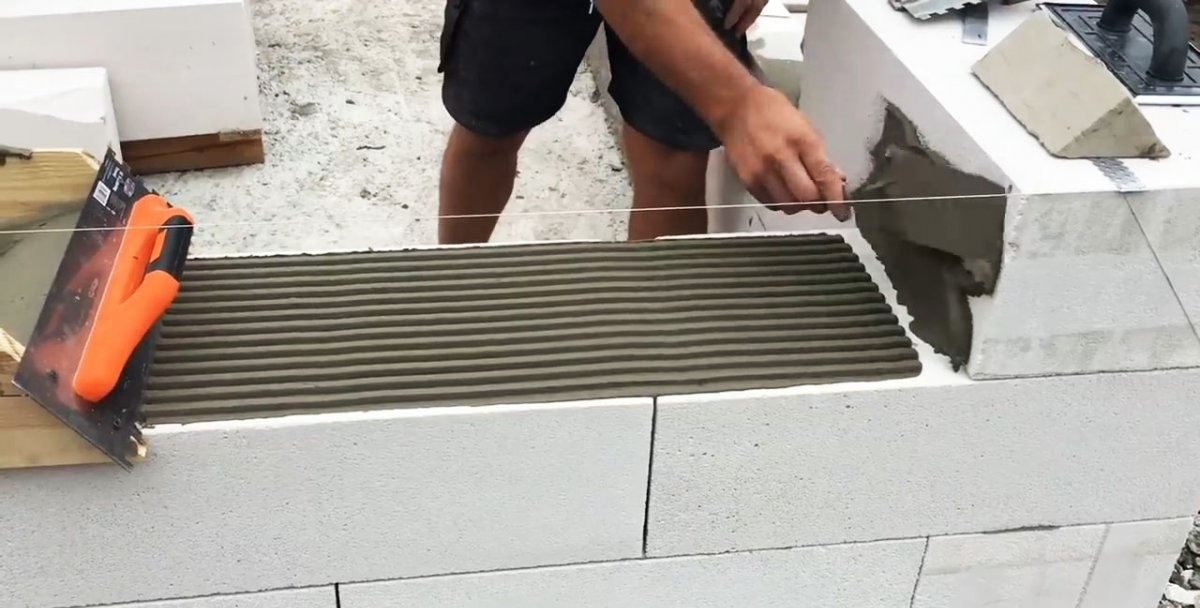
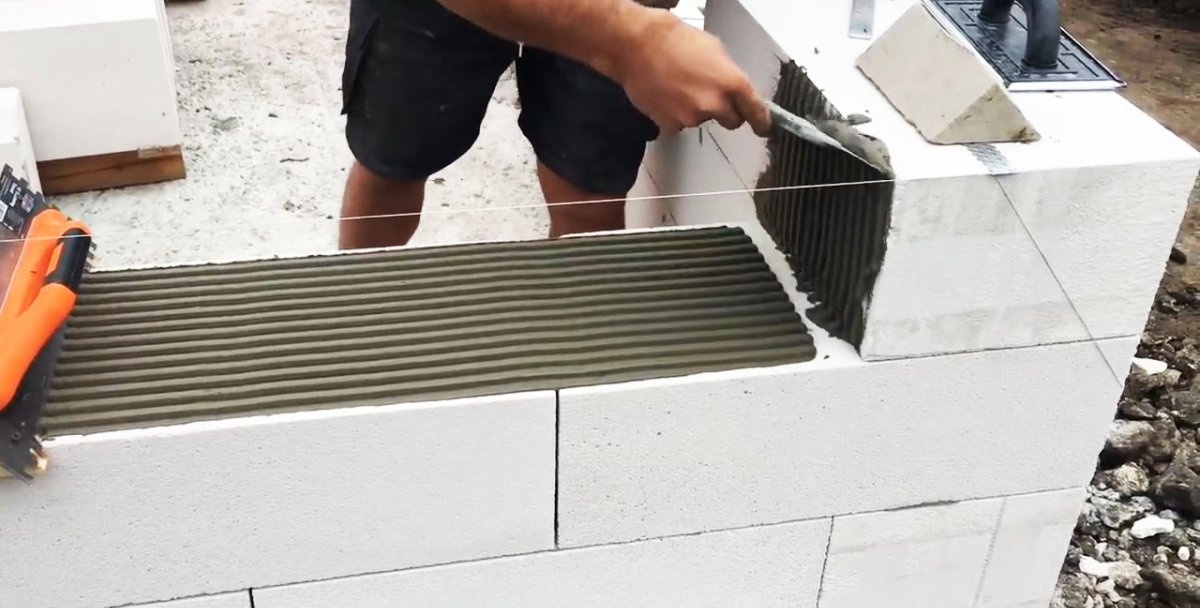
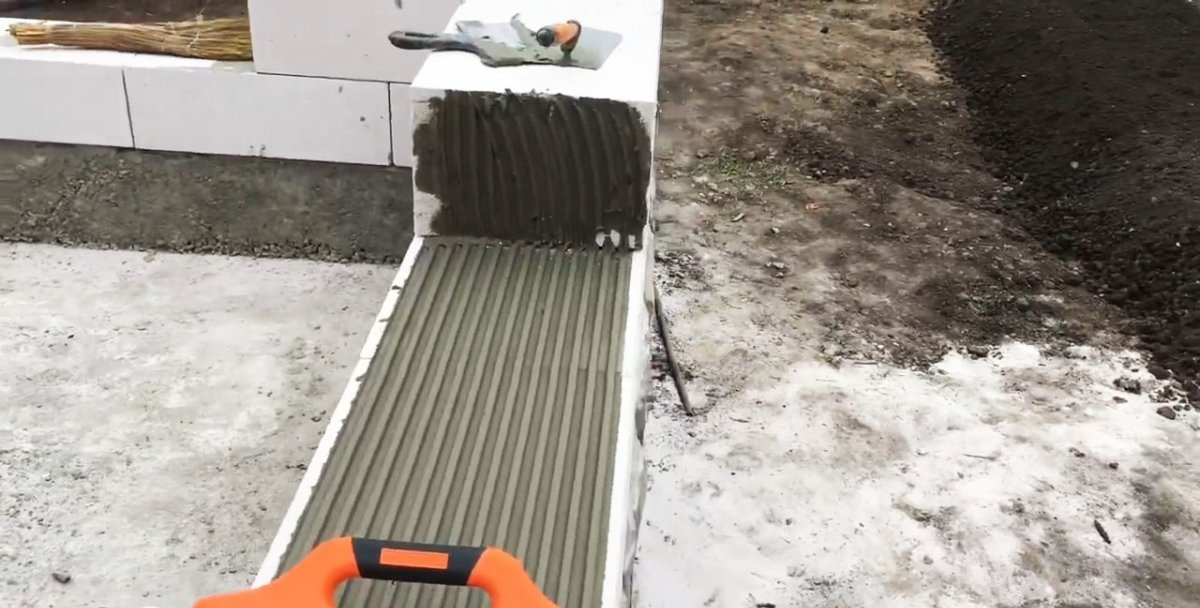
1. Place the solution into the prepared container with a trowel and pull it along the row of masonry. There is practically no discrepancy in the sizes of the blocks themselves, so our device should easily move along a straight line of a row of bricks;
A simple device for laying blocks that will save your time and effort

A simple device for laying blocks that will save your time and effort

2. Apply the mortar to the end of the previous block with a trowel and level it with a spatula-comb. If the size of the ridges on the solution container and the spatula are the same, then the seams are ensured as uniform as possible;
A simple device for laying blocks that will save your time and effort

A simple device for laying blocks that will save your time and effort

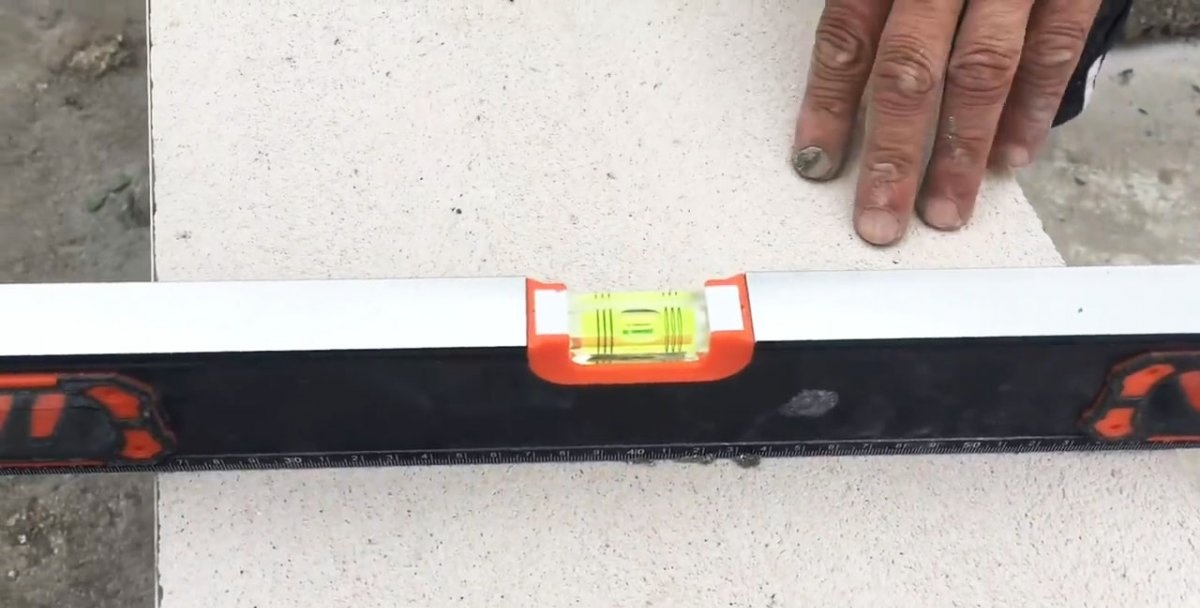
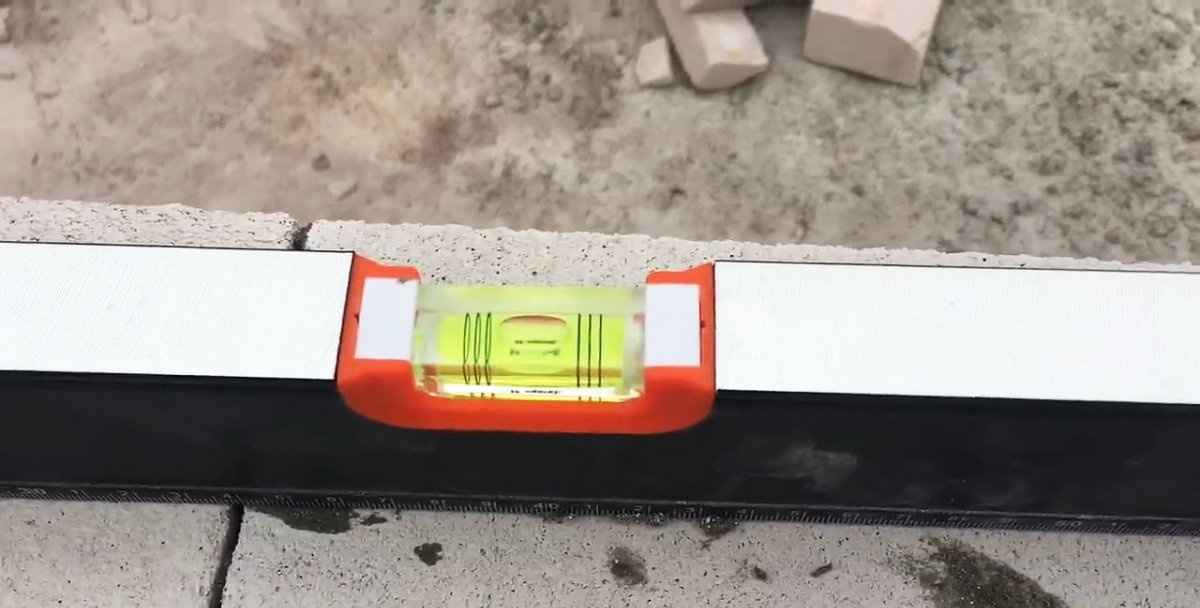
3. Place the block in its place in the row and nail it in with a rubber mallet or by hand. A stretched cord will serve as a guide for aligning the straight line. The clarity of the masonry must be constantly monitored using a bubble level;
A simple device for laying blocks that will save your time and effort

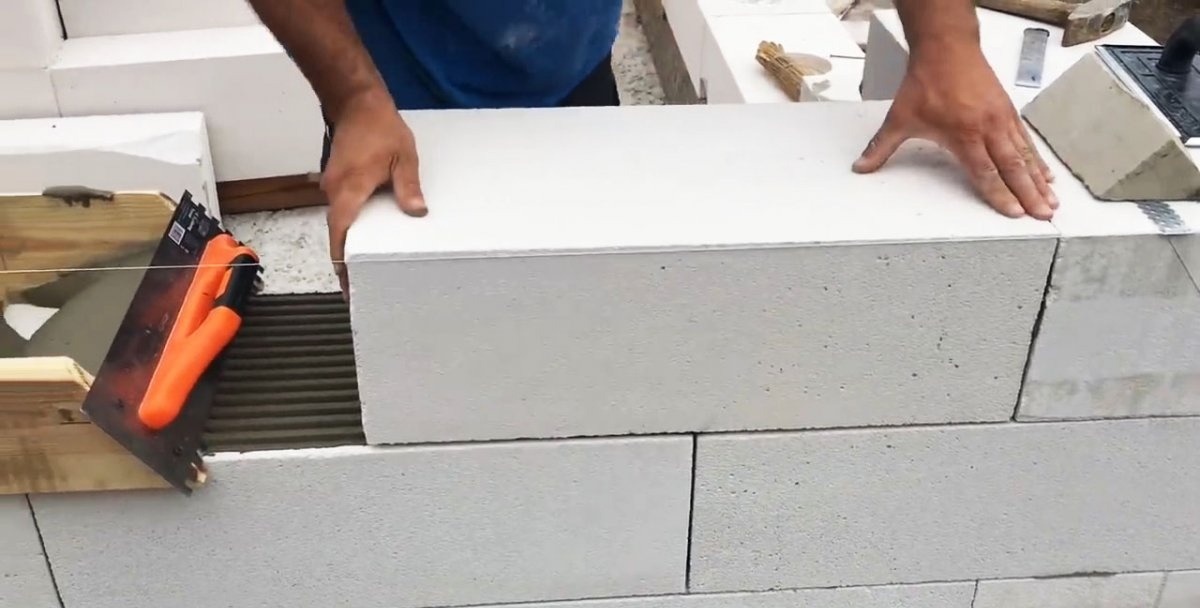
4. We carry out the same procedure with the following blocks, not forgetting to follow the order of spacing of bricks in the masonry.
A simple device for laying blocks that will save your time and effort

A simple device for laying blocks that will save your time and effort

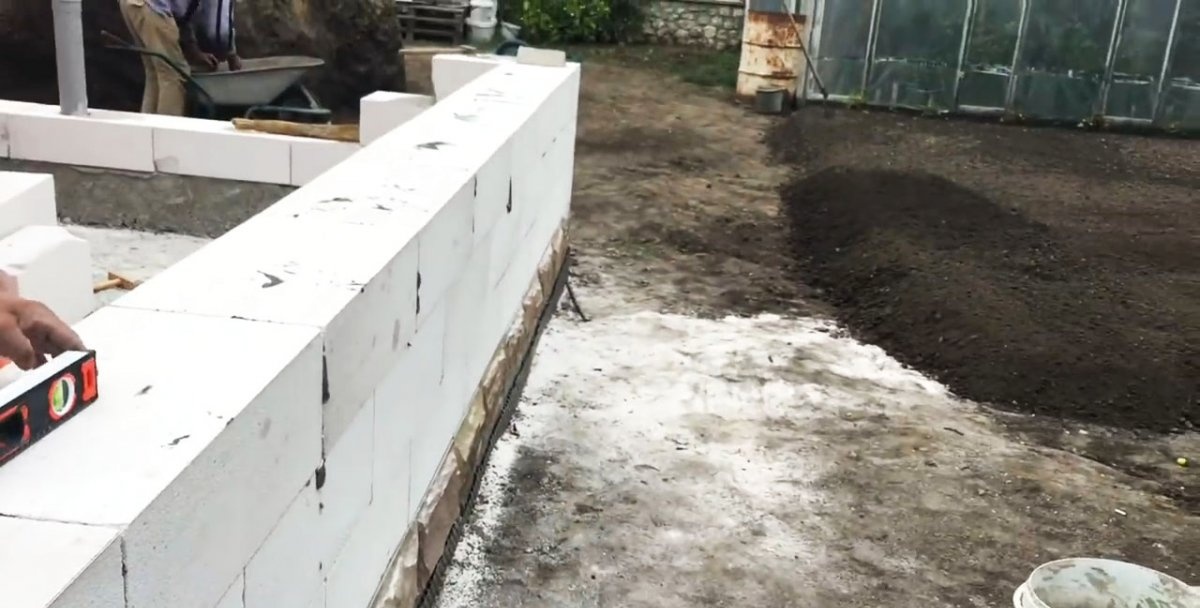
5. From the side parts of the masonry, from the front and back sides, do not forget to promptly pick up the excess mortar squeezed out by the blocks. At the end of the row, we check its evenness using a level.
A simple device for laying blocks that will save your time and effort

A simple device for laying blocks that will save your time and effort

A simple device for laying blocks that will save your time and effort

Watch the video


come back
Comment
  • bowtiesmilelaughingblushsmileyrelaxed relaxedsmirk
    heart_eyeskissing_heartkissing_closed_eyesflushedrelievedsatisfiedgrin
    winkstuck_out_tongue_winking_eyestuck_out_tongue_closed_eyesgrinningkissingstuck_out_tonguesleeping
    worriedfrowninganguishedopen_mouthgrimacingconfusedhushed
    expressionlessunamusedsweat_smilesweatdisappointed_relievedwearypassive
    disappointedconfoundedfearfulcold_sweatperseverecrysob
    joyastonishedscreamtired_faceangryragetriumph
    sleepyyummasksunglassesdizzy_faceimpsmiling_imp
    neutral_faceno_mouthinnocent
4 minus one =
Comments (2)
  1. Akril
    #1 Akril Guests 8 April 2019 13:28
    2
    Cool device, as they say, the sledgehammer teaches the master))
  2. Screen
    #2 Screen Guests July 29, 2022 12:19
    1
    How to lay it on the corners?

How to remove worn wedges and reattach the ax head to the ax handle

How to make a device for properly sharpening metal drills with your own hands

How to decorate eggs without stickers and paints with your own hands

How to make a “Butterfly” metal detector using just 2 transistors

«Do it yourself - with your own hands» - a site of interesting homemade products made from scrap materials and items at home. Step-by-step master classes with photos and descriptions, technologies, life hacks - everything a real master or just a craftsman needs for needlework. Crafts of any complexity, a large selection of directions and ideas for creativity.

We recommend reading

Washing machine error codes