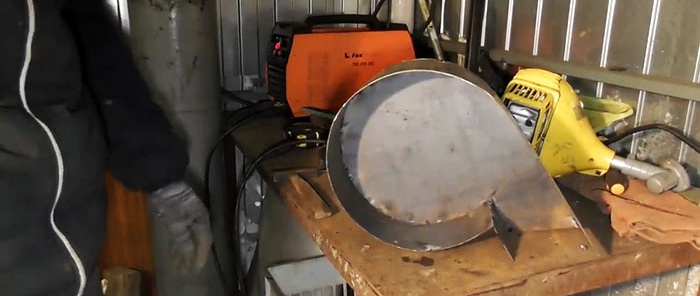
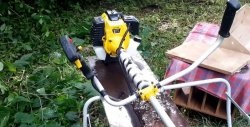
Do it yourself
Life hacks, master classes, useful tips, recipes.
home » Useful and interesting » Do-it-yourself snow blower from a brush cutter
With the onset of winter, an irresistible desire arises to mechanize the snow removal process, since you can’t shovel much with a shovel. Having enough free time and desire, you can temporarily upgrade the engine of a brush cutter for snow removal, and in the summer use it again for its intended purpose.
Do-it-yourself snow blower from a brush cutter

Basic materials:


  • brush cutter;
  • sheet steel with a cross section of 2-3 mm;
  • 2 bolts with M8 nuts;
  • pipe d20 or larger.

Converting a lawn mower into a snow blower


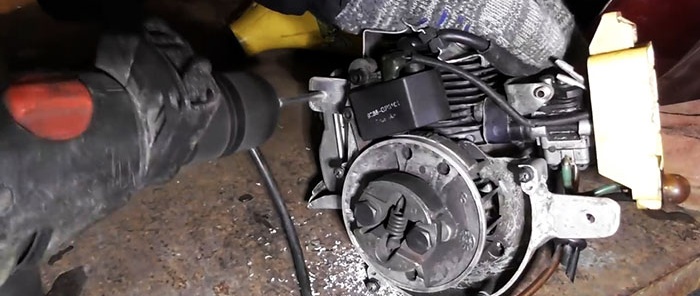
The first step is to remove the rod with the upper gearbox, the starter and the fuel tank from the brushcutter engine. On the clutch side, mounting ears are welded to the motor housing to secure it to the snow blower hopper. Holes are drilled in them and threads are cut for M8 bolts.
Do-it-yourself snow blower from a brush cutter

Do-it-yourself snow blower from a brush cutter

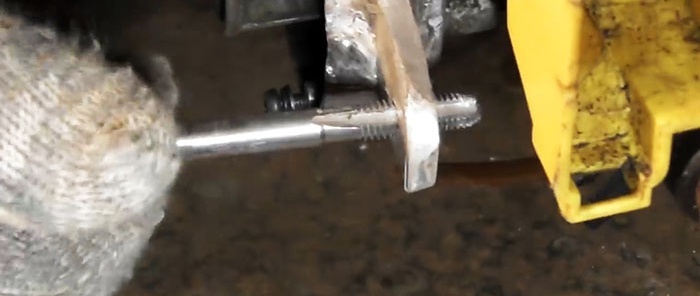
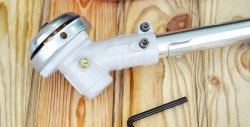
After upgrading with lugs, the lawn mower is put back together, but without the rod yet. Next, you need to shorten the rod so that there is literally a gap of 5-7 cm between the upper and lower gearboxes. To do this, first cut the tube, and then the shaft.
Do-it-yourself snow blower from a brush cutter

Do-it-yourself snow blower from a brush cutter

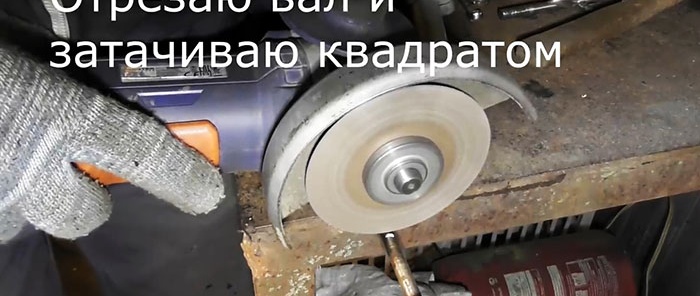
The cut end of the shaft is sharpened with a square so that it fits freely into the gearbox.
Do-it-yourself snow blower from a brush cutter

Do-it-yourself snow blower from a brush cutter

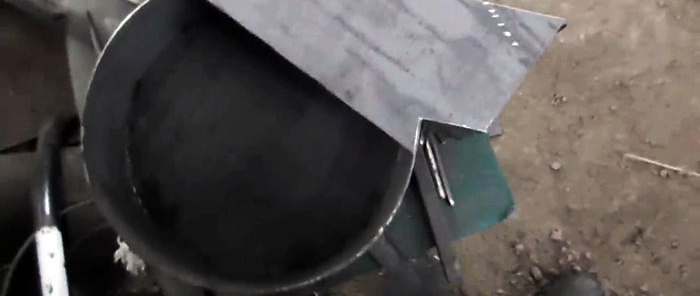
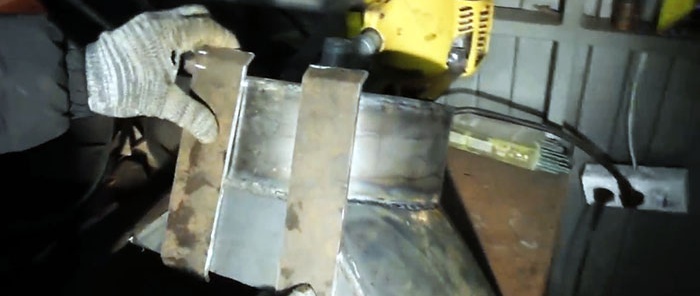
After remaking the engine and rod, the snail of the snow blower itself is made.Its shape is cut from sheet steel. The diameter of the base of the snail should be several centimeters larger than the mowing blade, which will later be digested to capture snow.
Do-it-yourself snow blower from a brush cutter

Do-it-yourself snow blower from a brush cutter

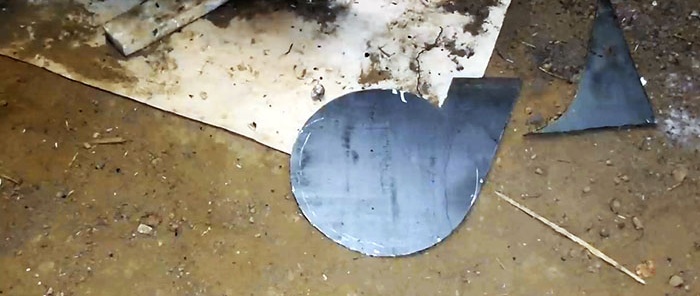
A side wall made of the same steel is welded to the base of the snail. The height of the resulting sidewall is approximately 10 cm. The higher it is, the greater the snow capture, but an increase is only advisable when using a powerful scythe. In the example sample, the engine power is 0.75 kW, which is basically enough.
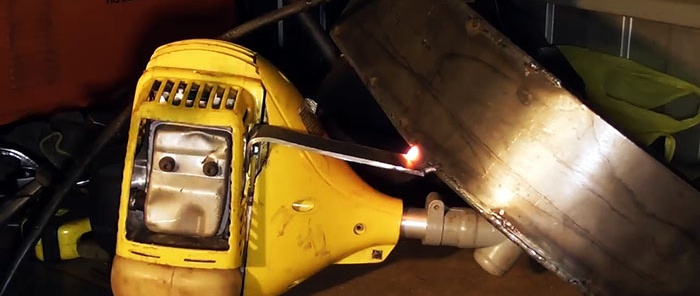
Next, you need to weld the snow ejection trunk, which is part of the snail. To do this, a steel cover is cut out.
Do-it-yourself snow blower from a brush cutter

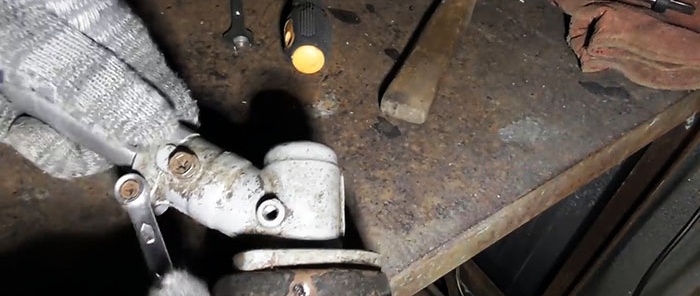
A hole is made in the center of the resulting body to connect the lower gearbox of the braid. The shaft is inserted into it, and mounting holes are made to secure the gearbox with bolts.
Do-it-yourself snow blower from a brush cutter

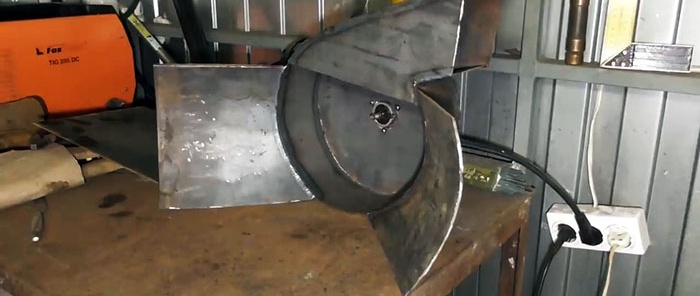
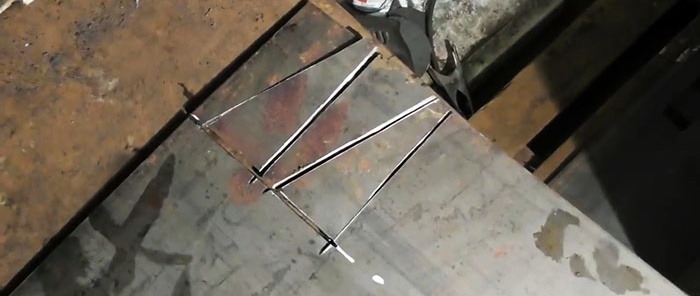
2 suspensions are made from steel in the form of curved strips, which are welded to the volute. The angle of their fixation is selected individually according to the dimensions of the brush cutter. This is not difficult, since at this moment it is already exposed, since its gearbox is clamped.
Do-it-yourself snow blower from a brush cutter

To direct the snow into the snail, you need to weld grips made of the same sheet steel to it. They consist of 3 parts. Two large wings diverge on the sides, and one pick-up is welded from below.
Do-it-yourself snow blower from a brush cutter

Do-it-yourself snow blower from a brush cutter

To make the snow blower slide, skids are welded to its body on the lower grip side.
Do-it-yourself snow blower from a brush cutter

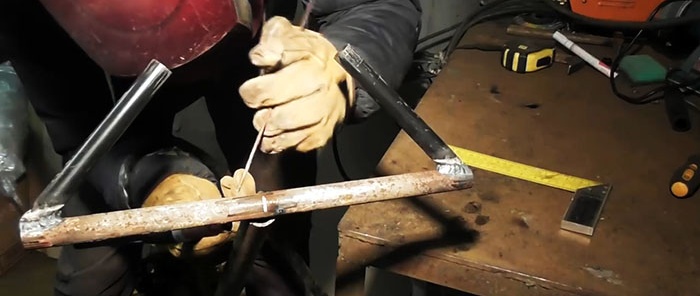
To control the unit, a pipe stand is attached to its body and skids. The steering wheel is welded to it. The gas lever and the ignition switch are placed on it.
Do-it-yourself snow blower from a brush cutter

Do-it-yourself snow blower from a brush cutter

All that remains is to modify the mowing knife. First of all, you should cut it a little, removing bends from wear. After this, snow grips are welded to it, one for each blade of the knife.
Do-it-yourself snow blower from a brush cutter

Do-it-yourself snow blower from a brush cutter

Do-it-yourself snow blower from a brush cutter

The snow blower, although small, does a good job of clearing snow.
Do-it-yourself snow blower from a brush cutter

Do-it-yourself snow blower from a brush cutter

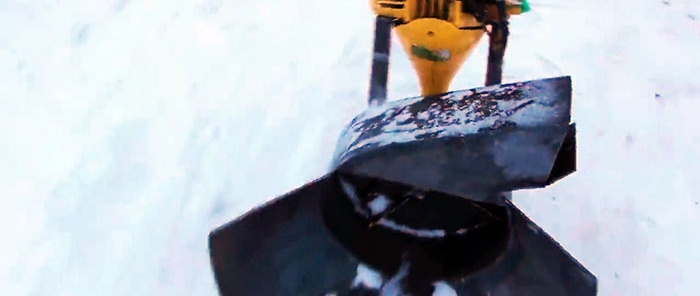
The small size of the capture bunker makes it difficult to work with dense snow, which, having collected in large lumps, simply does not enter the snail.
Do-it-yourself snow blower from a brush cutter

Do-it-yourself snow blower from a brush cutter

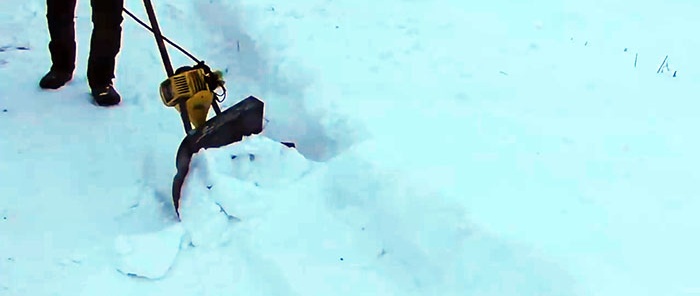
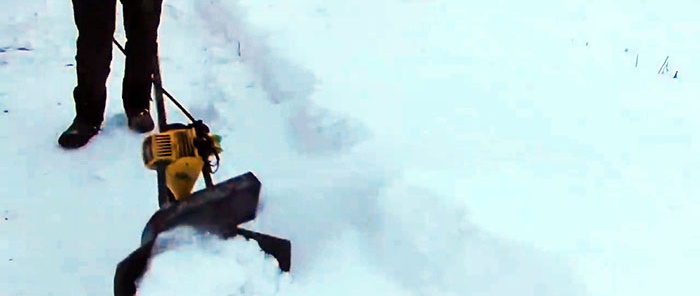
The device works most effectively on freshly fallen snow. The positive thing about this modification of the lawn mower is that its motor can be removed and a whole bar attached to it to continue mowing weeds in the summer.

Watch the video


come back
Comment
  • bowtiesmilelaughingblushsmileyrelaxed relaxedsmirk
    heart_eyeskissing_heartkissing_closed_eyesflushedrelievedsatisfiedgrin
    winkstuck_out_tongue_winking_eyestuck_out_tongue_closed_eyesgrinningkissingstuck_out_tonguesleeping
    worriedfrowninganguishedopen_mouthgrimacingconfusedhushed
    expressionlessunamusedsweat_smilesweatdisappointed_relievedwearypassive
    disappointedconfoundedfearfulcold_sweatperseverecrysob
    joyastonishedscreamtired_faceangryragetriumph
    sleepyyummasksunglassesdizzy_faceimpsmiling_imp
    neutral_faceno_mouthinnocent
5+two=
Comments (5)
  1. Dmitriy
    #1 Dmitriy Guests 5 December 2019 16:39
    12
    So much work to make, and it turned out to be such useless crap. A shovel will come out faster, easier, and cheaper. Useless thing!
  2. Guest Nikolay
    #2 Guest Nikolay Guests December 7, 2019 00:21
    2
    The thing is necessary, but there are some points that cannot be ignored.
    I wonder what kind of “luminum” the motor housing is made of, so that the “ears” are welded at home?
    Square sharpening. Let’s say the shaft is short, everyone’s eye is perfect, the axial symmetry of the square is present, and these “ears” will not fall off due to beating. But, most trimmers have shafts (mounting sockets) with 7 or 9 splines, where will people put this square? And the rod inside is not homogeneous, no matter what area you use.
    Working with a tool is a separate horror.There is no need to show this if you don’t know in which direction the cutting disc of an angle grinder should rotate, and what happens to gloved hands when working with rotating mechanisms.
    To prevent foreign objects (limbs) from getting into the finished apparatus, a grille should be provided in front.
    1. Bess
      #3 Bess Guests December 7, 2019 07:40
      2
      The opinion of the sofa specialist has arrived)) Of course, he has never done anything, but he definitely always knows how it will be better))
  3. Engineer
    #4 Engineer Guests 14 January 2020 13:16
    1
    Quite an interesting thing. It is quite suitable for pensioners and people who find it difficult to throw a shovel. And the resource, well, what a resource, you won’t be working in three shifts, it’s perfect for home use.
  4. Georgiy
    #5 Georgiy Guests February 18, 2021 11:48
    1
    Why show a crude, unfinished design? Work it out, check it and then show what you got. This will be more interesting and more useful for followers.

Packaging with a rose for a bottle of wine | Do it yourself

2 simple and useful homemade attachments for an angle grinder

How to make a hummingbird | Do it yourself

Trimming technique: numbers, postcards, topiary. | Do it yourself

«Do it yourself - with your own hands» - a site of interesting homemade products made from scrap materials and items at home. Step-by-step master classes with photos and descriptions, technologies, life hacks - everything a real master or just a craftsman needs for needlework. Crafts of any complexity, a large selection of directions and ideas for creativity.

We recommend reading

Washing machine error codes