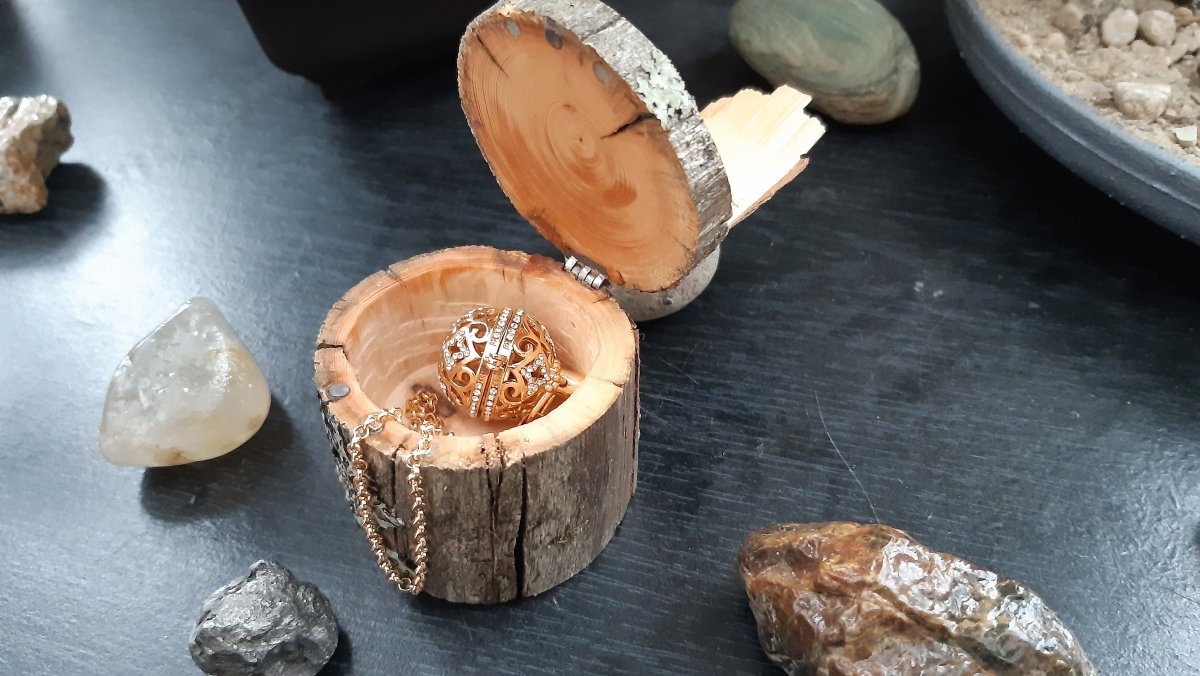
The eighth of March is approaching, and it's time to buy present for your ladies. Most men, according to statistics, in addition to a bouquet of flowers, buy jewelry as a gift to their women. Rings, earrings, pendants. In addition to the main gift, you also need to purchase beautiful packaging for this very gift. Along with jewelry dyeing, as a rule, a velvet case of a suitable shape is purchased. But a simple, ordinary case, albeit beautiful, is banal and predictable. My master class is for those who are tired of monotonous and boring standard packaging, who want to add at least some variety and individuality to the solemn moment of presentation. That is, make the original packaging yourself, with your own hands. The kind that you can’t buy in a store, which will be in a single copy. Namely, a box-case for jewelry, in the form of a piece of an old thick branch covered with moss.
There is nothing difficult in making such a thing. Working with dry wood - what could be easier!
Will need
- Ruler.
- Marker.
- Secondary glue.
- Boring machine with wood cutters, saw blade, and 1mm drill bit.
- Hacksaw.
- Wood sandpaper (coarse).
- Acrylic varnish.
- Small hinge-hinge.
- Neodymium magnets, 3mm in diameter.
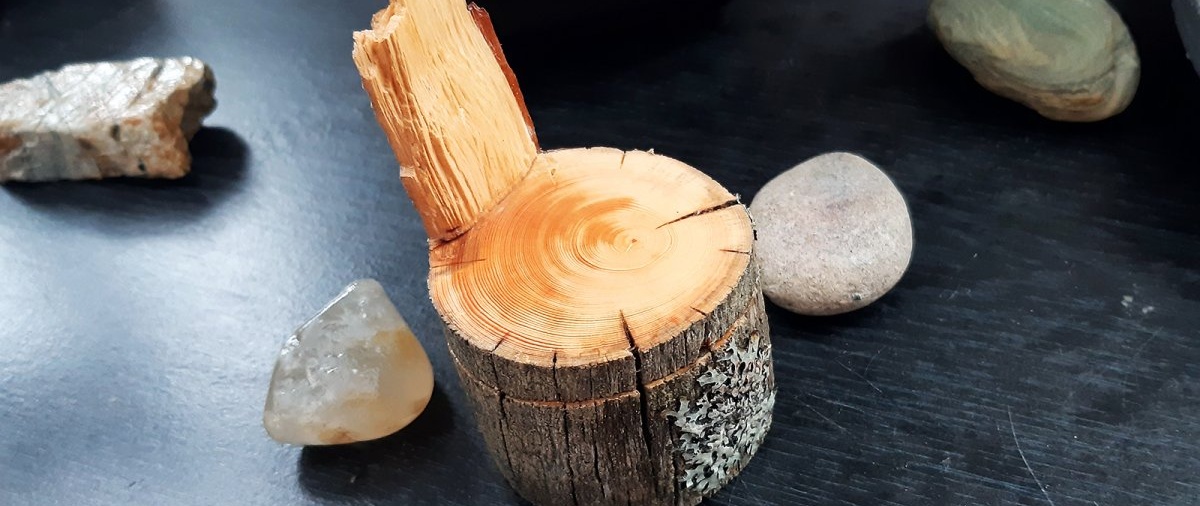
- Well, and, in fact, a thick branch from which the box will be made (with a diameter of at least 5 cm and a length of about 7-8 cm).

Making a box-case
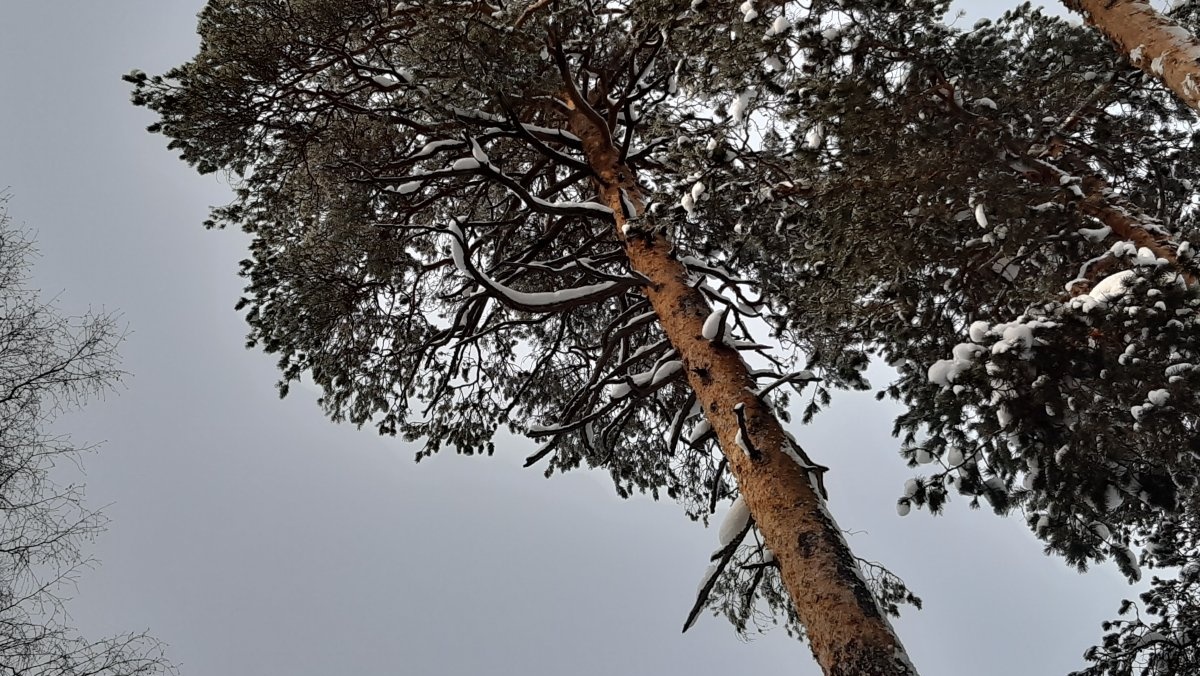
First, of course, you need to find a suitable material. You can get such a branch in any forest belt or park. They lie in abundance under tall old trees.
These are dry, dead and fallen branches from which the bark has already peeled off. Under the influence of time, wind and rain, they became smooth, slightly cracked along the length, and in places covered with moss and lichens. We cut off the required piece.

Let it thaw and dry for a couple of hours, and get to work. The first step is to align one of the ends. We make a cut with a hacksaw as evenly as possible - this will be the bottom. Next, measure 5 cm from the bottom and saw it off in the same way.

There is one point here; If you want to have a box with a smooth lid, then we saw it to the end, accurately and evenly. If, like mine, there is a small sliver left, such as a broken edge, then you should not cut all the way. Leave the outermost five mm and break it off along the notch. It will look something like this:
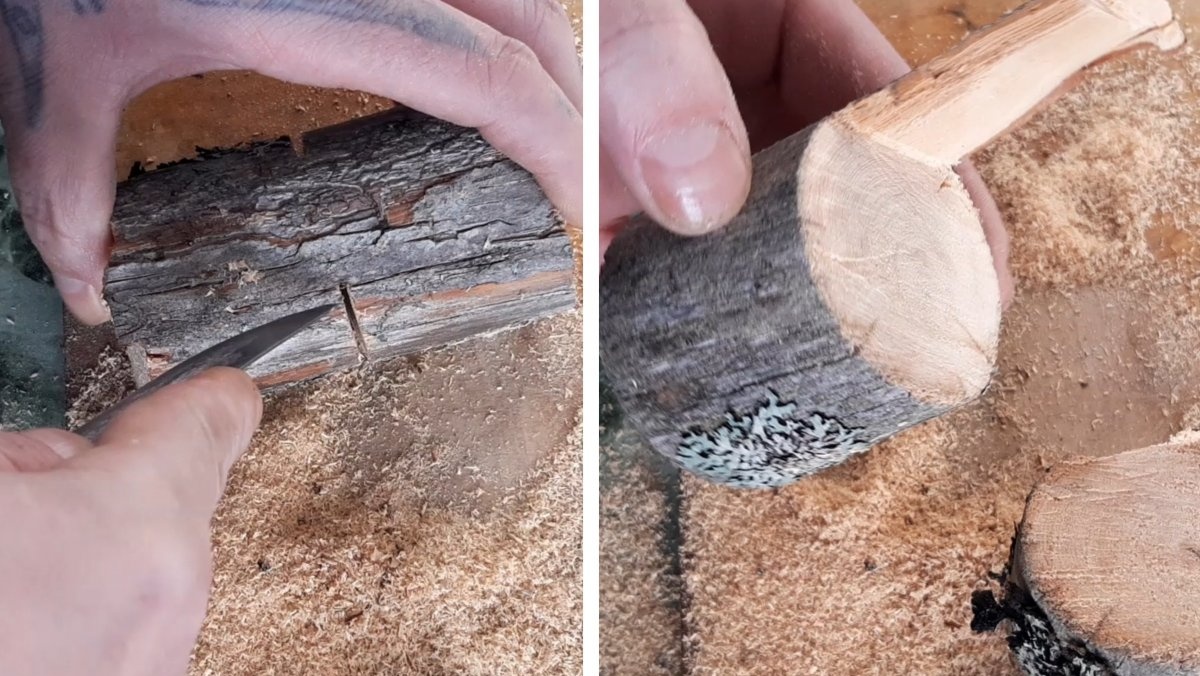
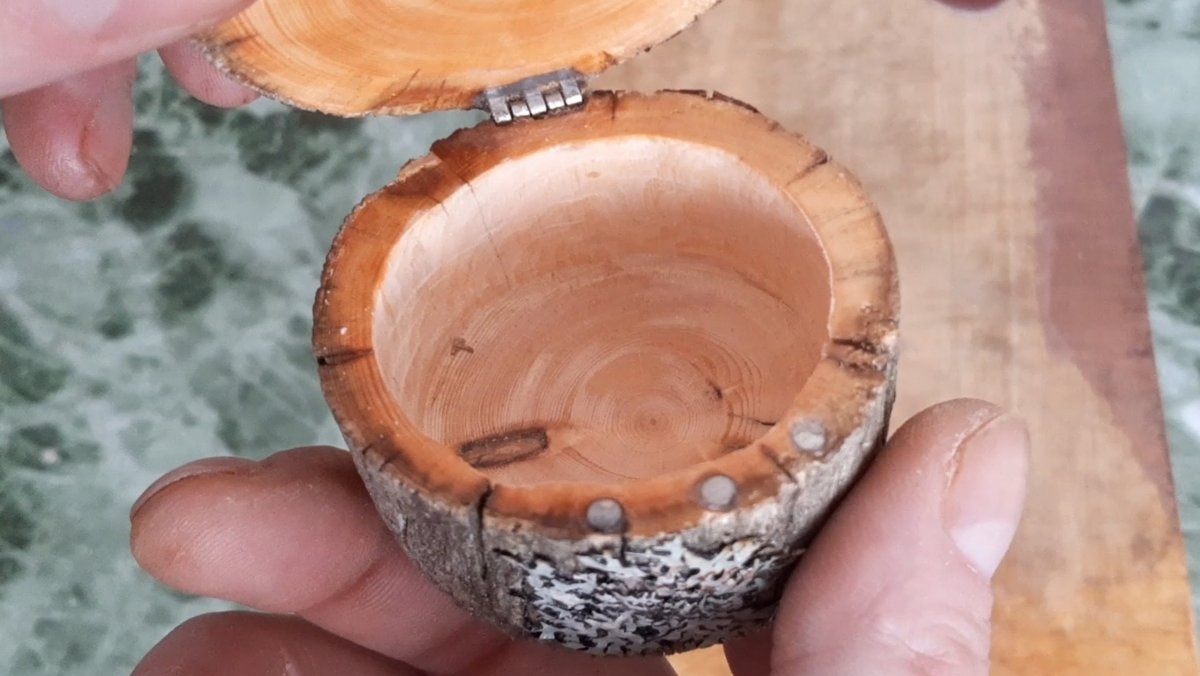
We sand the cuts with sandpaper. First large, then smaller ones. So that the natural pattern of tree rings appears.
Next, measure 1 cm from the top and saw off. This will be the lid.

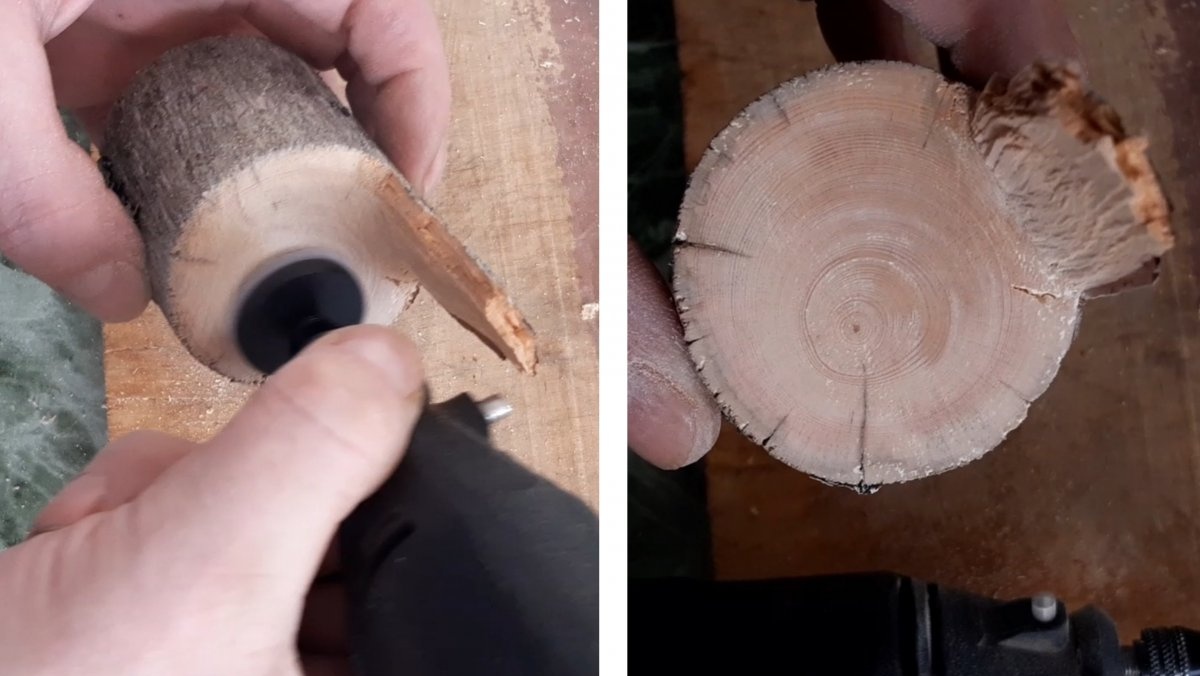
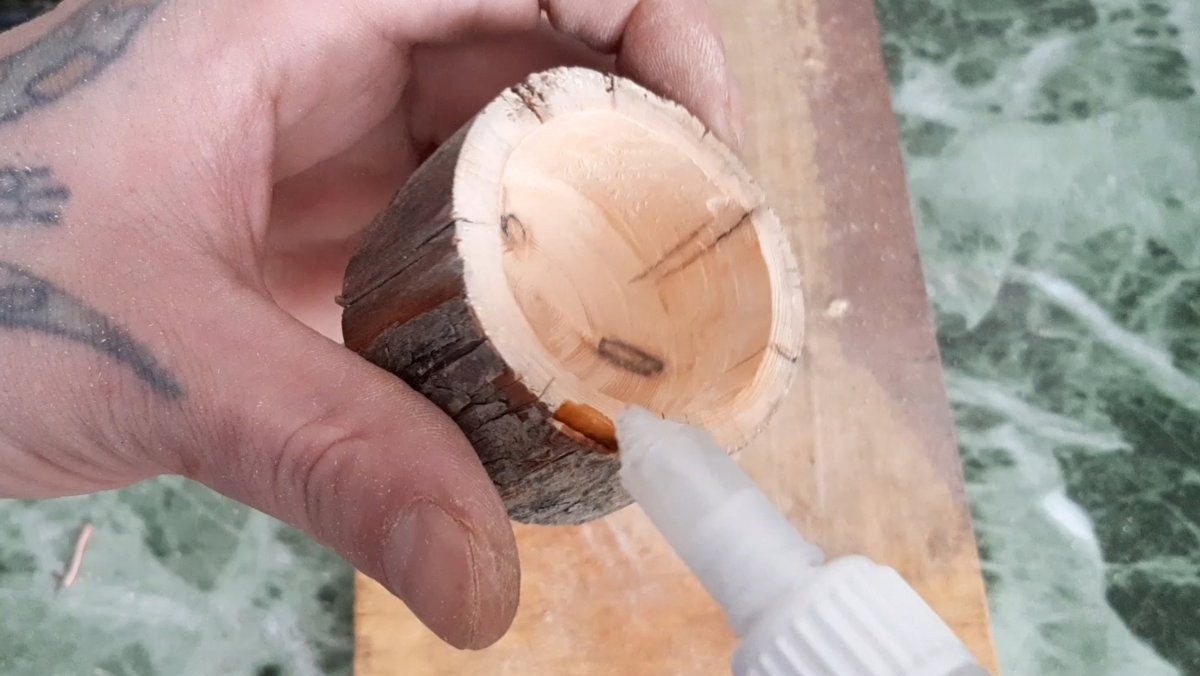
Now you need to drill out the middle of the future box.

For those who don’t have a burr machine and cutters, you can use a drill and a piece of a thick drill bit instead of a cutter. So, we drilled out the middle, leaving the walls and bottom about 5 mm thick. We also clean the inside with sandpaper.

All that remains is to install the loop and magnets. I borrowed the loop from the body of a gasoline lighter that was lying around.


You can use any similar one. Using a marker, mark the places on the body and lid where the loop will be installed, and drill out the grooves for the loop with a thin drill.
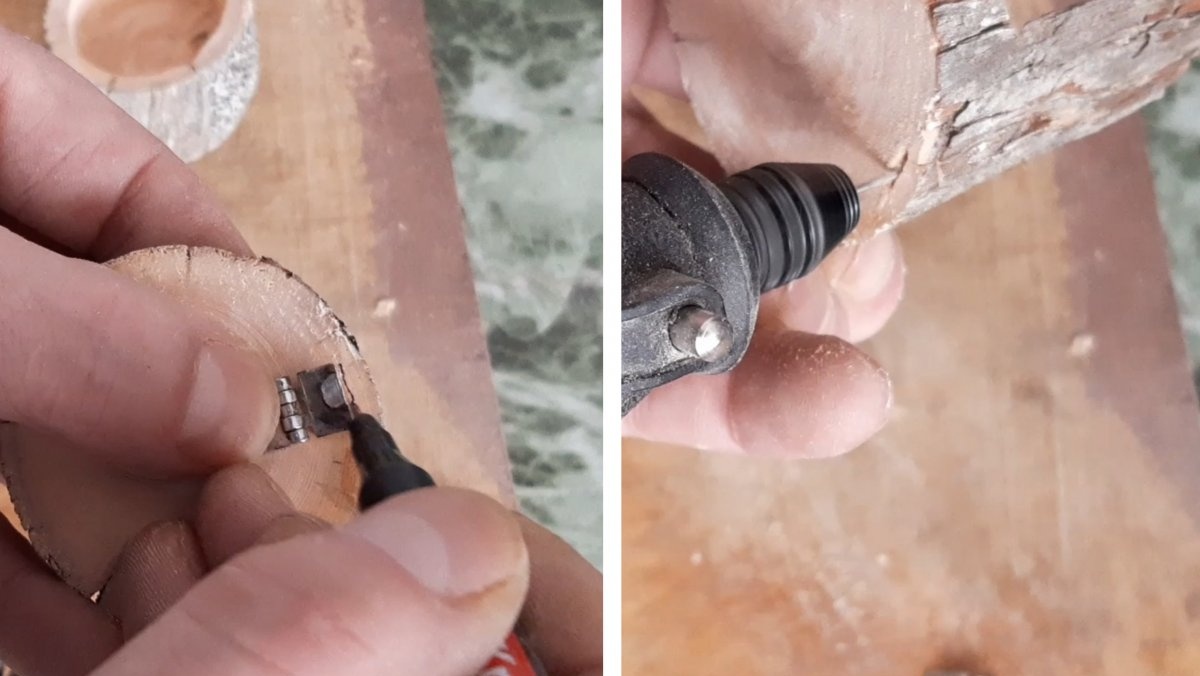

You should not worry that thin wood will not withstand it and will burst at the places where the hinges are attached; the second glue on which we place the hinges will saturate and make this wood look like stone!
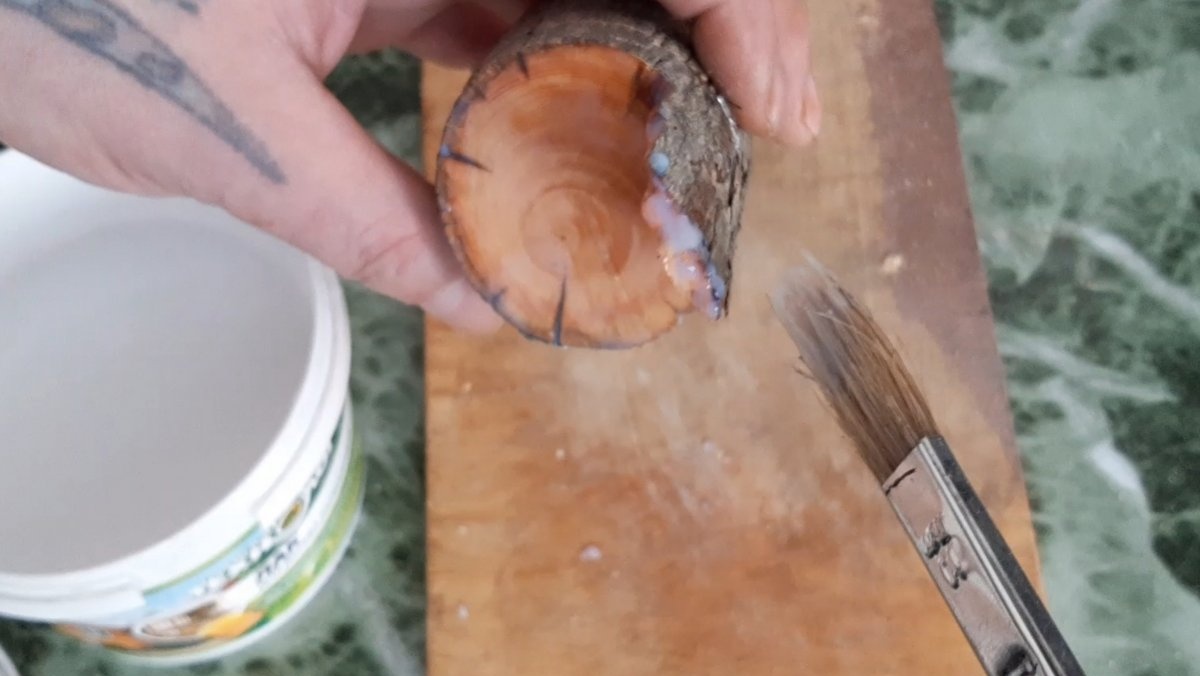
Now we varnish the entire outer area with varnish.
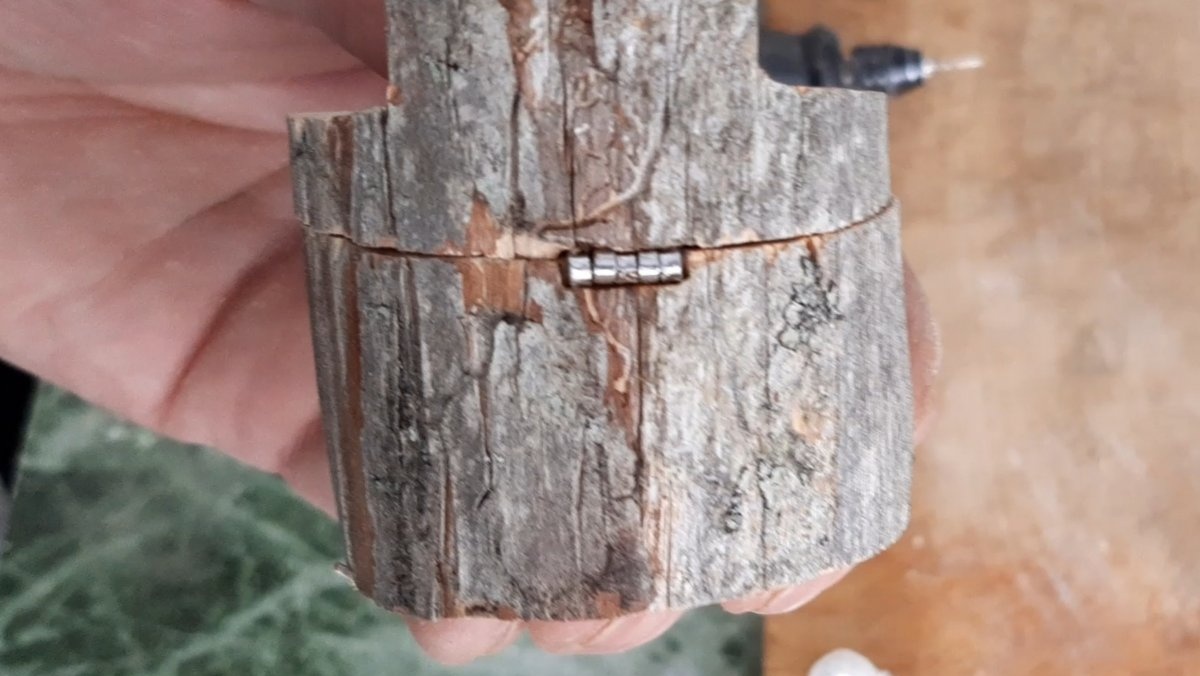
We put the box on the radiator to dry so that the varnish hardens faster and the glue sets. In warmth, the varnish hardens quickly, but it’s still better to wait a couple of hours, just in case. After the specified time has passed, we check how the loop works. If glue gets into it and it doesn’t work well, it doesn’t matter - drop a drop of oil on the loop, and everything will work as expected. All that remains is to install the magnets. These neodymium magnets can be removed from broken or unwanted headphones. Well, or buy it in a store. So, using a suitable drill, we drill recesses for the magnets in the body of the box.
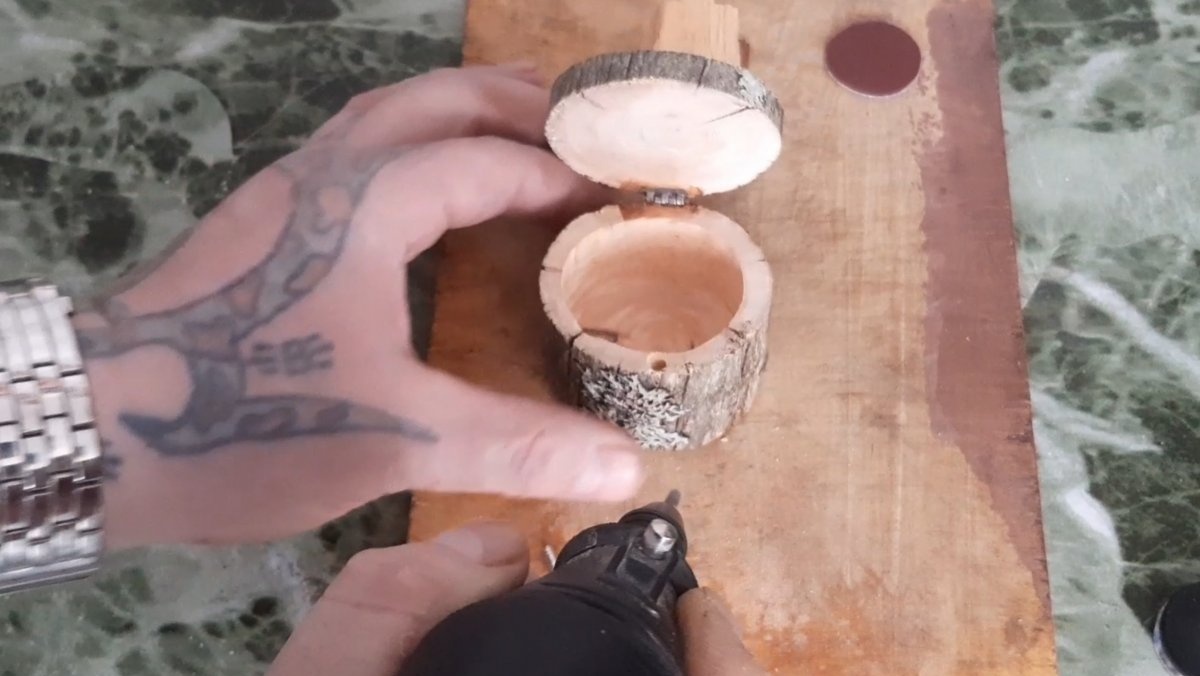
I made three deep notches, three magnets deep. To close more firmly. We insert magnets into the recesses and bury second glue in them. When the glue and magnets are firmly stuck to the wood, use sandpaper to remove the remaining glue. It will turn out like this:
We repeat the same procedure with the lid. From the inside, of course! Just carefully measure so that the magnets on the lid are positioned exactly opposite the magnets on the body.

And don't forget about the polarity of magnets! If the polarity is incorrect, they will not attract the lid, but repel it. Well, the box-case is ready.You can coat it with varnish one more time, and then put a pillow or velvet fabric on the bottom on which the gift will lie. Any woman will be much more pleased with this packaging than the standard one from the store.

Also, when presenting such a gift, she will be pleased to know that the man’s hands are growing from the right place! And this was important at any time!