Will need
To improve the saw we must prepare:
- Multilayer plywood;
- wooden beam;
- various adhesives;
- screws and screws;
- mortise door hinge;
- bolts, washers and nuts;
- extension spring;
- wing bolts;
- spray paint cans, etc.
To work we will need: drill, hammer and punch, screwdriver and wrench, square, protractor ruler, etc.
Rack manufacturing process

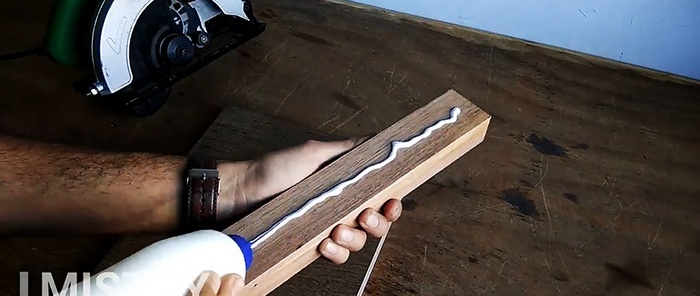
To one edge of the furniture rectangular board along the width we glue a proportionate wooden beam with PVA glue.
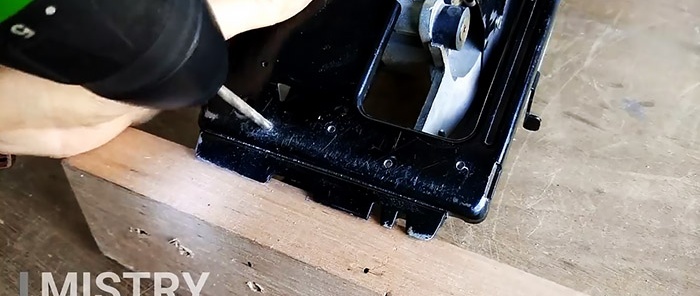
We drill 4 holes on the back side of the shield above the beam, countersink them for countersunk screw heads and screw them in with a drill.

On all corners of the base, without going beyond the dimensions, we glue small squares from the same furniture board and secure them with countersunk screws.


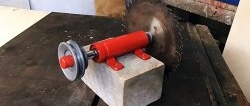
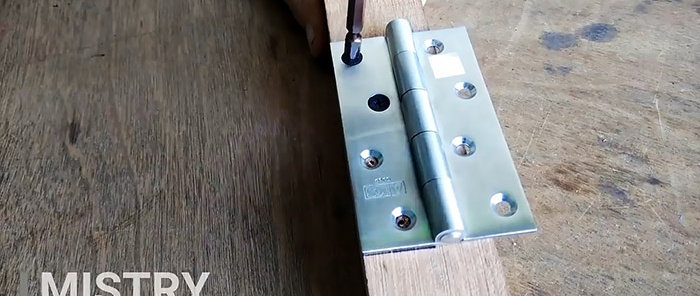
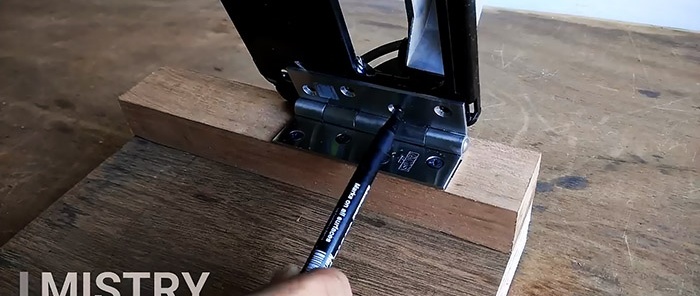
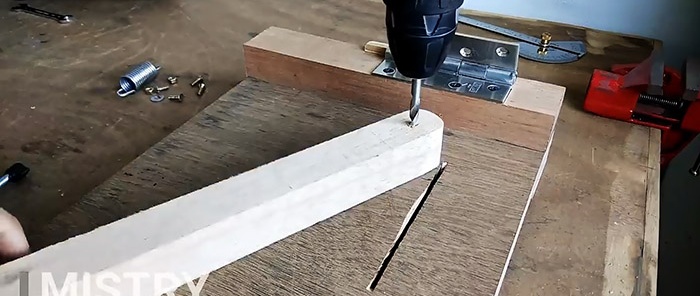
We fasten one wing of the mortise door hinge to the center of the beam from above with screws.
We fasten the saw blade to the second wing using screws, washers and nuts, using a hand screwdriver and a wrench.
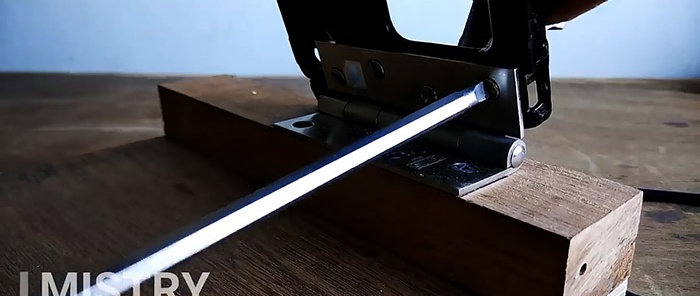
On the side of the outer surface of the beam, approximately under the center of the mortise loop, we screw in a screw, to which and to the bracket on the saw body we connect a compression spring, which will return and hold the saw in the upper position.

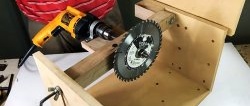
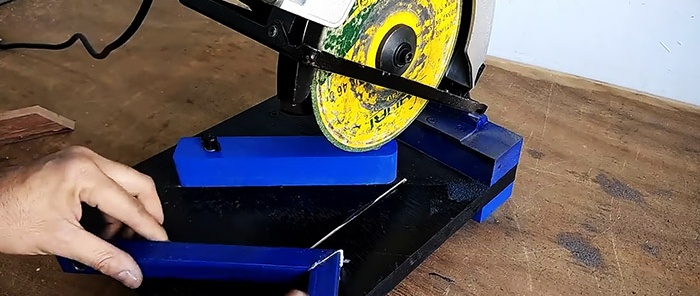
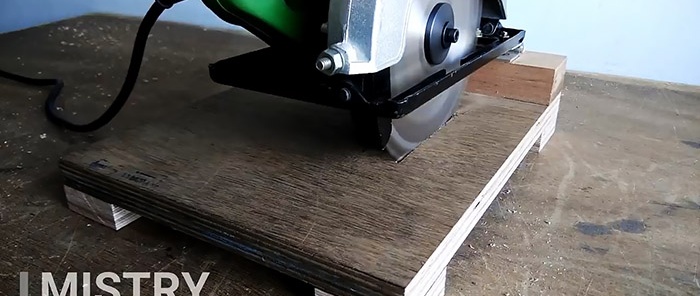
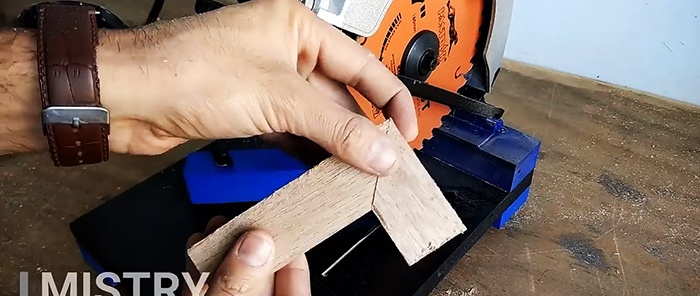
We fix the cutting blade on the saw regularly, checking its verticality with a square. We use a disk to saw a groove in the base so that it can come out when sawing workpieces.
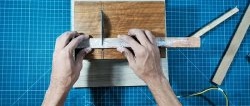
We temporarily remove the saw and try on a square beam with a rounded end, which will be fixed transversely to the groove at its beginning on the left. Using a drill, we drill a through hole at the rounded end of the beam and go a little deeper into the base material.
We slightly widen and deepen the mark in the base, place a nut over it and, using a suitable screw and hammer, drive in the hardware. To make it stay in the socket better, we impregnate the boundary between the nut and the base material with superglue.
We insert a wing bolt into the hole in the beam and screw it into the nut. Using a square, we align the beam so that it forms a right angle with the groove for the disk. Mark this position on the base and secure it with a wing bolt.
We also drill a through hole from the other edge of the beam, leaving a drill mark on the base. After this, unscrew the bolt and remove the beam. We prepare the drill mark on the base and fasten the nut as we did the first time.
We put the beam in place and fix it with two wing bolts. We mark the place where the timber is cut along the edge of the base, remove it and shorten it, after which we put it back in place and fasten it only with a bolt closer to the groove.
Rotate the beam around the bolt 45 degrees using a protractor ruler. We fix it in this position and through the hole at the other end of the beam, make a mark with a drill on the base.

We move the beam to the side and, as in previous times, prepare a recess for the nut and fix it in the blind hole. We again install the beam in the second position and fix it with another wing bolt.
We paint the details of the resulting structure in two colors according to a certain system using construction tape to create clear boundaries between the colors.

We install a disk and a beam on the saw, which sets the cutting angles, after which our modernized circular saw is ready for work. Now we can saw wood and metal workpieces quickly and accurately at right angles and 45 degrees.