Do it yourself
Life hacks, master classes, useful tips, recipes.
home » Construction and repair » How to repair a faucet axle box without buying spare parts once and for all
How to repair a faucet axle box without buying spare parts once and for all

The cause of dripping from the mixer is wear of the faucet axle box. Many people simply change it, because they do not know that it can be easily repaired by replacing the fluoroplastic pressure washers with new copper ones. The proposed method allows you to repair the crane axle box even easier, without purchasing any parts at all.
The faucet is leaking

What you will need:


  • copper wire with a diameter of 1 mm;
  • adjustable wrench;
  • screwdriver;
  • wire cutters

Crane axle repair process


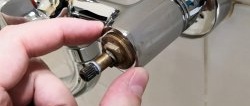
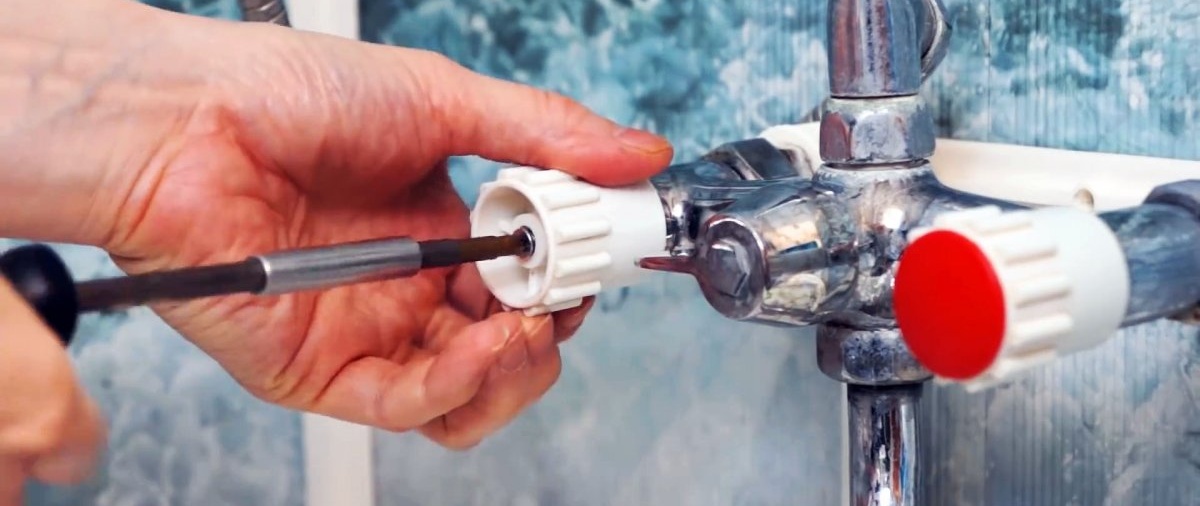
First of all, we determine which valve axlebox is leaking. Then we remove the lamb from it and unscrew it from the mixer with an adjustable wrench.
Unscrew the screw from the mixer wing

unscrew the valve axle from the mixer with an adjustable wrench

On the back of the faucet box there is a black rubber or colored silicone seal. You need to pull it out and remove 2 ceramic plates.
faucet mixer box

There is a black rubber or colored silicone seal on the back of the crane axle box

remove 2 ceramic plates

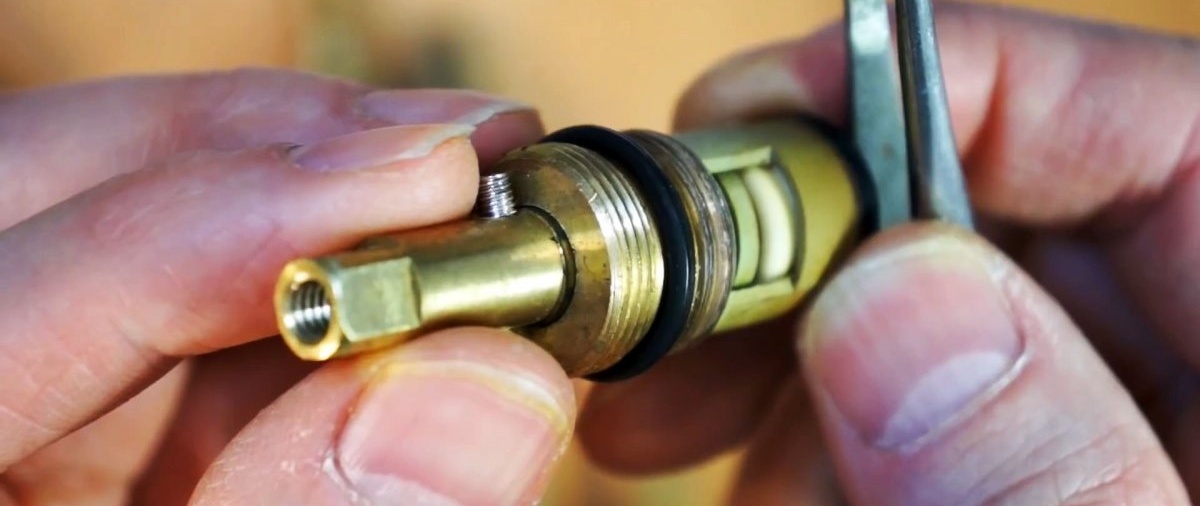
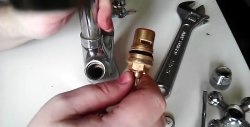
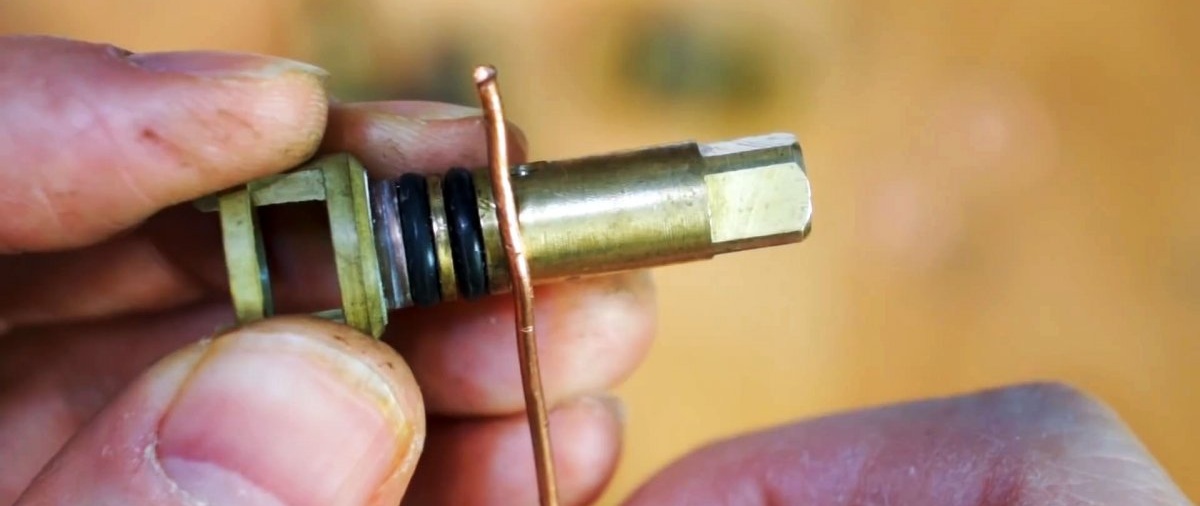
Next, you need to push out the rotary rod. It's stuck. To do this, you will need to unscrew the stopper on the side or remove the ring, depending on the configuration of the axle box valve. After this, the rod will come out of the body.
unscrew the side stopper or remove the ring

it is necessary to push out the rotary rod

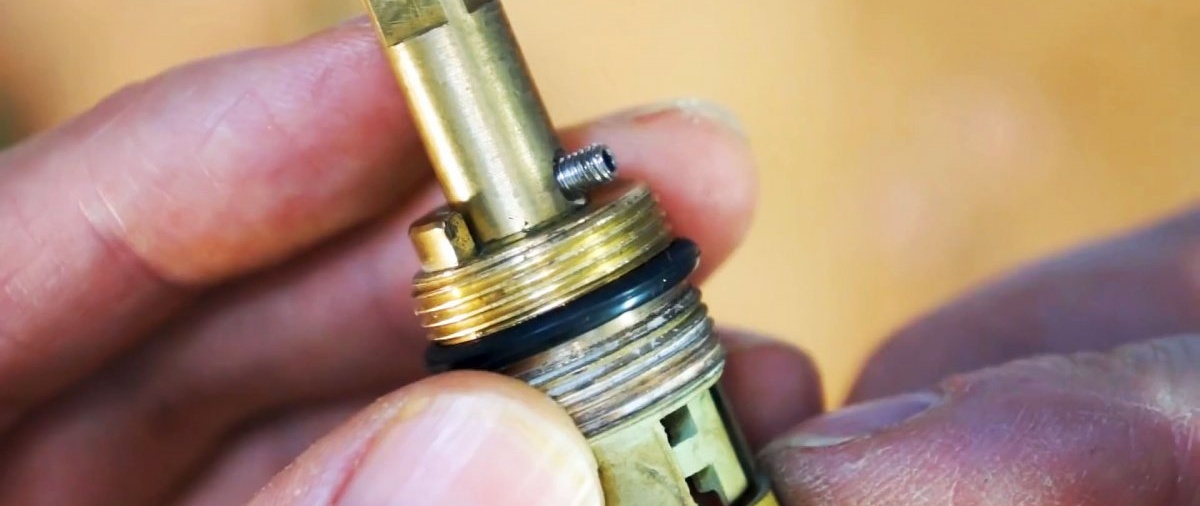
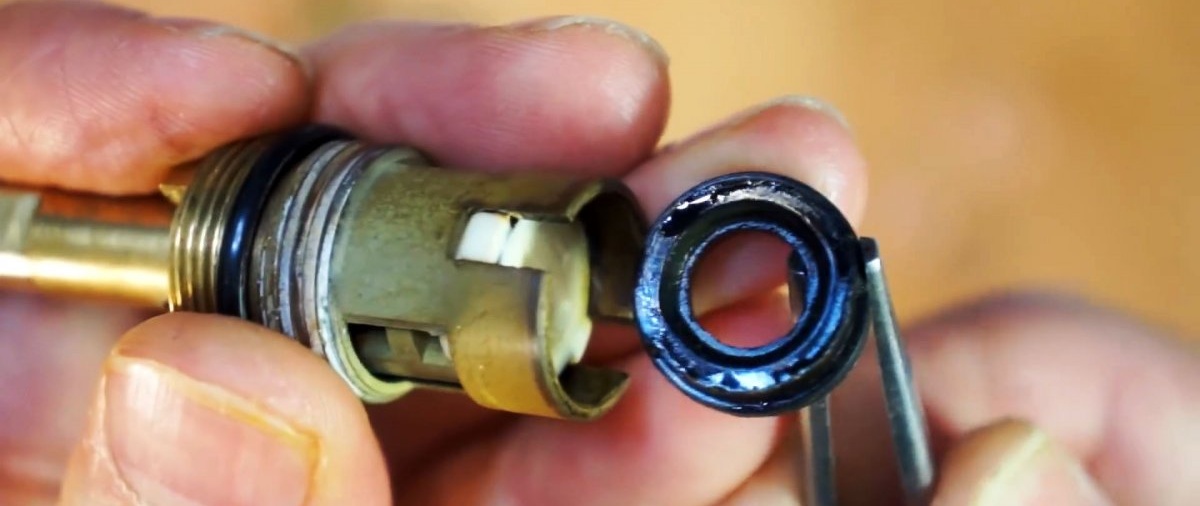
At the bottom of the rod there is a fluoroplastic ring, which is the cause of the drip. It wears off and the ceramic plates are not pressed. Typically repairs involve replacing it with a copper washer.When it is not at hand, you can use a homemade ring.
the rod has a fluoroplastic ring

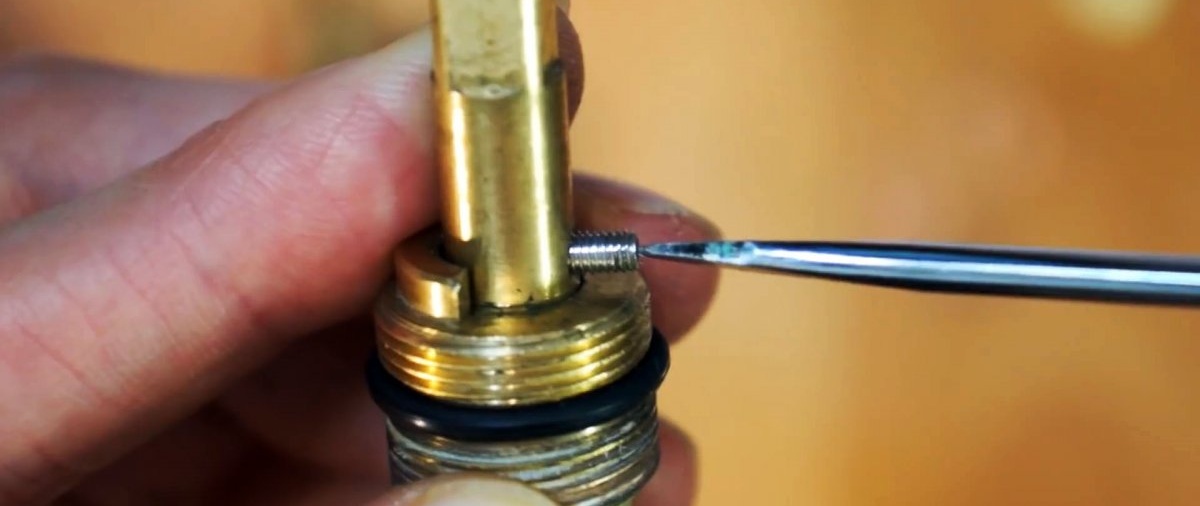
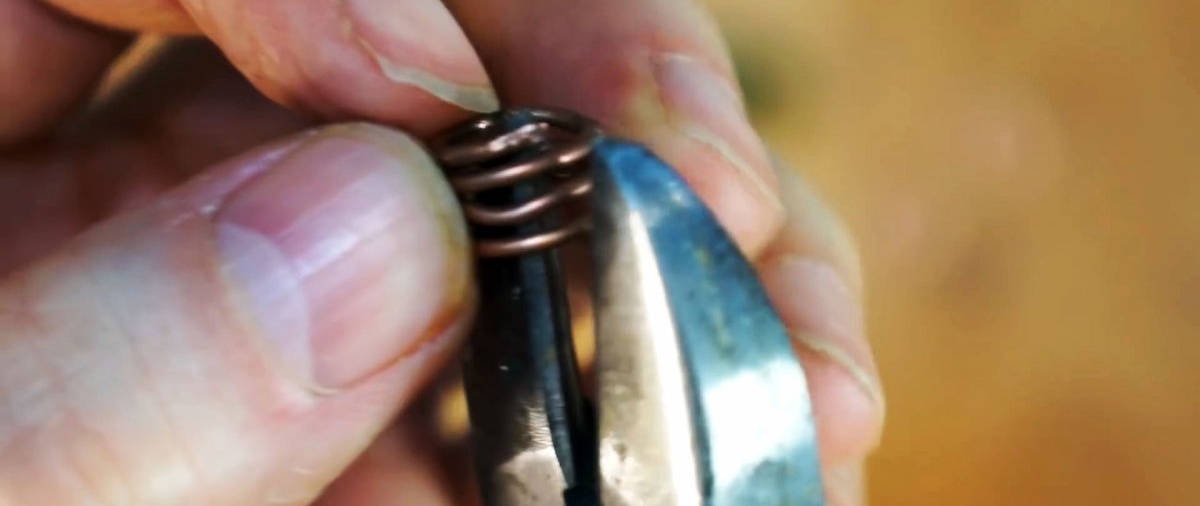
To make it, a pair of turns of copper wire from a wire with a core cross-section of 0.75 sq. mm is wound onto the rod. Then the coils are cut with wire cutters. The result is several repair rings.
Take copper wire

We wind the wire on the faucet axle box of the mixer

We cut with nippers

copper ring

A homemade ring is placed instead of a fluoroplastic washer. Then you need to clean the dirt from under the rubber seals on the rod. If they were brought up, then a little fum tape is wound on them.
A homemade ring is placed instead of a fluoroplastic washer

Next, the rod is installed in place and locked. It is important that it does not dangle. If there is play, then a repair ring should be made from thicker wire. After this, the ceramic plates are returned. You need to check that when you turn the rod to the left, they open the flow.
the rod is installed in place and locked

ceramic plates are returning

If possible, it is worth replacing the black rubber seal with a silicone one from an old crane axle box, if you have one.
replace the black rubber seal with a silicone one

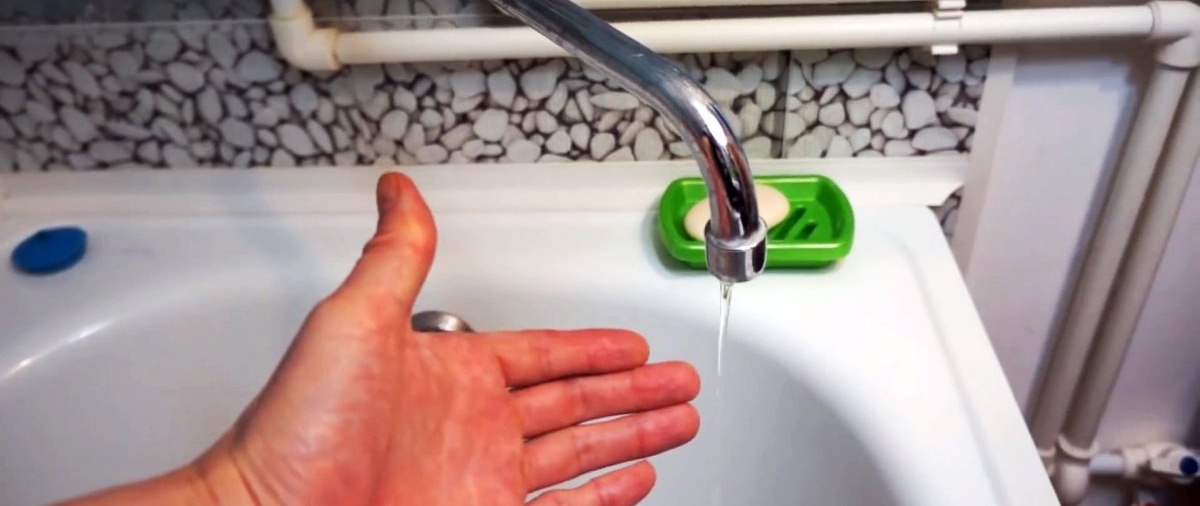
After this, the mixer is assembled and tested.
unscrew the valve axle from the mixer with an adjustable wrench

With the new ring there will be no more leaks.
Repaired faucet no longer leaks

Watch the video


come back
Comment
  • bowtiesmilelaughingblushsmileyrelaxed relaxedsmirk
    heart_eyeskissing_heartkissing_closed_eyesflushedrelievedsatisfiedgrin
    winkstuck_out_tongue_winking_eyestuck_out_tongue_closed_eyesgrinningkissingstuck_out_tonguesleeping
    worriedfrowninganguishedopen_mouthgrimacingconfusedhushed
    expressionlessunamusedsweat_smilesweatdisappointed_relievedwearypassive
    disappointedconfoundedfearfulcold_sweatperseverecrysob
    joyastonishedscreamtired_faceangryragetriumph
    sleepyyummasksunglassesdizzy_faceimpsmiling_imp
    neutral_faceno_mouthinnocent
4 minus one =
Comments (2)
  1. Sergey
    #1 Sergey Guests 15 January 2021 20:00
    2
    Thanks to the author, I learned a lot of new things, cool video is clear and intelligible!
  2. Victor
    #2 Victor Guests 19 January 2021 23:18
    2
    With hard water, silicone and ceramic parts quickly become covered with scale and firmly adhere to the sleeve. Accordingly, there is no elastic pressure, and there is a leak. Previously, I cleaned it once every six months, and the leak disappeared without replacing the washers. Then I tried to apply graphite (pencil) to the inside of the sleeve. I don’t know if the graphite helped, or if the water became better, but I already forgot the last time it dripped.

“Bogatyrskie” manti with minced meat | Do it yourself

Wire jig | Do it yourself

Postcard "Owls" | Do it yourself

Do it yourself - crafts and master classes | Page 208

«Do it yourself - with your own hands» - a site of interesting homemade products made from scrap materials and items at home. Step-by-step master classes with photos and descriptions, technologies, life hacks - everything a real master or just a craftsman needs for needlework. Crafts of any complexity, a large selection of directions and ideas for creativity.

We recommend reading

Washing machine error codes