Do it yourself
Life hacks, master classes, useful tips, recipes.
home » Workshop » How to make a welding clamp for any welding angle
To quickly and evenly weld pipes, rods and other rolled metal at an angle, it is very convenient to use a special clamp. It holds parts stronger than magnets, and is also capable of being adjusted to different joining angles. This is a really useful device for a welder, which is not difficult to make yourself.
How to make a welding clamp for any welding angle

Basic materials:


  • pipe 100 mm;
  • corner 50x50 mm;
  • strip 50 mm;
  • M16 studs – 2 pcs.;
  • bolts M10, M16;
  • regular and extended nuts, washers M10, M16, M20.

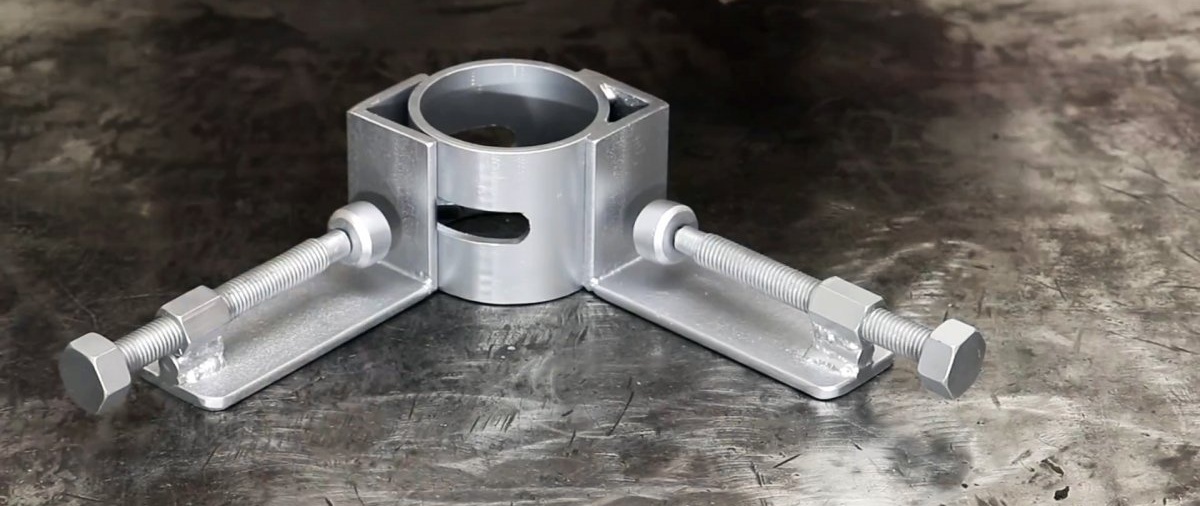
The process of making a clamp for welding


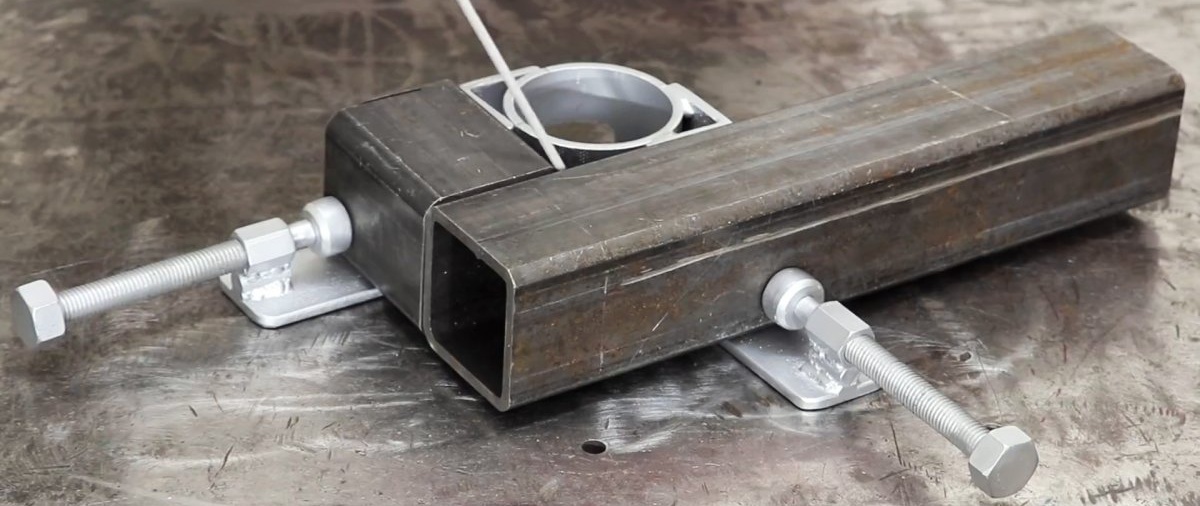
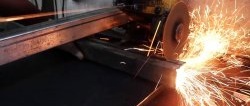
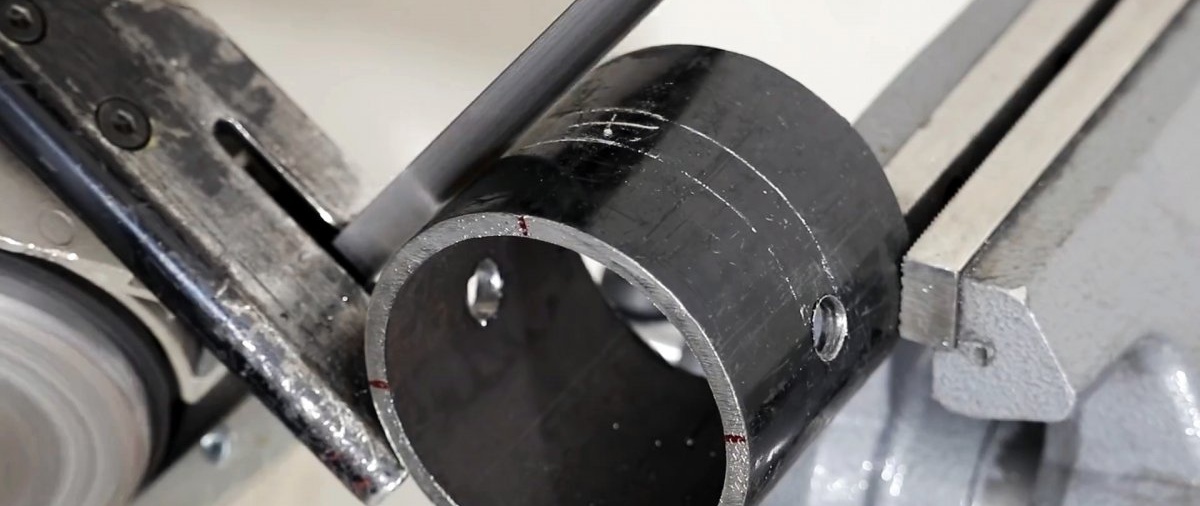
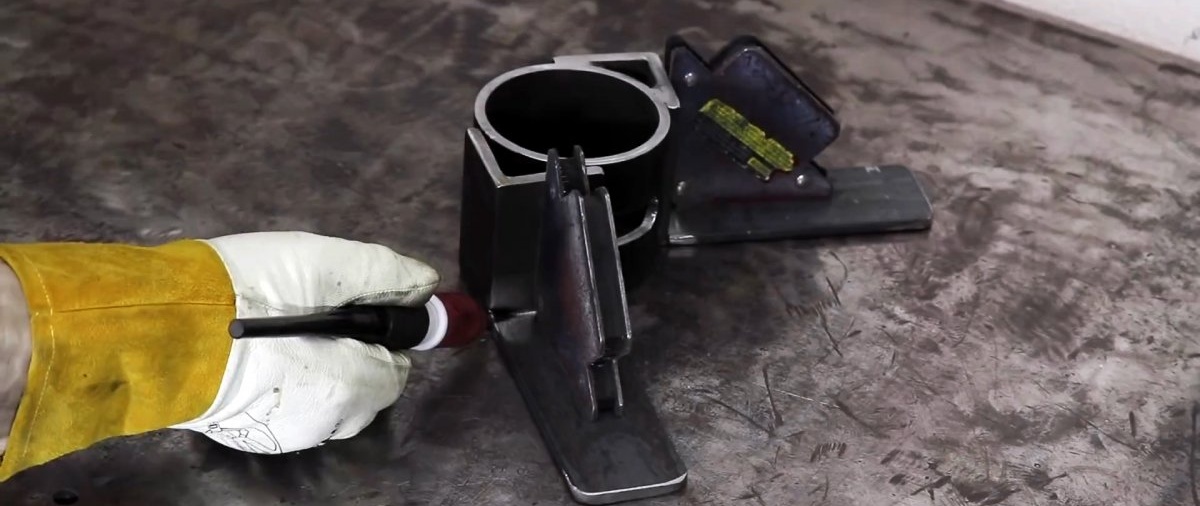
You need to cut a piece 7-10 cm long from the pipe. A cutout 16 mm wide is made in the center, halfway around the circle.
A cut is made in the pipe blank

Blank with cutout

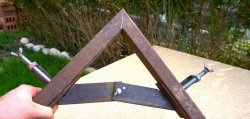
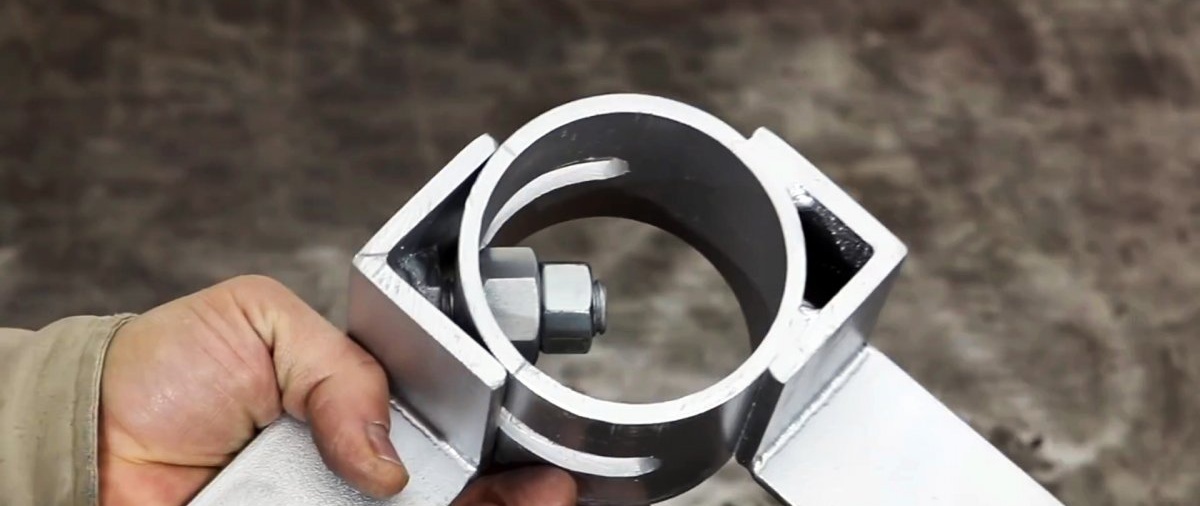
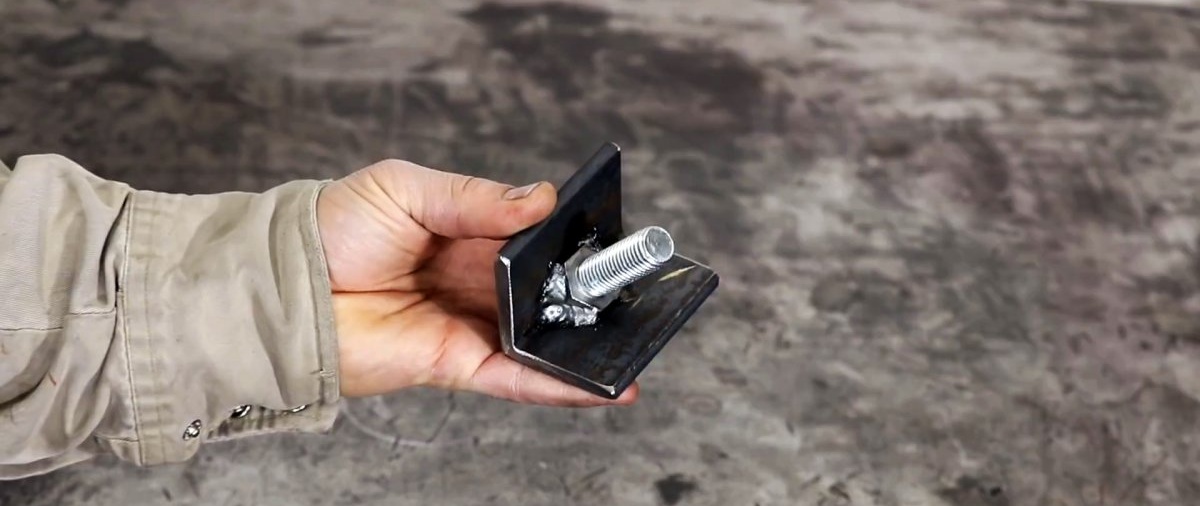
Next you need to prepare 2 pieces of angle along the length of the pipe. An M16 bolt with a machined head is welded into the center of one of them.
A bolt is welded into the center of the corner

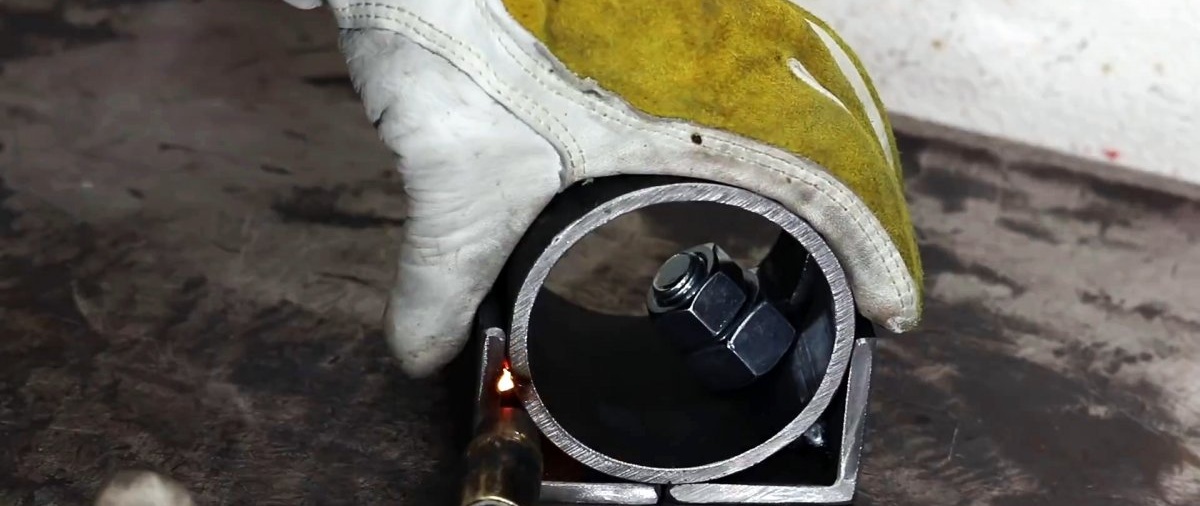
The angle with the bolt is inserted into the slot in the pipe. From the inside, an M20 nut is put on it and an M16 is screwed on.
The angle with the bolt is inserted into the slot in the pipe and secured with nuts

You need to move the corner to the edge of the groove and clamp it. Then a second one is placed close to it and welded to the pipe.
The second corner is welded to the pipe

Strips 15 cm long are welded to the corners at right angles. It is important that the metal does not bend during welding and that the angle is maintained.
A strip section is welded to the corners at right angles

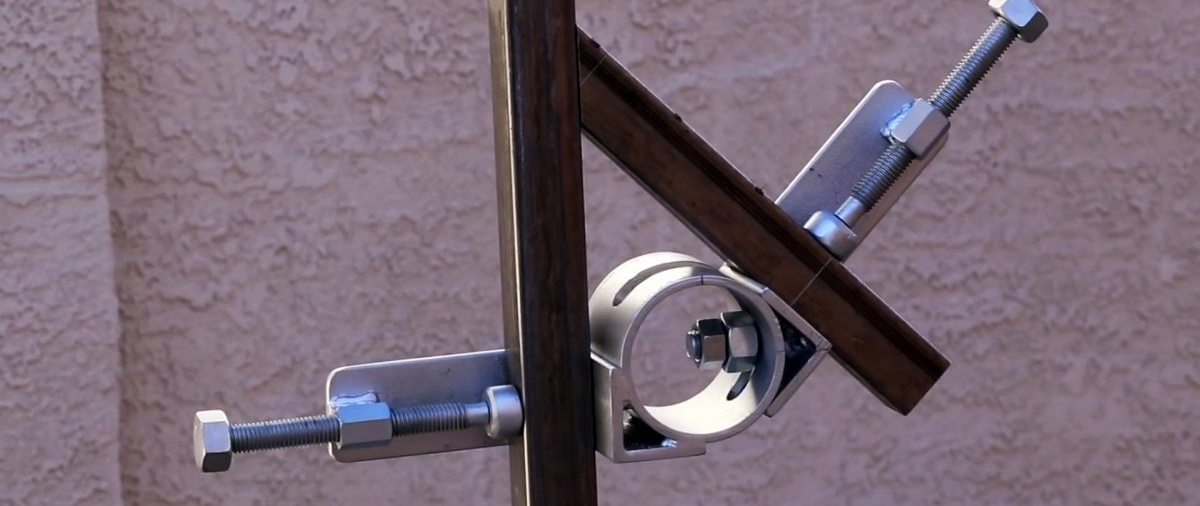
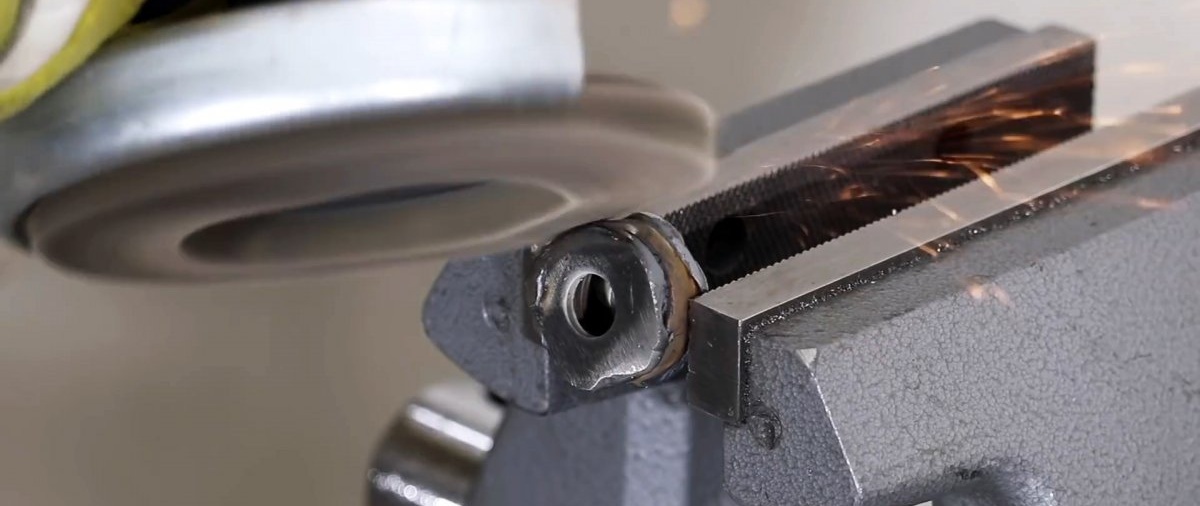
At the next stage, 2 stops are made for clamping the clamp. To do this, 2 rings are cut from a 3/4 inch tube.
2 rings are cut from an inch tube

Washers are welded to their sides. On one side you need to weld a small washer so that the head of the M10 bolt does not pass through it.
Washers are welded to the sides of the segments

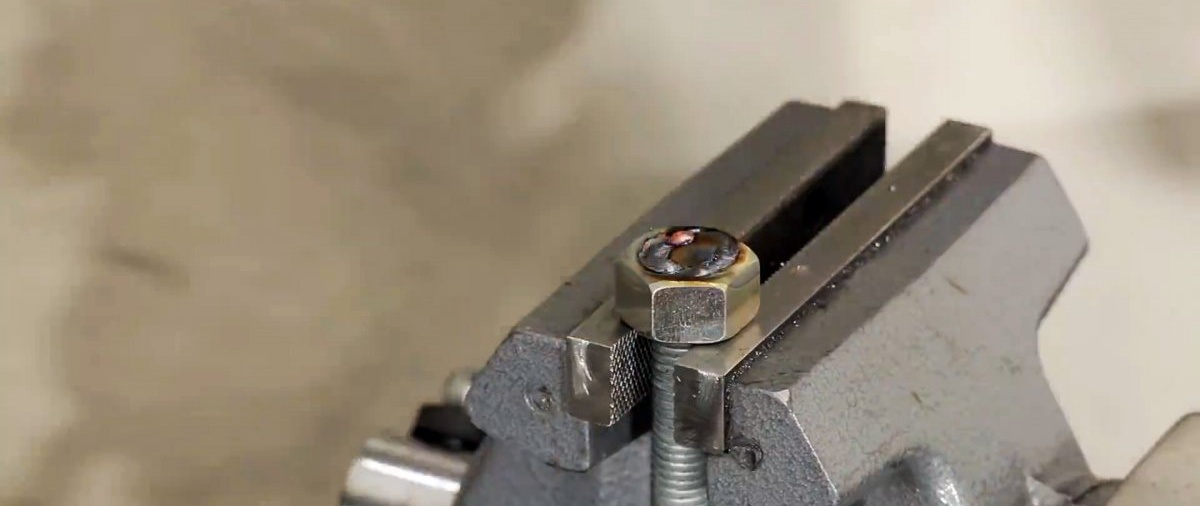
To make the clamp you need to prepare 2 M16 studs. A head is welded to them at one end; M20 nuts can be used as it.
A nut is welded to the end of the stud

From the second one, M10 nuts are welded to the end. The latter are machined in order to screw extended M16 nuts onto the studs.
M10 nuts are welded at the second end of the pipe

screw extended M16 nuts onto the studs

The stops are screwed to the studs with M10 bolts.
Stops are screwed to the studs

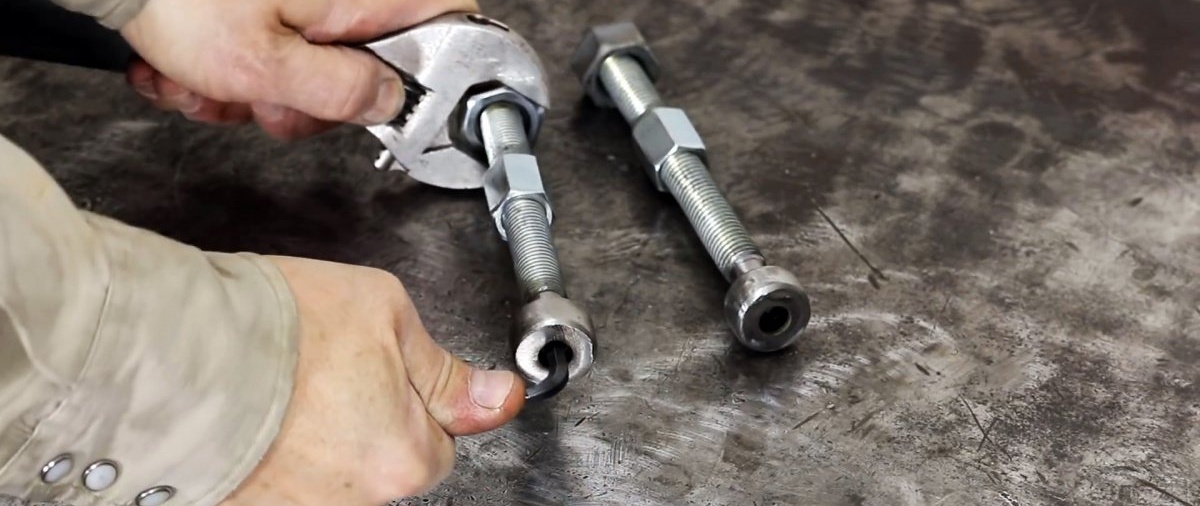
Next you need to weld them with elongated nuts to the strips at the corners. For this purpose, spacers made of rods are used.
We weld the stops

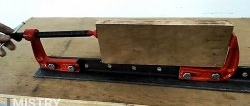
After welding, the clamp is painted.
the clamp is painted

Its movable corner must be installed exactly opposite the welded one in order to maintain a right angle. Then marks are made on the pipe with a hacksaw along its edges. After this, you should move the moving angle to 45 degrees, and also put notches.
We mark the clamp with notches

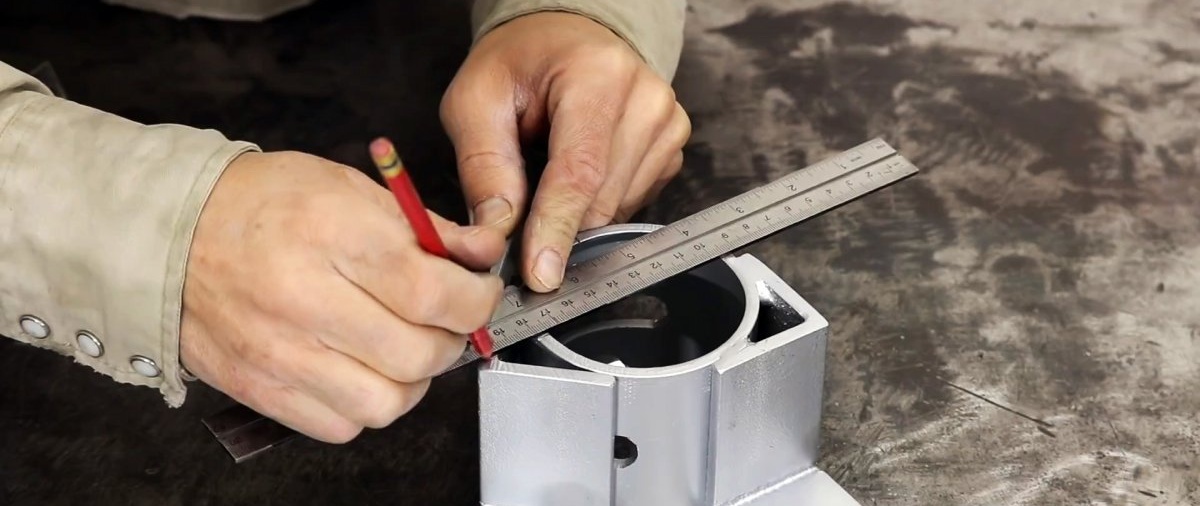
Based on the marks, it will be possible to set the clamp at the desired angle and clamp pipes or other rolled products on it for welding. The result is a very convenient, useful design that allows you to weld even metal structures.
We weld with a homemade clamp at a right angle

We weld with a homemade clamp at any angle

We weld with a homemade clamp

We weld any angle with a homemade clamp under a canopy

We weld with a homemade clamp at right angles on weight

Watch the video


come back
Comment
  • bowtiesmilelaughingblushsmileyrelaxed relaxedsmirk
    heart_eyeskissing_heartkissing_closed_eyesflushedrelievedsatisfiedgrin
    winkstuck_out_tongue_winking_eyestuck_out_tongue_closed_eyesgrinningkissingstuck_out_tonguesleeping
    worriedfrowninganguishedopen_mouthgrimacingconfusedhushed
    expressionlessunamusedsweat_smilesweatdisappointed_relievedwearypassive
    disappointedconfoundedfearfulcold_sweatperseverecrysob
    joyastonishedscreamtired_faceangryragetriumph
    sleepyyummasksunglassesdizzy_faceimpsmiling_imp
    neutral_faceno_mouthinnocent
3+three=
Comments (0)

How to make a shaft for a circular saw from scrap materials

How to use car tires in the garden

Patterned Ceiling Light | Do it yourself

Vase for cosmetics | Do it yourself

«Do it yourself - with your own hands» - a site of interesting homemade products made from scrap materials and items at home. Step-by-step master classes with photos and descriptions, technologies, life hacks - everything a real master or just a craftsman needs for needlework. Crafts of any complexity, a large selection of directions and ideas for creativity.

We recommend reading

Washing machine error codes