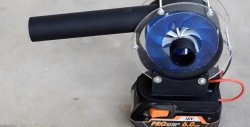
In the workshop, a lot of dust, shavings and other debris accumulate on work surfaces with folded tools. To erase or vacuum it, you need to remove everything first. This is long and difficult, so you can make a compact, powerful blower. It will allow you to blow debris from under the tools onto the floor without moving it.

Materials:
- Electric motor 775 DC 12V -
- 5.5mm power jack;
- 5.5 mm power plug with wire;
- round push-button switch;
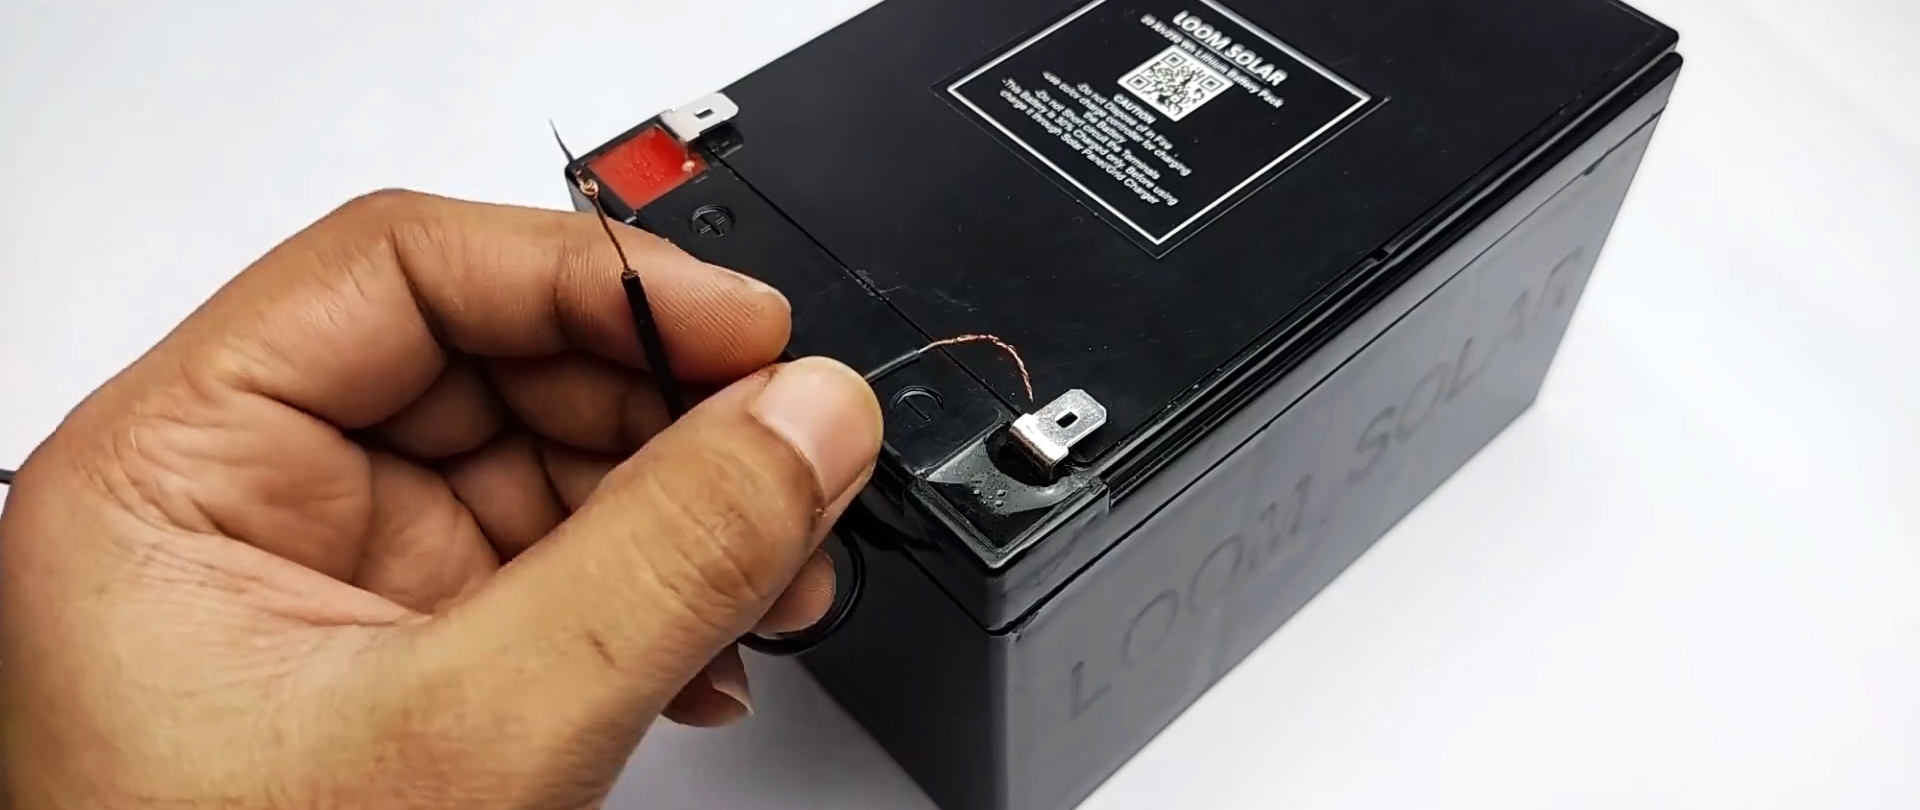
- battery 12V;
- sewer plastic pipe 110 mm, 50 mm, 20 mm;
- plexiglass;
- Super glue;
- wires.
Blower manufacturing process
It is necessary to cut a ring 50-60 mm wide from a 110 mm sewer pipe to make the blower body.


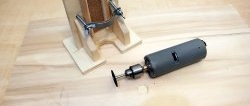
Then you need to make a plug for it. To do this, you need to loosen a piece of the same pipe lengthwise, and after heating the plastic with a hairdryer, level it, pressing it between two planes until it cools. A disk is cut out from the resulting plate, which fits tightly inside the previously sawn-off ring.

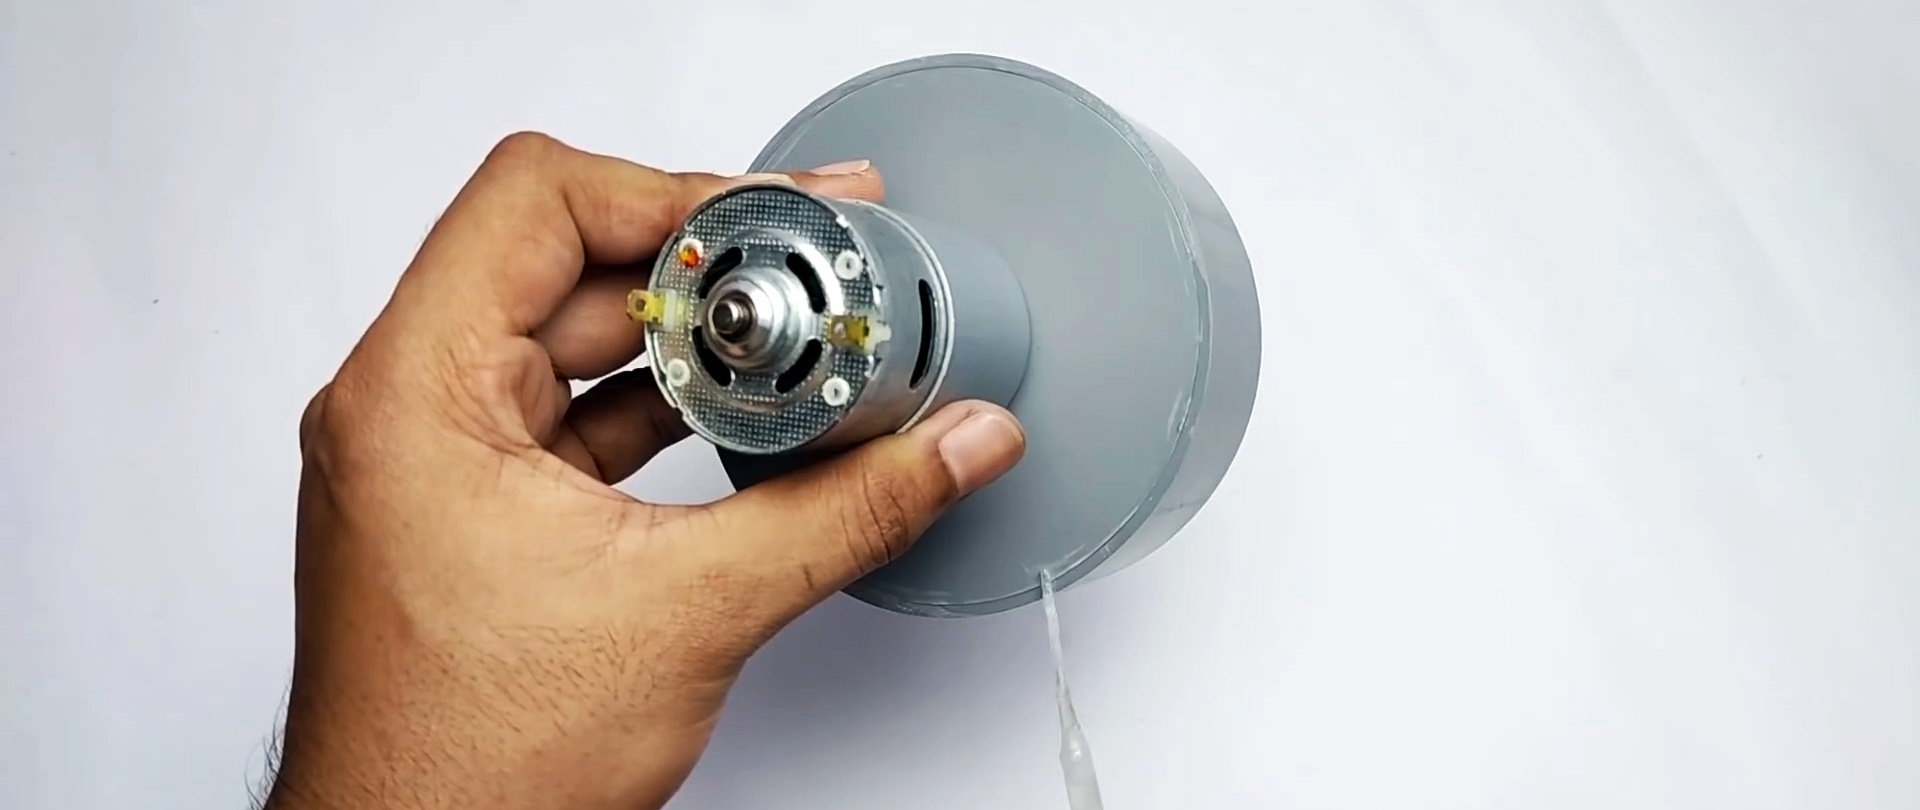
In the blank of the plug, a hole is visible in the center for the shaft of the electric motor, taking into account the protrusion on its body, as well as 2 more slightly on the side for the mount. Then the motor is screwed to it with two screws.

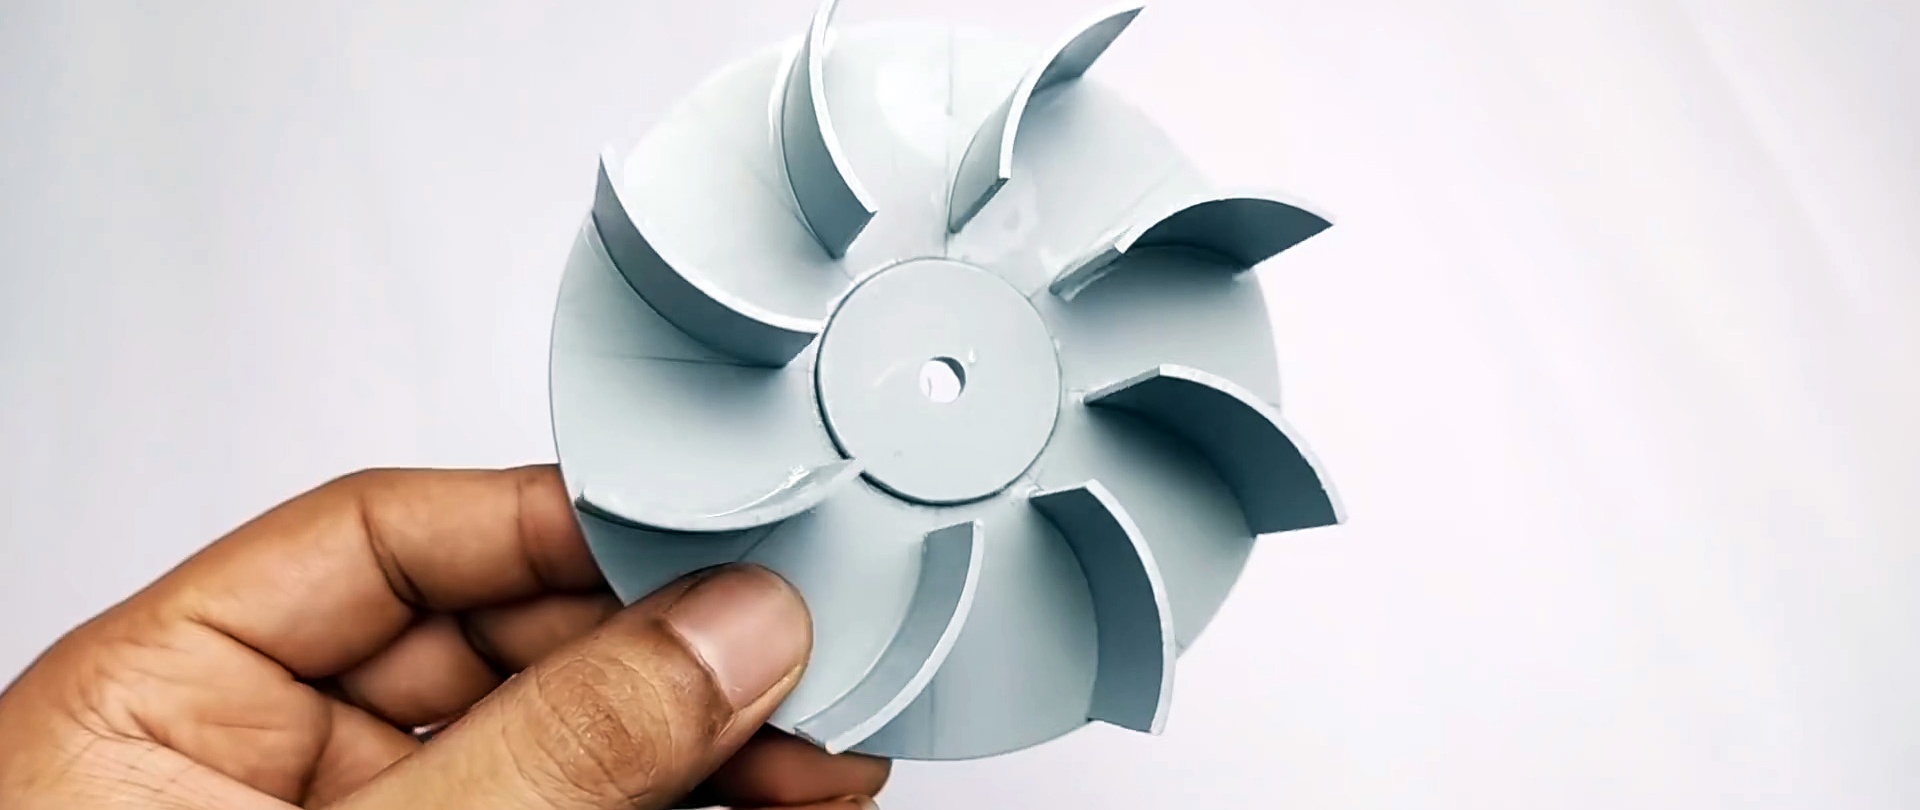
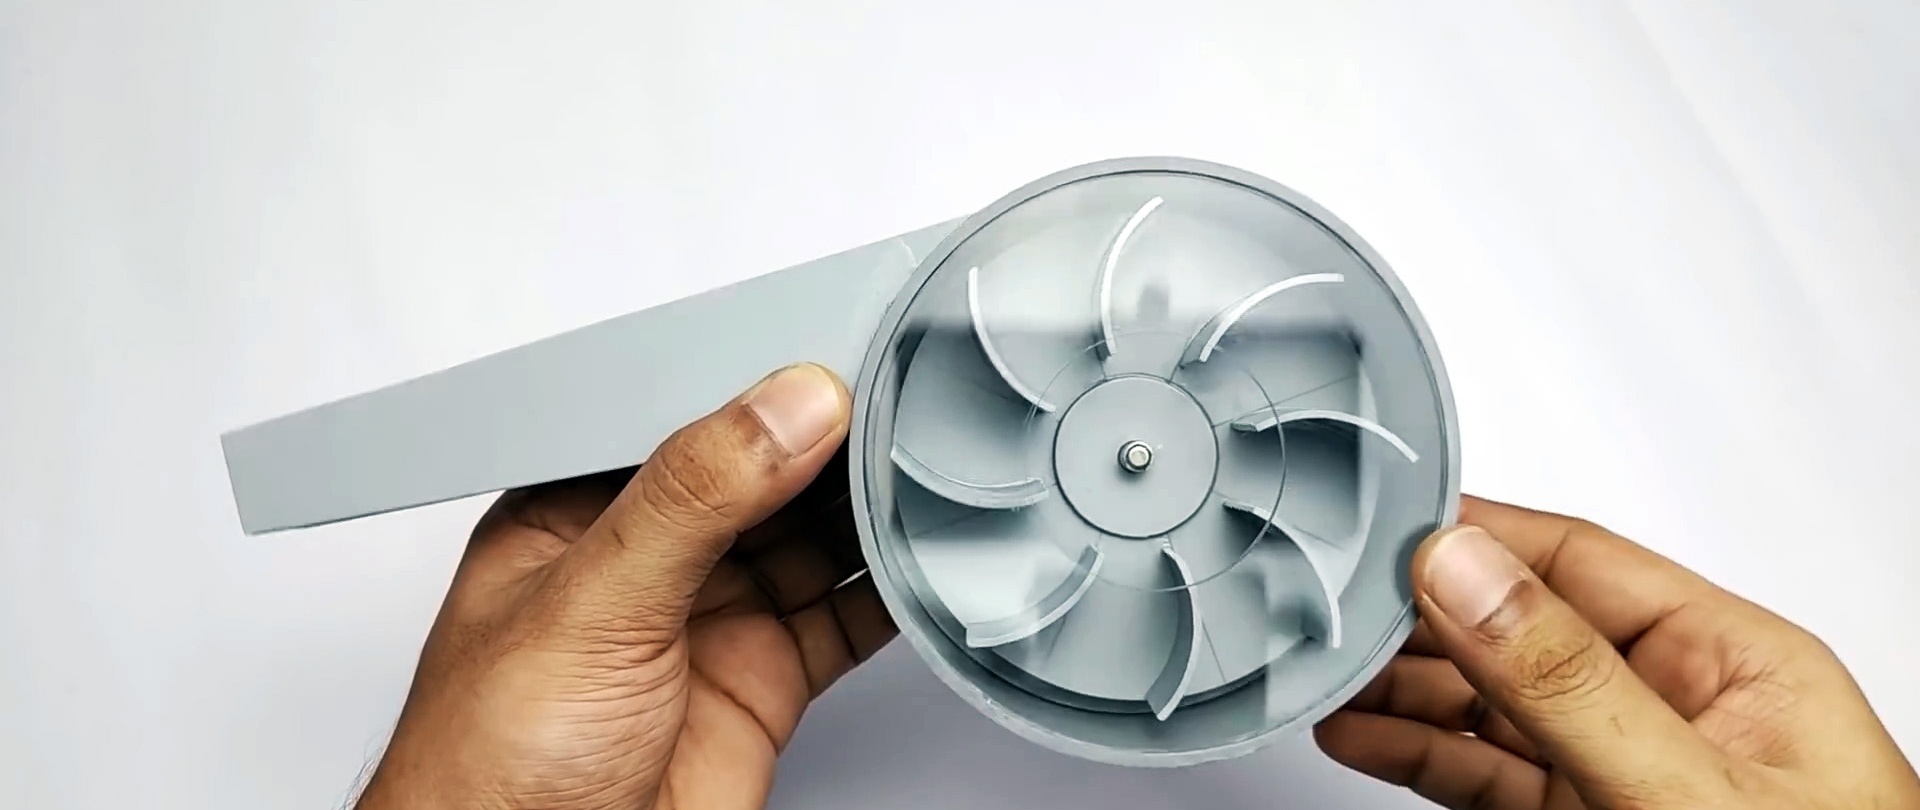
To make an impeller, you need to similarly cut a disk from a pipe straightened into a plate. Only it is made 6-10 mm smaller in diameter, so that when placed inside it does not cling to the walls of the ring. The center is marked on the disk and a circle with a diameter of 40 mm is drawn. Then it is divided into 8 equal sectors.

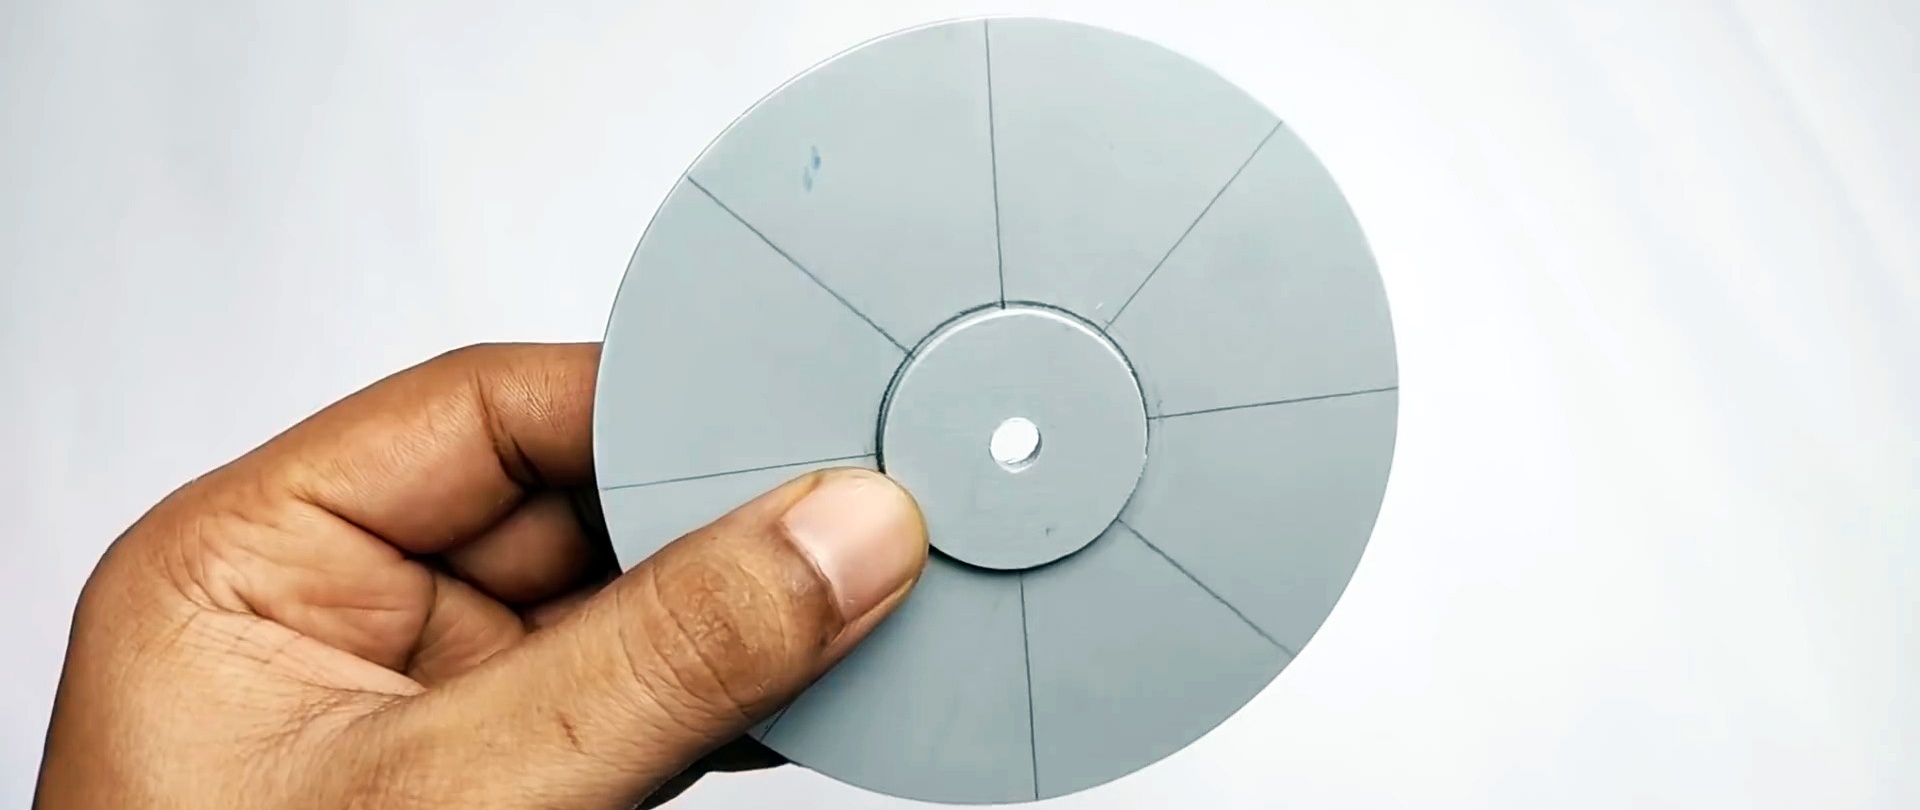
The center of the workpiece is visible under the motor shaft, and then a disk with a diameter of 40 mm is glued onto the drawn circle. This trim is also drilled.
Several 20 mm long rings are cut out of a 50 mm pipe. They need to be cut into segments, which are glued along the sector marking line of the reinforced disk. As a result, we get a working impeller.

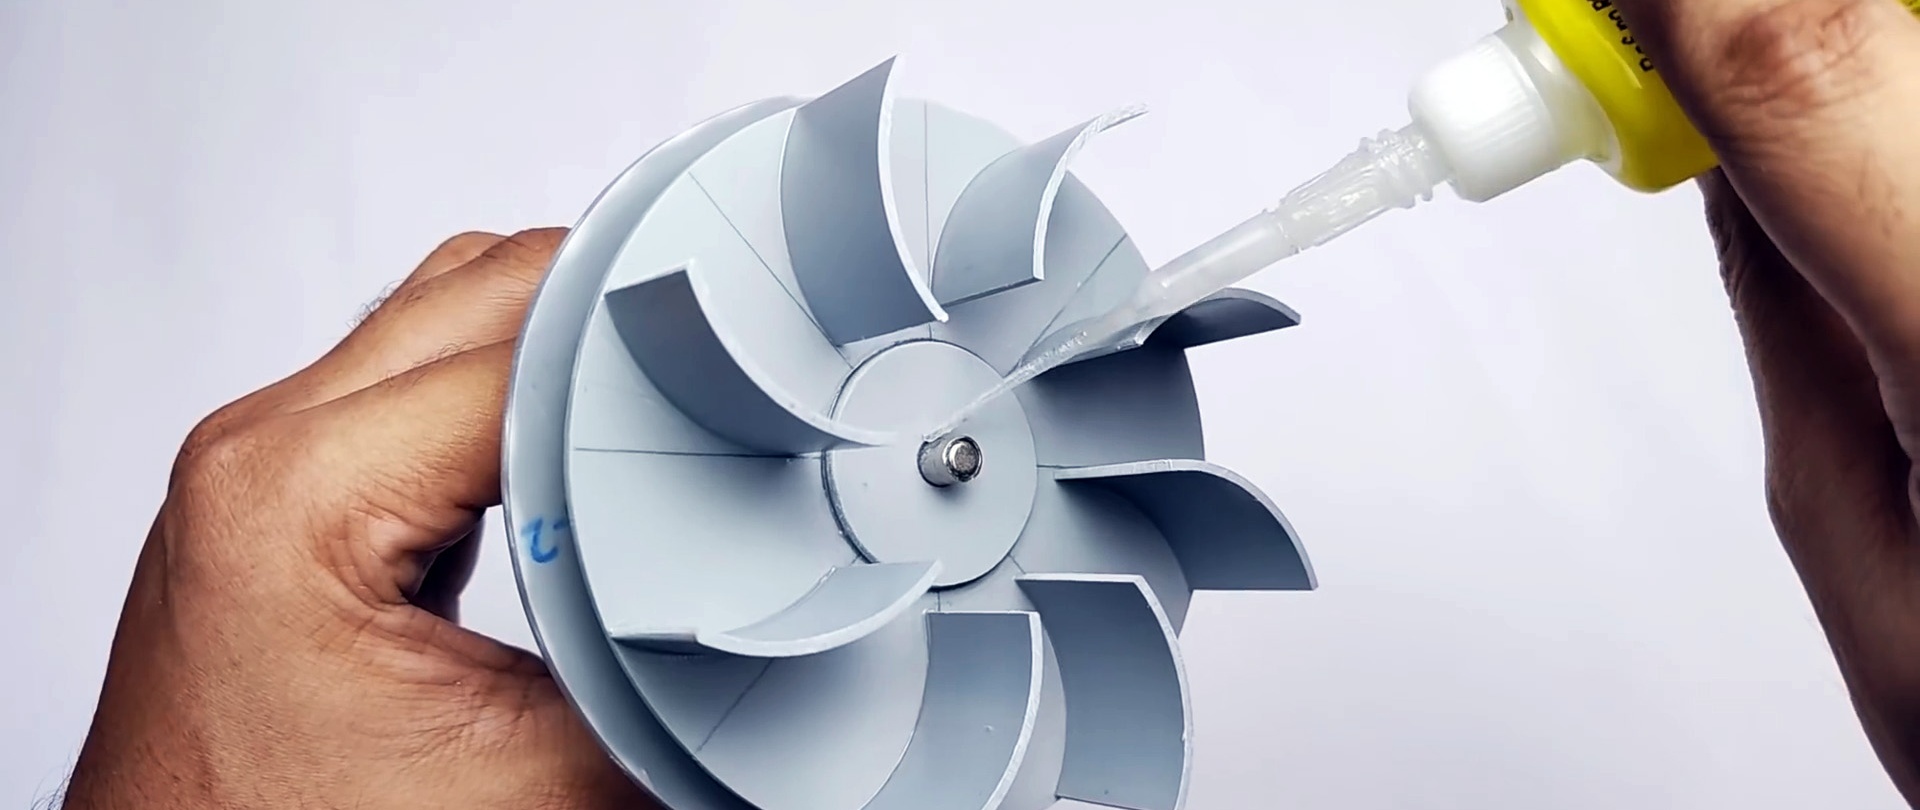
Now you need to install it on the motor shaft, screwed to the plug that has not yet been glued. If you are using a 775 motor, you can put an adapter for a TV cable on its shaft, and glue the impeller onto the latter. Due to the notches on it, the glue holds better.

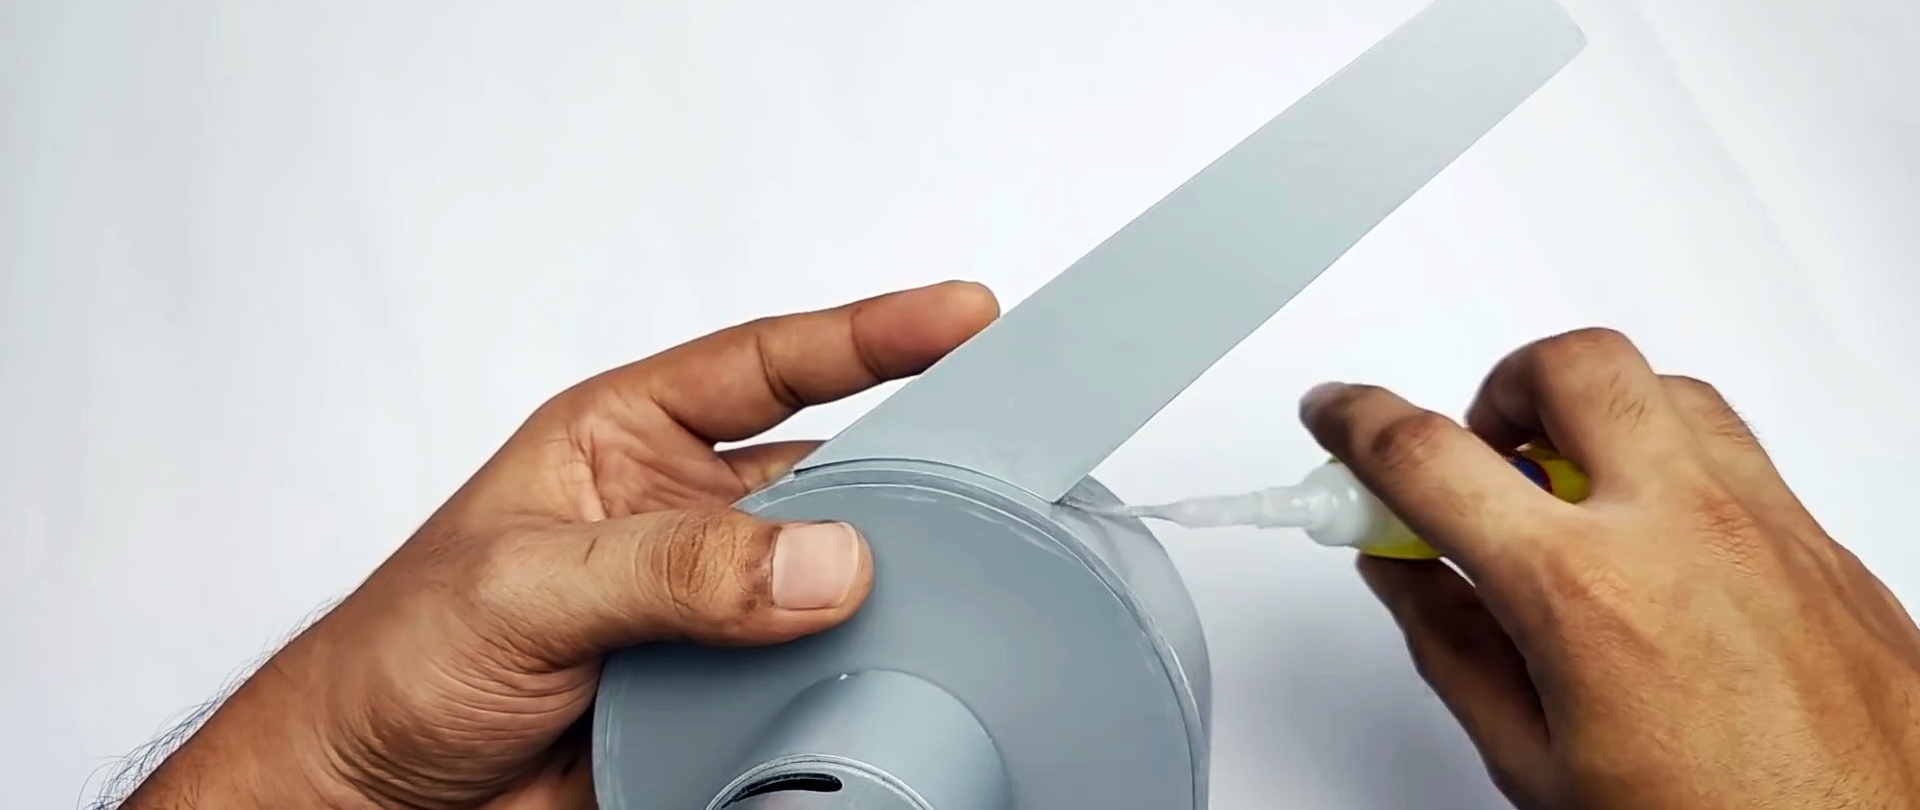
Next, a square window is cut into the blank under the blower body to blow air out. After this, a plug with a motor and impeller is glued into it.
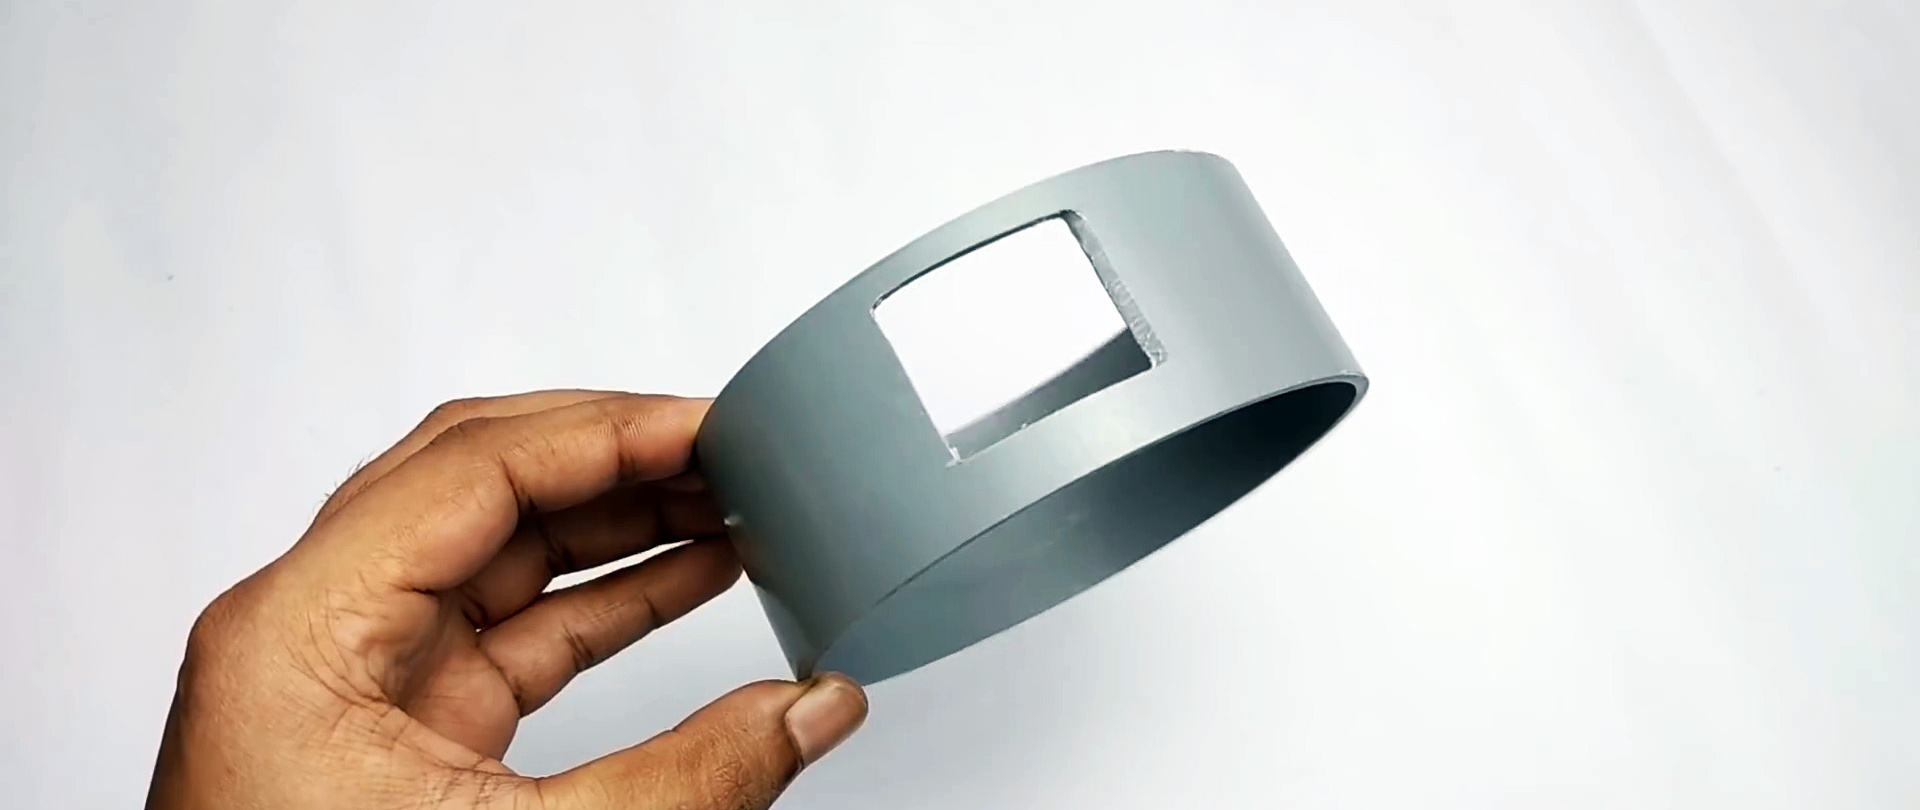

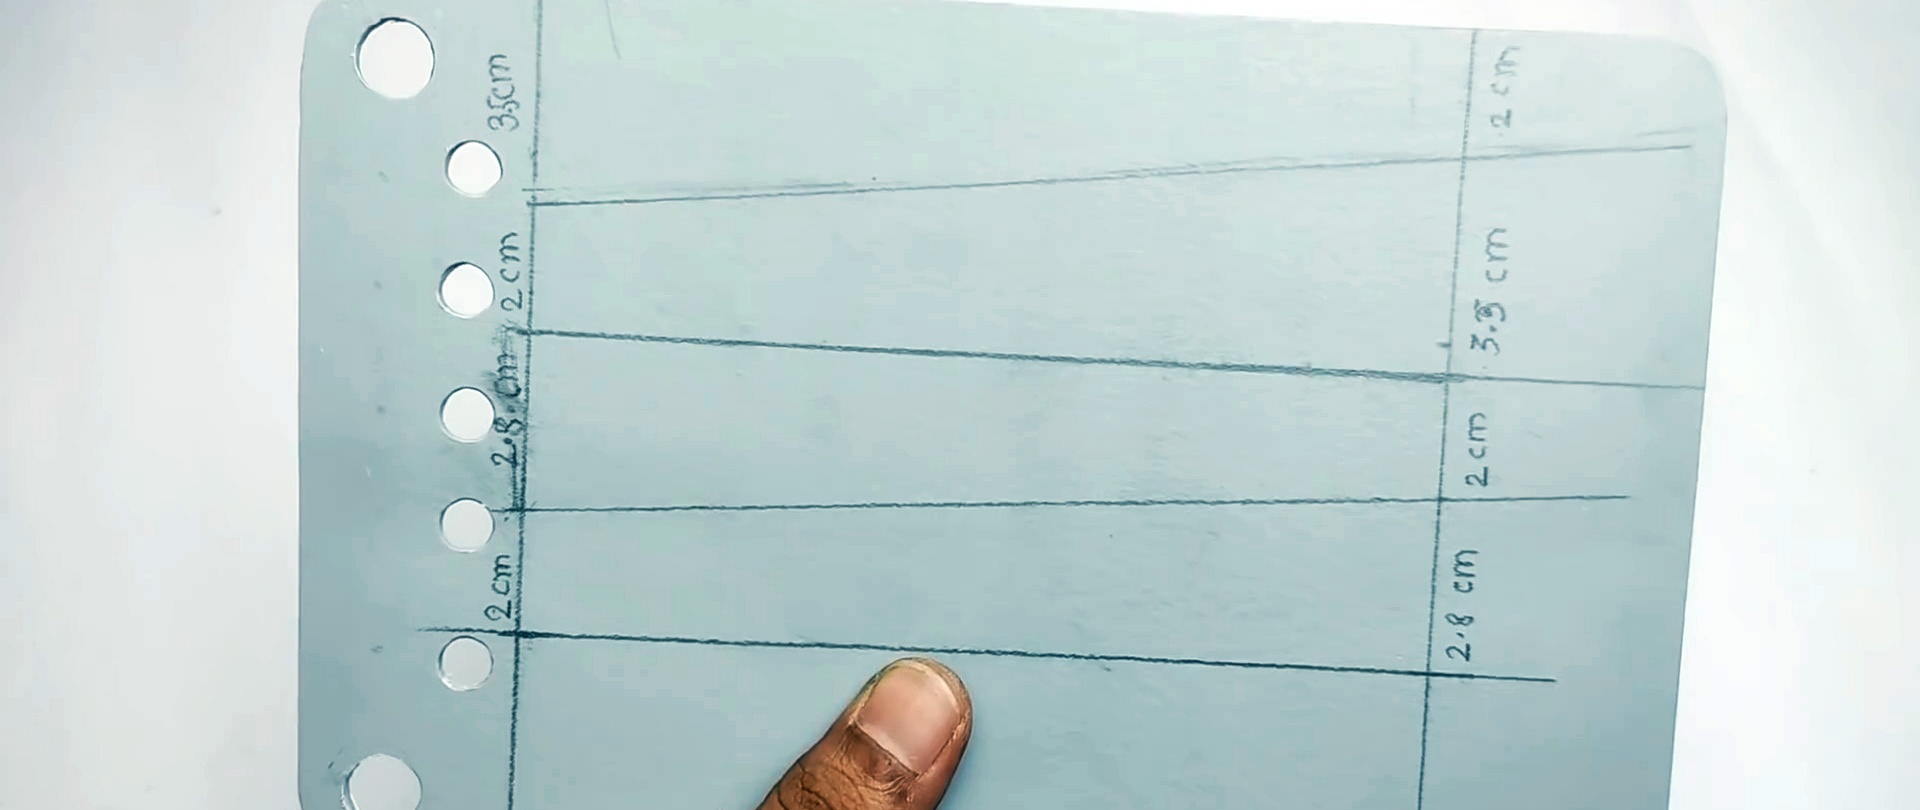
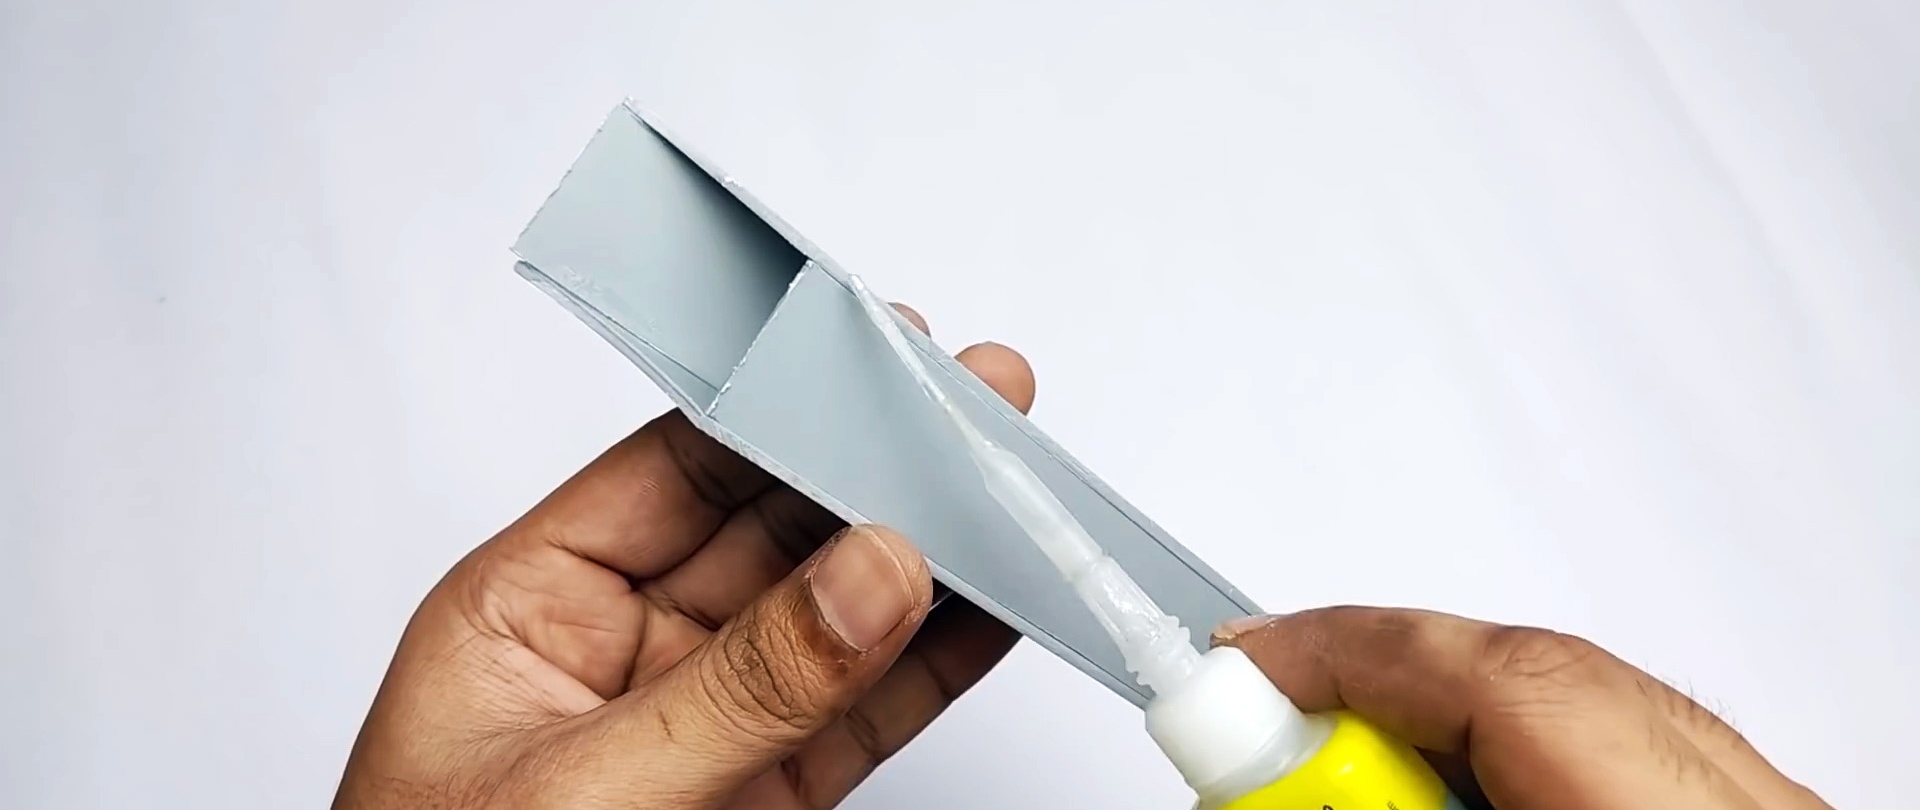
To make a pipe for the directional exit of air from the blower, you will need to flatten another piece of pipe into a plate and make markings on it as in the photo. The resulting 4 strips are glued into a profile pipe. Next, it is glued to the body over the cut window.
A protection for the impeller with a hole for drawing in air in the center is cut out of plexiglass. It needs to be glued into the body in front of the blades so that it does not touch them.

An L-shaped handle is glued together from two pieces of plastic pipe with a diameter of 20 mm. At the junction, a hole must be made in the long tube for cable entry. The edge of the short one is cut at an angle to fit into the blower body.
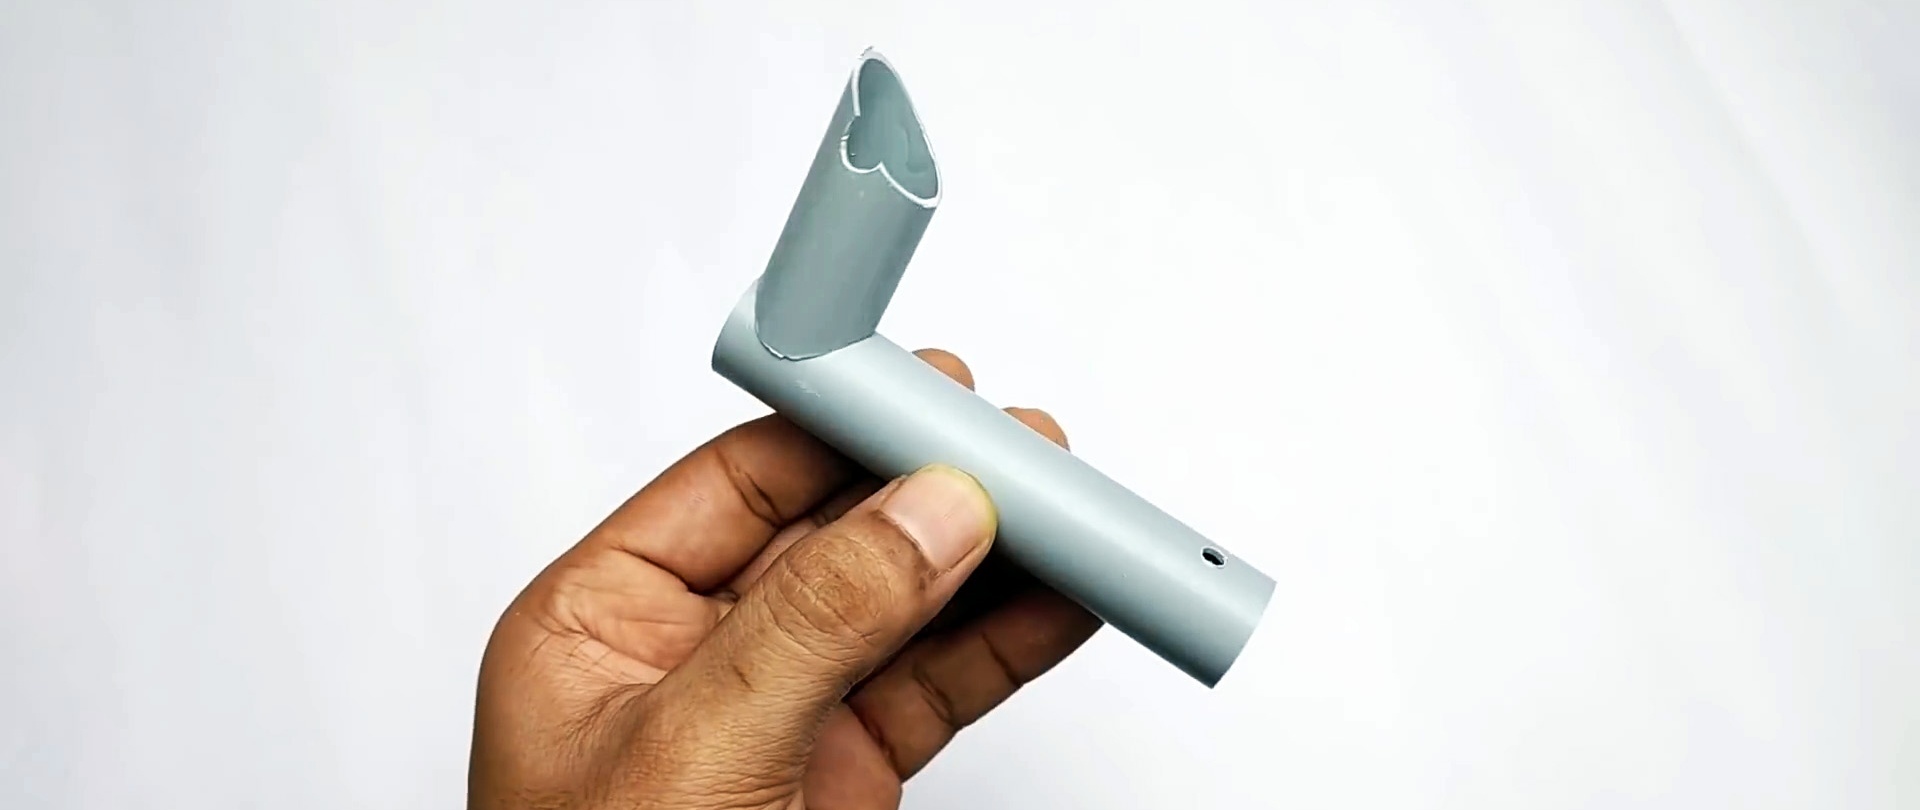
A plug with an installed power connector is glued to the end of the long edge of the handle. Wires are soldered to it in advance. They need to be laid to the second end of this tube. There they are soldered to a push-button switch and directed to the exit of the handle. The switch itself is glued in similarly to the connector.

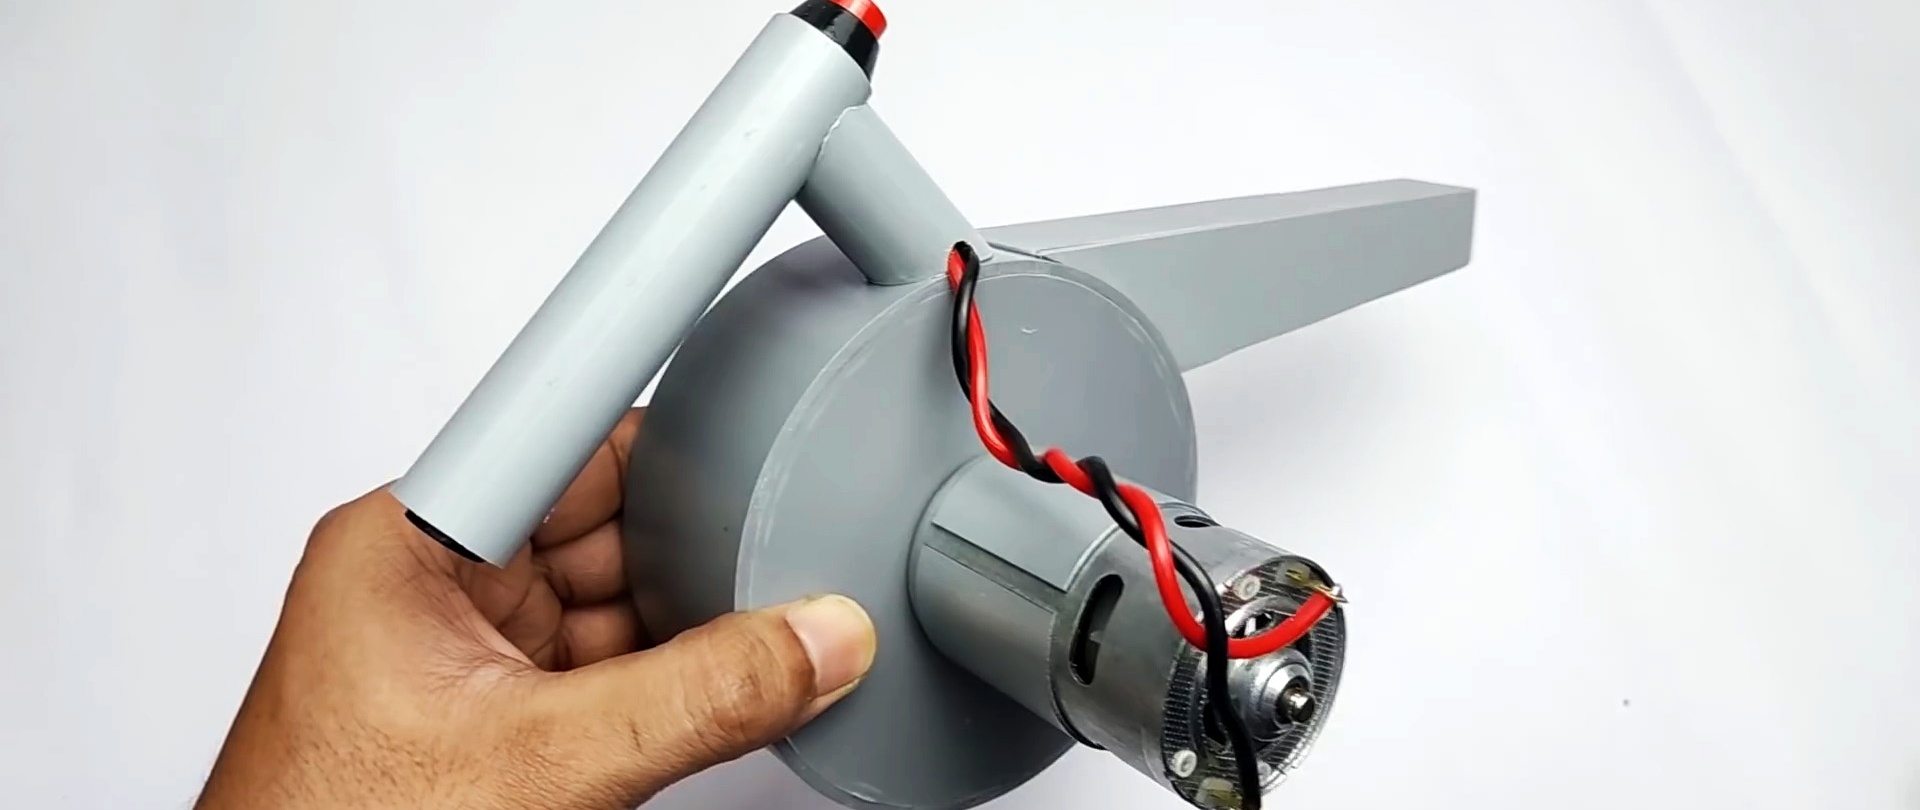
Now the handle can be glued to the body. The wires from it are soldered to the motor contacts.
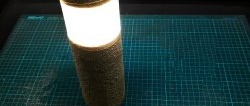
A casing made from a piece of 50 mm pipe is pulled over the engine itself. Ventilation holes need to be made in it. The open edge of the casing is sealed with a plug with a hole.

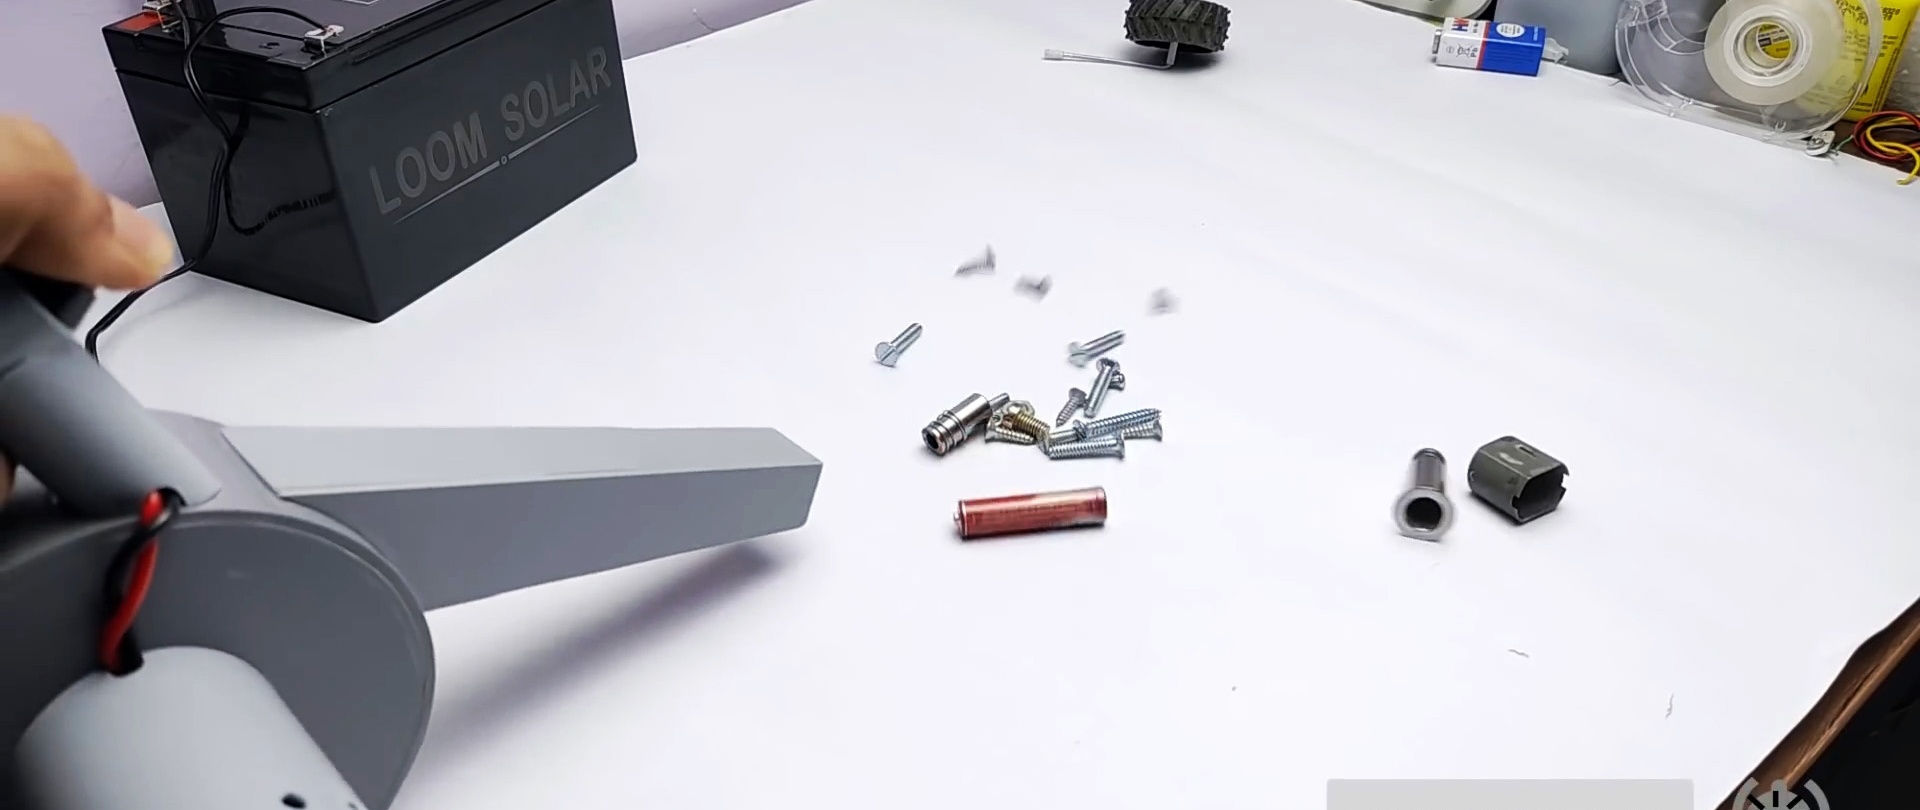
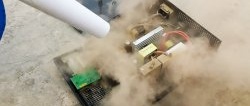
Now you can connect the power supply or battery to the blower. In the latter case, a piece of wire with a plug is used. In this design, it blows away not only dust and shavings, but even small screws, batteries and other small items.