An amazing and rarely seen flasher circuit, which is built on just one transistor. And the transistor in this circuit does not operate in avalanche mode. The device is designed for smooth periodic switching on and off LED at a rate of approximately one cycle every two seconds. It can be used as a component of lighting design, as an indicator of supply voltage to various household electrical and electronic equipment, in various toys and for other purposes.
- circuit simplicity;
- assembled from inexpensive, accessible and similar components;
- does not require adjustment;
- allows changing the duration of the on-off cycle.
Electrical diagram
The schematic diagram of the device is shown in the figure: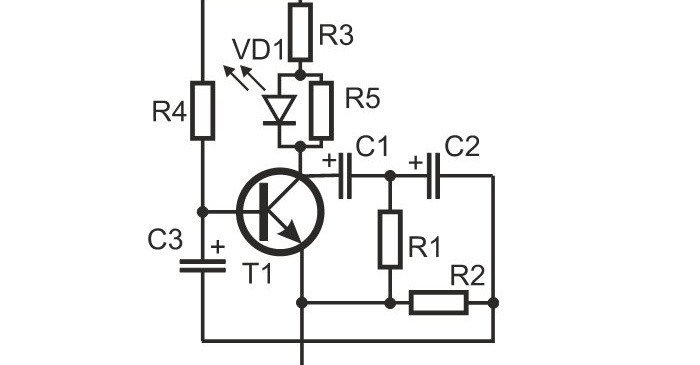
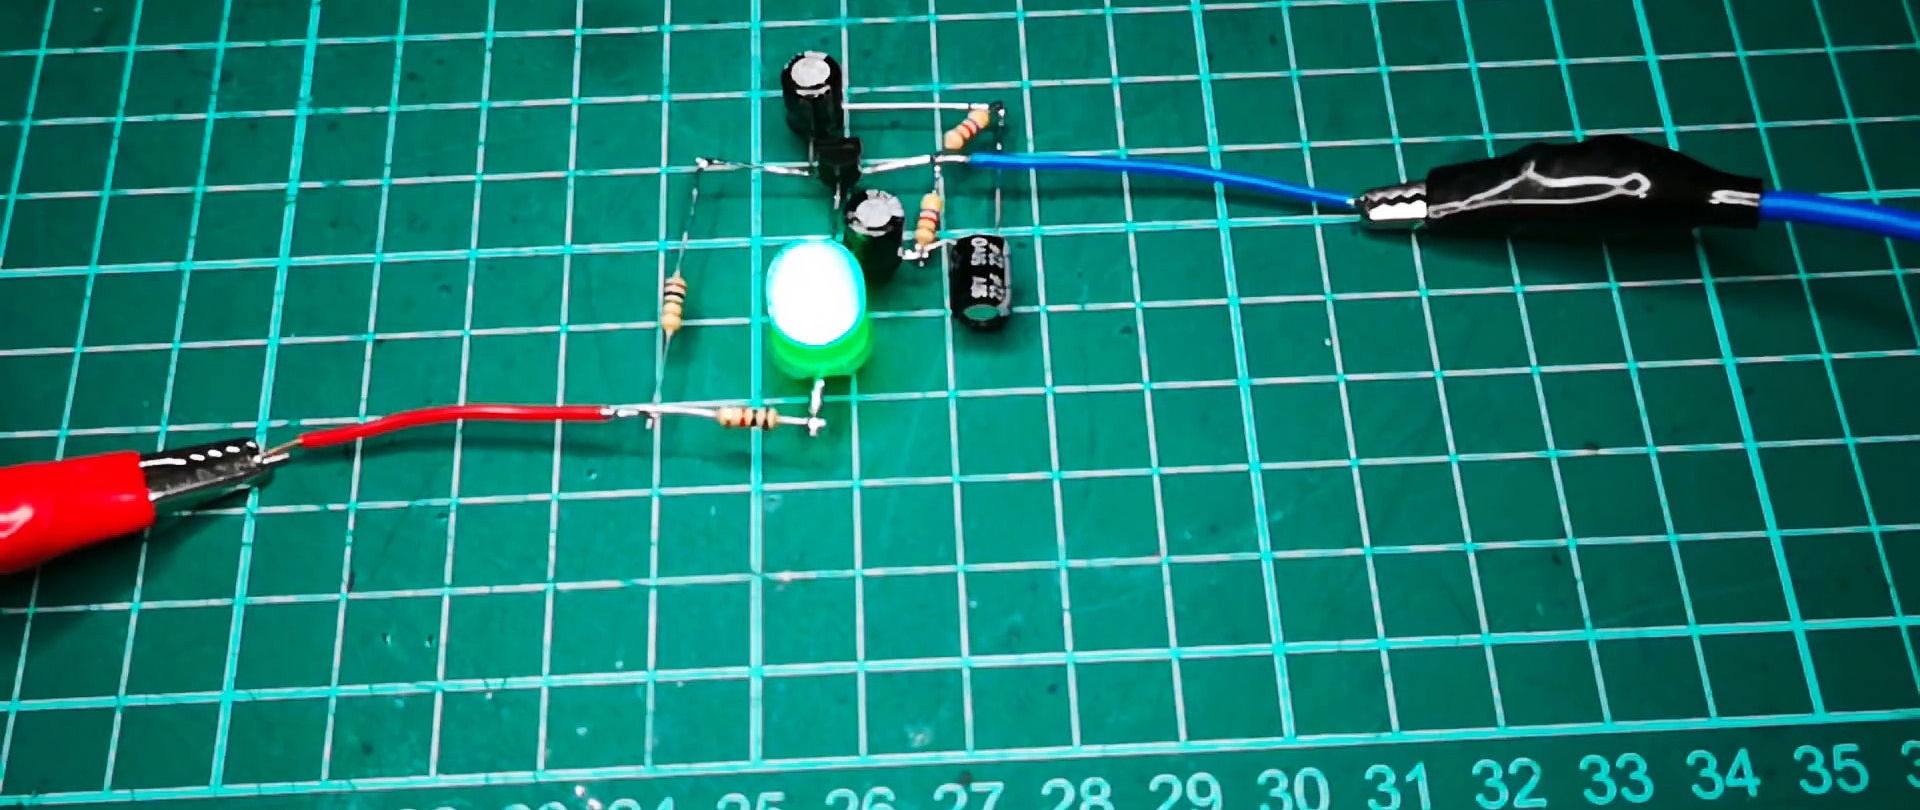
The device is a single-stage self-oscillator based on NPN transistor T1, which is covered by positive feedback supplied from the collector to the base through a phase-shifting chain of elements R1C1, R2C2 and C3. The transistor operates in mode A, the required positive bias voltage is supplied to the base through resistor R4. Managed Light-emitting diode VD1 is connected to the collector circuit T1 through the current-limiting resistor R3. VD1 is additionally blocked by resistor R5, which ensures current flow through the transistor when the LED is off.
For power supply, it is permissible to use any suitable 12 V DC source.
When replacing R2 with the chain shown below, you can change the operation period of the circuit within a fairly wide range.

Electronic circuit diagram elements
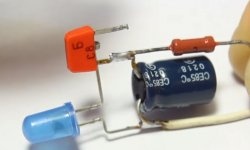
The device circuit uses:- transistor 2SC1815 (marking on the C1518 case, pinout is shown in the sketch);
- three electrolytic capacitors 22 μF, 50 V (both imported products and domestic K50-6 are suitable);
- three resistors 4.7 kOhm, 0.25 W;
- resistor 1 MΩ, 0.25 W.
“VD1” can be set to any Light-emitting diode red or green glow with operating current up to 25 mA.
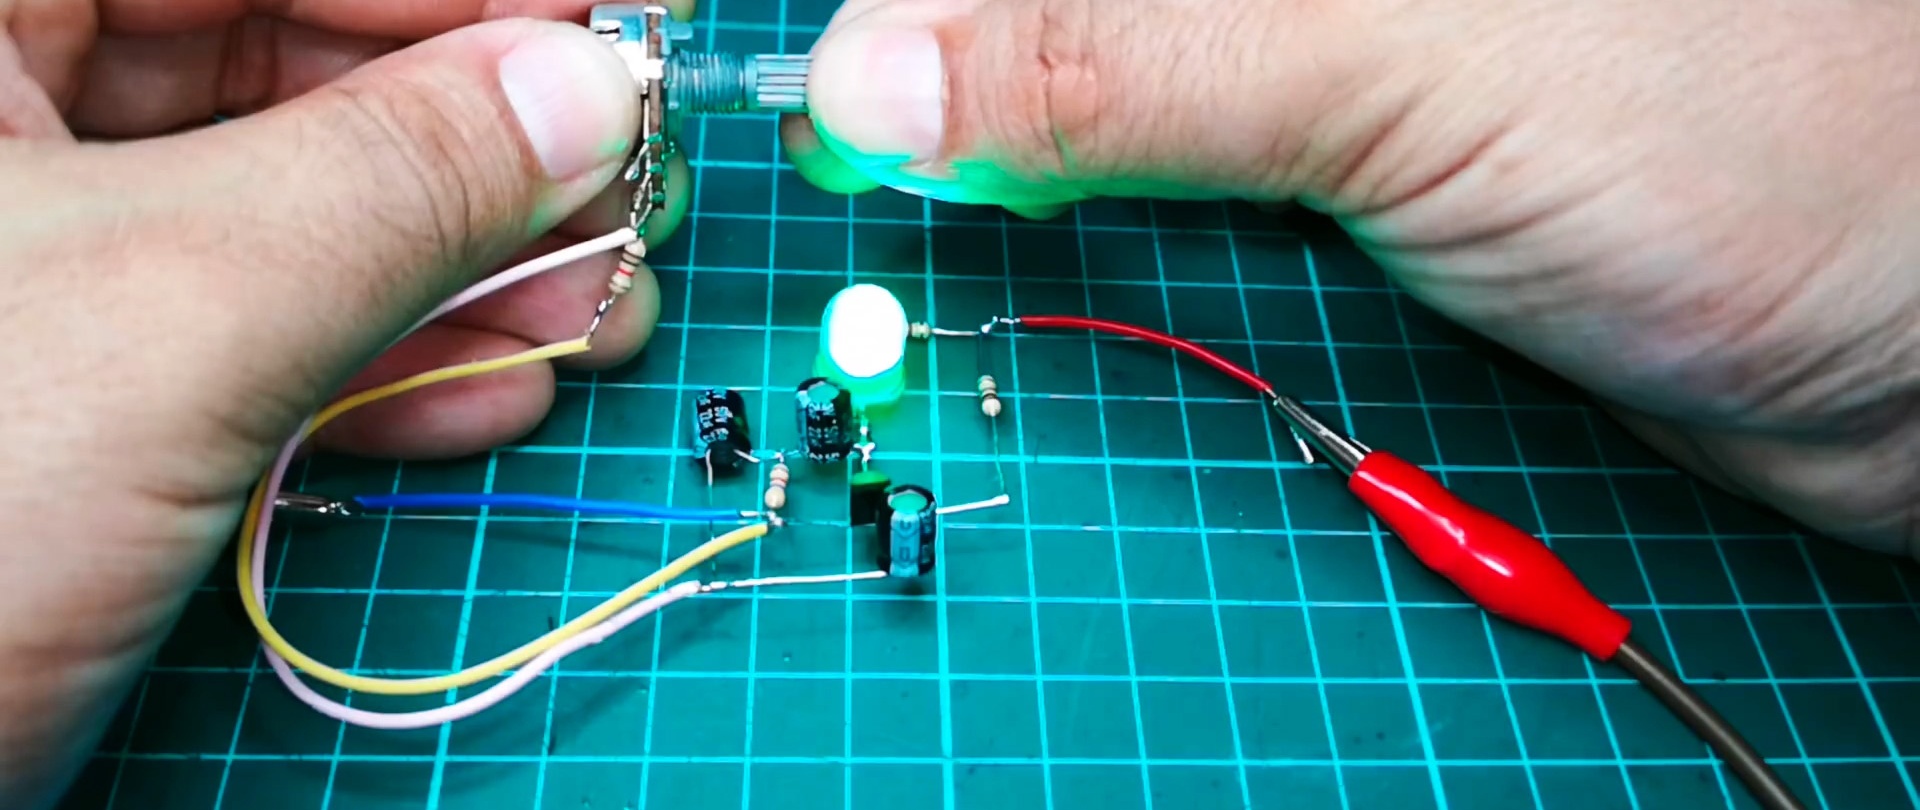
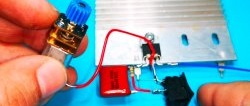
Circuit assembly
The circuit can be assembled on a printed circuit board - a mole rat or on a homemade board, including one with one-sided metallization. Taking into account the relatively low mass of parts, transistor “T1” is quite suitable as the power basis of the circuit when assembling “on weight”.

Electrolytic capacitors must be connected in compliance with their polarity. A resistor with a resistance of 1 MOhm is connected to the base.

If transistor C1815 is missing, it can be replaced with numerous imported analogues, for example, 2SC1383, 2SC3940 or 2SD471. Among domestic components, KT3102A or “B” is closest to it.
Resistor values can vary within fairly wide limits. This does not have a significant effect on the operation; only the brightness of the “VD1” glow and the period of its operation can change.A similar situation holds true for the power supply voltage.
Let's put together a diagram.


Solder the capacitors.

And a resistor.

A correctly assembled device begins to function immediately after supplying voltage to its circuit.
As already mentioned: you can use resistor R2 on the circuit and adjust the duration of the pulses.