By combining inexpensive, available electronic components, some of which can be removed from a fluorescent light bulb, you can obtain a device for turning on LED lamps using 220 V batteries, 1.5 V batteries or an 18650 battery. Using the device, it is possible to test light bulbs in places where it is not possible to test them by screwing them in into the cartridge. The device can also replace a flashlight.

The converter consists of only four parts, is capable of operating from 1.5 V and producing an output voltage of up to 300 V.
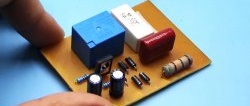
Details:
- Ferrite transformer - http://alii.pub/67loov
- resistor 22 Ohm - http://alii.pub/5h6ouv
- enameled copper wire;
- transistor IRFZ44N - http://alii.pub/5ct567
- capacitor 16 V 1000 µF - http://alii.pub/5n14g8
- radiator for transistor;
- E27 light bulb socket;
- battery.
Converter manufacturing process
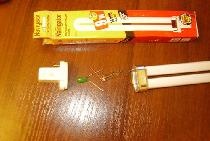
To manufacture the device, some parts can be removed from the body of a burnt-out fluorescent light bulb with an E27 base.

A ferrite transformer and a 22 Ohm resistor are removed from it.

The core of the transformer needs to be removed.The device only requires a coil with a winding.

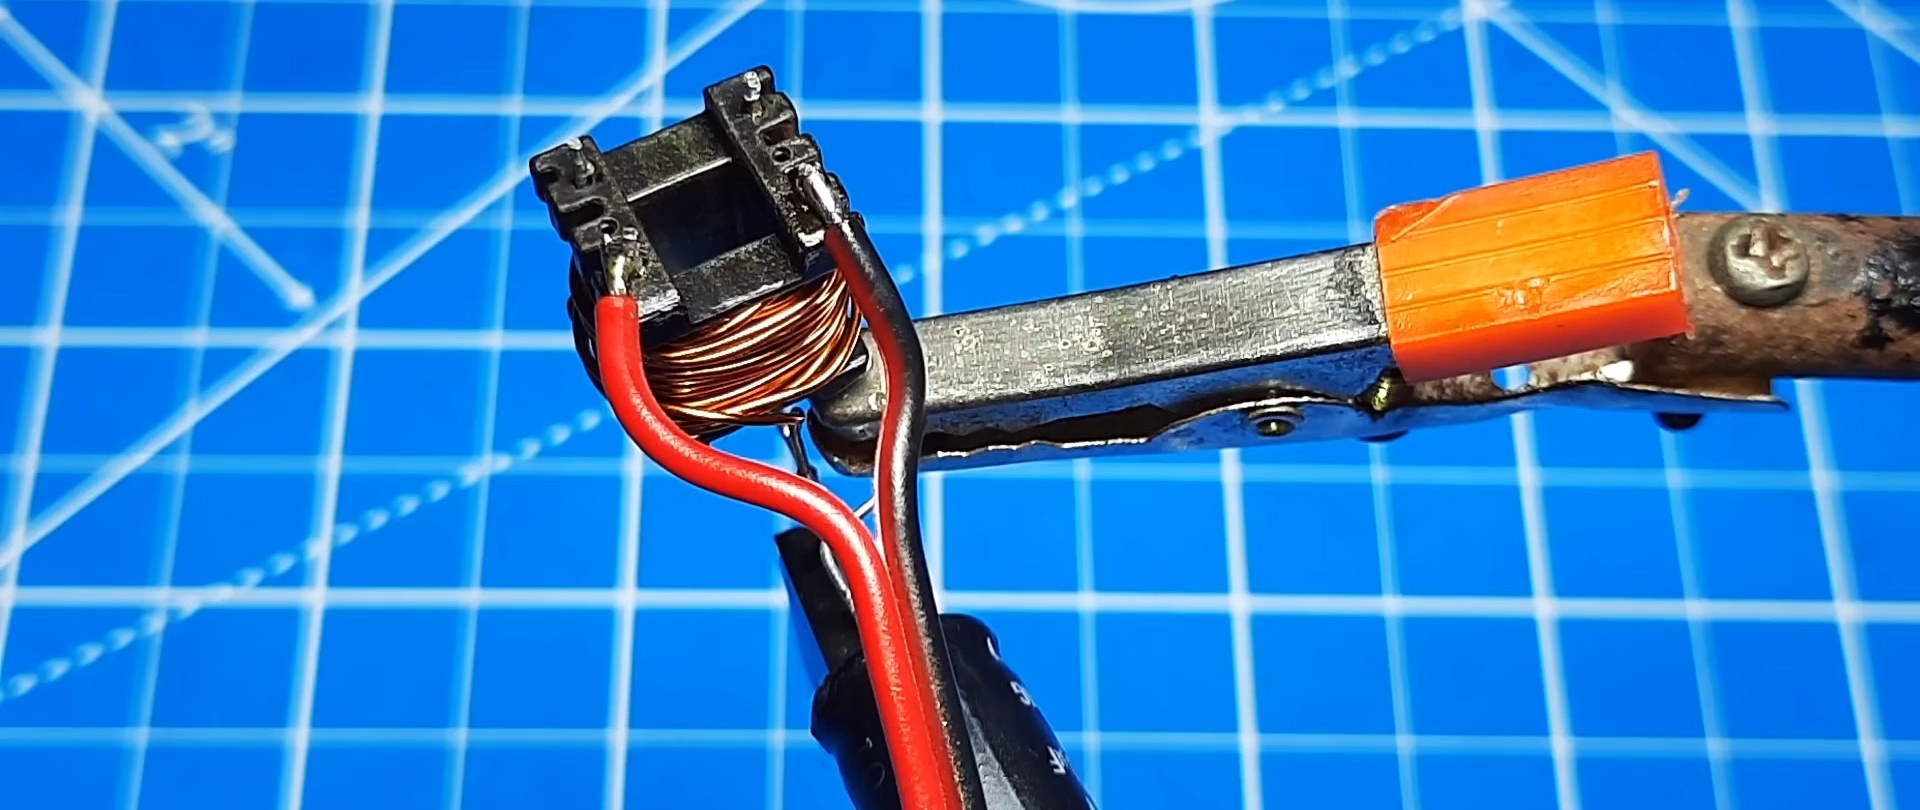
Next, take the enameled copper wire and fold it in half. Its loop is twisted several times and applied to the reel.
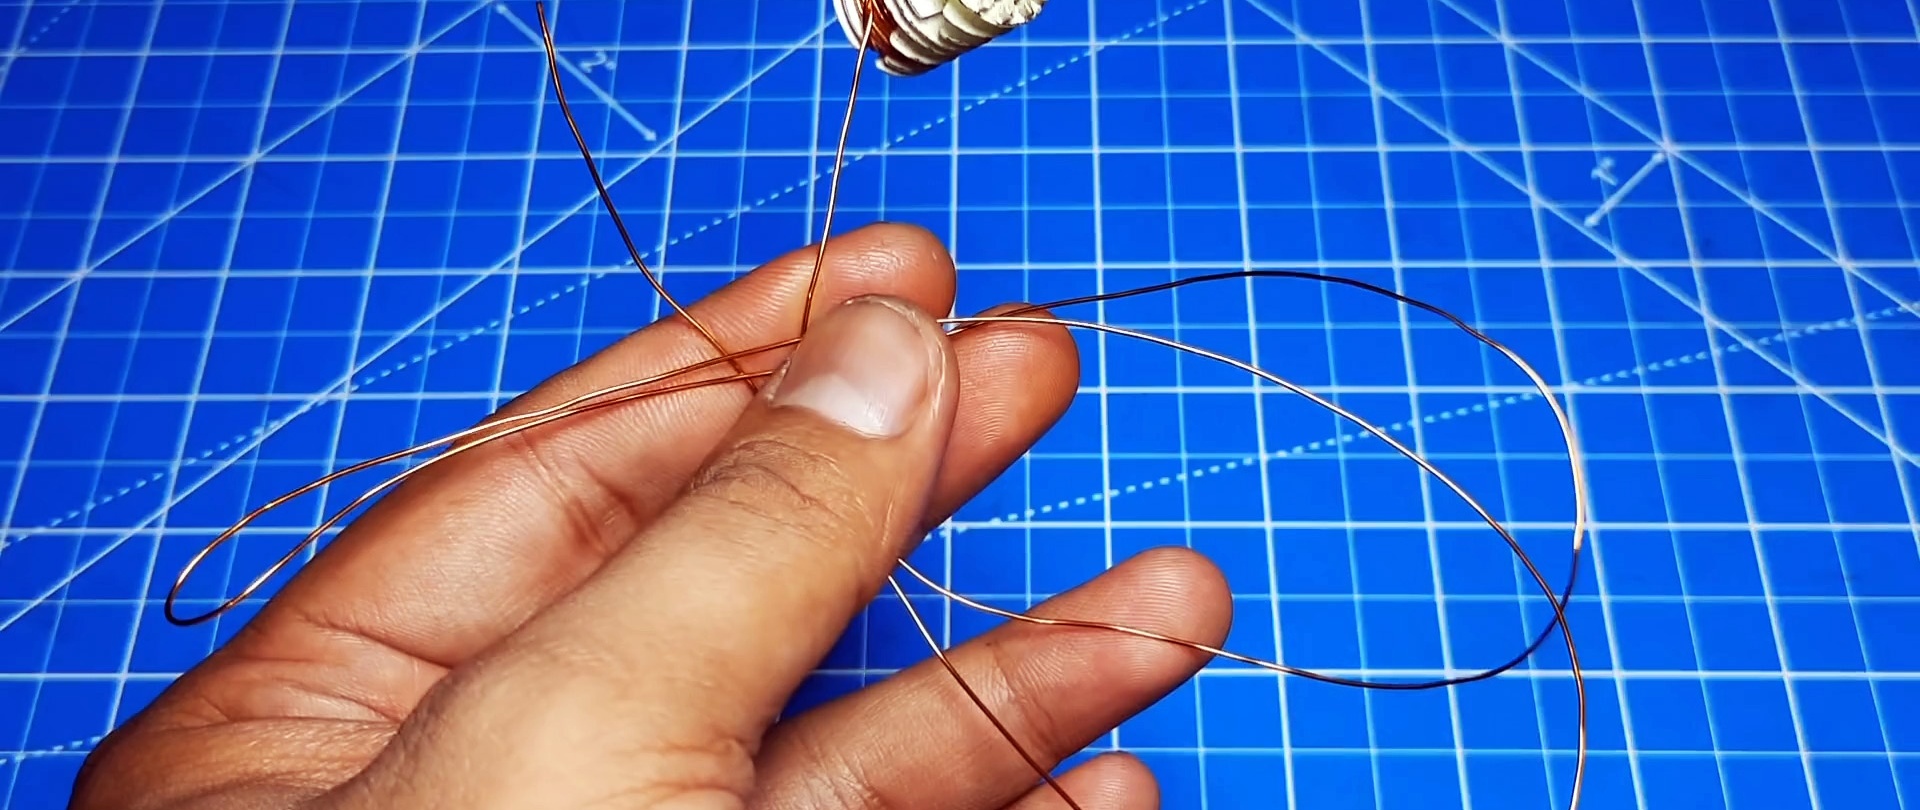
Now one end of the wire is wound onto a reel. You need to make 9 turns. In this case, the second end of the wire must be bent back so that the winding rests on it.
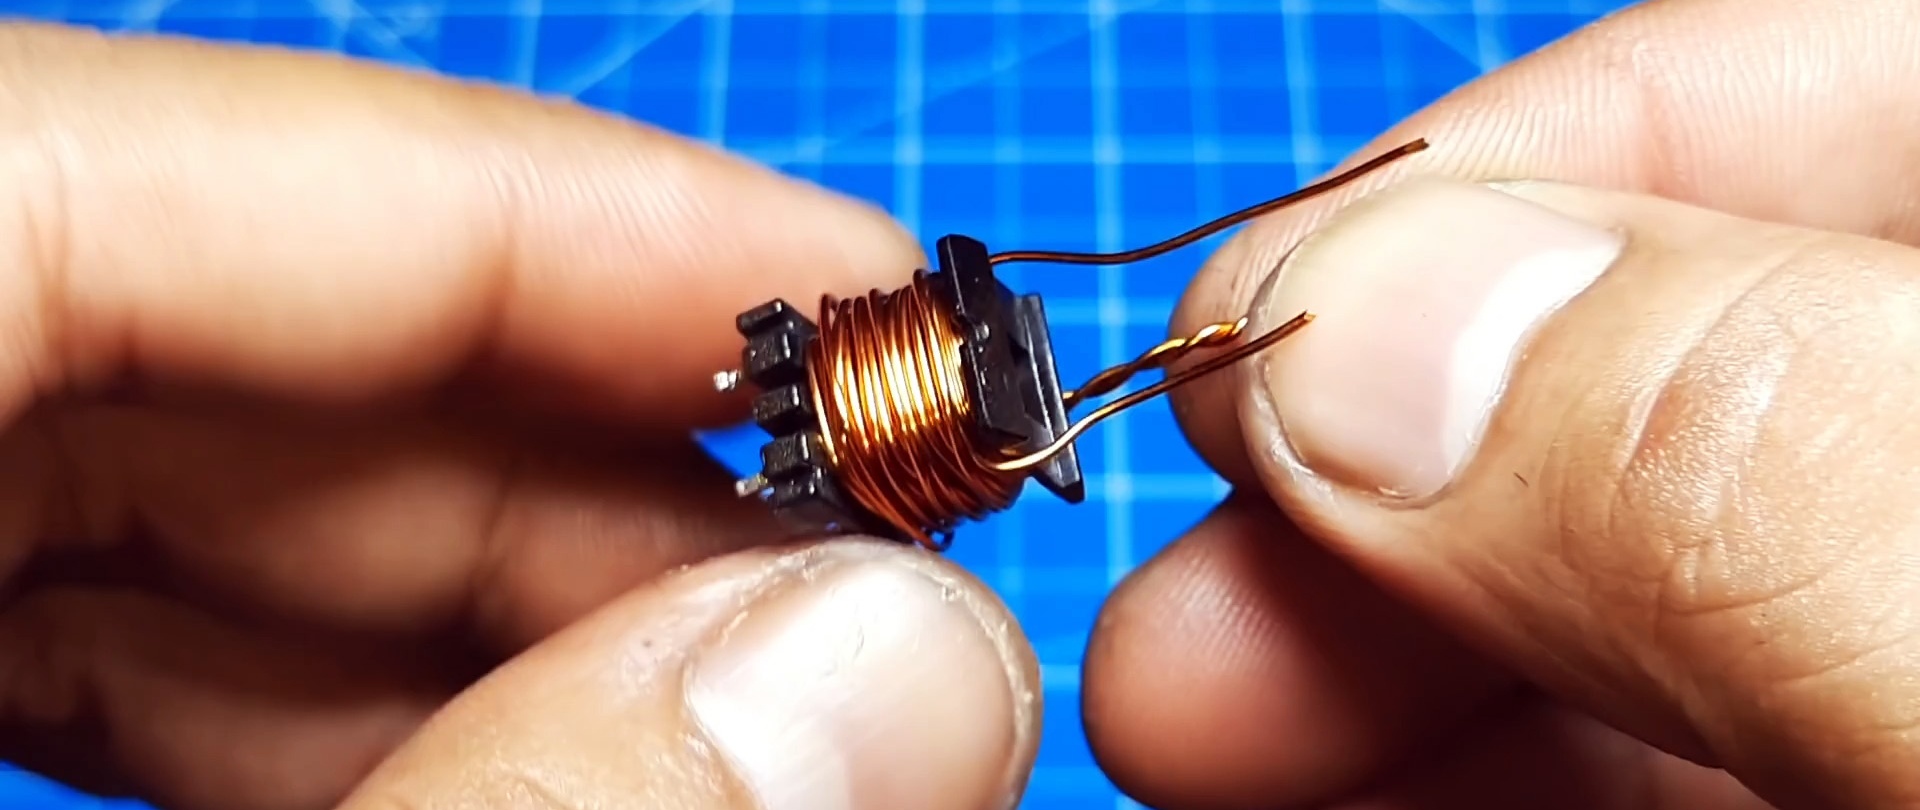
The remaining half of the wire is also wound in 9 turns, but towards the beginning of the previous winding. Then the ends of the winding are bent and fixed.
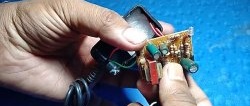
Now we take the IRFZ44N transistor and solder a 22 Ohm resistor to its left leg. The single edges of the homemade winding on the coil need to sleep with the central leg of the transistor and the resistor.

A 16 V 1000 µF capacitor is soldered between the right leg and the twist of the homemade winding. Then you need to solder the light bulb socket to the third and fourth legs of the coil, with the outputs of its standard winding.
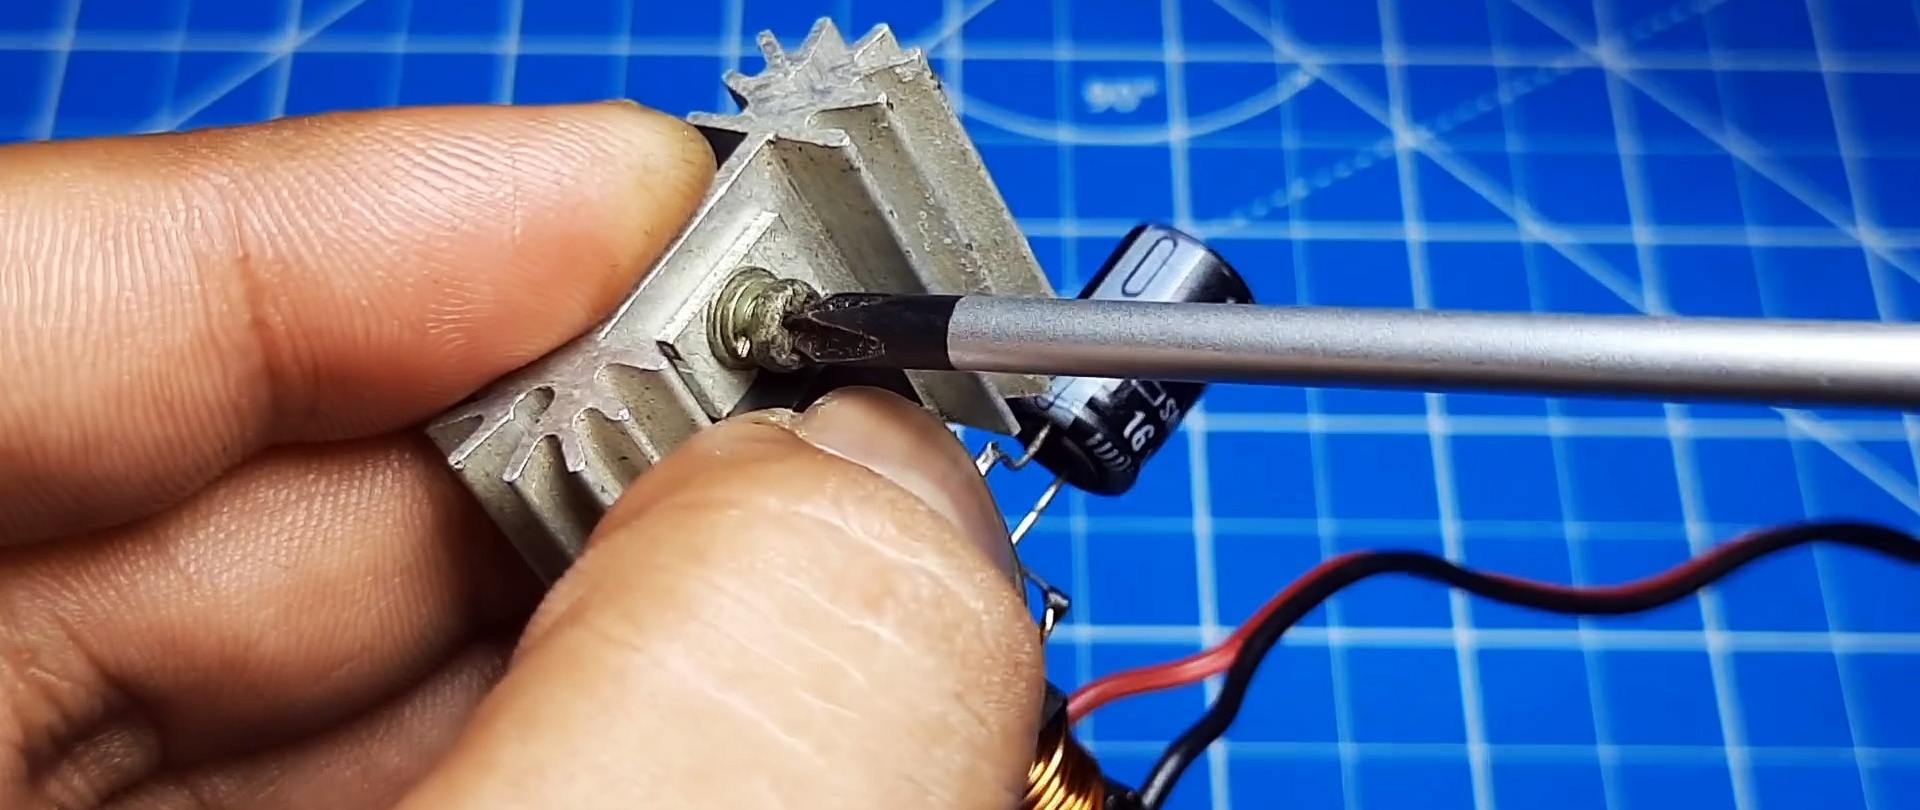
To cool the circuit, an aluminum radiator should be connected to the transistor.
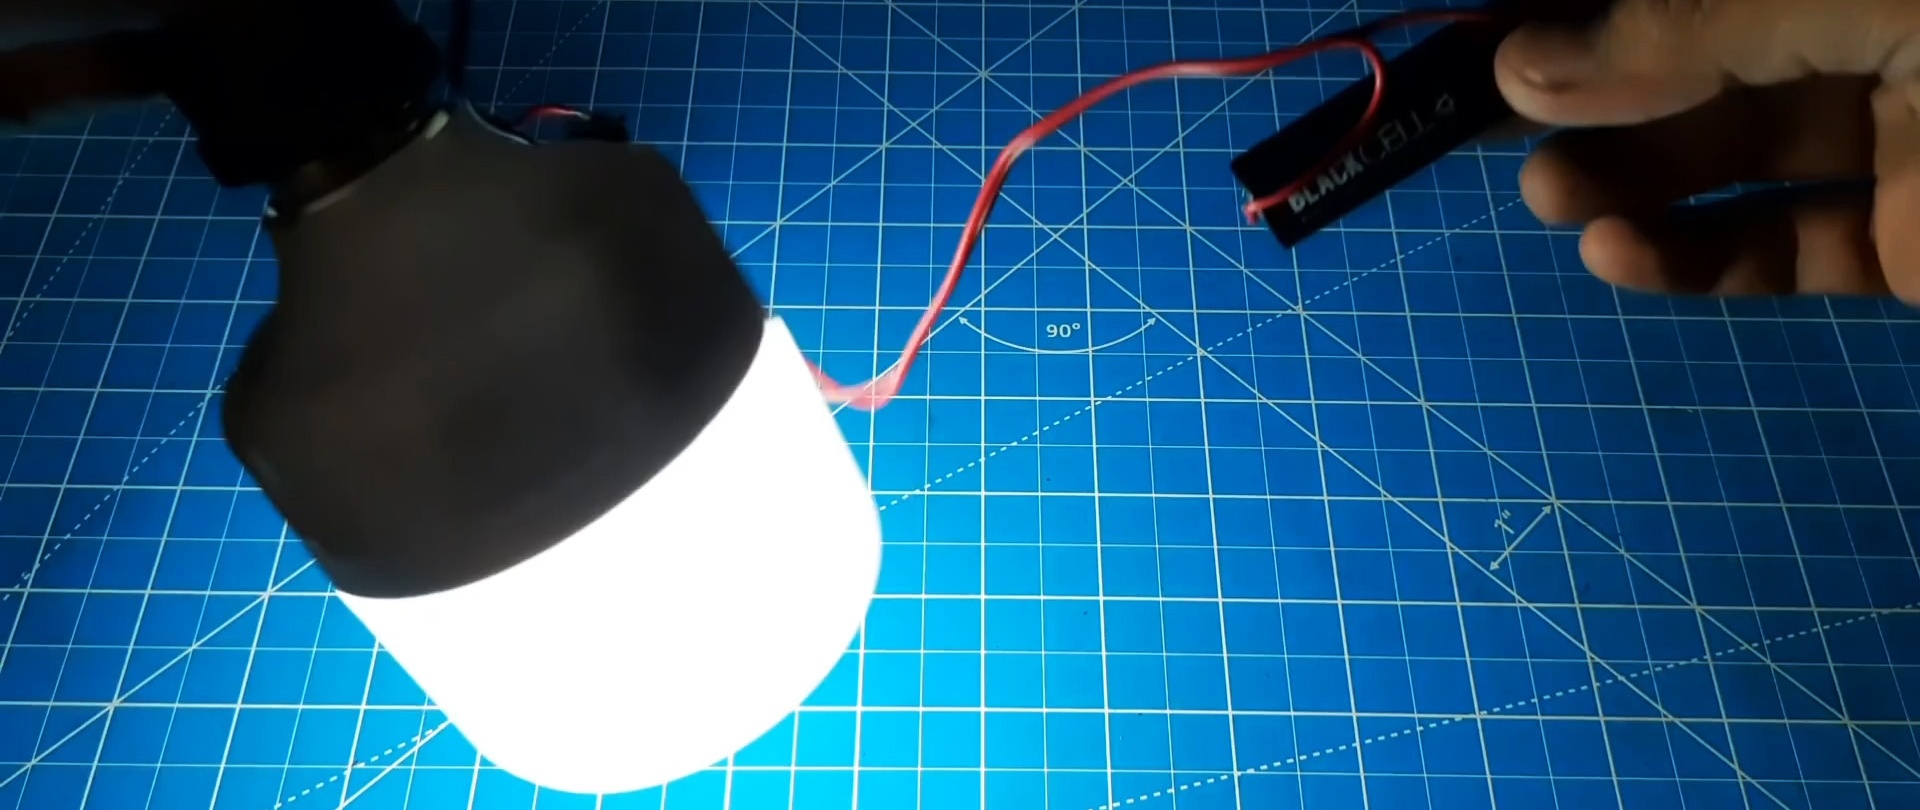
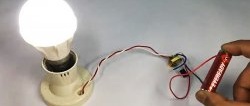
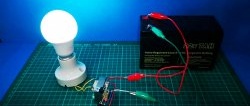
Now all that remains is to power the device.
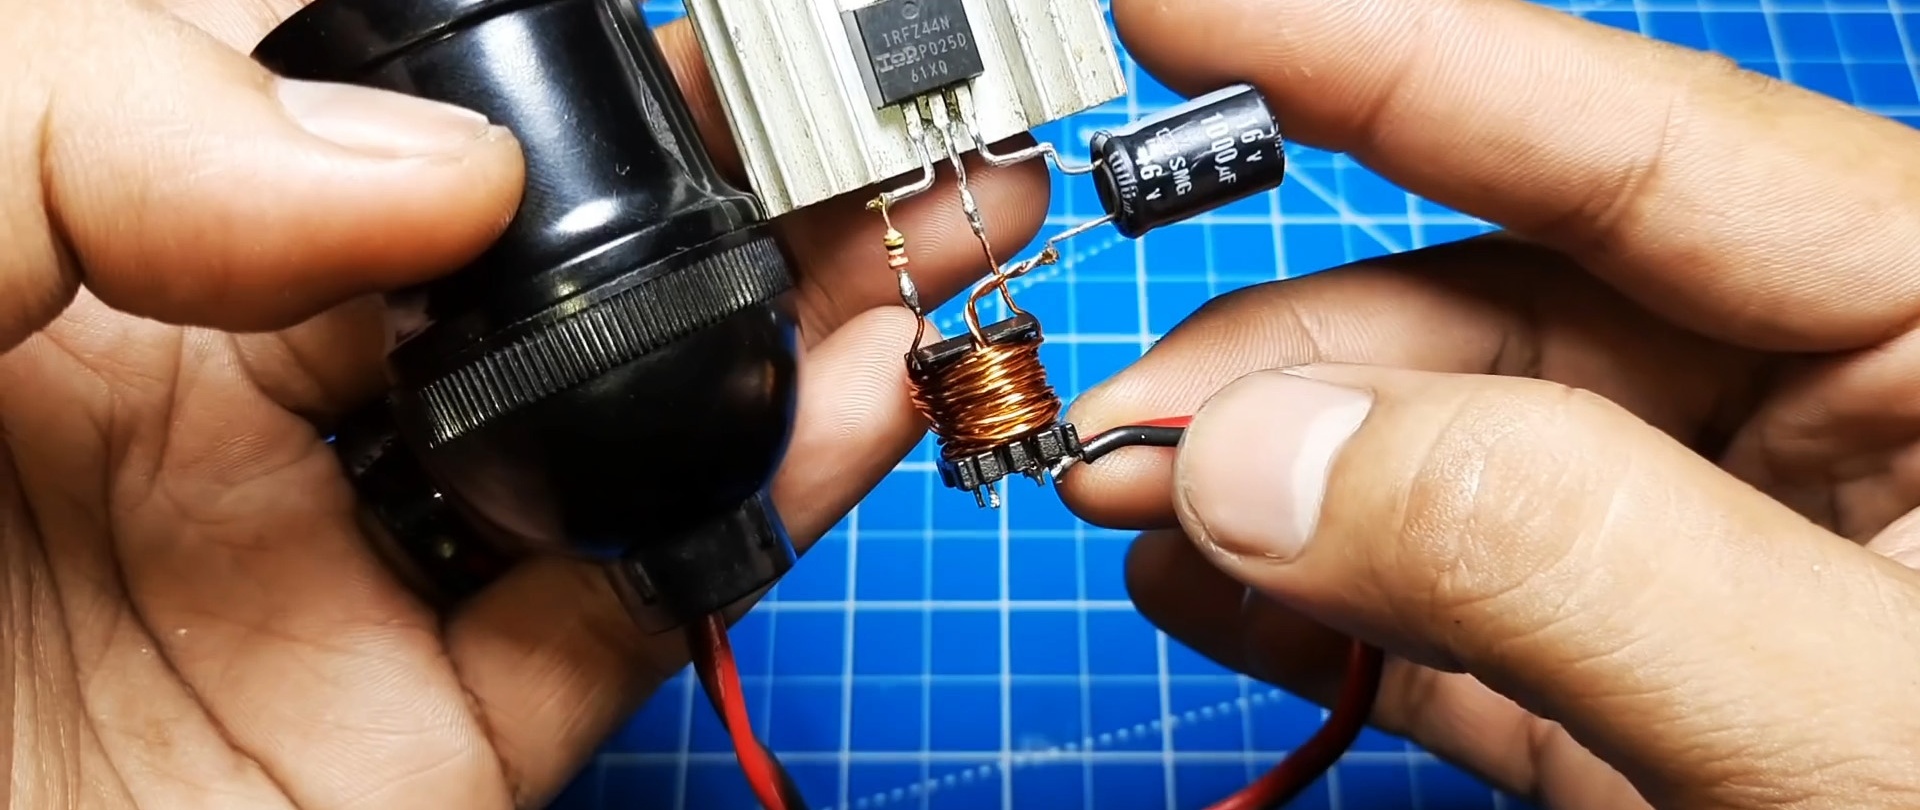
A lithium battery is used for this.

We connect the negative wire from it to the leg of the capacitor on the side of the transistor, and the positive wire to the leg from the coil.

Now, if you install a 220 V LED lamp in the socket, it will light up. If desired, the device can be placed in a housing to make it easier to use.