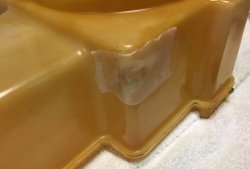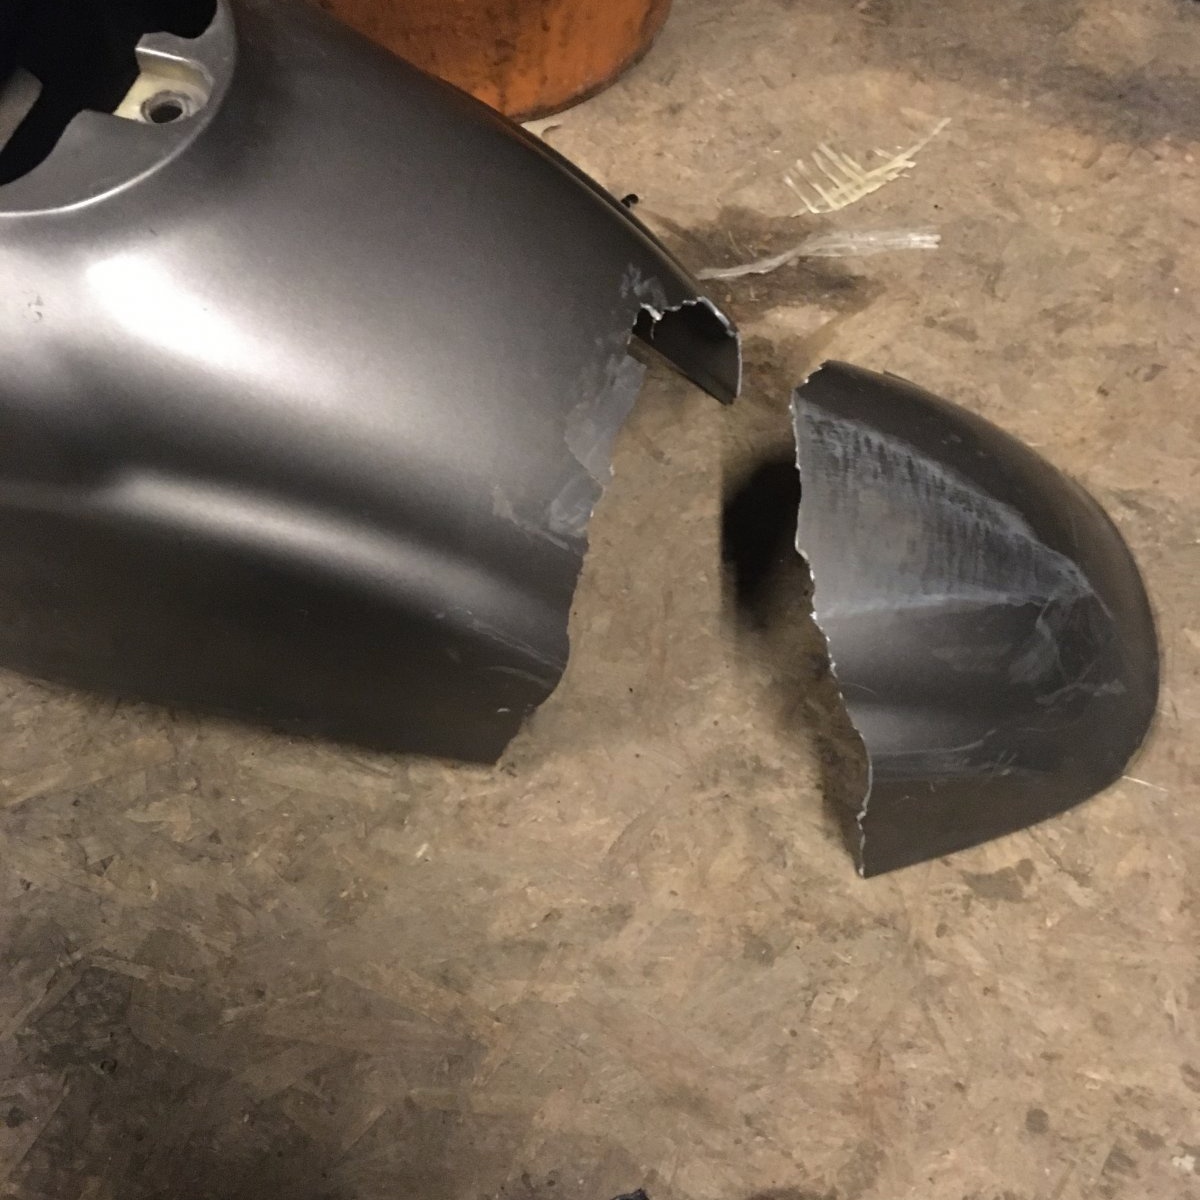
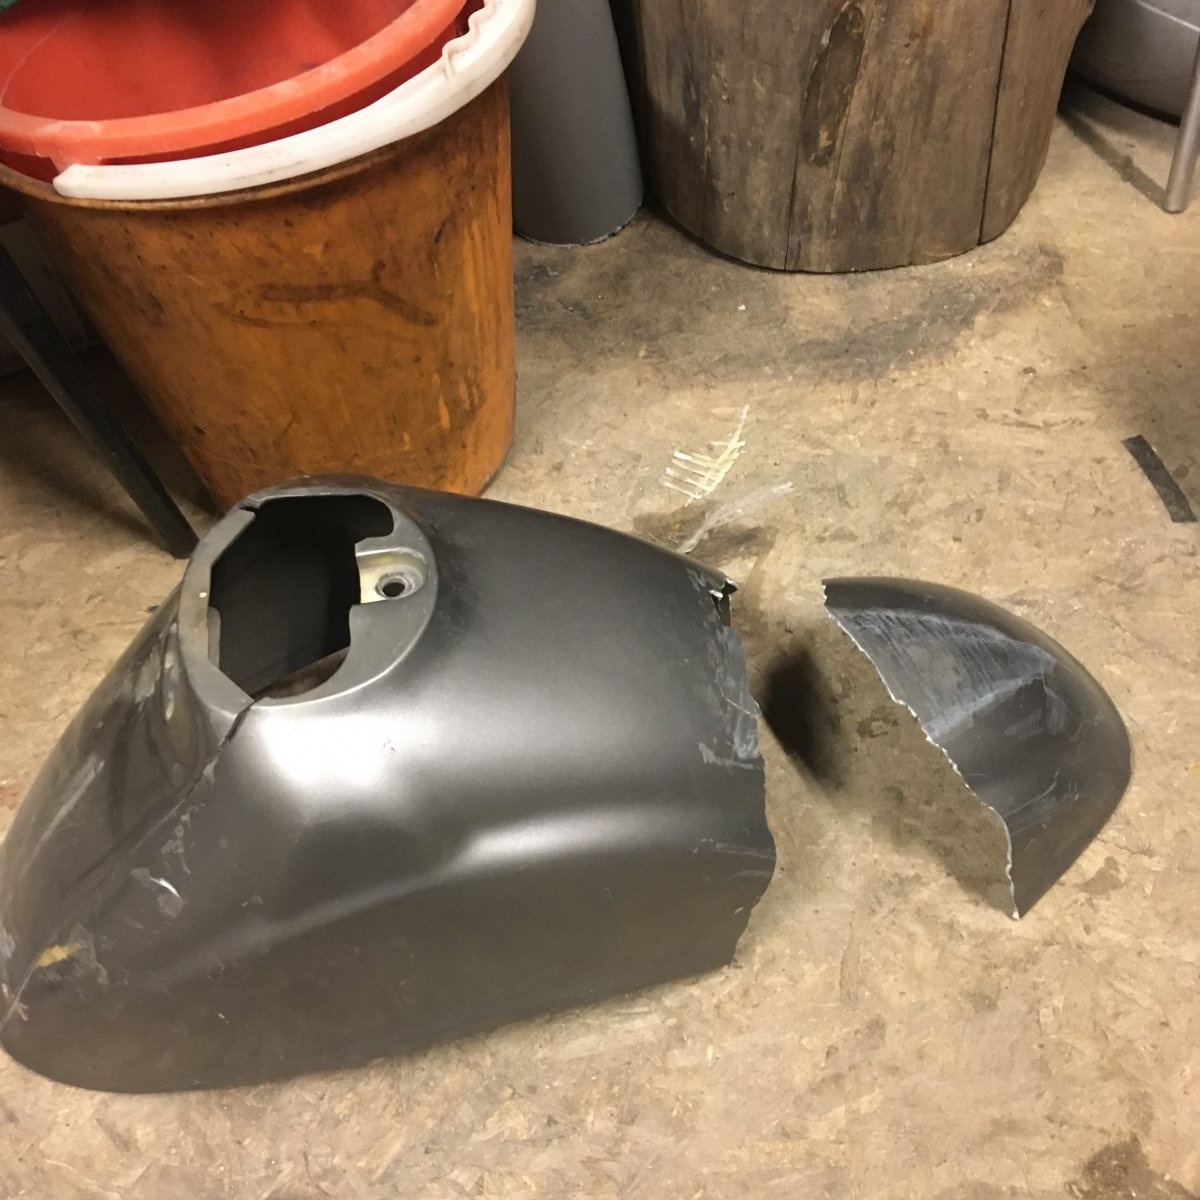
An accident does not contribute to the integrity of the scooter, so a slight impact broke the front fender of my Honda Giorno in half.

After a few hours in the garage, I decided not to glue the two halves together, but to simply shorten the wing. Error. The first rain showed me this in all its glory - the length of the plastic was not enough to protect me from the splashes, and the entire flow of mud from the wheel rushed like a fountain onto my headlight and face.
After careful consideration, I went to the hardware store and purchased epoxy glue, gloves, a few pieces of fiberglass, and masking tape.
Preparatory work:
Before mixing the mixture, I lightly walked the plastic with sandpaper, then degreased it with a solvent (White spirit will do). I cut the fiberglass into small pieces to make it easier to work with. I poured glue and hardener into a plastic glass, then stirred for 10-15 minutes (there will be instructions on the box). I placed the wing parts under a support so that they would not move apart during the process.
Gluing:
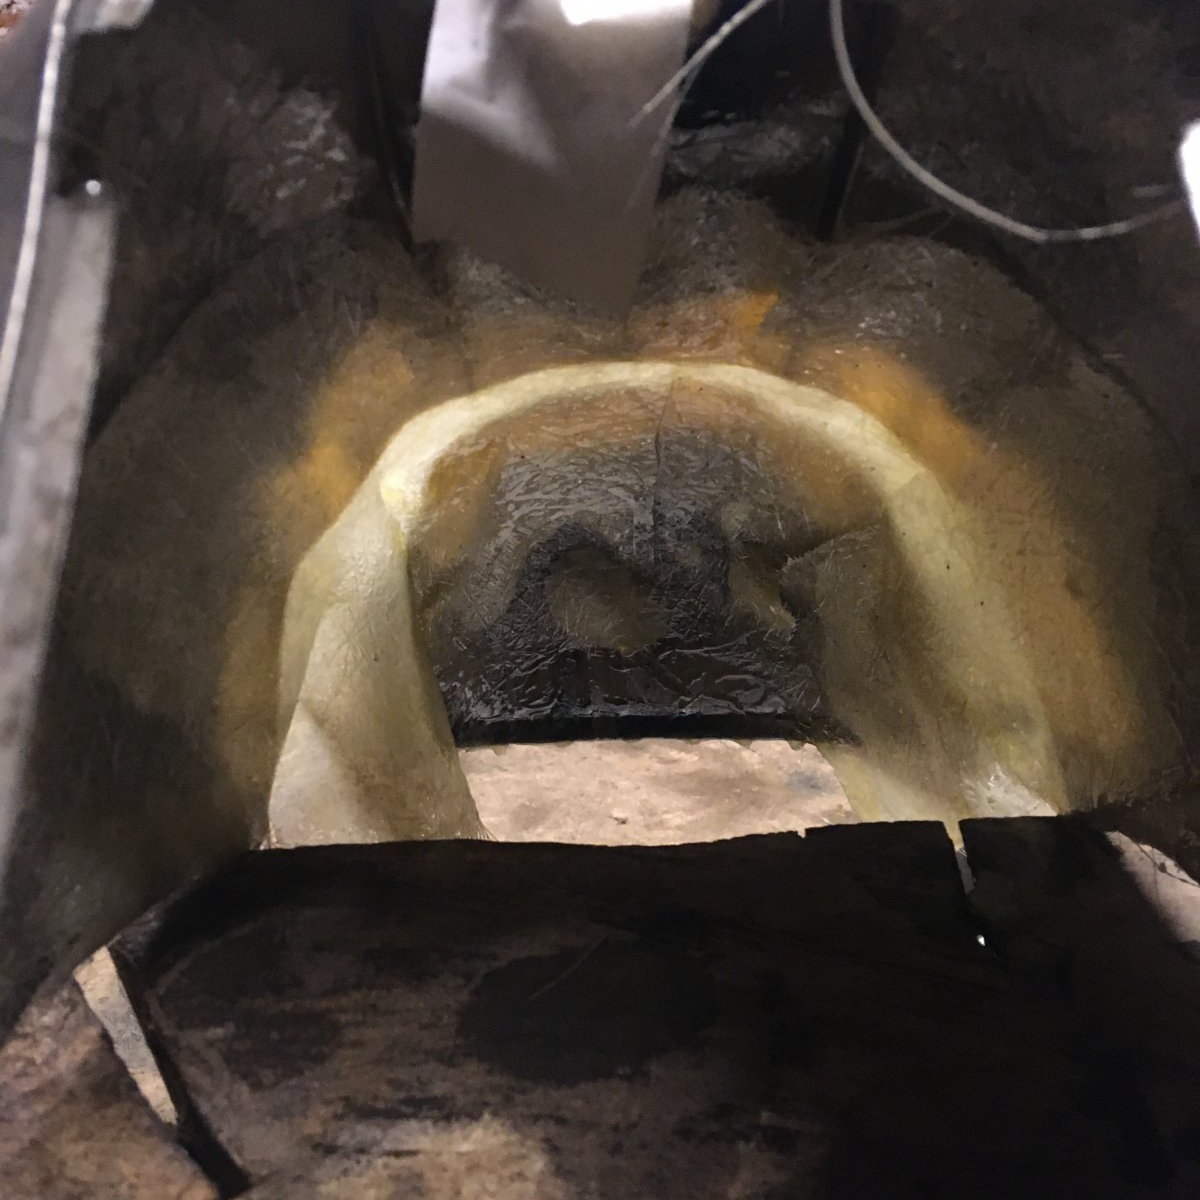
Using a regular brush, I evenly distributed the epoxy over the outside of the wing in a thin layer. I quickly created a shape using scraps of fiberglass.It is important not to allow the fiber to break/bend, as this will add extra work after drying. The resin slowly spread over the fabric, and I used a brush to get rid of the smudges. When the glue had set a little, I carefully turned the wing over and repeated the steps from the inside. I didn’t try very hard anymore, the back side is still not visible. After 20 minutes, it became clear that the resin continued to spread, and with it the halves of the wing. Masking tape came to the rescue. I glued a few strips of tension, the movement stopped.

Drying:
It was written on the box that a positive temperature and 24 hours (days) are required for complete drying, so I brought the wing into the apartment, fixing it in one position. By the way, you should not place it near heating appliances; the glue will dry unevenly in depth, and the gluing will not withstand even a slight blow.
I didn’t take any risks, so I just followed the process for three days.

Putty:
The wing dried and became one. Of course, it didn’t look like a factory one. It was decided to correct the flaws with automotive putty, fortunately it is sold in small jars for reasonable money.
Important: Look at the table on the can for ambient temperature/volume of hardener!
And you won’t have to go to the store again, because the mixture has already set in the jar due to the wrong proportion.
It turned out better with the second can: I spread the mixed mixture over the wing using a rubber spatula. Even though the car putty dries quickly, I decided not to touch the wing all night.

Treatment:
The next day I bought 2 types of sandpaper: coarse (for basic sanding) and fine (for post-processing). The work took about two hours with short breaks. There is nothing to talk about the process, I just sat and rubbed.
Overall, I was pleased with the result. By the season, all that remains is to go through the putty again, as small voids remain. And, of course, paint and varnish.
Expenses:
- About 1000-1500₽ for consumables and missing tools
- 3 evenings in the garage, 4 days waiting for it to dry.
Why didn't you buy a new wing? The Honda Giorno is a retro scooter, so replacing any plastic costs a considerable investment when compared to the price of the entire moped. On Aliexpress, the cost of a front wing starts from 4,000 rubles, and it is made using 3D printing.