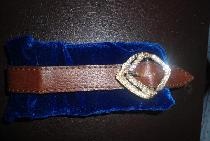
When you buy a wristwatch, it always comes with a strap, with which the watch is attached to your hand. Previously, watches were sold with leather straps or a stainless steel bracelet. As a last resort, from high-quality leatherette. Now, the situation is completely unimportant - either the bracelet is made of chrome-plated duralumin, which leaves green marks on the skin when the chrome layer peels off, or the strap is made of an unknown material, something between rubber and plastic. In the latter case, everything is completely sad - this rubber-plastic material bursts and tears, creating the risk of losing the watch.
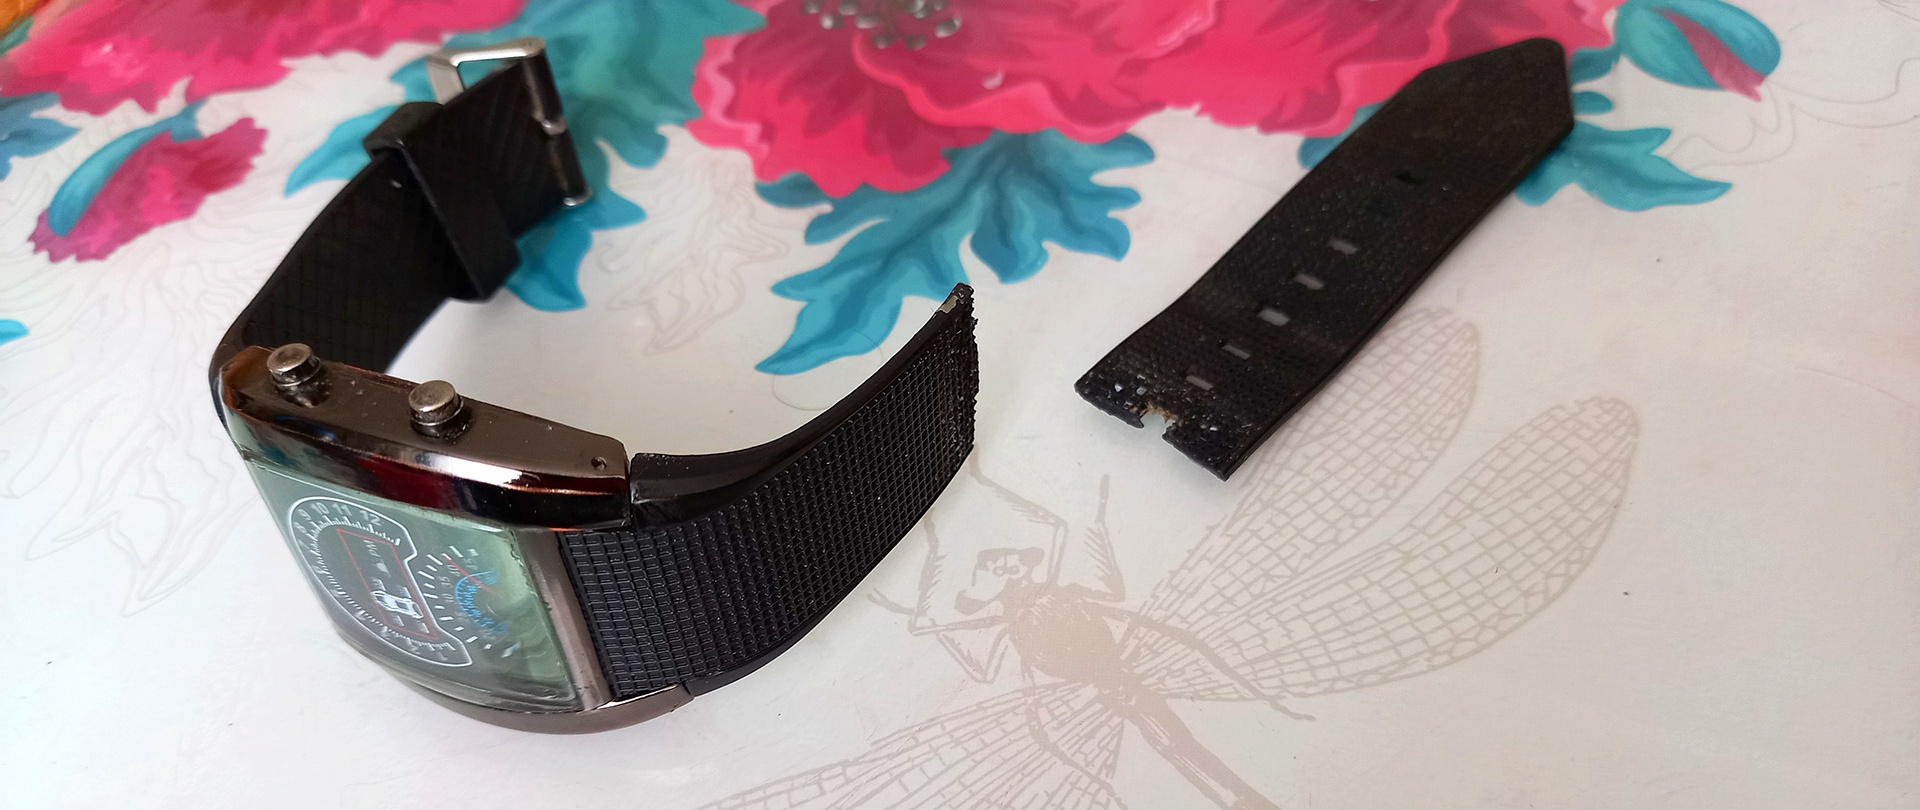
Moreover, such a low-quality strap comes not only with cheap watches, but also with quite expensive smart watches from well-known brands. If you have a torn (or cracked and just started to tear) strap, but it is not yet possible to buy a high-quality and expensive bracelet or strap, then it won’t take long to fix this issue. Making a strong and reliable strap for your favorite watch with your own hands takes 20 minutes!
Will need
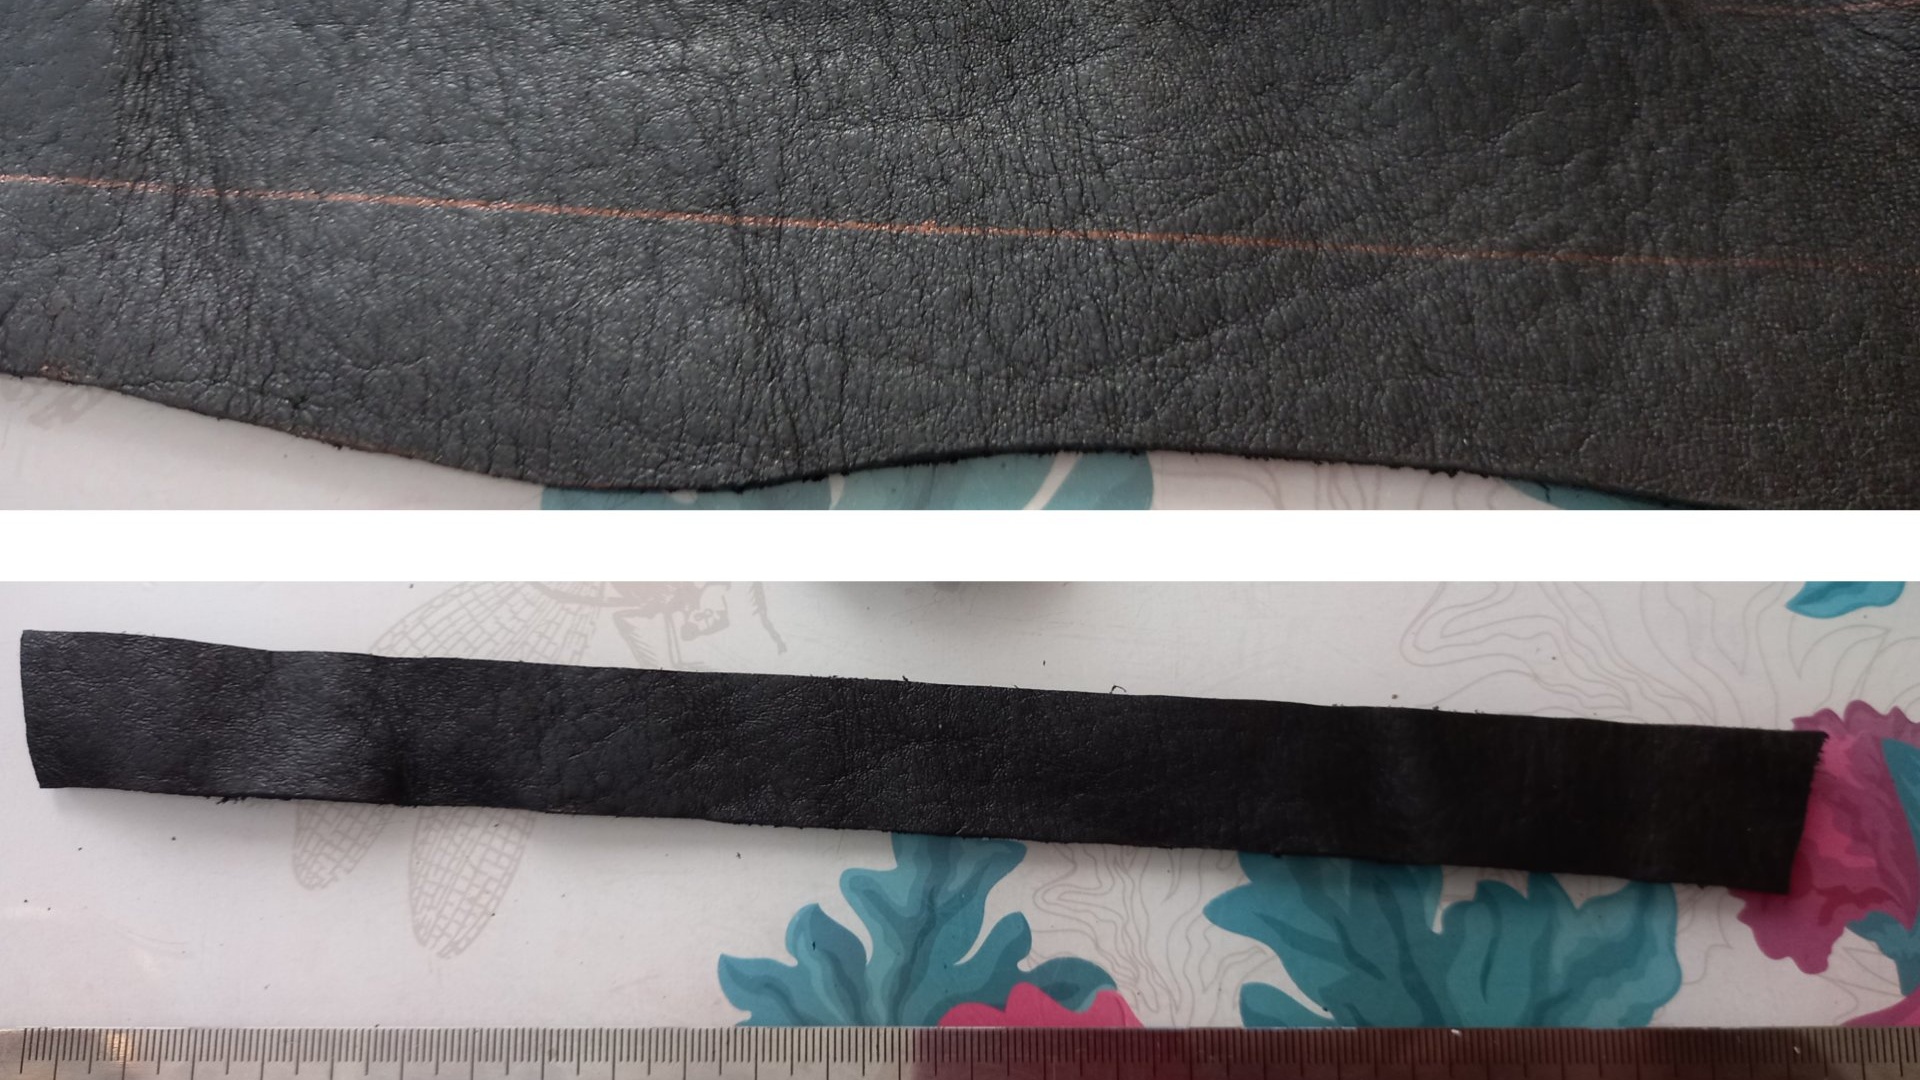
- A strip of soft leather, approximately 30x6 cm, 1 mm thick.
- Secondary glue.
- Leather glue.
- Scissors.
- Knife.
- Ruler.
- Marker.
- A drill and a thin tube with sharpened edges for cutting holes in the leather.

Watch strap repair
First of all, of course, you need to remove the remains of the old strap from the watch. To do this, you need to remove the pins on both sides that hold both parts of the strap on the watch.

Then you need to take the parameters from each half of the old bracelet - length and width.

Next, we proceed to making the first half of the bracelet, the one with holes for fastening. Using a ruler and marker, transfer the parameters to the skin; We transfer the width as it is, but the length - multiplied in half, in order to later fold it in half and get the required length. Cut out the strip.
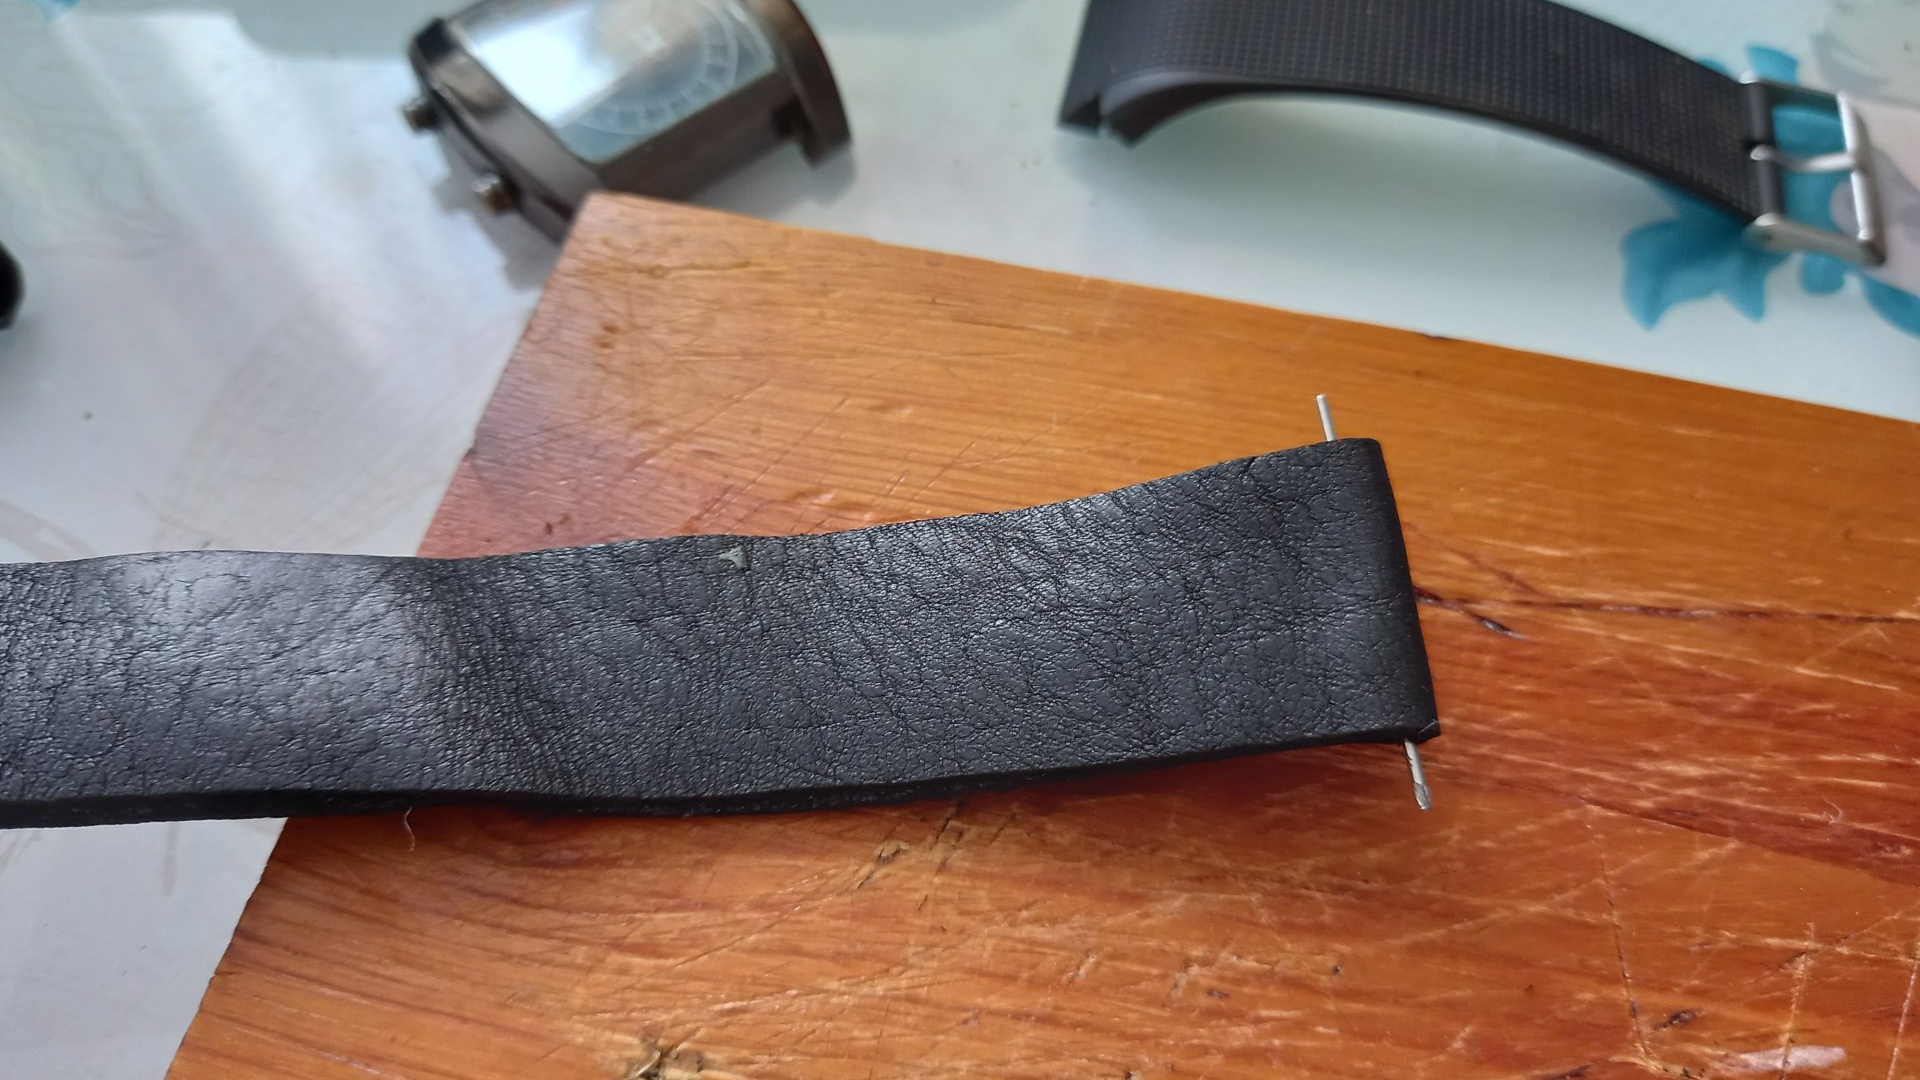
Fold the strip in half, mark the middle with a marker, grease the rough side with leather glue, and press the folded strip tightly for a few minutes. We do not apply glue to the middle, about five millimeters in diameter, so that there is space left for the pin. This is what it should look like:

The glued edges along the entire perimeter need to be dipped with liquid second glue to secure the gluing.

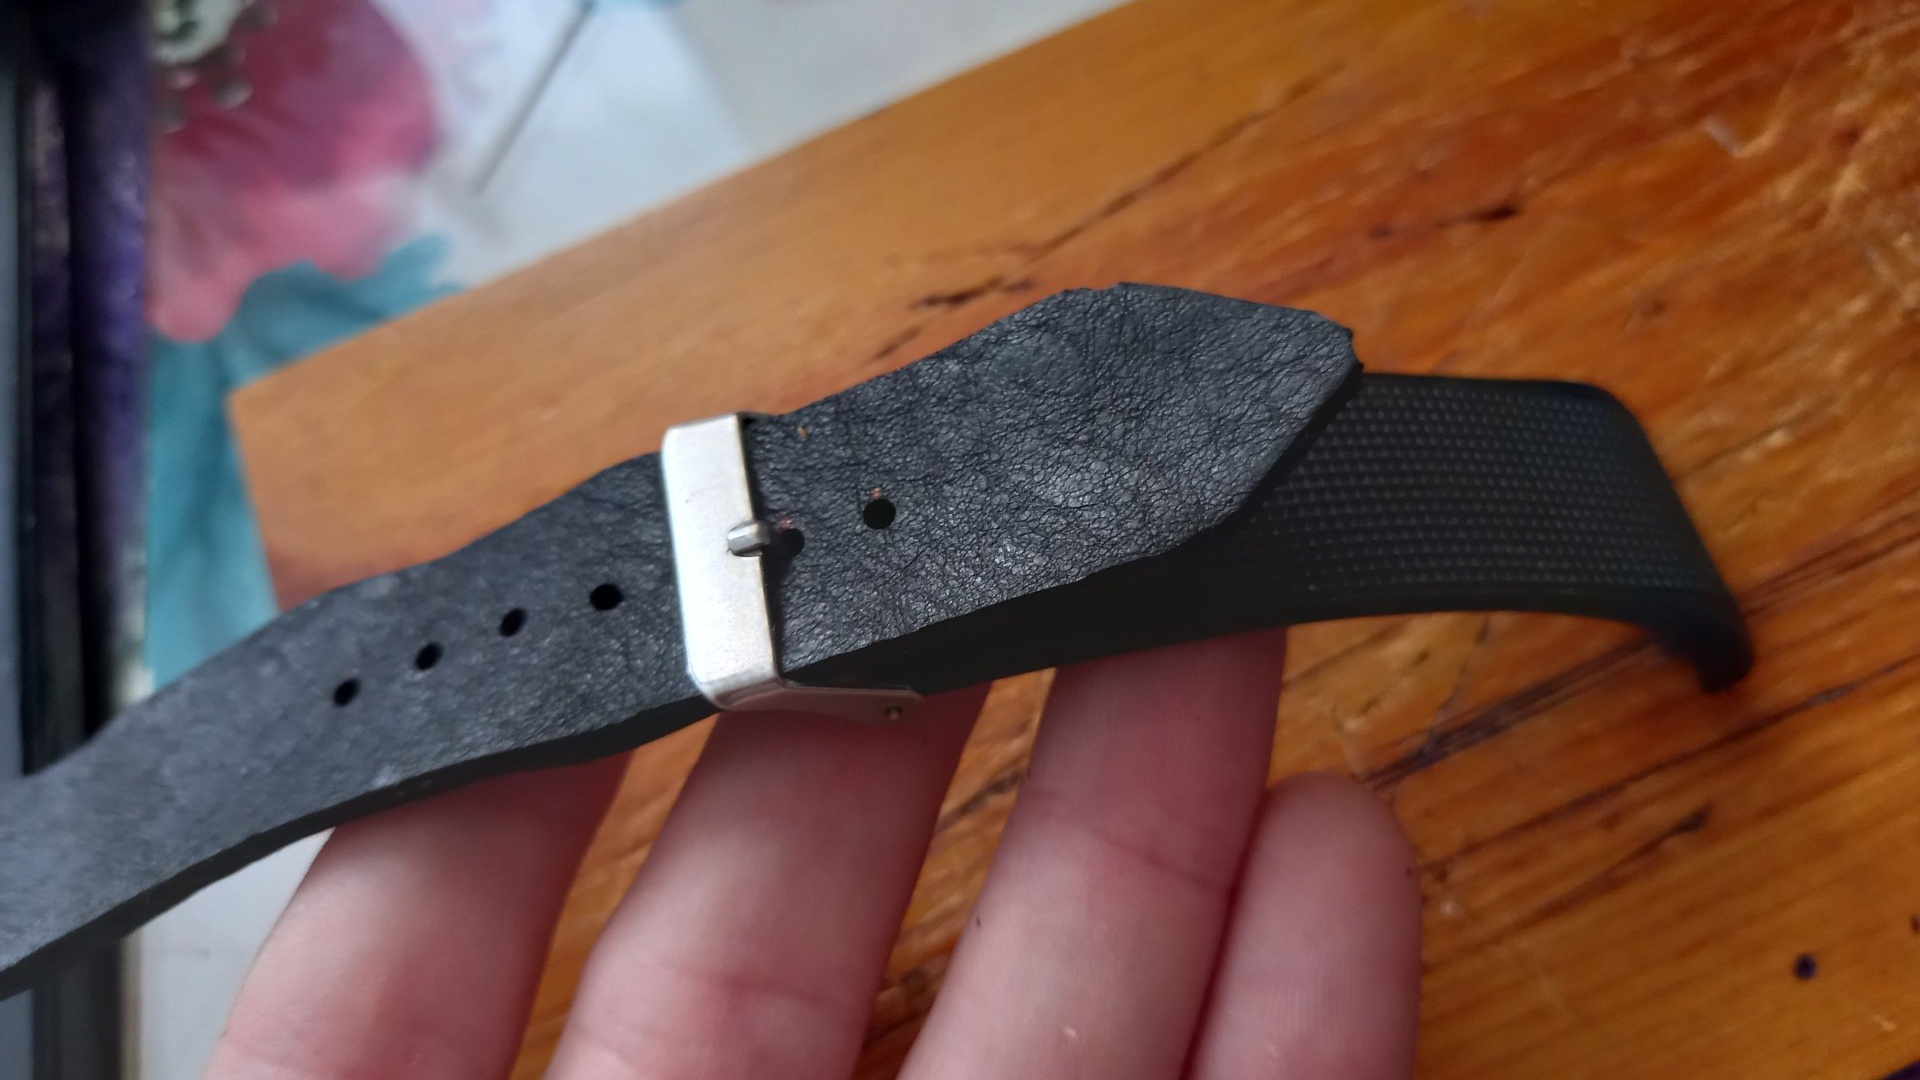
Second glue holds the skin very well. Better than threaded firmware, in my opinion. At least there are no seams and no threads sticking out. Yes, and less fuss. Once, in one of the articles, I made a pendant for a knife, on a belt, where I also glued the skin with superglue - it still holds. Not a crack or the slightest chip appeared, taking into account daily use! Now you need to cut holes for the buckle tongue. To do this, we apply the old strap (or its remains) to the new strap, and using this template we draw marks for future holes with a marker.
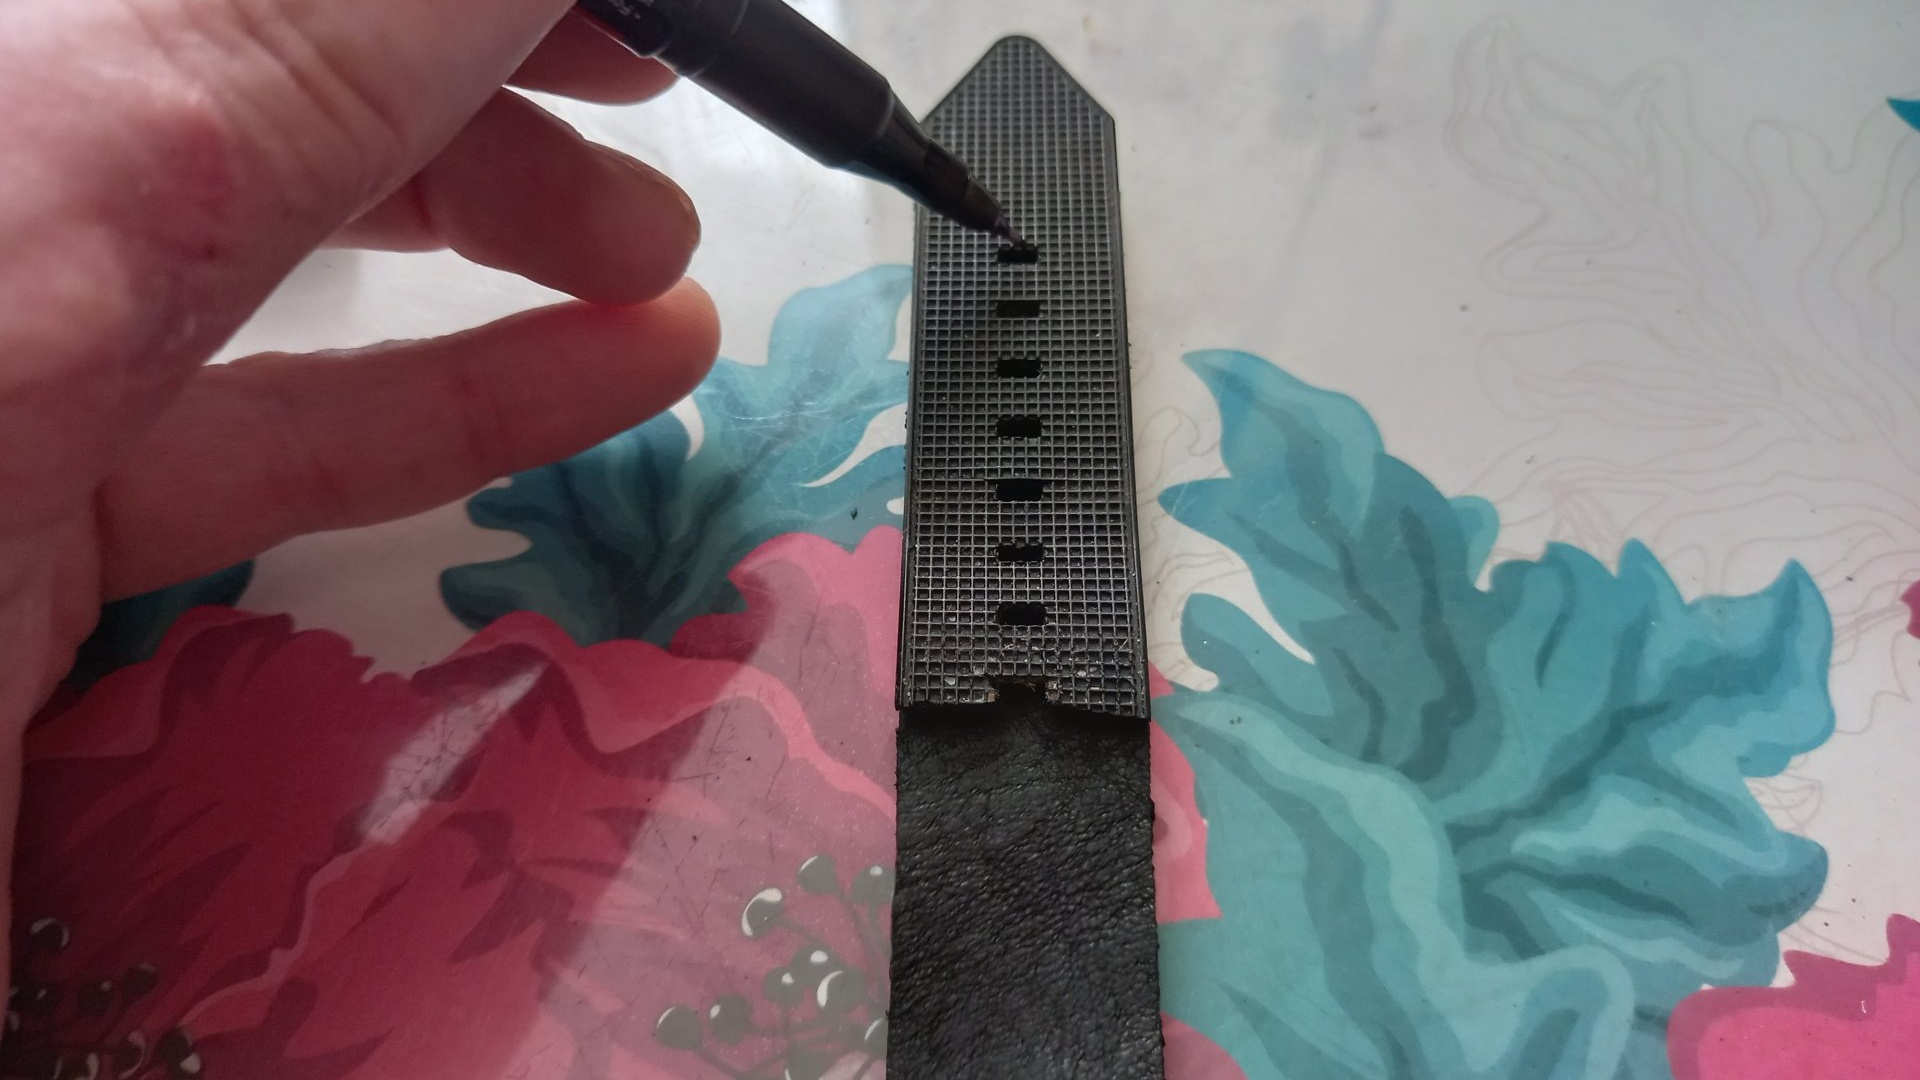
Now we need a tube with sharpened edges, with a diameter equal to the buckle tongue.
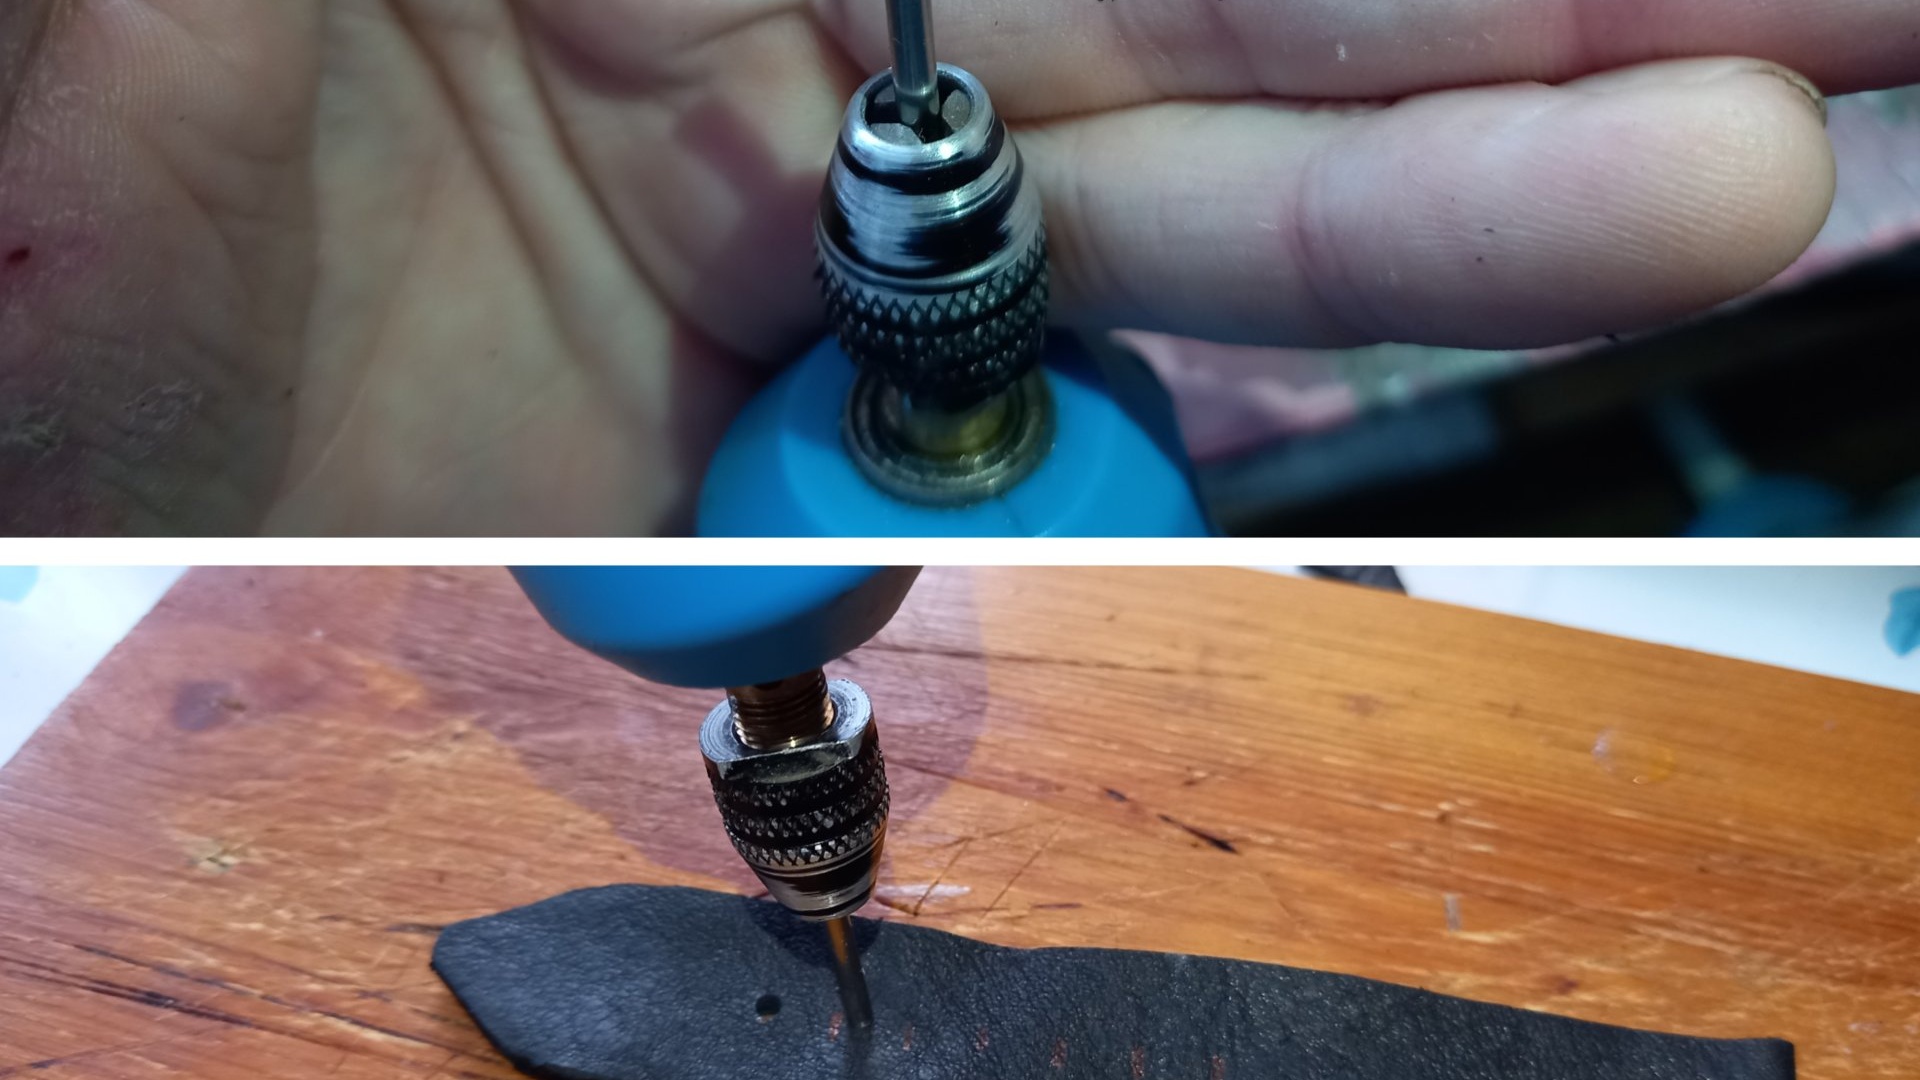
Using a drill or hammer, punch holes in the strap according to the drawn marks.Trying on the clasp.
If everything worked out as expected, then we proceed to the second half of the strap. Using the same principle, cut out a strip of leather. That is, with double length. If in the first half we left space at one end, under the hairpin, then in this half we will have to do this at both ends - under the hairpin and under the buckle.
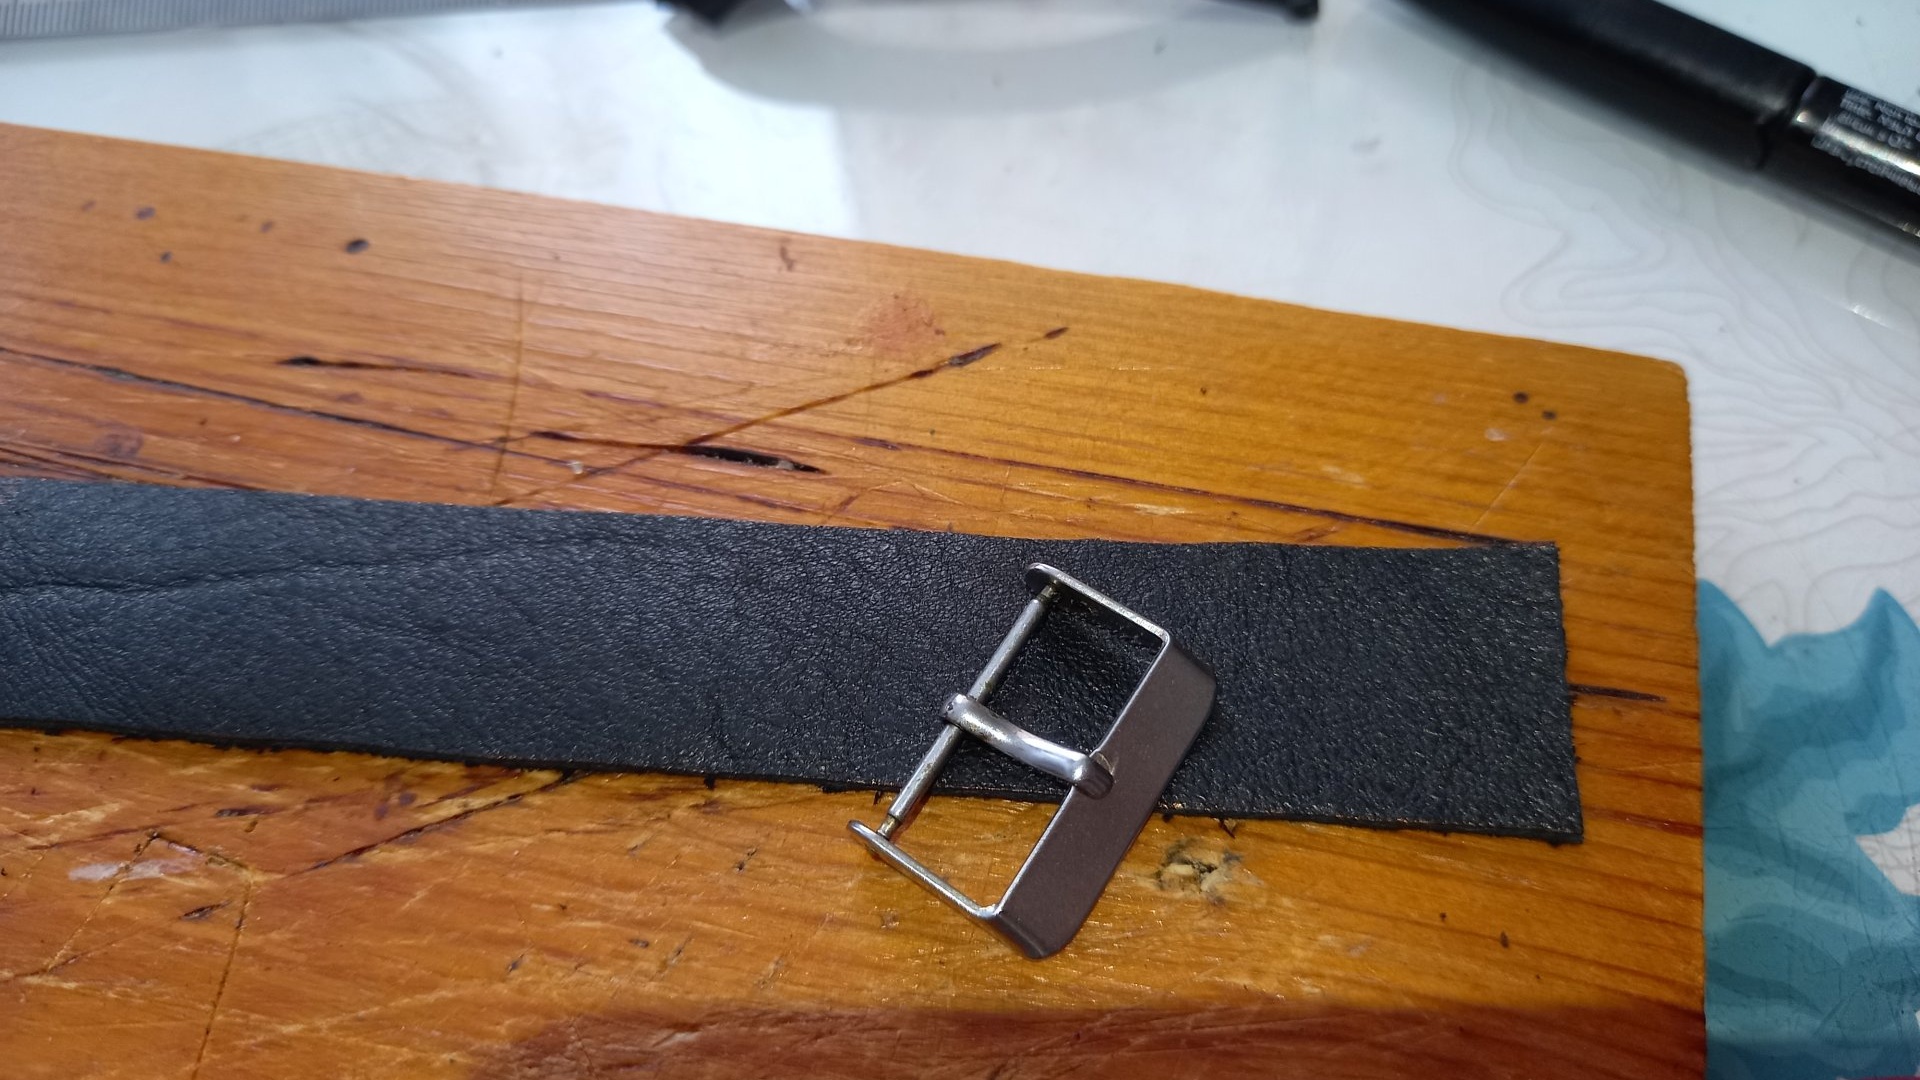
We bend the strap from one edge by 2-3 centimeters. We make a hole on the fold, in the middle. We thread the buckle tongue through it. We thread the strap through the buckle and glue it together. Like this:


We bend the remaining end to the glued edge and glue it in the same way. Don't forget, again, about the place for the hairpin.


This is the strap we ended up with:
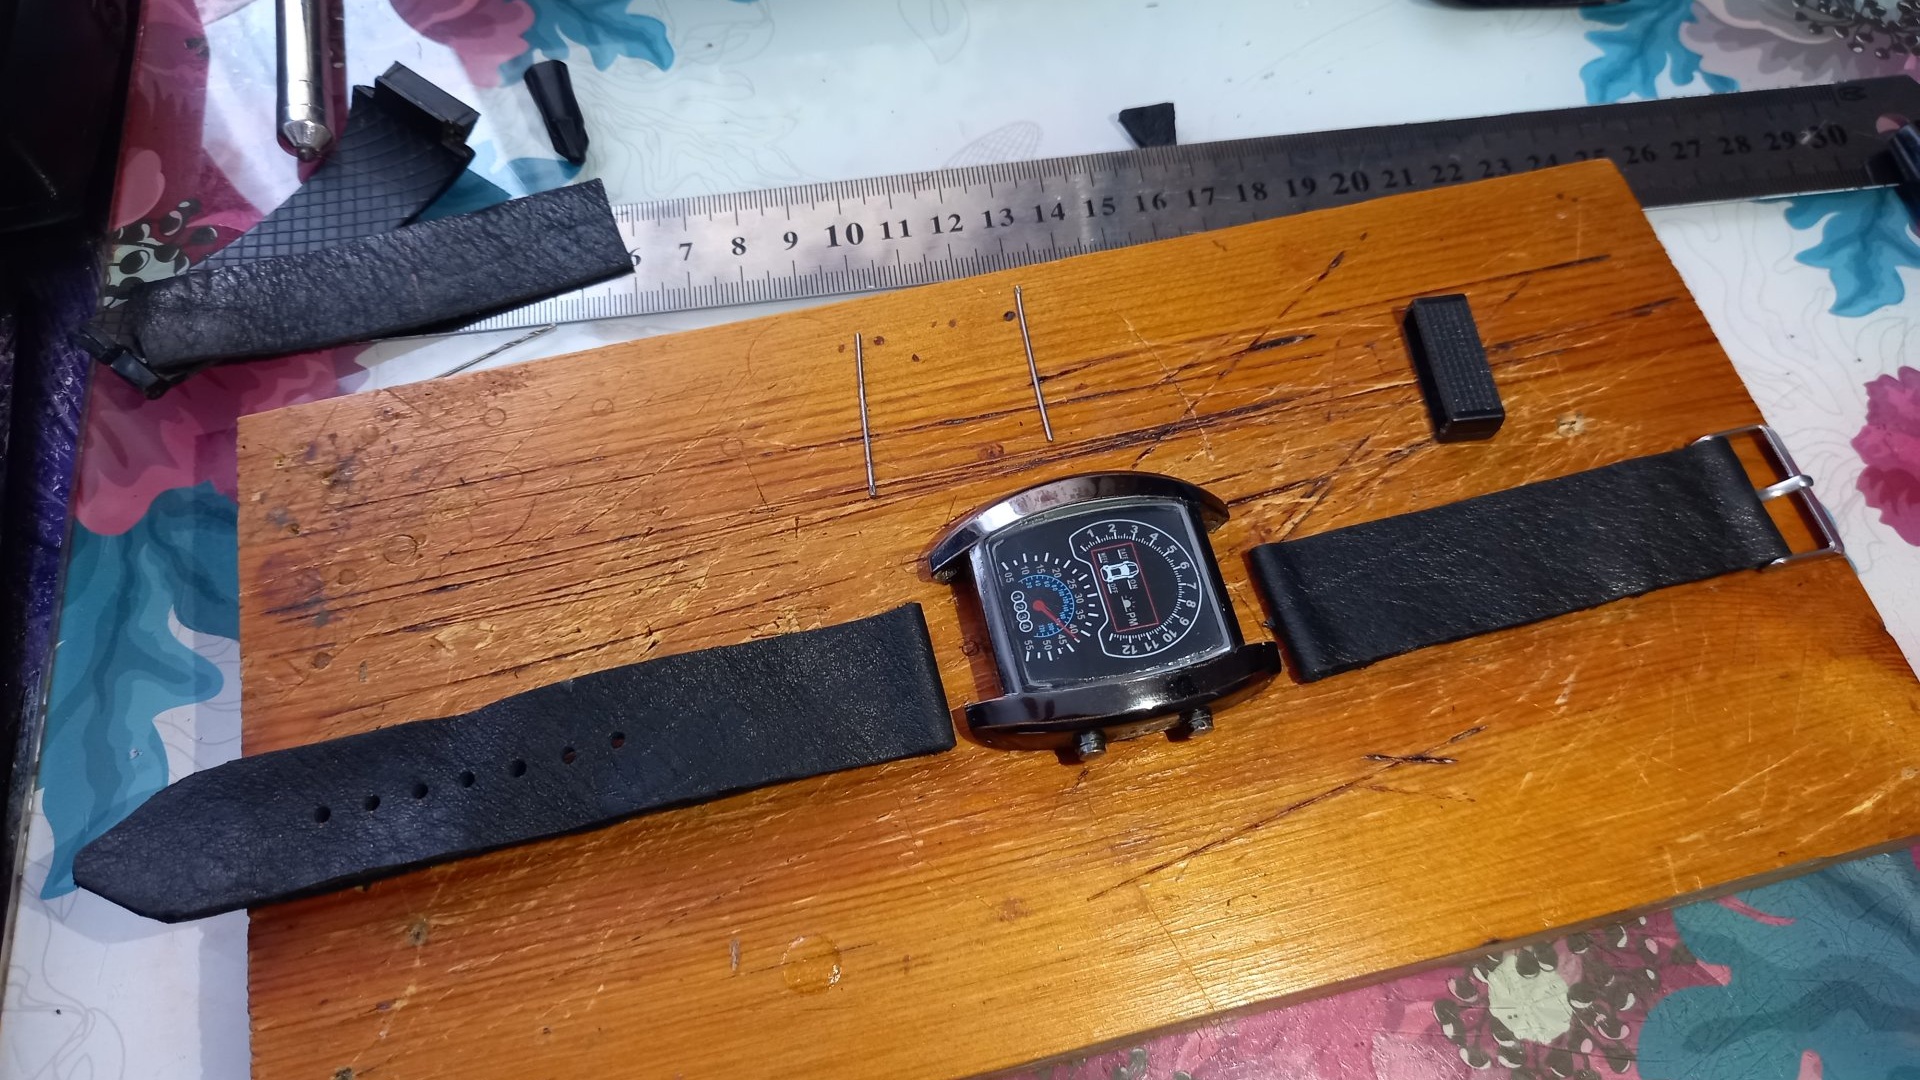
We put the strap from the old strap on half with the buckle, and fasten both parts of the strap to the watch with pins.

Now you can continue to use your watch without the risk of losing it. You can safely use this strap until you purchase a high-quality and reliable strap or bracelet.
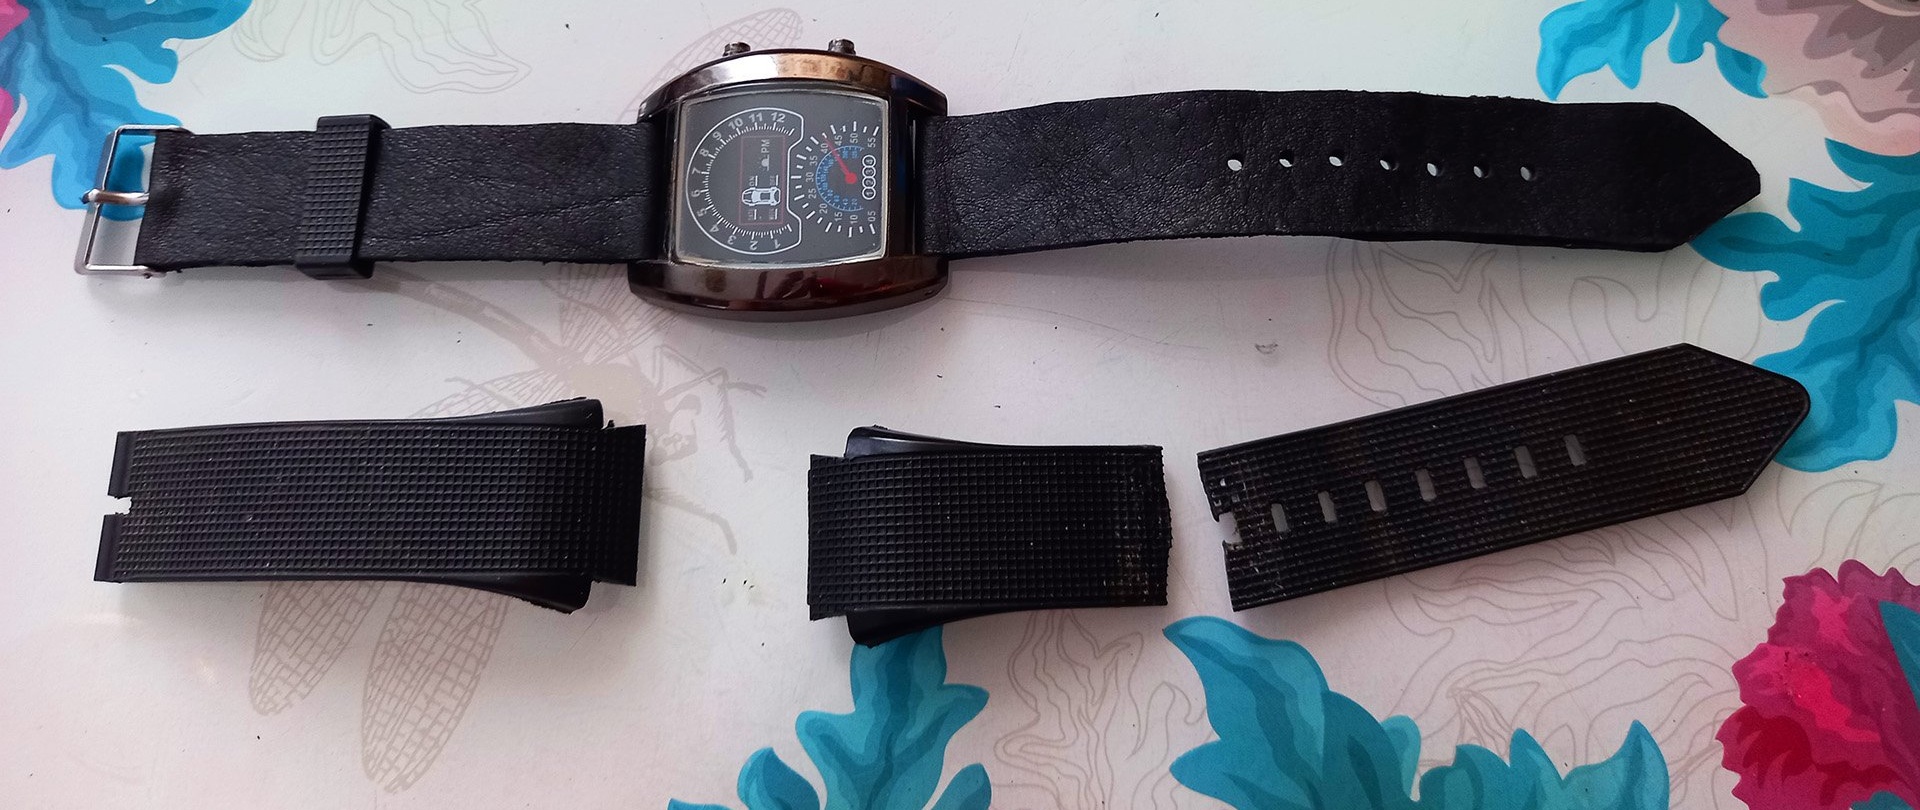
But personally, I’m not going to change it - I’m more than satisfied with the appearance, and, of course, I’m one hundred percent confident in the reliability of this strap, since I made it myself, and I know the limit of its strength.