Do it yourself
Life hacks, master classes, useful tips, recipes.
home » Homemade cars » Car armrest
Perhaps every car enthusiast dreams of a car that stands out against the backdrop of the faceless gray mass of similar models. The desire to travel comfortably in their vehicles forces car owners to look for original design solutions, one of which is an armrest.
An armrest in a car is a purely individual thing that requires a special approach. Most of the accessories offered by car dealerships are standard and designed for as many car brands as possible, regardless of their design features. For this reason, it is best to make the armrest yourself. The exception is when the armrest is an additional option in the vehicle configuration or it can be purchased from official dealers for a specific brand.
Let's take as an example one of the armrests, made with our own hands at home.
For this we will need: a plywood sheet about 1.5 cm thick, nails, PVA wood glue, foam rubber, leather (natural or artificial leather).
Manufacturing process:
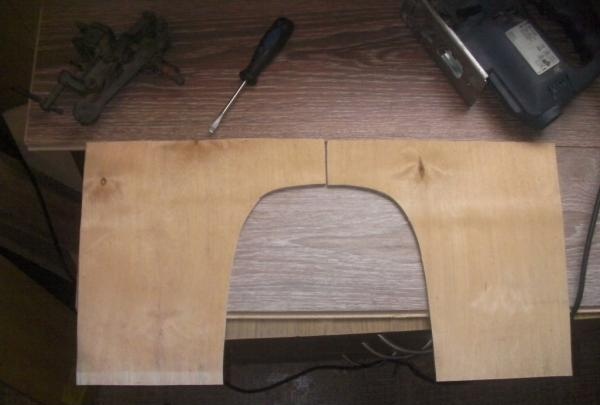
1. We take the required dimensions at the intended location of the armrest and make a stencil.For maximum convenience, it is best to use cardboard, due to its durability and ease of use. Let's try on the stencil. We are making adjustments.
2. Based on the stencil, cut out the details of the armrest. It is recommended to use a jigsaw. We process the resulting parts with a file or sanding paper.

we process the details


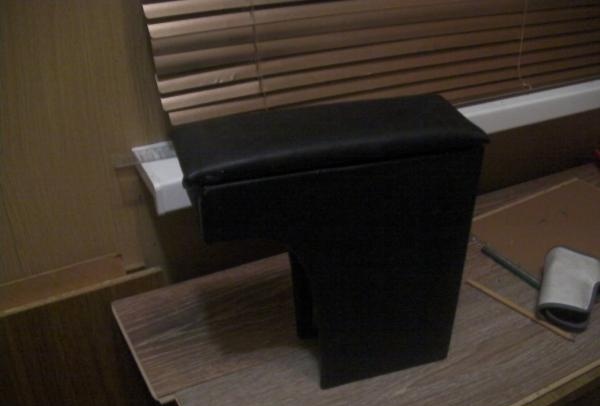
3.Glue the resulting parts together or nail them with small nails. Please note that when using nails on the surface of wood, cracks and breaks may occur. Therefore, nails must be used carefully. Let the glue harden.

Let the glue harden time

Making compartments for small items


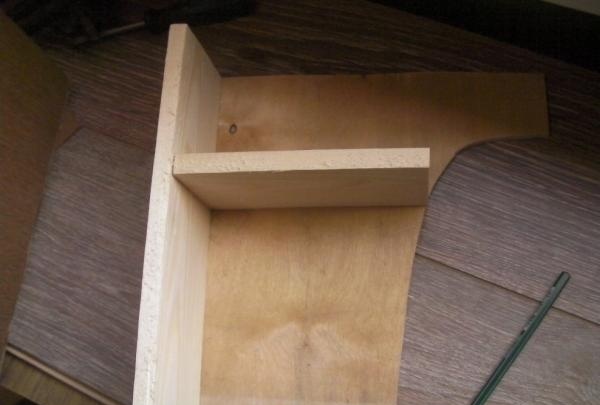
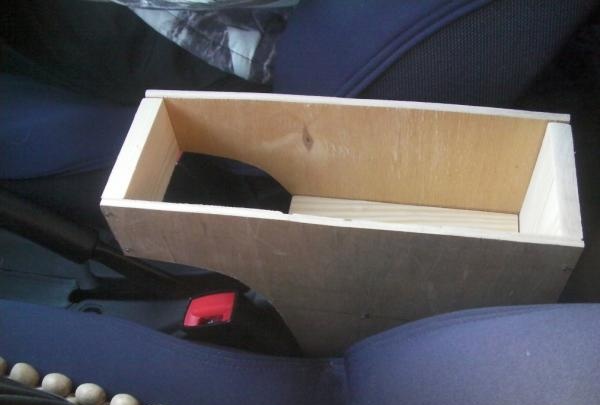
4. We make compartments for small things.

Glue it together

choose randomly


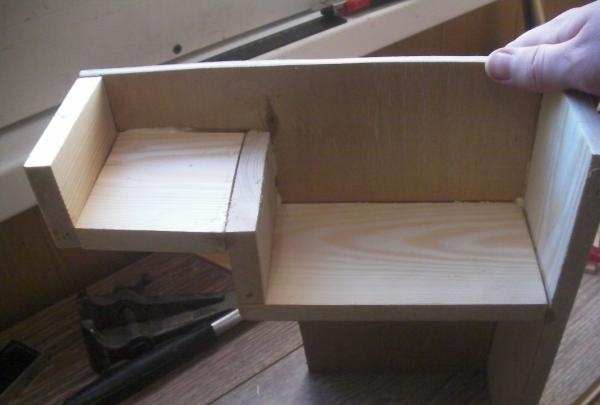
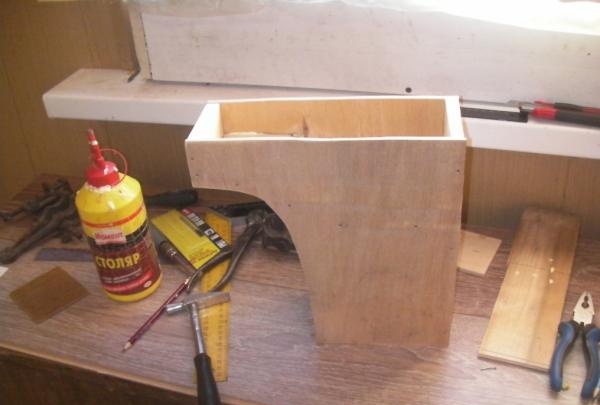
Their design, size and depth can be chosen arbitrarily.
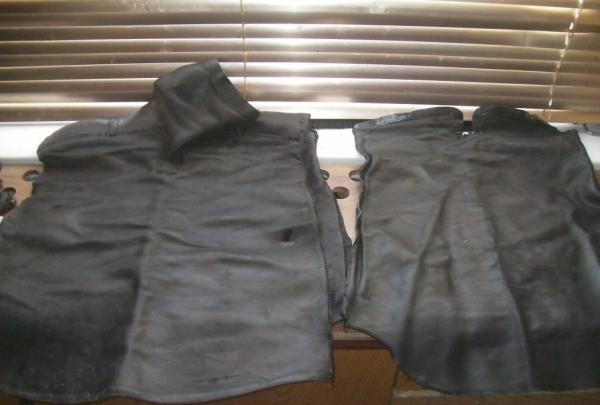
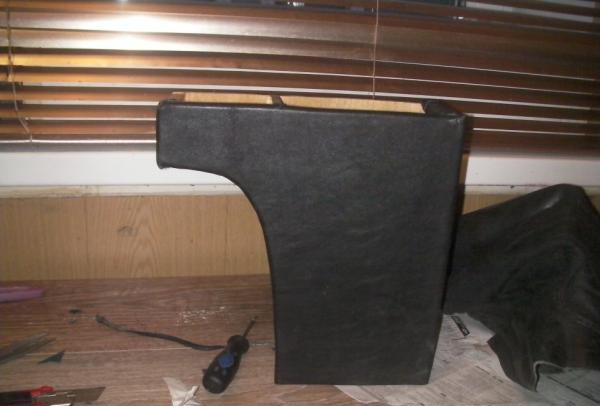
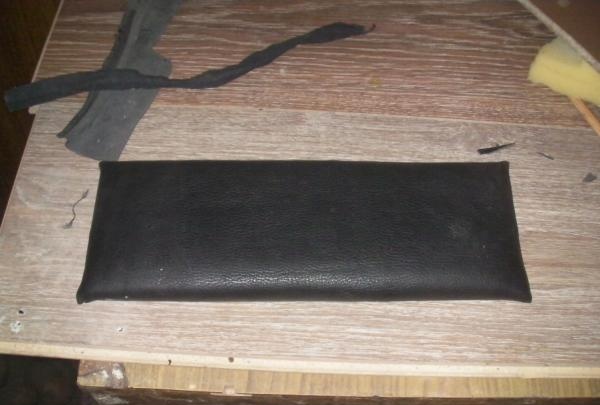
5. We cover the armrest with leather. To do this, lubricate the leather with wood glue and carefully stretch it onto the surface of the armrest so that no folds, bulges or air bubbles form. After this, we smooth the leather with a hot iron - this way the glue dries faster and is evenly distributed over the surface, without leaving folds or dents.

leather

We cover the armrest with leather


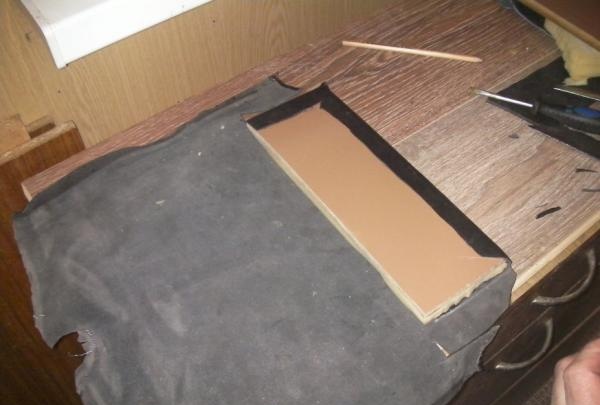
6.We make the lid. The total length of the cover should be slightly longer than the length of the armrest. Before covering the lid, it is best to place a piece of foam rubber under the skin.

Making a lid

put a piece of foam rubber


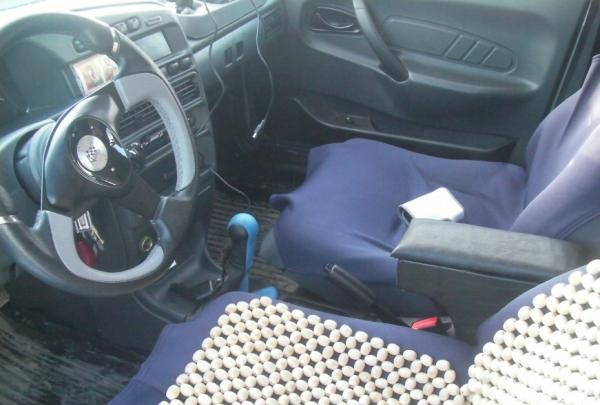
7. Screw the hinges to the cover and to the armrest body, and install them in the car.

Screw the hinges to the lid

Install

Armrest for car


DIY armrest


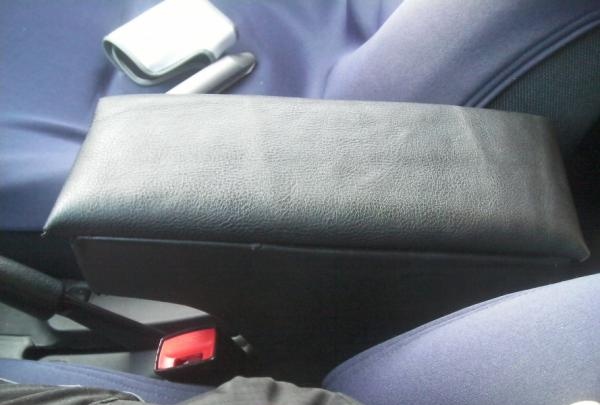
The armrest is ready. For greater beauty and durability, you can use shoe care cream or other leather products.
come back
Comment
  • bowtiesmilelaughingblushsmileyrelaxed relaxedsmirk
    heart_eyeskissing_heartkissing_closed_eyesflushedrelievedsatisfiedgrin
    winkstuck_out_tongue_winking_eyestuck_out_tongue_closed_eyesgrinningkissingstuck_out_tonguesleeping
    worriedfrowninganguishedopen_mouthgrimacingconfusedhushed
    expressionlessunamusedsweat_smilesweatdisappointed_relievedwearypassive
    disappointedconfoundedfearfulcold_sweatperseverecrysob
    joyastonishedscreamtired_faceangryragetriumph
    sleepyyummasksunglassesdizzy_faceimpsmiling_imp
    neutral_faceno_mouthinnocent
4 minus one =
Comments (4)
  1. Ignis
    #1 Ignis Guests 15 October 2013 22:14
    12
    It’s normal for the pelvis, but it’s a door.
  2. Demyan
    #2 Demyan Guests 15 March 2014 17:41
    7
    I like.
  3. Igor
    #3 Igor Guests 18 September 2014 12:26
    7
    Well done!!! but the dimensions wouldn’t hurt, at least for a moment))))))))))))
  4. I
    #4 I Guests 25 September 2018 21:47
    3
    It’s immediately obvious what you do with your own hands and what you post as theory)))

DIY culinary notebooks | Do it yourself

How to salt and dry fish in an electric dryer with your own hands

Santa Claus's mailbox | Do it yourself

Hat for a newborn girl | Do it yourself

«Do it yourself - with your own hands» - a site of interesting homemade products made from scrap materials and items at home. Step-by-step master classes with photos and descriptions, technologies, life hacks - everything a real master or just a craftsman needs for needlework. Crafts of any complexity, a large selection of directions and ideas for creativity.

We recommend reading

Washing machine error codes