Do it yourself
Life hacks, master classes, useful tips, recipes.
Surely every housewife has her own little secrets and favorite recipes with which she pleases her beloved family. Well, of course, every housewife should have a special notebook for notes for her favorite recipes. So that at any time you can take such a notebook and use it or, conversely, write down the desired recipe. Now, of course, there are a lot of ready-made cookbooks on sale, with hundreds of different recipes, but for many this is considered very cumbersome and inconvenient, since until you find the right recipe, you will spend a lot of time and will not always get the desired result. So, in such cases, it will certainly be very convenient to have a small culinary notebook with a blank block of sheets into which you can paste or write in your favorite recipes. Every housewife can make such an assistant with her own hands, and this interesting master class will help us with this.
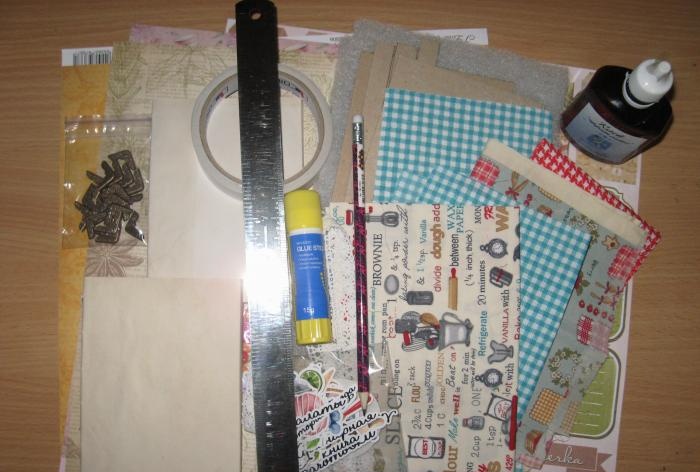
So, to make two small notebooks we need to take:
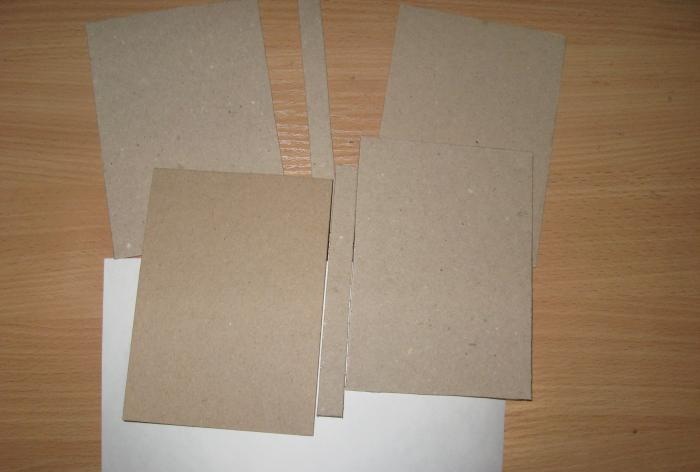
  • Binding cardboard 4 pieces measuring 10.5 * 14 cm, this is A6 format, as well as two binding strips 1.5 cm by 14 cm;
  • White cardboard;
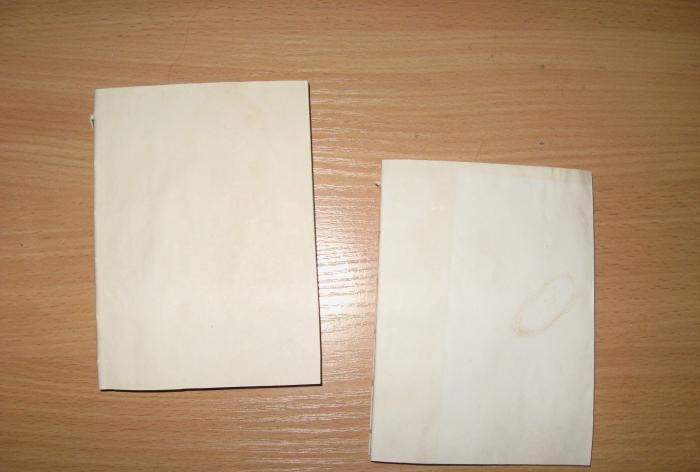
  • Two ready-made tinted blocks A6 format (you can buy ready-made blocks or sew them yourself), you can also buy a very ordinary notebook and simply remove the cover from it;
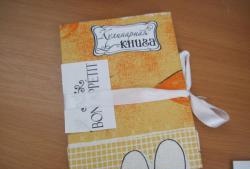
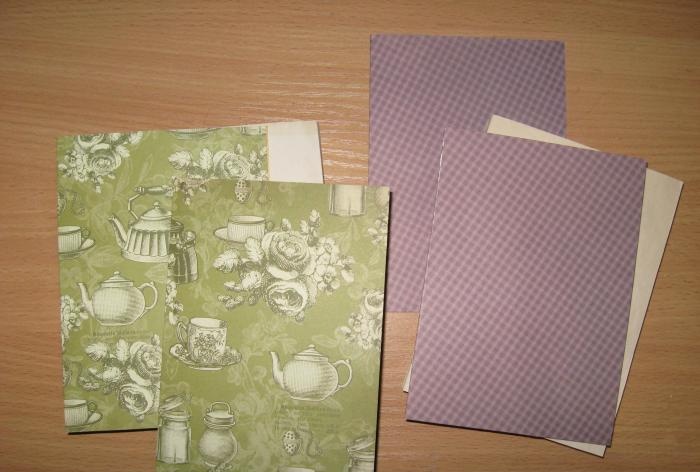
  • Paper for scrapbooking with culinary motifs;
  • Bronze metal corners, take 8 pieces;
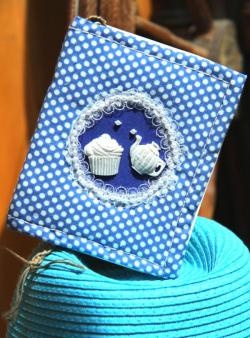
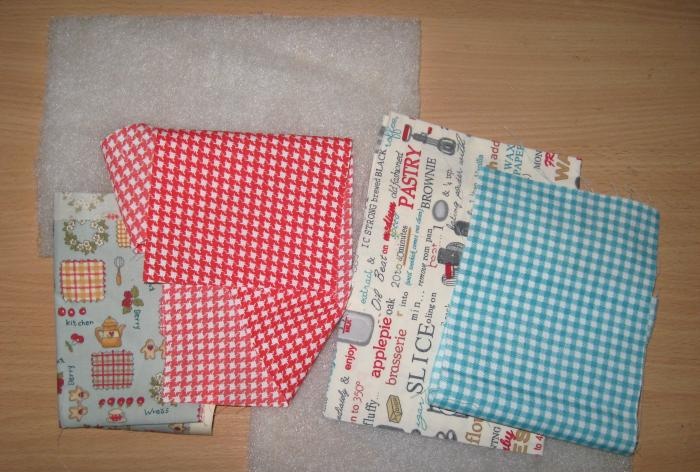
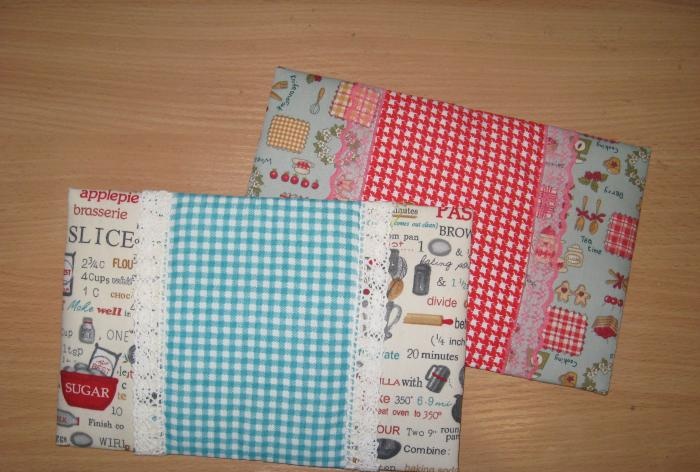
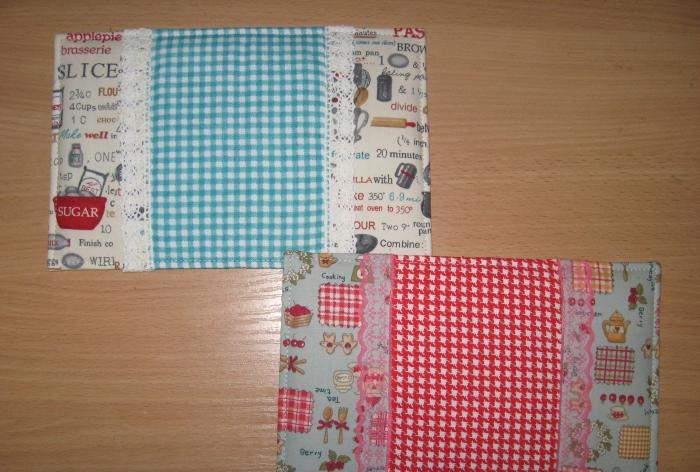
  • Fabric mint and white check, red and white check and two fabrics with kitchen elements, we will combine fabrics in notebooks;
  • Sintepon;
  • The lace is white cotton and red;
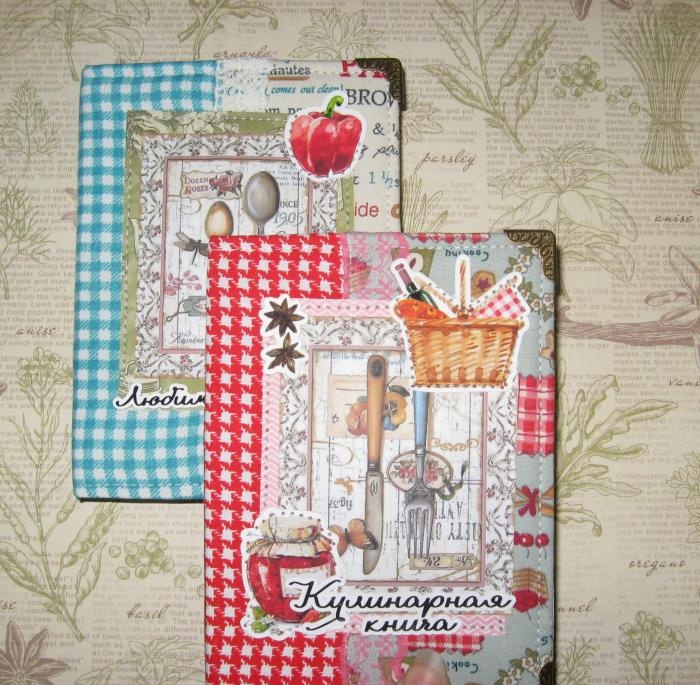
  • Culinary pictures, cards and a set of culinary die-cuts with inscriptions and various kitchen utensils;
  • Rep ribbons with polka dots for bookmarks;
  • Kitchen pendants;
  • Metal brads;
  • Clips, pencil, ruler, double-sided tape, scissors, glue stick, water-based glue.


DIY culinary notebooks

DIY culinary notebooks

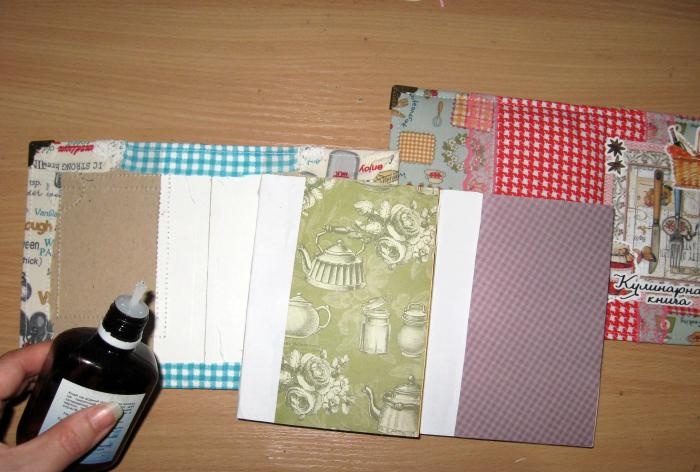
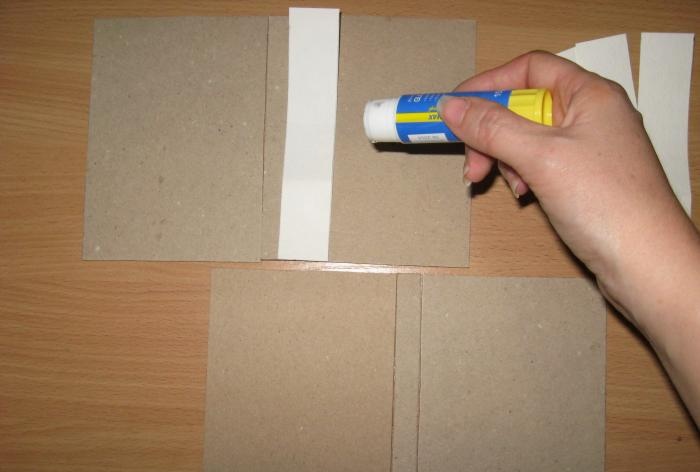
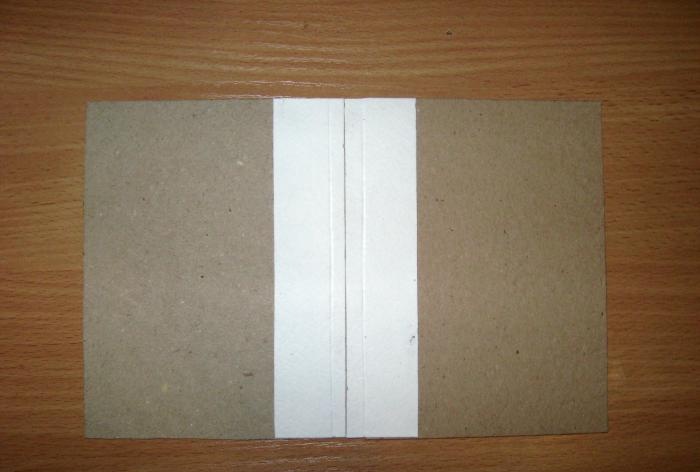
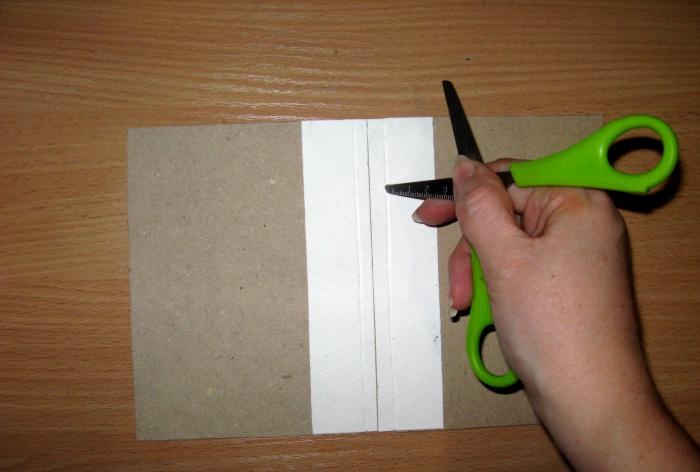
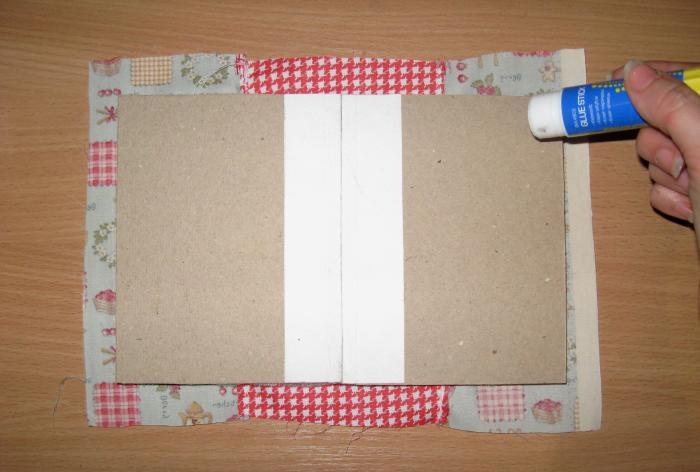
We lay out two binding rectangles evenly on the table, and between them a binding strip; now we measure out two narrow strips from cardboard and glue them to both joints of the cover.
DIY culinary notebooks

DIY culinary notebooks

Glue and level. We use scissors where the strip bends so that the base is well covered.
DIY culinary notebooks

DIY culinary notebooks

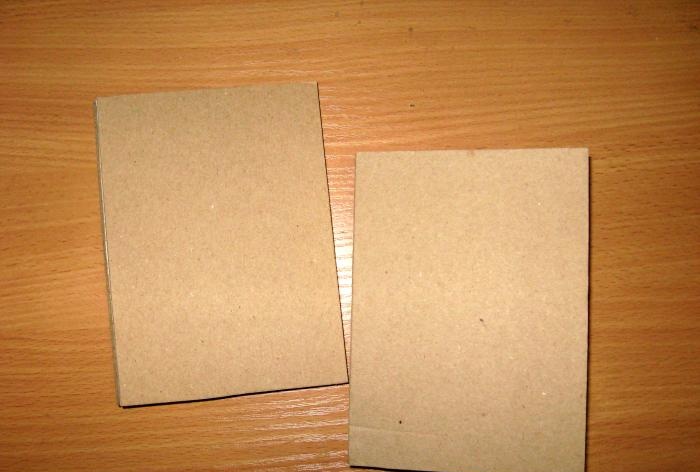
We put them together and get these little books. Now we glue the padding polyester onto them with double-sided tape.
DIY culinary notebooks

DIY culinary notebooks

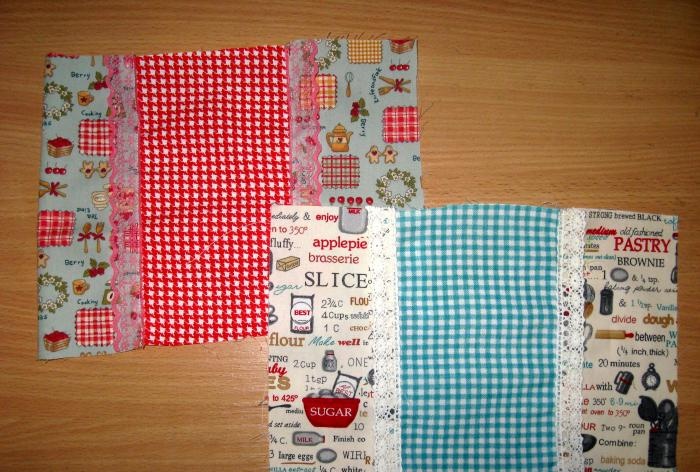
Now let's take the fabrics. We combine and cut off the pieces, don’t forget to make extra for the hems. Cut two strips of lace for each notebook.
DIY culinary notebooks

DIY culinary notebooks

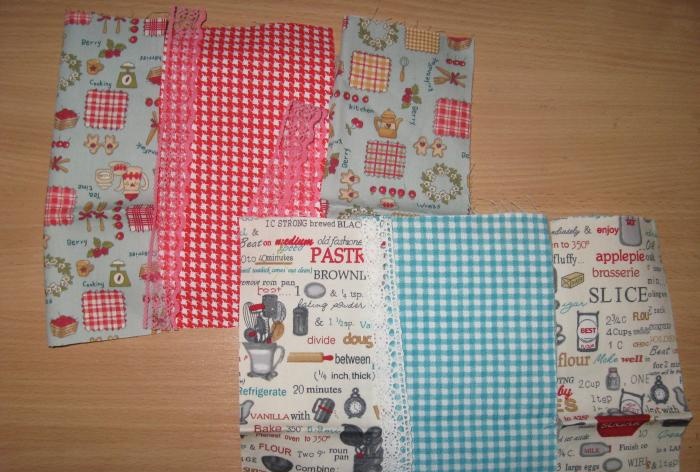
We iron all the pieces of fabric and sew them together. We sew lace at the joints. Now we wrap the binding blanks with fabric. We smear the edges of the binding base with a glue stick, fold the fabric and glue it. For now we put it aside.
DIY culinary notebooks

DIY culinary notebooks

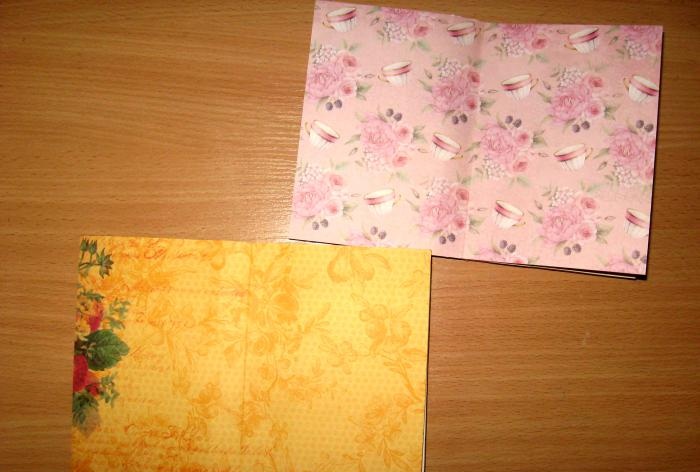
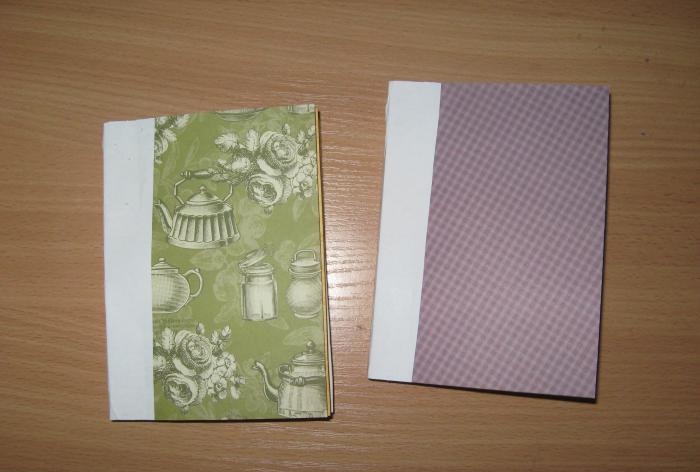
Let's prepare the blocks. For our blocks we need to make colored endpapers from scrap paper. Cut two rectangles and fold each in half to the height and width of the block.We smear the edges near the spine from top to bottom with a glue stick, and glue the endpapers in front and behind the block. Now we cut off strips of white paper, wrap it and glue it in such a way as to glue the top and bottom of the block along with the spine. We clamp the blocks with paper clips and set them aside.
DIY culinary notebooks

DIY culinary notebooks

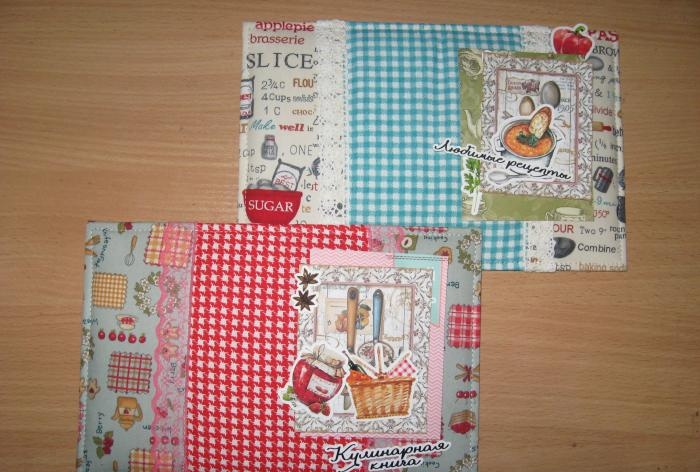
We sew soft covers along the edges.
DIY culinary notebooks

DIY culinary notebooks

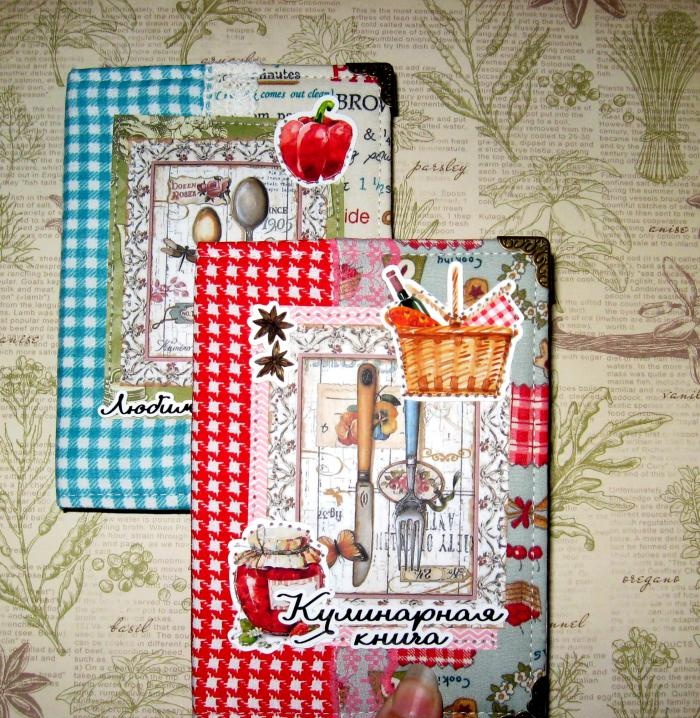
Now we try on pictures, cards and die-cuts for covers. Sew on all the elements. The blocks with endpapers are also ready.
DIY culinary notebooks

DIY culinary notebooks

Now we need to assemble our notebooks, namely, glue the blocks into the covers.
DIY culinary notebooks

DIY culinary notebooks

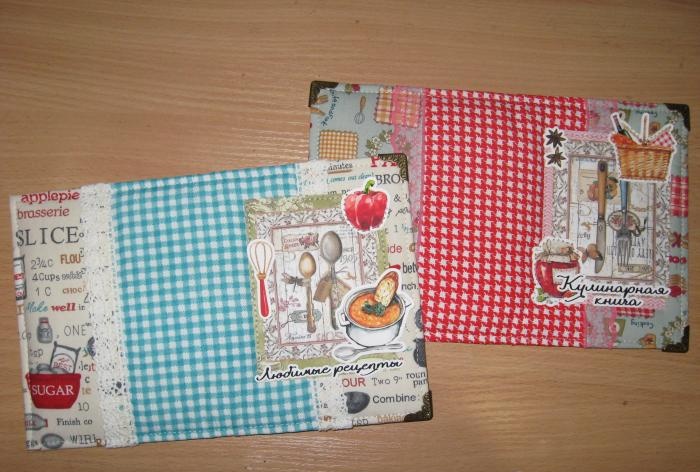
Glue the blocks. Glue the endpapers of the block onto the sides of the cover and you’re done. We clamp with clamps and let it dry. Then we put on the metal corners and the notebooks are ready. Thank you for your attention and good luck to everyone!
DIY culinary notebooks

DIY culinary notebooks
come back
Comment
  • bowtiesmilelaughingblushsmileyrelaxed relaxedsmirk
    heart_eyeskissing_heartkissing_closed_eyesflushedrelievedsatisfiedgrin
    winkstuck_out_tongue_winking_eyestuck_out_tongue_closed_eyesgrinningkissingstuck_out_tonguesleeping
    worriedfrowninganguishedopen_mouthgrimacingconfusedhushed
    expressionlessunamusedsweat_smilesweatdisappointed_relievedwearypassive
    disappointedconfoundedfearfulcold_sweatperseverecrysob
    joyastonishedscreamtired_faceangryragetriumph
    sleepyyummasksunglassesdizzy_faceimpsmiling_imp
    neutral_faceno_mouthinnocent
4 minus one =
Comments (0)

Five ways to unscrew a bolt with torn edges

Giraffes in love | Do it yourself

Rice and chicken balls with cheese “Nezhnye” | Do it yourself

Portable Miter Saw | Do it yourself

«Do it yourself - with your own hands» - a site of interesting homemade products made from scrap materials and items at home. Step-by-step master classes with photos and descriptions, technologies, life hacks - everything a real master or just a craftsman needs for needlework. Crafts of any complexity, a large selection of directions and ideas for creativity.

We recommend reading

Washing machine error codes