Do it yourself
Life hacks, master classes, useful tips, recipes.
home » Handicraft techniques » Decoupage » Decoupage master class » Frame for rubber bands
It's no secret that the harmonious development of a child requires a variety of external stimuli. In other words, a child’s intelligence should be developed without relying on nature. This is used by numerous manufacturers of children's toys designed to develop speech, fine motor skills, understanding of the world and much more. However, “purchased” products are no better than those you make yourself. Moreover, many of these toys require a minimum of materials.
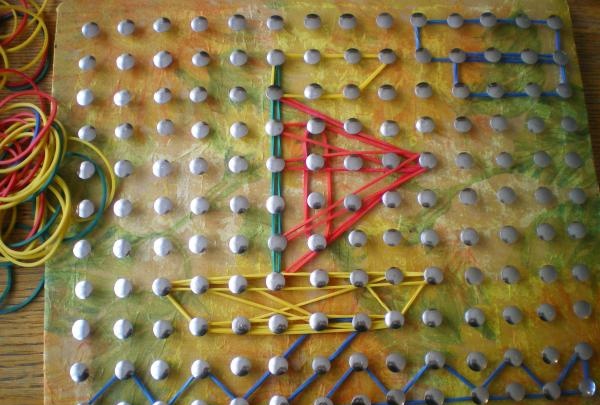
For example, a board for rubber bands that can be stretched to produce various shapes and entire pictures can be made in 3-4 hours. The child will like this toy and will be a good tool for developing fine motor skills, learning geometric shapes, the concept of size and basic colors.

Frame for rubber bands


In order to make such a frame, we will need:
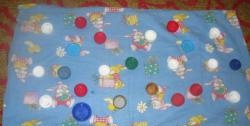
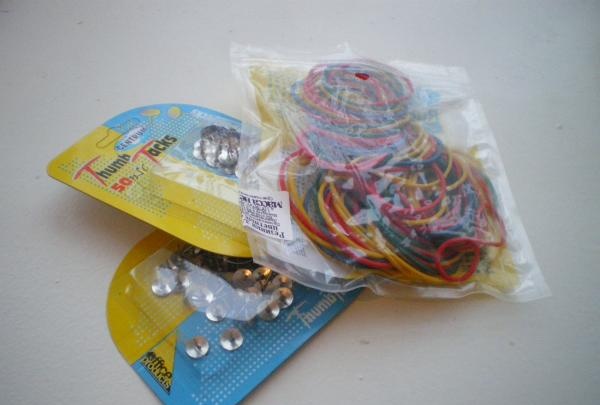
• Wooden base, dimensions here are approximately 23x29;
• Buttons (about 200 pieces);
• Rubber bands for money (sold in office supply stores).
To make this frame, you also needed PVC glue and a two-layer napkin. The finish on the wooden base was not very good - it had stains and scratches, so it was necessary to drape it.

Wooden base

rubber bands nails


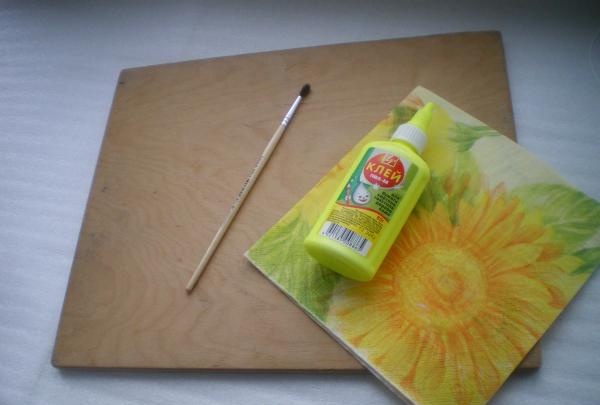
At the first stage, we drape the board.Separate the top layer of the napkin with the pattern and place it on top of the wooden base. Pour the glue into a small jar and apply it to a napkin using a brush.

we drape the board


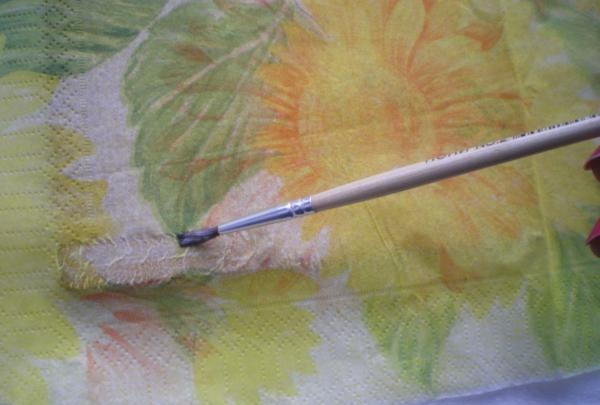
Such actions vaguely resemble decoupage. After the glue has dried and the napkin has stuck to the wood, we make markings. To do this, you can use a simple pencil to put dots in the right places (here they are every 2 cm, the distance between the rows is also 2 cm).

reminiscent of decoupage


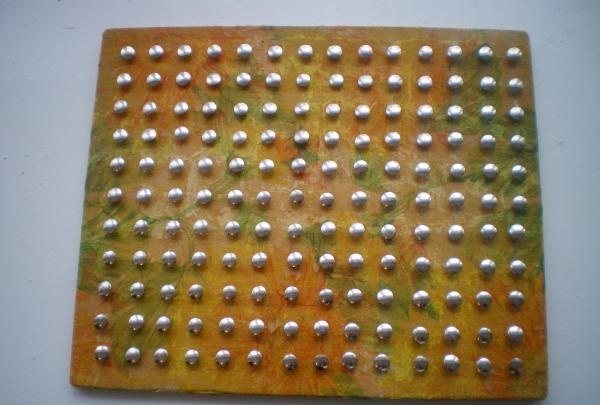
After this, press the buttons into the designated points. The effort required to secure the button into the base can range from slight to intense. It all depends on the material used as a base. For example, in some cases the button went up to the top of the board. Then it was removed using a stationery knife to the desired height.
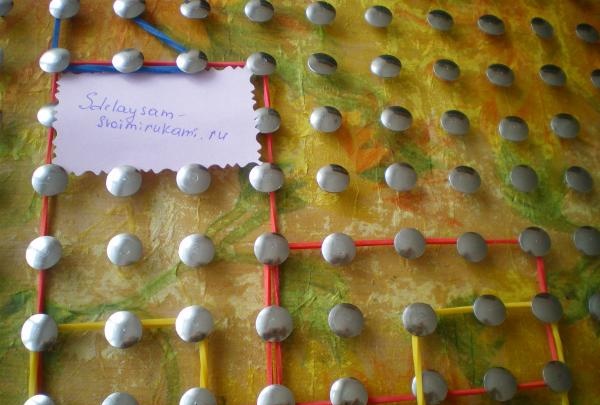
In the end, this is what happens:

Hammering nails


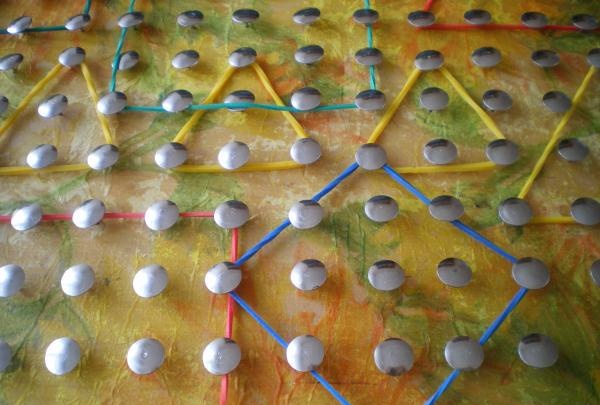
That's it, the frame is ready! You can try tightening the elastic bands. First, your baby will need your help to understand the new toy. And then he will make different figures himself and delight you with his imagination.

We stretch the elastic bands

Frame for rubber bands


Happy creativity!
come back
Comment
  • bowtiesmilelaughingblushsmileyrelaxed relaxedsmirk
    heart_eyeskissing_heartkissing_closed_eyesflushedrelievedsatisfiedgrin
    winkstuck_out_tongue_winking_eyestuck_out_tongue_closed_eyesgrinningkissingstuck_out_tonguesleeping
    worriedfrowninganguishedopen_mouthgrimacingconfusedhushed
    expressionlessunamusedsweat_smilesweatdisappointed_relievedwearypassive
    disappointedconfoundedfearfulcold_sweatperseverecrysob
    joyastonishedscreamtired_faceangryragetriumph
    sleepyyummasksunglassesdizzy_faceimpsmiling_imp
    neutral_faceno_mouthinnocent
5+two=
Comments (0)

We adopt a quick method of peeling eggs

How to make a heater from an oil filter with your own hands

How to defrost washer fluid in a tank with a homemade heater

This is definitely the most compact way to store tomatoes.

«Do it yourself - with your own hands» - a site of interesting homemade products made from scrap materials and items at home. Step-by-step master classes with photos and descriptions, technologies, life hacks - everything a real master or just a craftsman needs for needlework. Crafts of any complexity, a large selection of directions and ideas for creativity.

We recommend reading

Washing machine error codes