Do it yourself
Life hacks, master classes, useful tips, recipes.

With prolonged and intensive use, radio remote controls begin to develop a characteristic malfunction. The remote control buttons stop responding to pressing. This happens due to contamination of the contact pads of the board and rubber buttons, or due to wear of the conductive coating of the buttons. To restore the operation of the remote control, you can carefully disassemble the remote control, clean the pads and buttons with a damp cloth, and apply a little conductive glue to the buttons. But there is another way to restore the remote control. This is to use pieces of foil glued to conductive rubber bands.

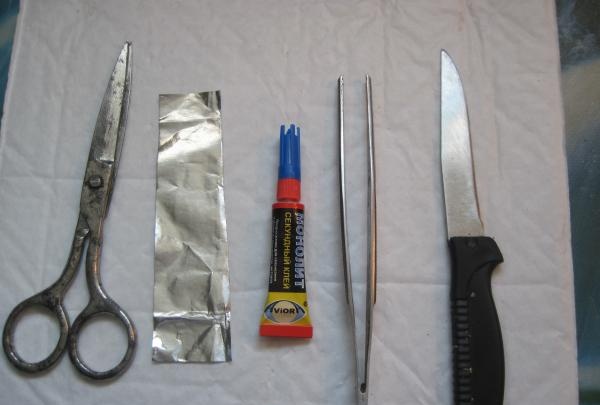
To repair the remote control, we will need scissors, a knife, tweezers, Monolith glue and cigarette foil.

tools for repair

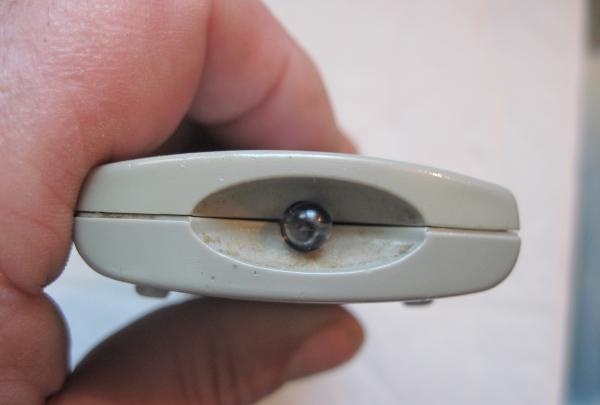
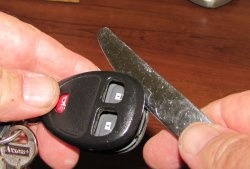
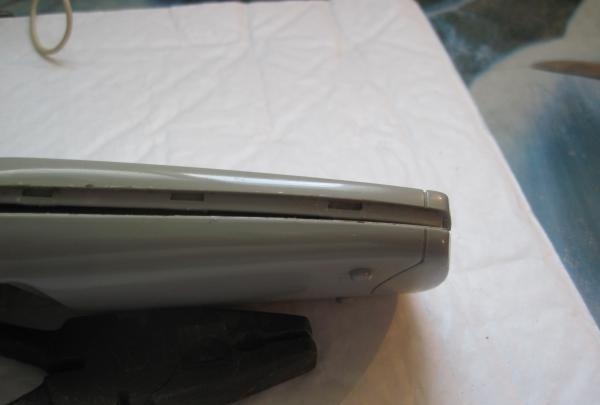
Remove the batteries from the remote control. Use a knife to carefully separate the remote control into two halves. The halves of the remote control are usually fixed with latches like this.

open the remote control

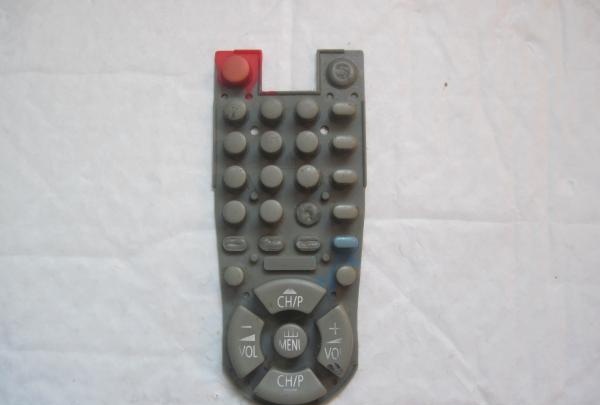
Next, remove the board and the block of rubber buttons. Use a damp cloth to remove dirt.

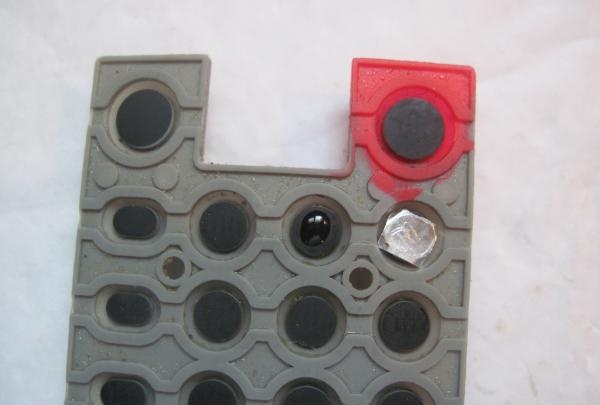
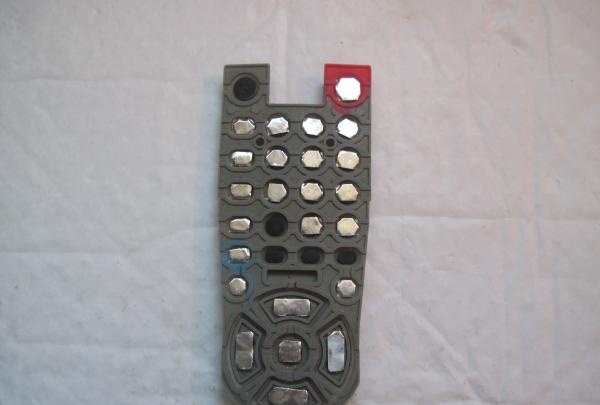
We cut squares from foil to the size of the contact pads.

foil squares

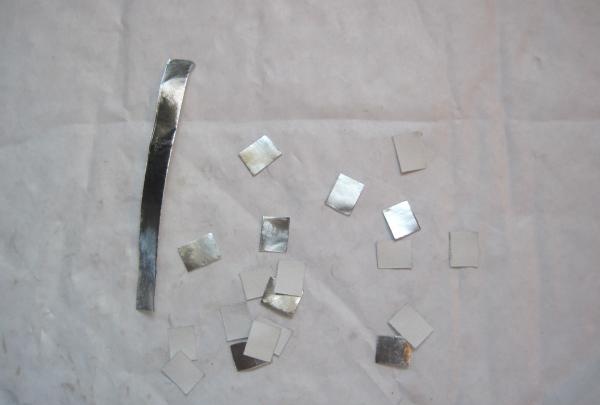
Drop a little glue onto the conductive coating and, taking the square with tweezers, glue it.

glue the foil

Our remote control has five buttons that are not used. Therefore, it is not necessary to glue foil on them.

remote control buttons
Glue foil on the buttons

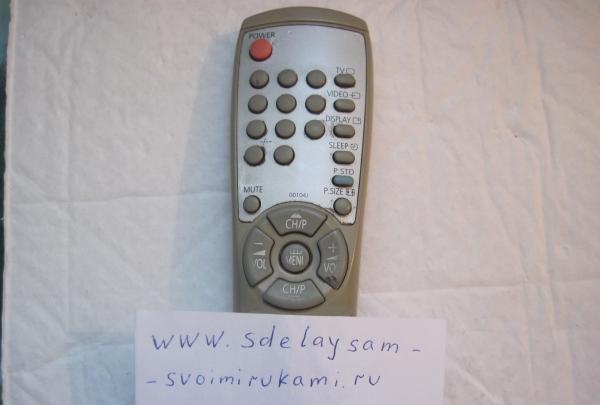
Next, we assemble the remote control. We insert the batteries, observing the polarity, and check the operation of all buttons.

let's assemble the remote control

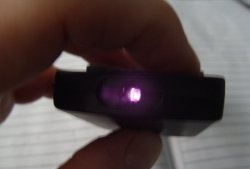
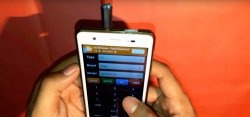
This method restored the functionality of many remote controls of various radio equipment. A repeated defect appears after about a year. You can restore the operation of the buttons again by tearing off the old foil and gluing a new one. And one more piece of advice. To check the operation of the remote control, you need to point the lens of any digital camera at the infrared Light-emitting diode remote control and press any button. If Light-emitting diode blinks, then we can assume with great confidence that the remote control is working properly.

remote control works

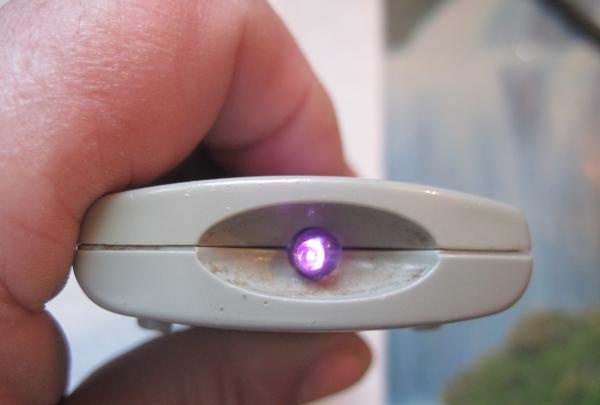
If we don’t see blinking, then the remote control is faulty.

Remote control repair
come back
Comment
  • bowtiesmilelaughingblushsmileyrelaxed relaxedsmirk
    heart_eyeskissing_heartkissing_closed_eyesflushedrelievedsatisfiedgrin
    winkstuck_out_tongue_winking_eyestuck_out_tongue_closed_eyesgrinningkissingstuck_out_tonguesleeping
    worriedfrowninganguishedopen_mouthgrimacingconfusedhushed
    expressionlessunamusedsweat_smilesweatdisappointed_relievedwearypassive
    disappointedconfoundedfearfulcold_sweatperseverecrysob
    joyastonishedscreamtired_faceangryragetriumph
    sleepyyummasksunglassesdizzy_faceimpsmiling_imp
    neutral_faceno_mouthinnocent
3+three=
Comments (10)
  1. Vitaly
    #1 Vitaly Guests December 2, 2014 22:43
    9
    ring the foil before you start working with the remote control! Cigarette foil often does not conduct current, aluminum is applied to the paper with a *mesh* or dots.
  2. Sergey
    #2 Sergey Guests 7 January 2015 19:18
    3
    Good day to all!

    I struggled with the TV remote control for a long time, the buttons only worked every now and then.

    After reading it, I rang the cigarette foil and literally in 5 minutes restored all the non-functioning buttons.

    A big THANK YOU to the author!!! wink
  3. Eugene
    #3 Eugene Guests 19 January 2015 17:01
    5
    I propose to slightly improve the method of gluing foil (from paper-based candies) to the rubber contacts of the remote control. More than once I tried to glue with different types of adhesives, but over time everything fell off. Rubber, and especially graphite-containing rubber, does not hold glue. But, I found a way. Using a stationery knife, we make 3-4 shallow (about 5...1 mm) cuts on each site. No effort required, cuts great. Next, take the epoxy resin and mix 2-3 grams with an acid hardener. This volume is more than enough. Using a needle, apply small droplets of resin to the cut contact pads and wait 3-5 minutes. During this time, the resin, due to its high fluidity, penetrates into the cuts and fills them. There is no need to fiddle with anything, it will flow in there on its own. Next, we place pre-cut squares or rounds of foil on the remaining drops and barely press them to the base of the rubber bands. You CANNOT press down with your finger, otherwise the remaining resin will fall from your finger onto other areas and after polymerization there will be no contact on them. We wait 5-8 hours until it completely “dries”. To control the polymer, we do not throw away what the resin was diluted on/in, but use it as a “tester” of hardening. After time, the resin has some residual elasticity and does not break when pressing buttons, and the adhesive strength is top class. Over time, the aluminum will wear off rather than peel off. At the end, you can (should) press a little with an elastic band on the thick fabric to give a spherical shape to the edges of the foil. We assemble the remote control, or whatever you have, and enjoy the light presses.Good luck everyone.
  4. Lybimoff
    #4 Lybimoff Guests 22 January 2015 20:35
    3
    This remote control was repaired by me at work, as they say, in the field. Material that was at hand. It's been over a year now and all the buttons are working perfectly. Although before the repair there were offers from work colleagues to buy a new remote control. Thank you all for your feedback and comments.
  5. Passed by
    #5 Passed by Guests October 25, 2015 11:13
    8
    The foil falls off after a week (the glue dries out - it crumbles), the conductive paste is smeared, mix with a silicate base - complex components are needed... the best and proven method: QUILTE THE WORKING SURFACE WITH COPPER WIRE LIKE A THREAD (3-4 stitches are enough for a century)!
  6. Sergei
    #6 Sergei Guests December 27, 2016 09:45
    7
    There is a much simpler method. Degrease and thoroughly wipe conductive coatings with a pencil lead. 100% result!
  7. Rahmatoff
    #7 Rahmatoff Guests September 30, 2018 11:43
    2
    I use keyboard film for repairs; I have been doing repairs this way for over 15 years. It’s impossible to describe in detail in the comments, so I’ll share a link to my master class in one forum.
  8. Sergey K
    #8 Sergey K Visitors 13 November 2018 17:18
    1
    The idea is good, but in more than 30 years I have never had a case where a simple and effective remedy did not help - thoroughly wash the remote control body and then wipe the board and rubber band with the buttons with alcohol. Withstands this several times, in any case, the remote control of the TV purchased in the early 90s still works, although the TV itself is gone ;)
  9. Guest Leonid
    #9 Guest Leonid Guests 6 January 2019 16:07
    1
    First you should pay attention to the cleanliness of the contact surfaces. I always first wash the button block with water and washing powder, and wipe the board with a dry or alcohol-moistened cloth.In the vast majority of cases, this turns out to be enough.
  10. Alyosha
    #10 Alyosha Guests 26 September 2022 20:08
    1
    or take contactol

Various | Page 33 | Do it yourself

How to make a bracelet from pins | Do it yourself

How to convert clamping pliers into a wide quick-release clamp

How to make a powerful desalinizer from a refrigerator compressor

«Do it yourself - with your own hands» - a site of interesting homemade products made from scrap materials and items at home. Step-by-step master classes with photos and descriptions, technologies, life hacks - everything a real master or just a craftsman needs for needlework. Crafts of any complexity, a large selection of directions and ideas for creativity.

We recommend reading

Washing machine error codes