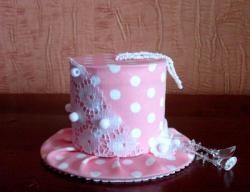
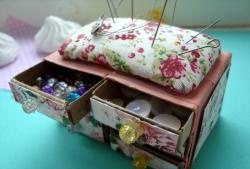
In order to make a pincushion in the shape of a miniature doll chair, you need to prepare the following materials and tools:
- curtain fabric of 2 types,
- padding polyester,
- dense adhesive pad (shabrak),
- cardboard cylinder, diameter 6 cm, height 8 cm,
- a small piece of any medium-density cardboard,
- glue "Moment gel transparent",
- white bias tape, about 40 cm long,
- dark brown beads, different sizes,
- transparent rhinestones (which need to be glued),
- white transparent organza ribbon, 1 cm wide, about 30 cm long,
- scissors,
- sewing needle for handicrafts,
- tweezers with sharp ends,
- threads in the color of the fabric,
- a small piece of dark brown soutache braid.
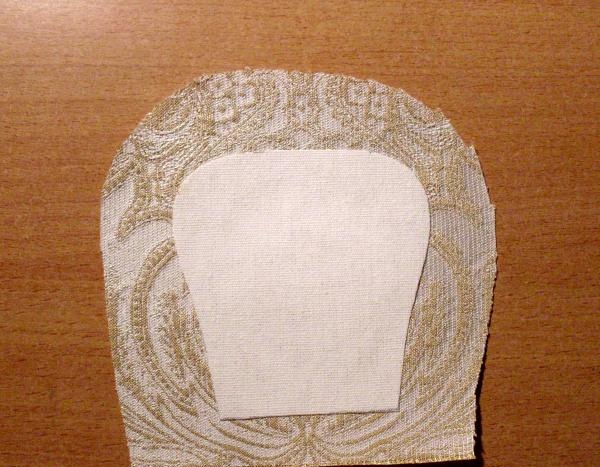
Cut out the part of the back of the chair from a thick adhesive pad. It should be 7.5 cm high, 7 cm wide at the widest point. From curtain fabric of the same type, cut out two parts for the back of the chair with seam allowances. Glue the interfacing to one of the curtain back pieces.
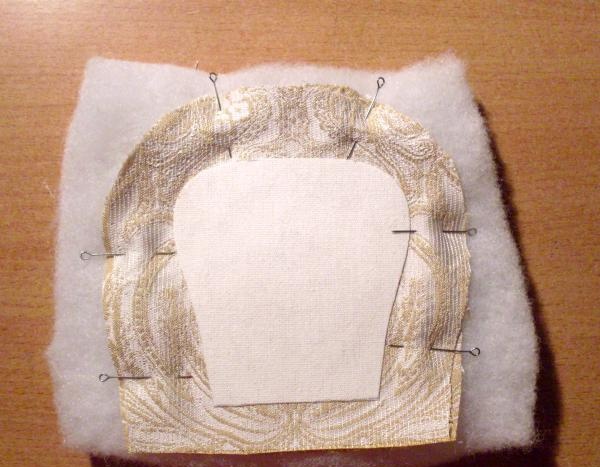
Fold the parts of the back of the chair from the curtain facing each other, place the padding polyester on the side of the unglued part, and pin all the layers together with safety pins.

Using a sewing machine, sew a line along the back of the chair blank at a distance of 2 mm from the adhesive pad (this distance is provided for the edge of the thick adhesive pad after turning the part inside out).
Remove the pins, cut out the padding polyester allowances (this will make it easier to turn the part right side out), trim the seam allowances to 1 cm.
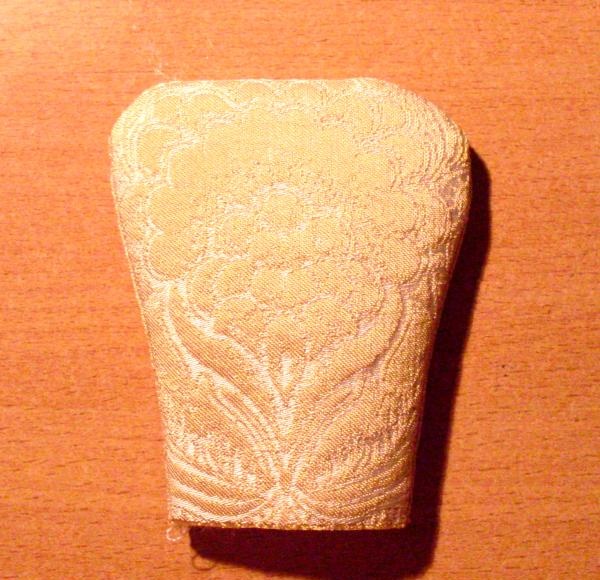
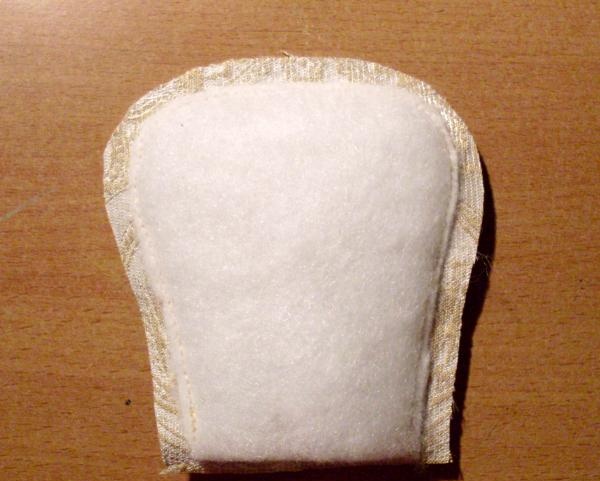
Turn out the back part of the chair. Iron on the side of the glued part.
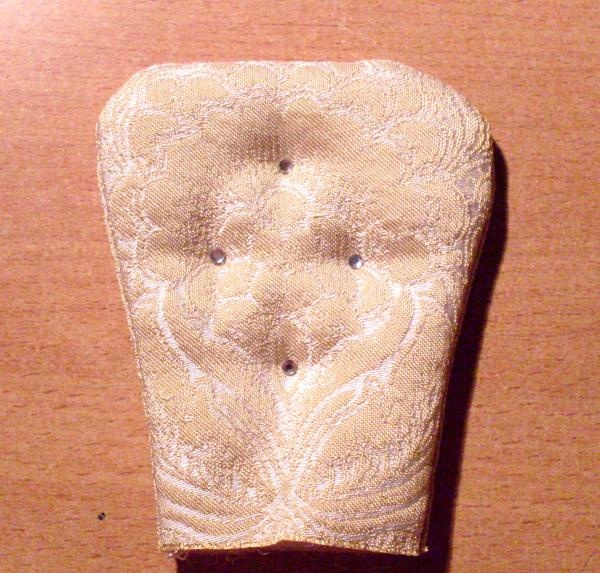
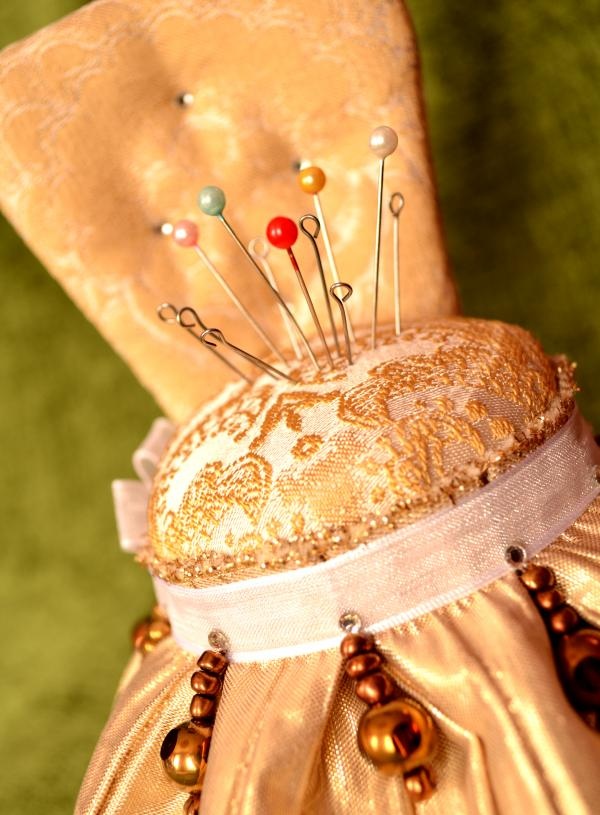
Use blind stitches to quilt the back of the chair in 4 places, and glue rhinestones over the stitches.
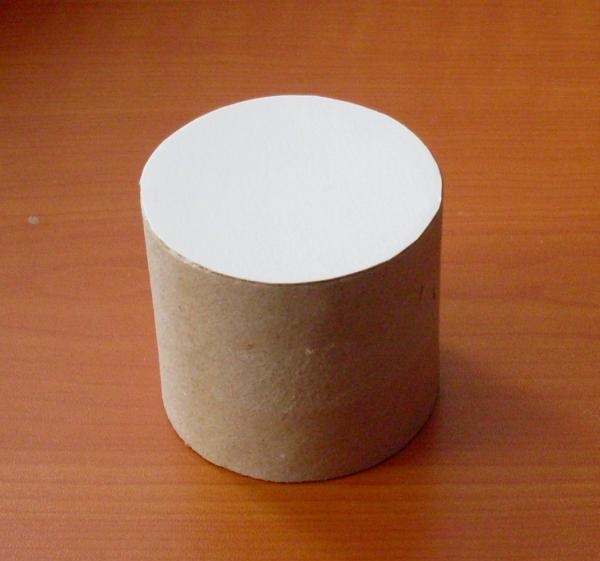
Glue the cardboard bottom onto one of the end sides of the cardboard cylinder.
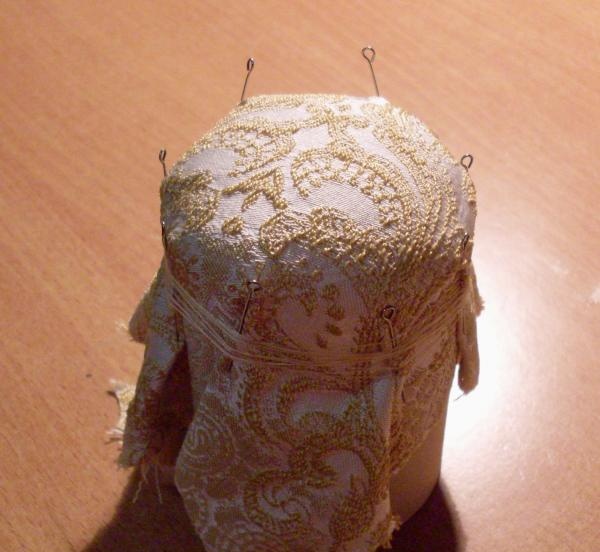
Cut out several layers of padding polyester according to the shape of the bottom. Place it on the cylinder, cover it with one type of curtain fabric on top, secure it well with safety pins, and also by wrapping the fabric with threads around the cylinder.
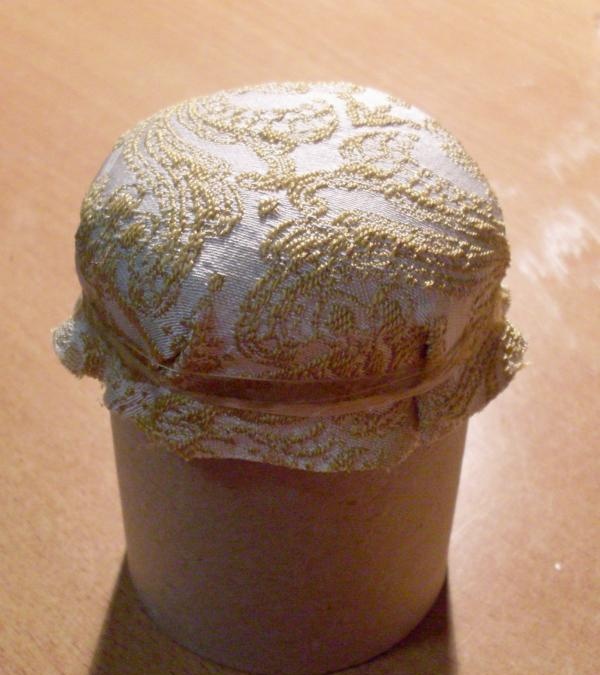
Carefully trim the fabric allowances, coat the thread winding with a good layer of glue so that it soaks through the fabric and sticks it to the cylinder. Let dry.
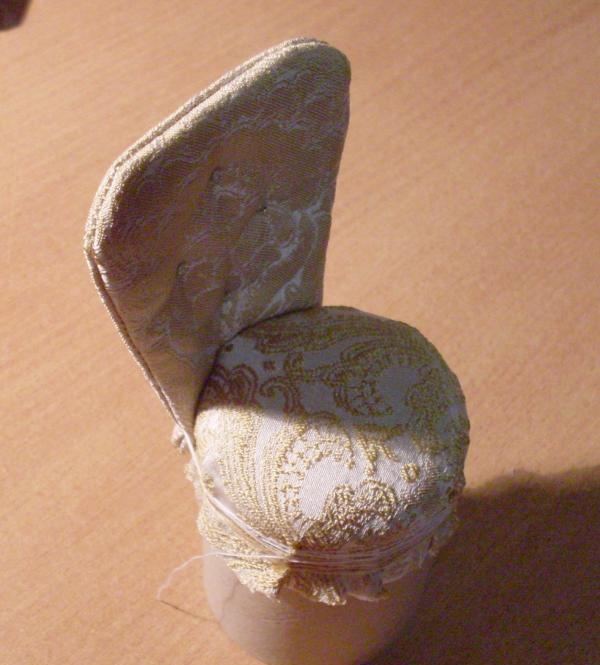
Glue the back to the seat of the chair.
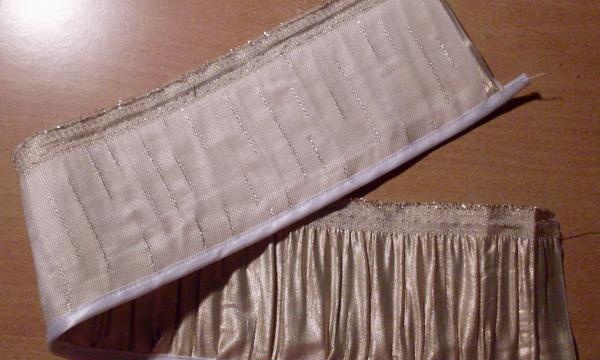
Cut a rectangle from a different type of curtain fabric. Its height is the height of the cylinder, and its width is two girths of the cylinder plus 2 cm for the seams. Edge the bottom edge of the fabric with white bias tape.
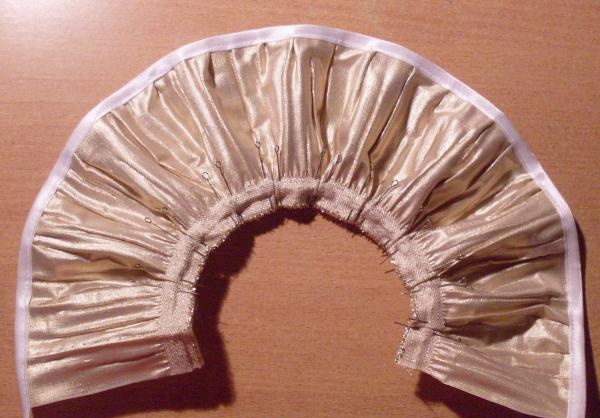
Gather the top edge of the strip into small folds. Secure them with hidden stitches. Sew the prepared “skirt” of the chair into a ring. Glue it onto the chair.
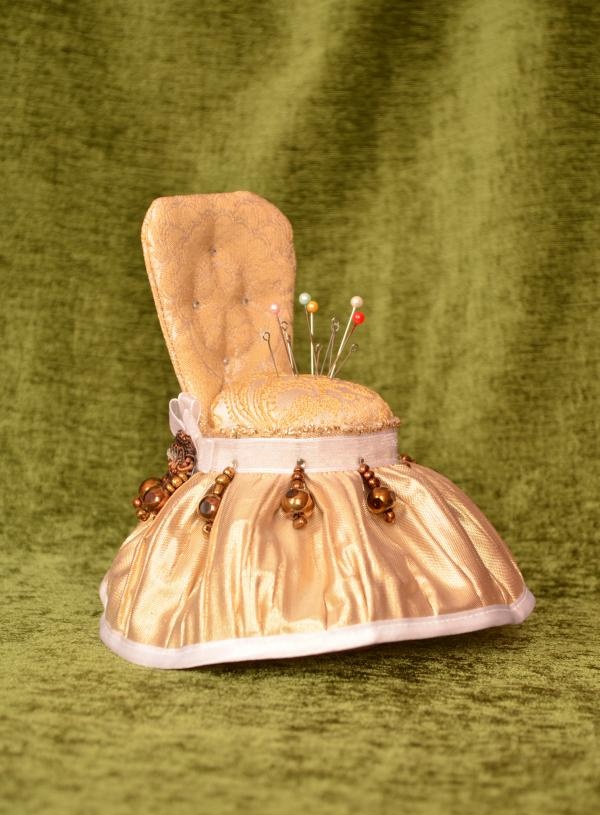
Tie a white ribbon along the top edge of the “skirt”.
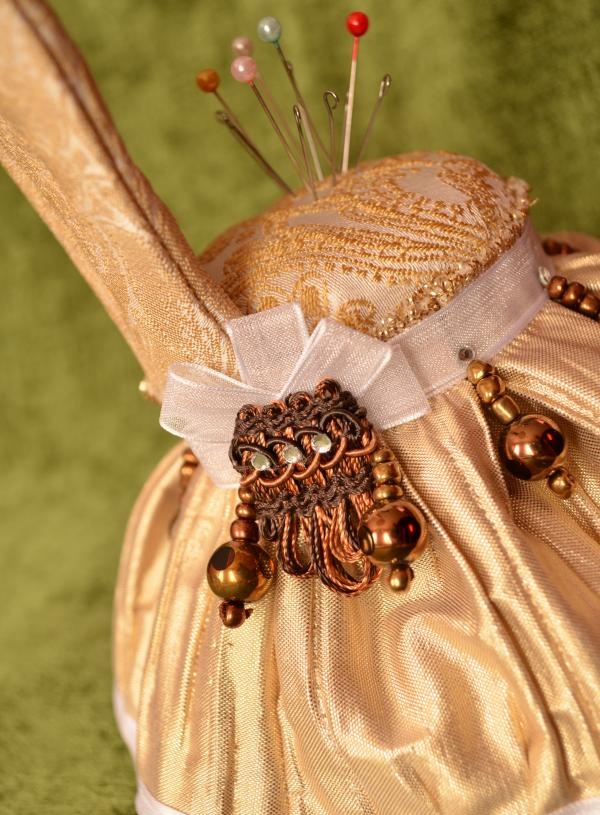
Sew a small decoration of soutache braid, ribbon and beads on the left edge.
Sew small bead pendants around the seat of the chair. Decorate the place where they are sewn with small rhinestones. It is more convenient to glue rhinestones if you use tweezers with sharp ends to hold them.
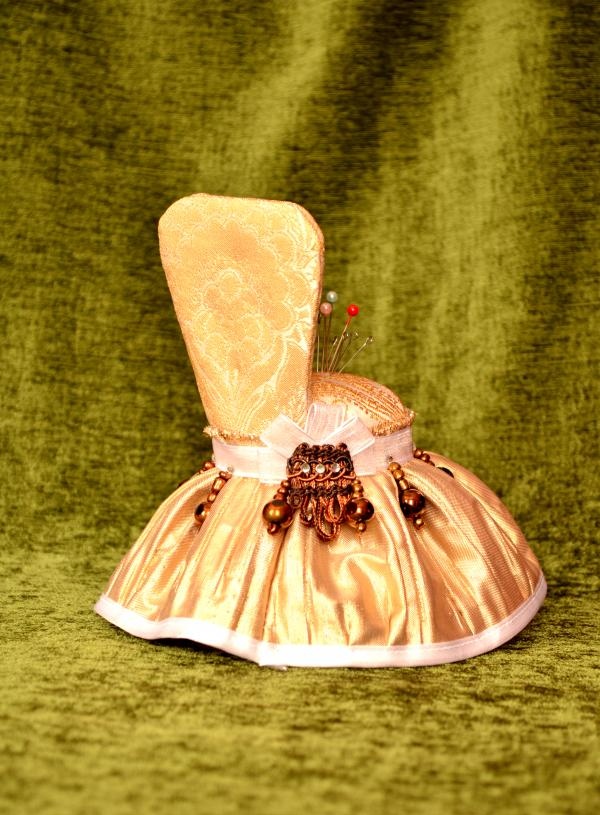
The pincushion is ready!