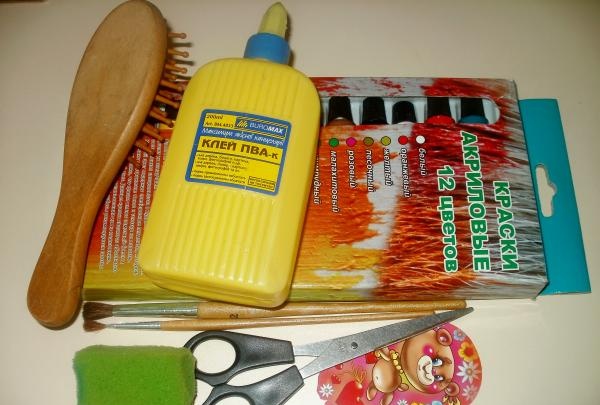
Materials and tools:
wooden comb;
acrylic paints;
picture;
sponge;
tassels;
PVA glue";
scissors;
acrylic lacquer.
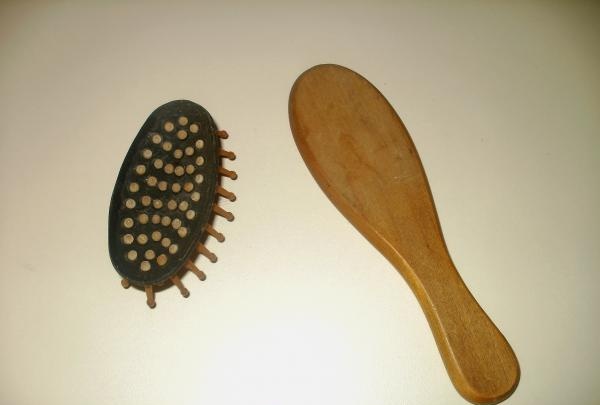
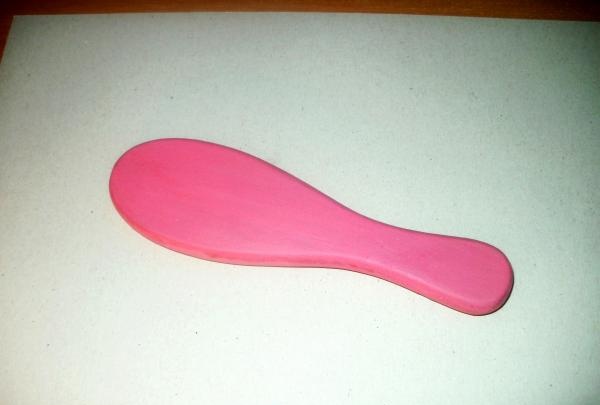
1. First you need to disassemble the comb. Separate the brush from the wooden body. For our work we will only need its wooden part; we put the brush aside.
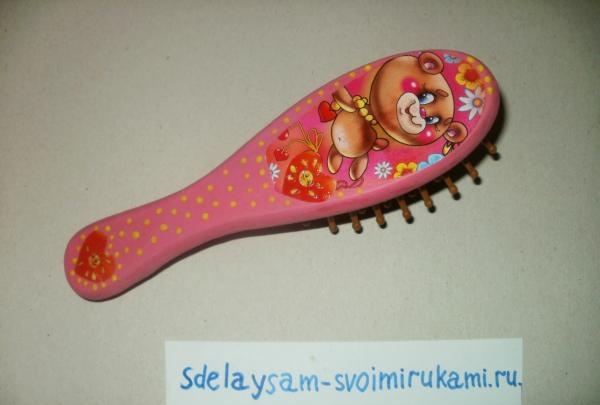
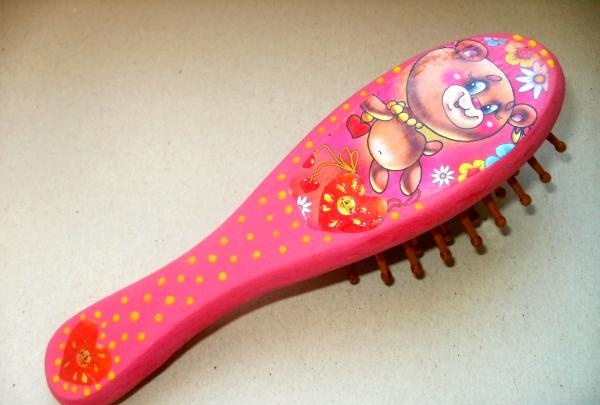
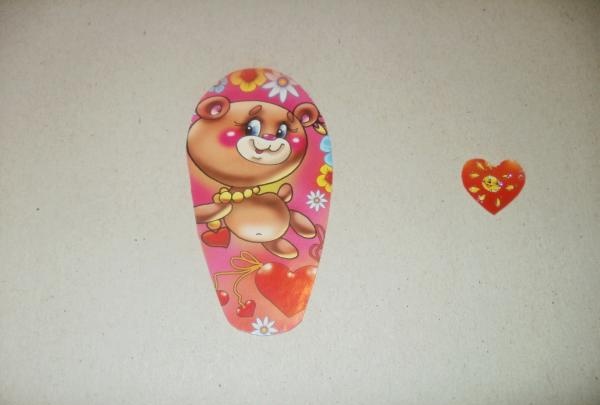
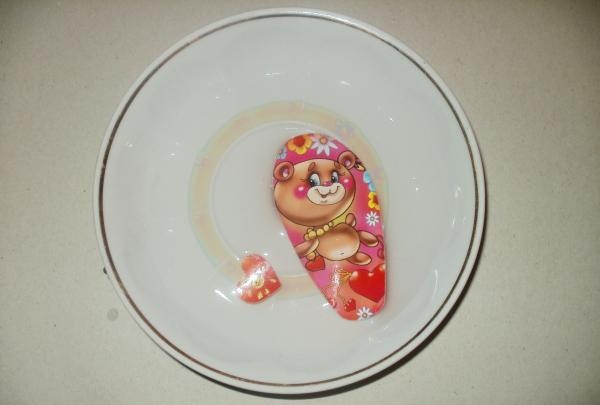
2. We will make a comb for a girl, so we select a suitable thematic picture. The picture can be on a napkin or postcard. We cut out the design, giving it an oval shape and the appropriate size - we make it slightly smaller than the body of the comb.
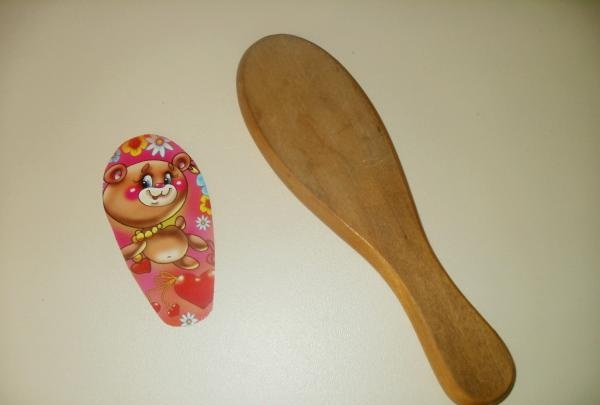
3. Cut out the second picture – a small heart.It will be located at the end of the wooden handle.
4. Now let's start coloring the comb. Apply several layers of pink acrylic paint. This can be done with a brush, sponge or a piece of foam rubber. Apply a new layer only after the previous one has completely dried. To make the color bright and saturated, you need to apply at least three layers of paint.
5. While the paint on the wooden base of the comb is drying, we begin preparing the pictures. They are cut from a card, so they need to be thinned out. Place both pictures in warm water for 10 - 15 minutes to soak. Then we separate the top layer, which we will use in further work. This must be done very carefully so as not to damage the picture, since wet paper tears easily.
6. On the reverse side, coat the pictures with glue diluted with water. Apply a little glue so that it does not protrude beyond the edges of the picture. To avoid the formation of wrinkles and unevenness, glue the picture, starting from the middle, and carefully smooth it out. If the picture shifts or a wrinkle appears, you can lift the edge of the picture and straighten it out.
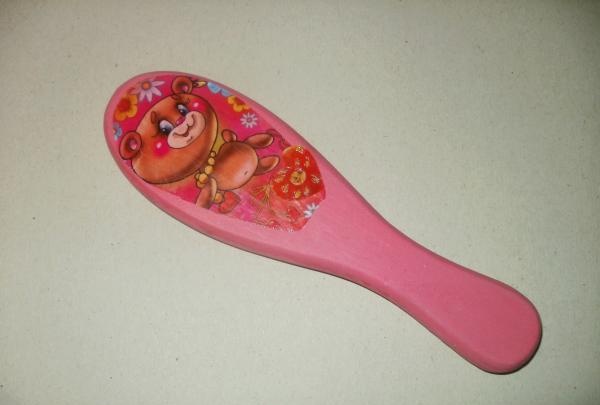
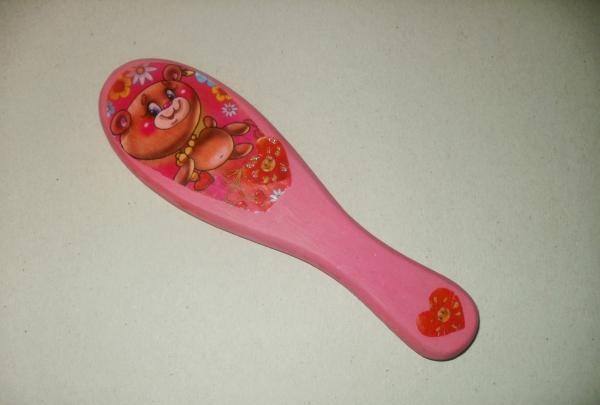
7. Complementing decor combs with yellow dots. We dip the back side of the brush in yellow paint and put dots around the pasted pictures, then all over the comb. You can apply dots with a toothpick or a wooden stick, the main thing is that they are the same size. After the applied paint has dried, we open the surface with varnish. It's better to open it several times.
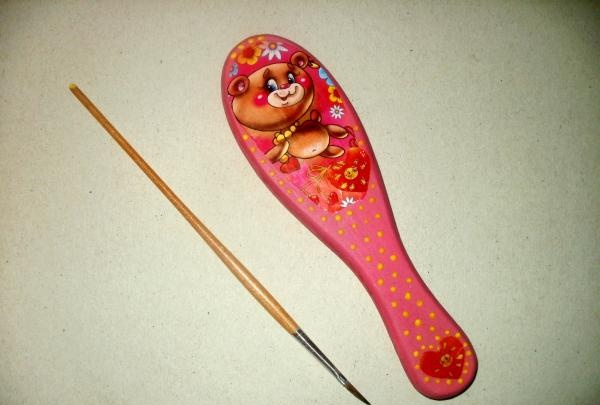
8. The wooden part of the comb is ready. Decoupage combs are finished. All that remains is to collect all the parts and you can start using it. The little fashionista will be delighted with such a comb, because no one else has one like this, and cannot have it!
This wooden comb will also make a great gift.