What do you need for work? Depending on the method chosen, you will need:
- method 1 - foam ring, PVA glue, pins with heads and knitting yarn;
- method 2 - cardboard circle, starch, knitting yarn, transparent wide tape.
- Both methods are easy, and even a child can handle them.
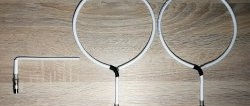
Progress. The first method is with a foam ring. We insert pins with heads along the outer edge of the ring at a distance of approximately 2 cm from each other.
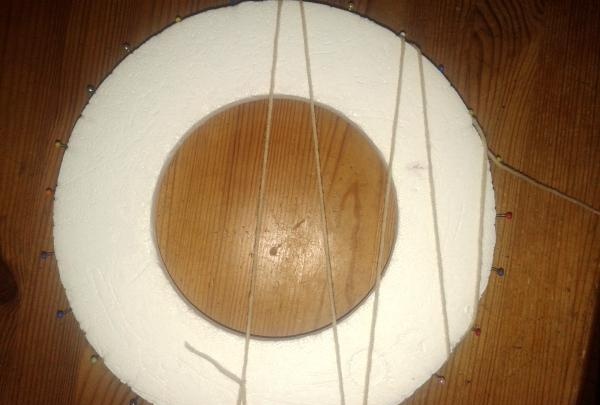
Threads are wound on the pins in a zigzag pattern from top to bottom and left to right. Attention: not around the ring, only around the pins. Pins hold threads like anchors.We wind it, rotating the ring in different directions so that the threads also lie in different directions.
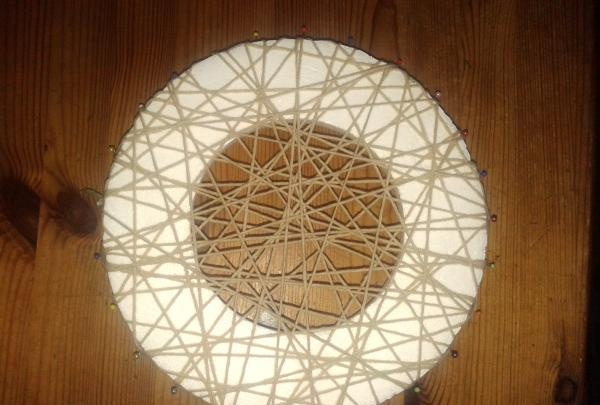
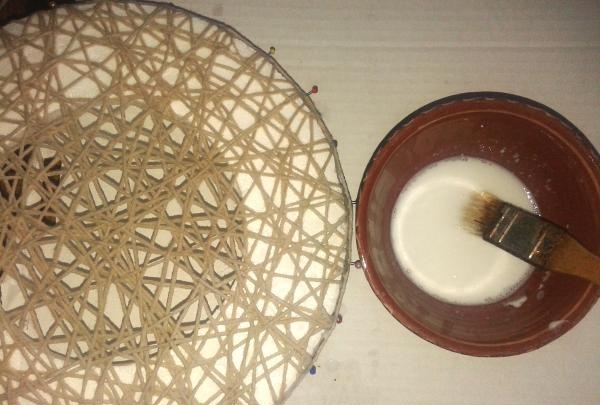
When a fairly frequent weave is formed, we direct the thread into the needle and quilt the weaves using the darning method. This way we give stability to the product and strength to the weave. Don’t get too carried away; quilting in two or three directions is enough. All the same, the napkin will be glued with PVA glue.
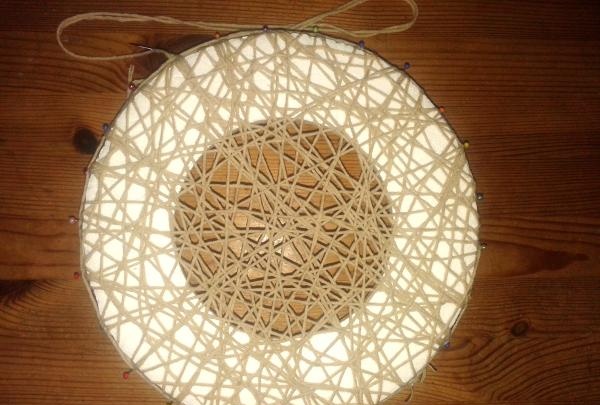
To glue the workpiece, dilute thick PVA 50:50 with water. Liquid glue does not need to be diluted. Using a brush, thoroughly coat all the weaves through and, without removing them from the pins, leave them to dry.
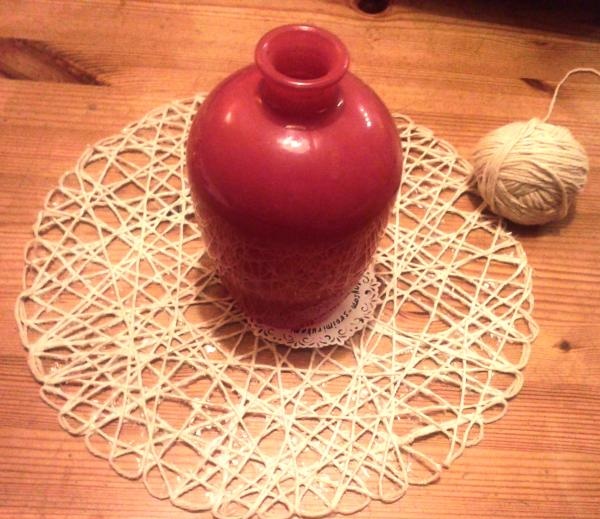
I took it off a little earlier, so my first napkin took on a slightly wavy look, as my husband put it: a pile of spaghetti. Once it dried, however, the napkin made from coarse unbleached yarn became pretty, straight up rustic.
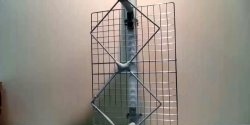
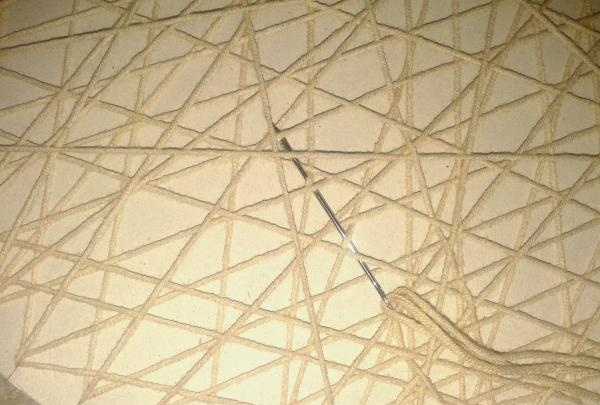
The second method is on a cardboard circle. To do this, cut out a circle the size of a large dish from very thick cardboard. Actually, the dish will serve as a template for us. Circled and cut out. We make deep cuts at a distance of two centimeters from each other; you can even make them in the form of cloves, as in the picture.
Looking ahead, I will say that it is best to seal the circle with wide tape: it will reduce the adhesion of threads and paper to zero. Otherwise, there is a risk that when separating the napkin from the base, you will grab a couple of scraps of paper with it. They come off easily, but this won't happen with tape. Having filled the space in a similar way, wrapping the cloves, it’s time to move on to securing the threads. But first check from the back side whether all the teeth are “involved”; they then form nice scallops from the loops.The same goes for pins - you need to check that not a single pin is empty! Quilting, I repeat, is similar to darning. The photo shows how the needle and thread dives under and over the threads.
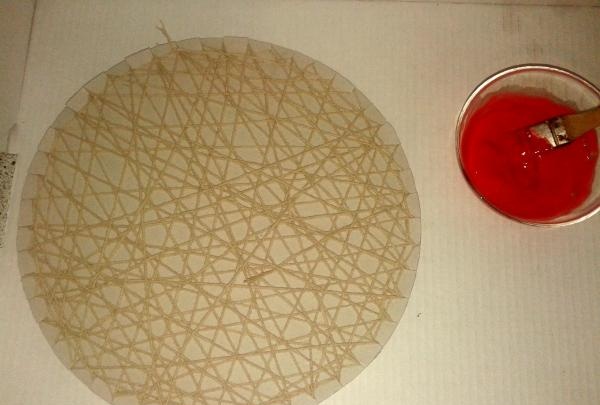
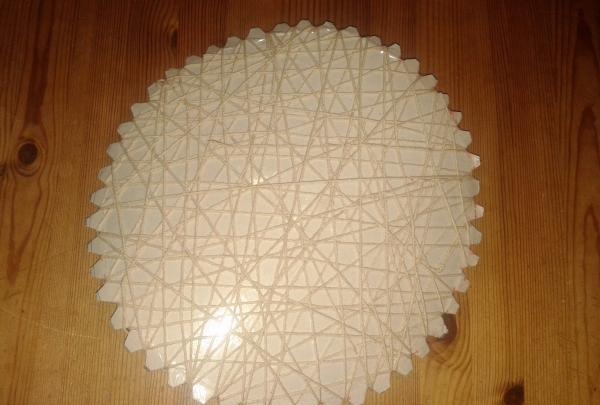
We will lubricate the finished napkin with a paste made from starch. Proportions: 2 tbsp. spoons of starch per 200 g of water. I added a little scarlet acrylic paint to the finished paste - I wanted a bright scarlet napkin. And it worked!
If you add blue, you get a blue napkin. Don’t rush to paint the entire paste, put some in a bowl, and the rest can be painted in a different color for the next napkin. In one go, I got as many as three pieces of stylish, unusual napkins! Here is the third napkin, freshly removed from the jagged template.
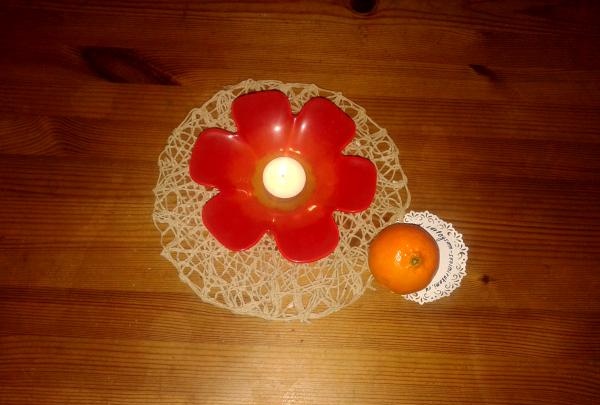
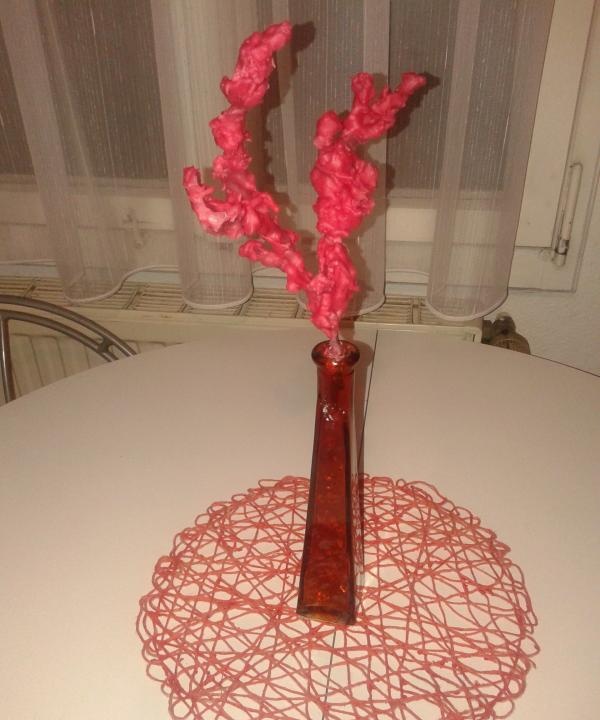
All of them are quite dense due to PVA glue or starch paste. But for obvious reasons, you cannot wash or use such napkins on wet surfaces. Making non-woven woven napkins is a lot of fun! This is great present and a thing that will be very useful in decorating a festive and everyday table.