Materials we will need:
– port-handle (microphone);
– floral tape;
– red satin ribbon;
– white decorative tape;
– glue gun;
– 2 sticks of silicone glue;
– floral wire;
– marsh-colored corrugated paper;
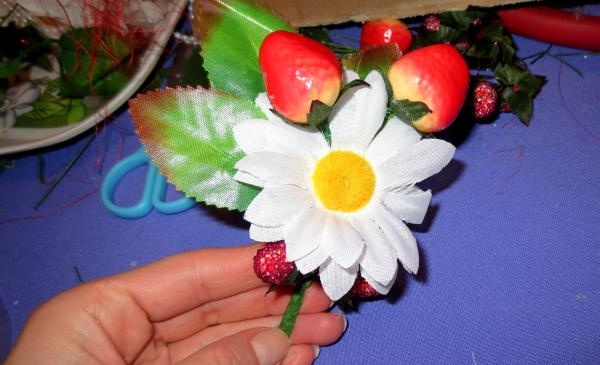
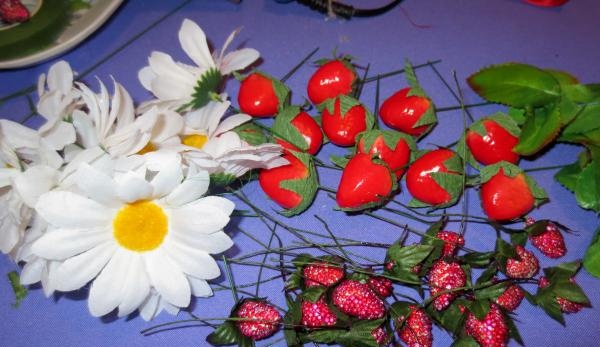
– 8 daisies;
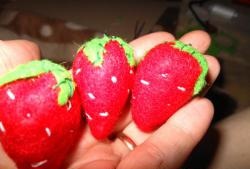
– 38 strawberries (15 large heads and 23 small ones with stems);
– artificial bergrass greenery;
– 15 artificial rose leaves;
– 5-6 ladybugs (decor);
– red sisal.
Manufacturing
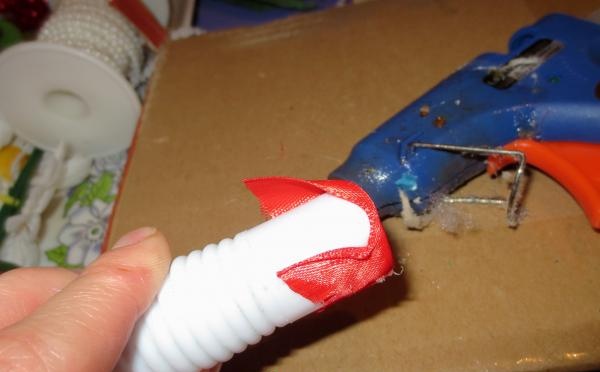
1.First of all we need to decorate the microphone. To do this, cut strips of red ribbon 25 cm long, there should be 20 of them. Fold each strip in half with the wrong side facing in and glue the ends together.

2. When all the strips are prepared, you can begin to design the port handle.Using a glue gun, we fix the double tapes around the entire circumference of the microphone. It will take 19 pieces of ribbon for the microphone, and leave 20 for the boutonniere.
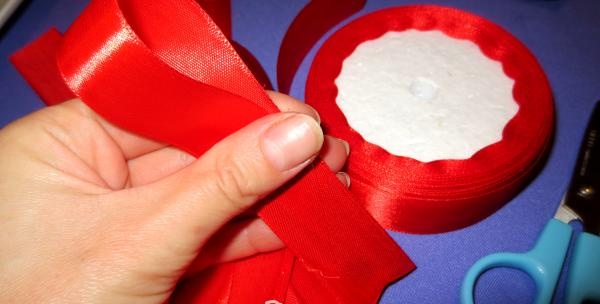
This is what should happen: the ribbons are arranged in the shape of a sun.
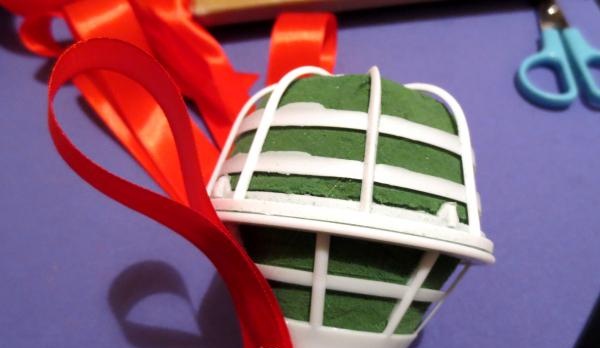
3. Cut off a small piece of the same tape and, using glue, fix the port handle downwards.
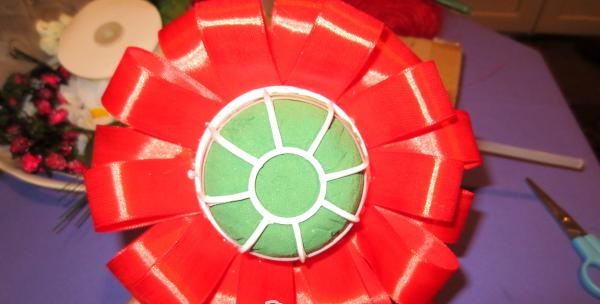
4. We finish decorating the microphone by wrapping and gluing the tape in a circle.
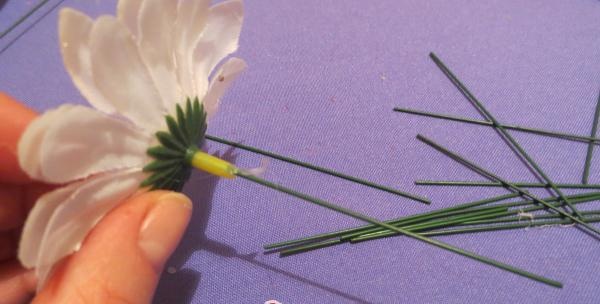
5. Let’s move on to forming the filling for the bouquet itself. We take floral wire and cut 25 pieces 5–6 centimeters long.

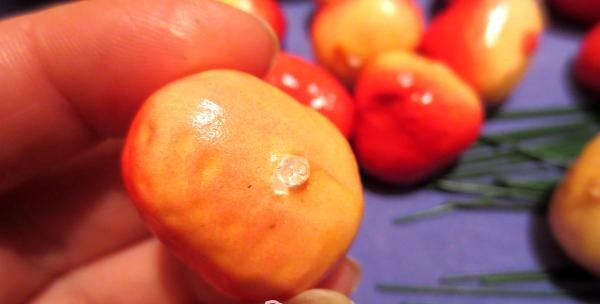
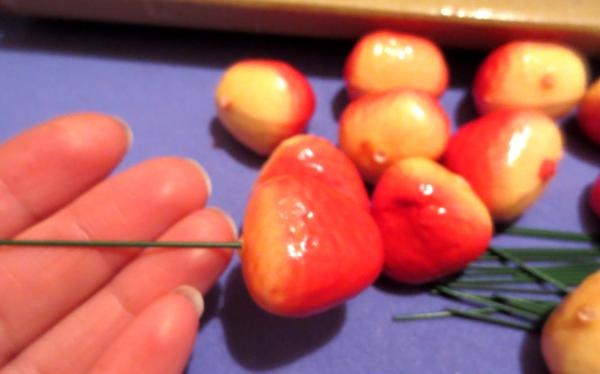
6. Drop a small amount of silicone glue into each of the large strawberries.

We insert the wire and get a stem for a fake strawberry.
We do the same with the heads of daisies.
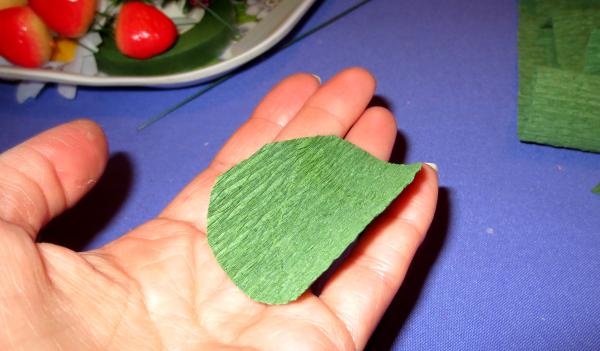
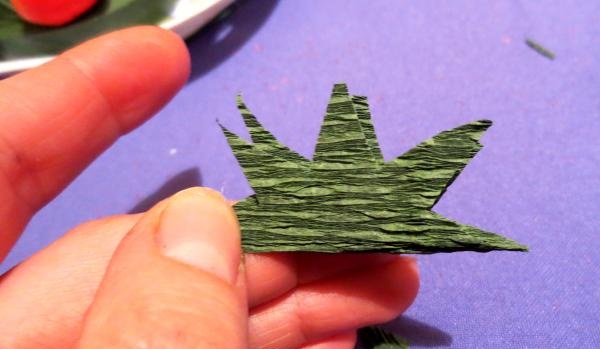
7. Cut out 15 circles of the same shape from corrugated paper.
Fold the circle in half and cut out the cloves to create a rim for the strawberries.
We make a hole in the middle of each headband and thread it onto a strawberry stem.
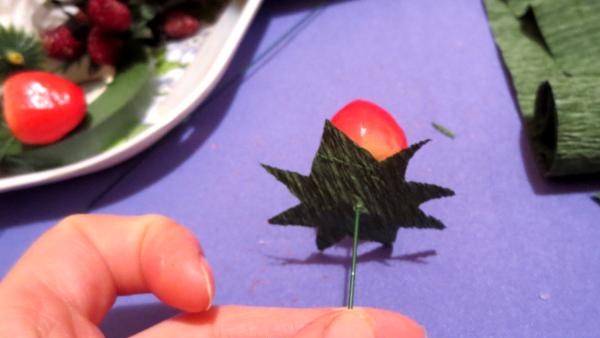
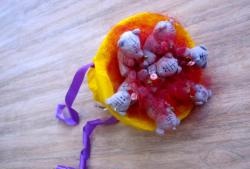
These are the preparations we should have for the bouquet design.
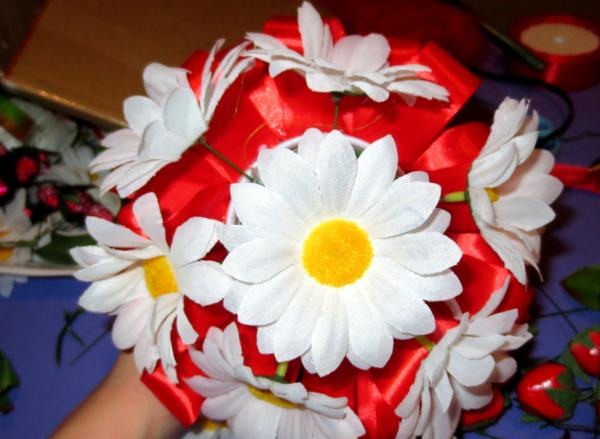
8. First, insert the daisies: one in the center and six evenly on the sides. To fix the flowers, we will not need glue, since the oasis contained in the microphone will perfectly hold whatever we stick into it.
Then we add large strawberries to the bouquet. It must be placed around the daisies at the same distance from each other.

We fix a small strawberry between the heads of a large one.
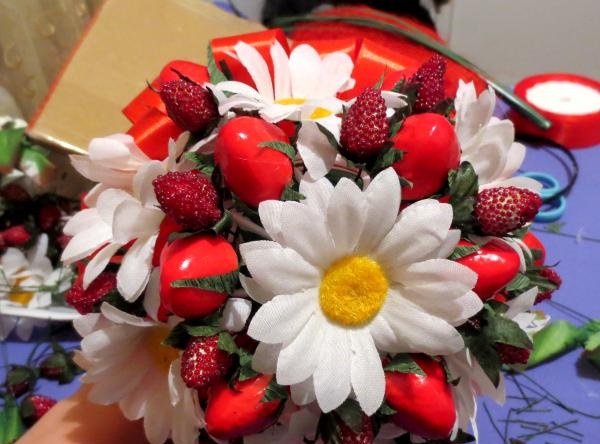
To add color to our bouquet, we’ll add rose leaves to it. We distribute them around the central daisy and on the sides of the bouquet so that there are no empty spaces.
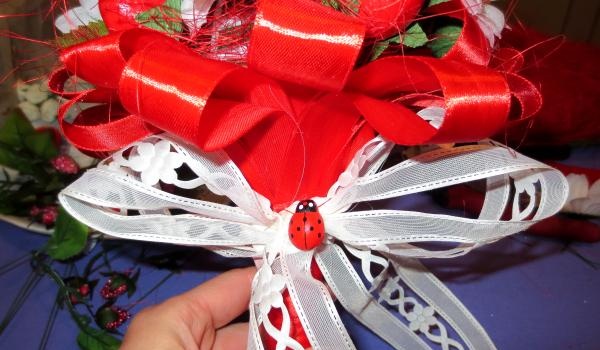
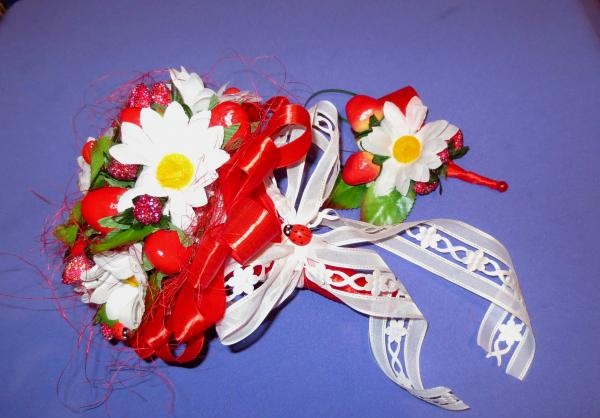
10. Cut a piece 60 cm long from a white decorative tape and tie it around the microphone handle. We tie it in the middle and form a bow. Fix with silicone glue. Add a decorative ladybug.
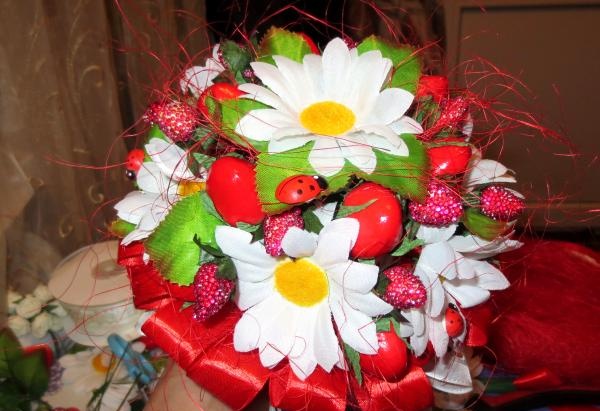
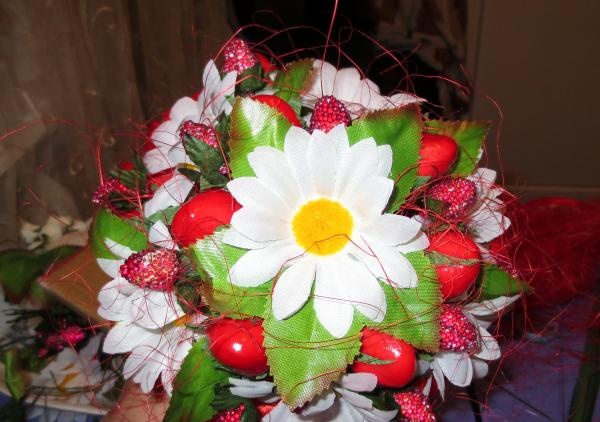
eleven.We add sisal and ladybugs to the top of the bouquet. You can add butterflies if you wish.
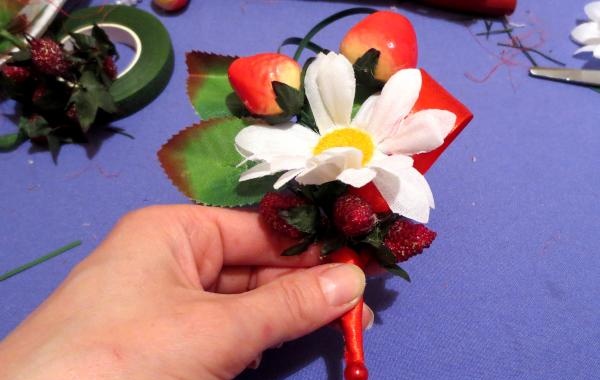
12. Let's move on to decorating the boutonniere for the groom. We take 3 rose petals and use glue to attach them to the stems of three small strawberries.
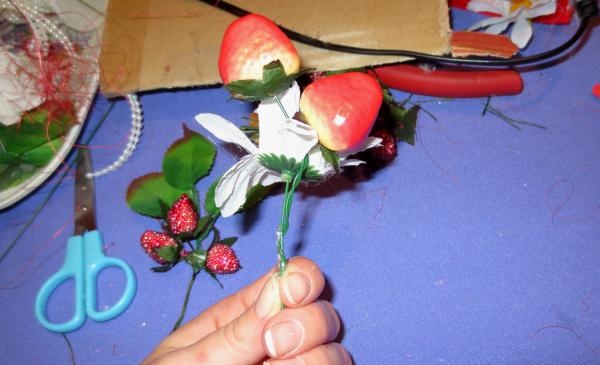
We also connect the chamomile and two large strawberries and fix them with a glue gun.
We connect all the parts together so that the rose petals are at the top, the chamomile and the heads of large strawberries are in the middle, and the small strawberries are at the bottom of the boutonniere. Using green floral tape, we wrap the stem stems of all the elements so that we get one common one.
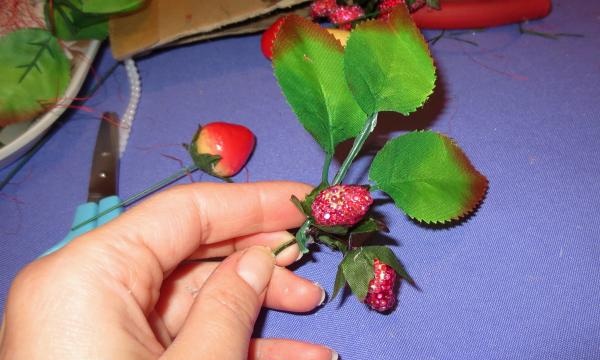
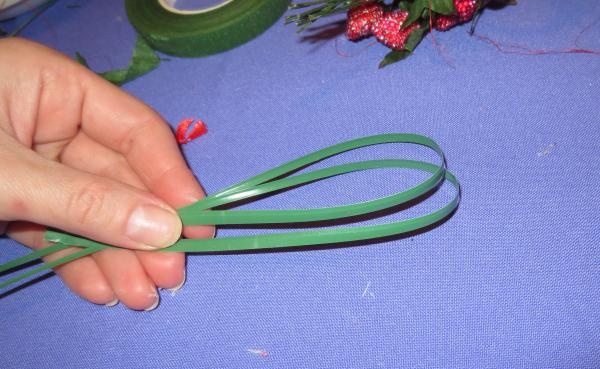
13. To complement the greenery, we use sprigs of bergrass. We twist them in half and glue them in the middle.
14. The final touch to the boutonniere design. Glue the bergrass and the remaining piece of red satin ribbon to the back. We wrap the stem of the boutonniere with this ribbon and bring the tail to the right side.
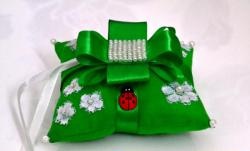
The result of our work: This work will take you no more than an hour and a half. Don't be afraid to experiment and add something of your own. After all, every craftswoman always brings a piece of her soul to the production of any work. Delight your family and friends with your creativity and ideas!